This site is supported by our readers. We may earn a commission, at no cost to you, if you purchase through links.
 To measure elastic for a waistband, grab a fabric tape measure and wrap it snugly around your waist where the waistband will sit.
Subtract 2 inches from this measurement so the elastic fits securely without being too loose. Cut the elastic to this length, then pin it around your waist to test the fit.
If it feels too tight or too loose, adjust before cutting final pieces. Consider the garment’s height when picking elastic width—1 inch is common for most projects.
Once measured, sew the ends together securely, and you’re ready to insert it. A perfect fit is just a stitch away, ensuring your elastic is securely in place.
Table Of Contents
- Key Takeaways
- How to Measure Elastic for Waistband?
- Choosing The Right Elastic for Your Project
- Measuring Elastic for a Waistband
- Sewing Elastic Into a Casing
- Inserting Elastic Into a Casing
- Choosing The Right Elastic for a Waistband
- Tips for Measuring and Cutting Elastic
- Traditional Elastic Joining Method
- New Elastic Joining Method
- Elastic Finishing
- Frequently Asked Questions (FAQs)
- Conclusion
Key Takeaways
- Subtract 2 inches from your waist measurement to get the ideal elastic length, ensuring a snug fit that won’t slip down during wear.
- Choose elastic width based on your garment’s height—use narrower elastic (¾-1 inch) for lightweight fabrics and wider elastic (1-2 inches) for heavier materials.
- Test your elastic’s fit by wrapping it around your waist before final cutting and sewing to confirm comfort and make adjustments if needed.
- For a smoother join, use the fabric square method instead of overlapping the elastic ends, creating a more comfortable waistband.
How to Measure Elastic for Waistband?

Measure elastic snugly around your waist, subtract 2 inches, and test for comfort—a perfect fit starts here!
Why struggle with elastic waistbands that pinch or sag? Measuring correctly is your first step to comfort! Grab a fabric tape measure and wrap it around your natural waistline—typically the narrowest part of your torso.
For the perfect fit, subtract 2 inches from this measurement for your elastic length. No tape measure? A string alternative works great—just mark it and measure against a ruler.
Wear form-fitting clothing for accuracy and consider your preferred waist height when measuring. Test comfort by wrapping the cut elastic around your waist before sewing.
Size charts can help if you’re making garments for others.
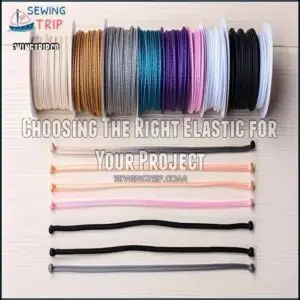
Choosing The Right Elastic for Your Project
You’ll need to pick the right elastic for your waistband to guarantee comfort and durability in your sewing project.
The perfect elastic depends on your fabric type, with options ranging from soft knit elastics for lightweight materials to sturdy woven bands for heavier fabrics.
Material: Polyester or Nylon
Now that you know how to measure your waistband, let’s look at elastic materials: polyester or nylon?
Polyester elastic offers superior durability and excellent recovery, making it perfect for frequently worn garments. While nylon provides exceptional softness against skin, it generally costs more and may stretch out faster over time.
Five reasons people choose specific elastic materials:
- Comfort for sensitive skin
- Budget constraints
- Project longevity needs
- Specific stretch requirements
- Garment application demands
Polyester maintains its shape longer and costs less, withstanding multiple washes without weakening. Nylon feels gentler and stretches more, ideal for items needing flexibility. Considering its widespread use, polyester was developed in the 1940s.
Match your waistband elastic material to your project’s specific needs for the best results.
Width: 1/4 Inch to 3 Inches or More
Elastic width plays a major role in your waistband’s functionality and comfort.
For lightweight fabrics like silks or sheers, thin 1/4 to 1/2 inch elastic provides gentle support without creating bulk. Medium-width options (5/8 to 1 inch) offer standard waistband support for everyday garments like pajamas or casual pants.
When working with heavier fabrics such as denim or canvas, choose wider 1.5 to 3 inch elastic for maximum support and stability. These wider options prevent rolling and distribute pressure more evenly across your waist. Considering elastic waistband options is essential for achieving the desired fit and comfort.
The fabric weight should guide your choice: lighter fabrics pair with narrower elastic; heavier materials need wider support. Remember that wider elastic creates a more defined waistband aesthetic, while narrower options provide a sleeker look.
Always match elastic width to your desired comfort level and garment style.
Stretch: Light, Medium, or Heavy-duty
Before selecting elastic for your waistband, understanding stretch level is essential for comfort and function.
- Light Stretch: Perfect for delicate fabrics and gentle support
- Medium Stretch: Ideal for everyday garments needing balanced elasticity
- Heavy-duty Stretch: Best for activewear or structured garments requiring firm support
- Fabric Weight Matching: Pair lightweight fabrics with light elastic strength
- Activity Level Consideration: Choose higher tension for high-movement activities
Match elastic tension to your garment purpose and comfort preference.
Remember, the right elastic stretch guarantees your waistband stays put without pinching or sagging.
Color and Texture: Various Options Available
Let your waistband elastic stand out by incorporating color and texture for added style and personality.
With so many options available, matching fabrics is simpler than you think. White elastic remains a go-to for everyday basics like t-shirts or pajama waistbands, offering subtle visual appeal.
For a pop of color, try a vibrant elastic for waistbands on casual shorts or playful skirts. Decorative elastic or textured waistband elastic works well for exposed waistbands on dresses or tunics, creating stunning texture effects.
Need something bold? Printed elastic brings flair to activewear or costumes, adding eye-catching designs. The right elastic selection transforms utility into fashion, effortlessly blending function and style!
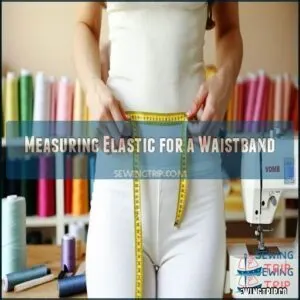
Measuring Elastic for a Waistband
To measure elastic for a waistband, start by wrapping a soft tape measure snugly around your natural waistline, typically the narrowest part of your torso.
Once you have the measurement, subtract 2 inches to account for the stretch and create a comfortable fit.
Subtract 2 Inches From Waist Measurement
When measuring for the perfect waistband, always subtract 2 inches from your waist measurement. This simple adjustment guarantees a snug fit with just the right amount of stretch—no pinching, no slipping.
For example, if your waist measures 30 inches, your elastic length should be 28 inches. A little negative ease creates the comfort you need for a secure waistband.
Follow these steps for measurement accuracy:
- Wrap a tape measure snugly around your natural waist (just above the belly button).
- Subtract 2 inches for a comfort adjustment.
- Test-fit the elastic around your waist for tension.
- Adjust the elastic length as needed.
Cut Elastic to Desired Length
To cut elastic to the correct length, subtract 2 inches from your waistband elastic measurement.
Wrap it snugly around your waist and test for comfort, ensuring proper negative ease. Adjust for fabric stretch and elastic shrinkage.
- Subtract 2 inches for stretch percentage.
- Use sharp scissors for precise cutting.
- Allow space for seams.
Consider Garment’s Height When Choosing Elastic Width
Choosing the right elastic width means thinking about your garment’s height and style—it’s all about balance and comfort.
A wider elastic pairs well with longer garments for a smooth finish, while narrower widths work best for shorter items to reduce bulk.
Here’s a quick Elastic Width Guide for waistband elastic measurement:
| Garment Height | Elastic Width | Why It Works |
|---|---|---|
| Short skirts | 3/4 to 1 inch | Slim fit, less bulk |
| Medium trousers | 1 to 1 1/2 inches | Balanced comfort and support |
| Long dresses | 1 1/2 to 2 inches | Smooth, comfy design |
| Heavy fabrics | 1 to 2 inches | Holds shape under more weight |
| Light fabrics | 3/4 to 1 1/4 inches | Maintains proportionality, less bulky |
Proportionality considerations are key.
Match elastic width to waistband and fabric for effective sizing.
For activewear, consider using elastic with four-way stretch fabrics to maximize movement.
Sewing Elastic Into a Casing
Thread elastic with ease using a safety pin, securing comfort and style in your waistband effortlessly.
Sewing elastic into a casing is a simple way to create a clean, adjustable waistband.
You’ll thread the elastic through the fabric tunnel using a safety pin, then close the casing securely with a straight stitch.
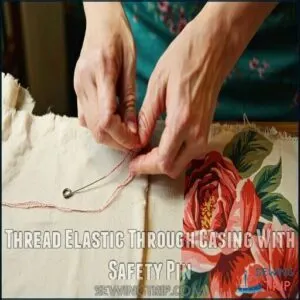
Thread Elastic Through Casing With Safety Pin
Threading elastic through a casing is a straightforward process, but it requires precision to avoid elastic bunching or pin placement issues.
Follow these steps to get it right:
- Pick a large safety pin (or a bodkin alternative) and secure one end of the elastic to it—choose a size suitable for your casing width.
- Insert the pinned elastic into the casing’s opening and begin threading it carefully through the fabric tunnel.
- To prevent losing the end, pin the elastic securely to the fabric near the opening.
- Using small, controlled movements, push the safety pin through, inch by inch, while scrunching up the fabric.
- Once the elastic exits the other end, unpin and remove the safety pin.
- Smooth out the elastic to guarantee it’s evenly spread and matches the elastic length measurement.
This method works for any elastic for waist projects!
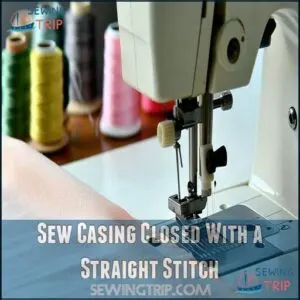
Sew Casing Closed With a Straight Stitch
After threading the elastic for your waistband, seal the casing with a straight stitch.
Adjust the straight stitch tension to match your fabric’s needs and set the casing stitch length for smooth results.
Secure stitch ends firmly to keep everything in place.
Sew carefully along the elastic casing width, avoiding puckering. A neat, even finish guarantees your elastic for waist stays comfy, flexible, and secure—ready for wear!
Inserting Elastic Into a Casing
Inserting elastic into a casing is simple with the right technique. Here’s how you can do it effectively:
- Safety Pin Method: Attach a safety pin to one end of the elastic and guide it through the elastic casing. Keep the other end secure.
- Preventing Twisting: Check that the elastic stays flat as you pull it through.
- Tension Adjustments: Overlap elastic ends, sew them together securely, and check comfort.
- Casing Stitch Types: Finish by sewing the casing shut neatly to lock everything in place.
Consider using a zigzag stitch technique for enhanced flexibility.
This elastic waistband tutorial guarantees even elastic movement ease!
Choosing The Right Elastic for a Waistband
Choosing the right elastic can make or break your waistband’s fit and comfort. Focus on factors like material, width, and stretch to guarantee it suits your garment perfectly.
Knit Elastic: Stretchy and Soft, Suitable for Lightweight Garments
Knit elastic is perfect for lightweight fabrics and comfy waistbands. It’s soft, stretchy, and keeps a polished look without bulk.
Here’s what to know about knit elastic:
- Durable Materials: Options like polyester-cotton blends guarantee stretch recovery, so it lasts with repeated wear.
- Width Options: Sizes range from 1/4 inch to over 1 inch—match the width to your garment’s design and comfort needs.
- Comfort Considerations: Smooth texture and medium elastic tension prevent puckering and deliver a snug, natural fit.
- Elastic Length: Cut based on elastic waistband sizing, usually 80-90% of waist size for flexibility.
Knit elastic’s durability and comfort make it ideal for everyday wear. You can find a wide selection online.
Standard White Elastic: Suitable for Hidden Waistbands
Standard white elastic is a sturdy, cost-effective choice for hidden casings, offering excellent durability for waistband support.
It pairs well with moderate-weight fabrics, ensuring a snug but comfortable fit. To measure elastic length, wrap it around your natural waist, subtract 1-2 inches, and cut.
For lightweight garments, choose thinner options, but thicker widths work best for structured designs needing extra stability.
If you’re looking for this material, you can find white elastic online.
Avoid cheaper prepackaged options—these lack durability and weaken with sewing. Bulk buying tips: purchase from reliable suppliers to save money while ensuring quality elastic for waistbands in future projects.
Fashion Elastic: Bright Colors and Patterns for Exposed Waistbands
When your waistband elastic is on display, fashion elastic delivers both function and flair.
It comes in bold patterns and vibrant colors, perfect for adding personality to any garment. From playful polka dots to sleek stripes, these designs complement countless fabric blends.
Here’s how to use fashion elastic for waistbands:
- Exposed Elastic Aesthetics: Choose patterns that match your garment’s style.
- Color Coordination Tips: Pick shades that harmonize or create contrast.
- Decorative Stitch Options: Use zigzag or stretch stitches for durability.
Whether it’s joggers or skirts, fashion elastic elevates your sewing projects while keeping comfort intact.
Width: Between 3/4 to 1 Inch
When choosing waistband elastic, getting the right width is key for both comfort level and optimal support. A range of 3/4 to 1 inch works well for most garments.
Here are some tips to keep in mind:
- Pair with fabric weight: Heavy fabrics need wider elastic for stability.
- Focus on comfort: Narrow elastic adds a gentle touch without pinching.
- Ensure proper elastic overlap: A snug waistband depends on neat stitching techniques.
- Tailor your casing: Create slightly larger openings for smooth threading.
Match elastic width to your project!
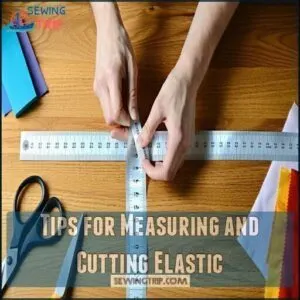
Tips for Measuring and Cutting Elastic
Measuring and cutting elastic correctly is key to creating a comfortable and secure waistband.
By following a few simple steps, you can confirm the elastic fits well and stays in place.
Remove Bulky Clothing Before Measuring
To get an accurate measurement when figuring out your waistband elastic length, avoid wearing bulky layers like jackets or sweaters.
Stick to form-fitting clothes for precision. Bulky layers can skew results, causing waistband measurement errors.
Here’s a quick comparison:
| Clothing Type | Accuracy | Common Errors | Notes |
|---|---|---|---|
| Bulky Layers | Low | Adds extra inches | Avoid when measuring |
| Form-Fitting Clothes | High | True waistline fit | Best for accuracy |
Adjust Elastic Size if It Feels Uncomfortable
Adjusting elastic size isn’t hard, especially if it feels too tight or slides down.
Follow these simple steps to guarantee a comfortable waistband:
- Wear the elastic around your waist and test comfort—it should flex without pinching.
- Subtract 2 inches from your waistband measurement for a better fit.
- Check if the fabric is stretchy; if so, shorten the elastic slightly.
- Sew the elastic in place and trial-fit the garment.
- Use wider elastic for styles sitting higher on the waist.
- Always prioritize comfort over rules; adjust as needed!
Avoid Overlapping Elastic Ends Before Sewing Them Together
Bulky waistband elastic can ruin comfort, especially when overlapping ends. For a Flat Finish and Comfort Improvement, try this simple method. It eliminates the overlap bulk while boosting Seam Strength and giving a Professional Look.
Here’s your waistband elastic guide:
- Measure Elastic Length: Follow elastic measurement guidelines to cut the correct elastic length for your waistband.
- Secure the First End: Sew one elastic end onto a small fabric square using a zigzag stitch.
- Attach the Second End: Align and sew the other end to the opposite fabric edge.
- Trim Excess Fabric: Carefully cut around stitches without leaving loose edges.
This smooth method guarantees reduced bulk and lasting durability.
Consider The Garment’s Height When Choosing The Elastic’s Width
When picking the right elastic width, the garment’s waist height plays a key role. A high-waisted style often needs wider elastic, around 1-2 inches, for great elastic support.
Low-rise designs, though, pair well with thinner elastic for flexibility and comfort. Think about fabric weight, too. Heavier materials like denim need sturdy waistband elastic, while lightweight fabrics do well with softer, thinner options.
Balance these factors with your style choice and needs. Here’s a quick guide:
Garment Type Elastic Width Reason
Carefully measure waistband elastic to guarantee fit and comfort level!
Traditional Elastic Joining Method
To join elastic ends the traditional way, you overlap them by about 1/2 inch and secure them with a zigzag stitch.
This method is simple and reliable, though it creates a small bump where the ends overlap.
Overlap Elastic Ends by 1/2 Inch
Creating the perfect elastic waistband starts with overlapping the elastic ends by 1/2 inch. This simple step guarantees a secure fit while maintaining flexibility and durability.
- Overlap Benefits: The 1/2-inch overlap balances elasticity and strength.
- Bulk Reduction: Smoothly align the elastic ends to avoid unnecessary bulk.
- Stitching Security: Confirm proper alignment of the elastic ends, so your stitches hold firm.
This method is essential for achieving a comfortable and reliable elastic waistband, keeping your elastic length accurate and your garment measurement intact.
Zigzag Ends Together
Using a zigzag stitch strengthens the connection between elastic ends, guaranteeing flexibility and durability.
Aim for a secure, neat finish:
- Position the overlap: Overlap elastic ends by 1 inch before sewing. This length guarantees a reliable bond.
- Test your setup: Try stitch length and width on scrap elastic for consistent results.
- Sew carefully: Start stitching near the center of the overlap, not at the edge, to stop bunching and keep the waistband smooth.
Creates a Bump Where Ends Overlap
When elastic ends overlap, they often create a bump—common but uncomfortable. Fortunately, overlap alternatives like a flat seam can solve this issue.
Here’s how to use a fabric square as an elastic connector:
- Cut a fabric square about 3 inches long and as wide as your elastic.
- Mark the center on the square’s wrong side for accurate join placement.
- Sew each elastic end to the square using a zigzag stitch.
- Trim excess fabric near the stitching for a smooth, seamless finish.
Bye-bye, bulky bumps—hello, comfortable waistbands!
New Elastic Joining Method
If you’re looking for a smoother, flatter way to join elastic ends, the new method is worth a try.
It uses a fabric square for extra stability, ensuring your waistband is comfortable and neat.
Cut Fabric Square The Width of Elastic by 3 Inches
To start, cut a fabric square that matches the elastic’s width by 3 inches. This precise square size guarantees a clean finish and solid stitch security.
Choose durable fabric for stability. Use sharp scissors for neat trimming, and pinking shears can help prevent fraying.
Accurate measurement here keeps your waistband smooth and sewing hassle-free—precision makes all the difference! For enhanced precision, consider aligning the fabric grain before cutting.
Mark Center of Fabric Square’s Wrong Side
Proper square centering starts with careful fabric marking on the wrong side, setting the foundation for accurate placement.
Follow these alignment techniques for a waistband sewing project:
- Lay the fabric square flat, making sure the wrong side faces up.
- Mark the center using a ruler and a fabric pencil or water-soluble marker.
- Draw a clear "X" at the intersection point for balanced placement.
- Verify the alignment by measuring the square’s sides for evenness.
With these steps, you’ll guarantee precise elastic measurement and sewing success!
Zigzag One Elastic End to Fabric Square
To secure one elastic end to the fabric square, follow these steps for a clean, sturdy finish:
- Use the Right Square: Choose a fabric square slightly wider than the elastic for stability. Cotton works well for its strength and flexibility.
- Place Elastic Perfectly: Align the elastic end with the square’s center mark. This guarantees even stitching.
- Adjust Your Machine: Set a wide zigzag stitch for flexibility and hold.
- Control Tension: Keep the elastic taut but don’t stretch it. This prevents uneven seams.
- Trim Carefully: After stitching, trim excess fabric near the zigzag for smooth seams.
This stitching technique brings durability and polish to your waistband projects.
Zigzag Other Elastic End to Fabric Square
Aligning the second elastic end to the fabric square requires precision for a neat finish.
Lay the trimmed elastic end against the marked center on the square’s wrong side, confirming alignment and stability. Use a zigzag stitch to secure it firmly.
Here’s how:
- Trim Any Fray: Neaten your elastic ends before sewing.
- Position Carefully: Place the elastic at a right angle on the square.
- Stitch Steadily: Start stitching 1/4 inch from the square’s edge.
- Check Firmness: Verify stitching holds tightly.
- Repeat Smartly: Finish with confidence!
Trim Fabric Square Close to Zigzagging
To finish your waistband elastic neatly, trimming the fabric square carefully matters.
With the zigzag stitching in place, follow these steps for a smooth result:
- Neat Square Trimming: Check that the fabric square matches the elastic’s width, so edges remain tidy.
- Pinking Shears Option: Cut close to the zigzag edge using pinking shears or sharp scissors. Leave just enough fabric for ravelling prevention.
- Precision Not Required: Keep cuts clean, but don’t stress—this section will stay hidden.
A well-trimmed elastic join guarantees comfort and clean sewing.
Elastic Finishing
Finishing elastic properly guarantees it’s secure and neat, giving your waistband a polished look.
Simple steps like trimming edges with pinking shears and stitching them down prevent fraying and create a durable result.
Turn Elastic Over With Fabric Square Facing Up
Flip the fabric square over so the elastic faces up. This helps with alignment and makes attaching and trimming easier.
Use pinking shears to neatly trim the edges of the fabric square, a method that prevents fraying and guarantees a smooth finish. While absolute precision isn’t needed, even cuts show care and help extend durability.
Follow these steps for a polished look:
| Action | Tool | Purpose |
|---|---|---|
| Flip fabric over | Hands | Align elastic with the square |
| Trim edges | Pinking shears | Prevent fraying |
| Mark square center | Pen/marker | Guide elastic attachment |
| Attach elastic ends | Zigzag stitch | Secure tightly |
| Check edges | Visual check | Guarantee a neat, clean finish |
Trim Fabric Square Ends With Pinking Shears
With your elastic and fabric square set, it’s time to grab your pinking shears! Trim around the fabric square’s edges, staying close to the zigzag stitches.
These shears are perfect for preventing fraying while adding a clean, professional look.
Here’s what to focus on:
- Pinking Shears Benefits: Stops fabric unraveling with zigzag edges.
- Square Size Variation: Keep the size minimal for neat trimming.
- Alternative Edge Finishes: Consider pinking shears for convenience.
- Shear Brand Comparison: Invest in durable, sharp options.
- Decorative Edge Options: Create stylish finishes for visible waistbands.
Sharp shears and careful trimming are key for sewing success!
Zigzag Trimmed Edges to Prevent Ravelling
After trimming the fabric square with pinking shears, use a zigzag stitch to prevent fabric fraying and maintain durability.
This step is key for effective edge finishing techniques, as it locks loose threads neatly in place.
Adjust zigzag tension settings for a smooth, decorative zigzag edge.
By doing this, you guarantee your elastic remains secure and your waistband looks polished.
A simple zigzag stitch option makes all the difference in elastic fraying prevention.
Stitching and Trimming Do Not Need to Be Precise
Don’t worry about perfect seams—it’s all about function. A balanced mix of relaxed sewing and quick stitching will keep your elastic secure and durable.
Casual trimming prevents frayed edges, while imperfect seams can still deliver a polished, rustic finish.
- Use a zigzag stitch to handle stretch.
- Trim lightly to stop fraying.
- Choose strong thread for support.
- Focus on security, not perfection.
Frequently Asked Questions (FAQs)
How do you measure elastic for a waistband?
Picture a snug hug around your waist: measure your natural waistline with a soft tape.
Subtract 2 inches for ease, and make certain the elastic is 80-90% of that for a comfy fit.
How can I get a smaller waist?
Focus on a balanced diet, strength training, and cardio to reduce overall body fat.
Stay consistent with exercises like planks and twists to tone your waist.
Small, sustainable changes lead to lasting results.
How much elastic do I need for a waistband?
Measure your waist snugly, subtract 1-2 inches for comfort, and adjust for fabric stretch.
Elastic length is typically 80-90% of your waist measurement.
Always test the fit before sewing to guarantee comfort and flexibility.
How do you attach elastic to a waistband?
Imagine a snug belt securing your waist.
To attach elastic, sew the ends into a loop, divide into equal sections, match to your fabric, and stretch while sewing to guarantee a smooth, comfortable fit.
What is the best elastic for a waistband?
The best elastic for a waistband depends on your fabric and needs.
Choose woven elastic for strong, durable support or knit elastic for softness and flexibility.
For exposed waistbands, consider decorative or fashion elastic for style.
How do you make an elastic waistband fit like a dream?
Did you know elastic should be 80-90% of your waist measurement?
To make it perfect, measure snugly, use a soft tape, subtract 2 inches, and guarantee even stretching while sewing for comfort.
How Do You Measure Elastic for Waistband?
To get the perfect fit, measure your waist where the garment will sit.
Subtract 2 inches from this measurement for your elastic length. You’ll need a snug-but-comfortable fit that doesn’t slide down.
How Much Do You Add for Elastic Waistband?
Like threading a needle, you need precision. For elastic waistbands, subtract 2 inches from your waist measurement for a comfortable fit. For stretchy fabrics, reduce length by 10-15% for proper tension.
How Much Elastic Do You Use When Sewing?
For waistbands, use elastic that’s 2 inches shorter than your waist measurement. You’ll want to cut it 80-90% of the actual waist size for a comfortable fit that stays in place.
How Much Should I Stretch Elastic When Sewing?
Stretch your elastic about 25% of its total length while sewing. You’ll want it snug but not tight. This creates even gathers and comfortable movement in your finished waistband.
Conclusion
Measuring elastic for waistband success means checking twice and cutting once.
You’ll save time, fabric, and frustration when you measure properly. Remember to subtract those essential 2 inches, test before final sewing, and select width based on your garment’s needs.
With these techniques, your waistbands will fit comfortably without sagging or pinching. Whether you’re making pajamas or professional attire, how to measure elastic for waistband is a skill that delivers perfect results every time.
- https://www.wikihow.com/Measure-Elastic-for-a-Waistband
- https://www.reddit.com/r/sewing/comments/1248tdh/how_to_calculate_elastic_length_for_waist/
- https://sewfullife.com/2017/03/10/a-new-trick-for-waistband-elastic/
- https://www.threadsmagazine.com/forum/waistband-elastic-formula
- https://pubs.nmsu.edu/_c/C234/index.html

