This site is supported by our readers. We may earn a commission, at no cost to you, if you purchase through links.
Embrace floating by exploring a range of securing methods like temporary adhesive spray, embroidery tape, or sticky stabilizers.
Experiment with these techniques to reveal stunning embroidery results that will leave a lasting mark on your creations.
Table Of Contents
Key Takeaways
- Float your fabrics to break free from the limitations of hoops and explore new and exciting embroidery possibilities.
- Secure your fabric without damaging it using temporary adhesives, tape, sticky stabilizers, pins, or a basting box.
- Eliminate hoop marks and achieve professional-looking finishes with floating techniques.
- Float your way to success by embracing the advantages of floating, such as expanded creative options, secure attachment, and precise design placement.
How to Float Fabric Machine Embroidery Tutorial?
To float fabric in machine embroidery, use adhesive methods like temporary spray or tape to secure the fabric on top of the stabilizer without hooping. This tutorial helps with precise embroidery on small or oddly-shaped items, avoiding hoop marks.
Securing Fabric Without Hooping
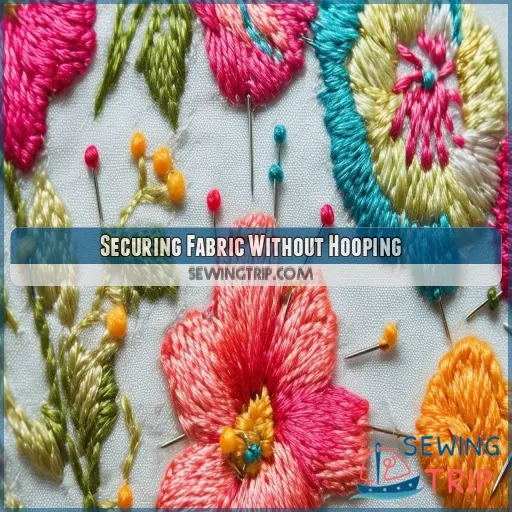
To secure fabric without hooping in machine embroidery, you’ll need to explore various attachment methods. You can use temporary fabric adhesive spray, painter’s tape, embroidery tape, masking tape, sticky self-adhesive stabilizer, pins, or a basting box to keep your fabric in place during the embroidery process.
Temporary Fabric Adhesive Spray
Temporary fabric adhesive spray is your go-to solution for floating fabric in machine embroidery. Apply it sparingly to your stabilizer, ensuring even coverage. Let it dry until tacky, then carefully position your fabric. This method works wonders for delicate materials and odd-shaped items.
Here are three key tips for using temporary fabric adhesive spray:
- Test on scrap fabric first
- Spray in a well-ventilated area
- Clean your machine’s needle regularly to prevent adhesive buildup
Painter’s Tape, Embroidery Tape, or Masking Tape
You can secure fabric without hooping using painter’s tape, embroidery tape, or masking tape. Apply the tape carefully along the edges of your fabric, ensuring it’s snug but not overstretched. This method prevents fabric damage and leaves no residue.
For delicate fabrics, consider alternatives like a basting box or sticky self-adhesive stabilizer.
When removing the tape, peel it off slowly to avoid any potential fabric distortion.
Sticky Self-Adhesive Stabilizer
Sticky self-adhesive stabilizer is your secret weapon for floating fabric. This innovative product eliminates the need for hooping, making your embroidery projects a breeze. Here’s why it’s a game-changer:
- Provides a strong hold without fabric damage
- Simplifies the floating process, no need for adhesive spray
- Works well with delicate fabrics that can’t handle hooping
Simply peel, stick, and embroider. It’s like having a basting box built into your stabilizer!
Pins
When sticky stabilizers aren’t an option, pins can be your go-to for floating embroidery. They’re especially handy for un-hoopable items. Here’s a quick guide to using pins effectively:
| Pin Type | Best For | Tips |
|---|---|---|
| T-pins | Thick fabrics | Place every 1-2 inches |
| Safety pins | Delicate materials | Use small sizes |
| Straight pins | General use | Angle away from needle |
| Quilting pins | Large projects | Place in grid pattern |
| Ballpoint pins | Knit fabrics | Prevents snags |
Basting Box
If pins aren’t your style, the basting box is a game-changer for floating fabric. Many embroidery machines offer this feature, which stitches a temporary outline around your design area.
It’s like giving your fabric a secure hug, ensuring it stays put without tension clips or magnetic hoops.
The basting box is perfect for hoopless embroidery, providing extra stabilizer and a foolproof way to float fabric for stunning results.
Advantages of Floating
Floating fabric in machine embroidery offers several key advantages that expand your creative possibilities. You’ll be able to embroider small or un-hoopable items, secure fabric without damage, eliminate hoop marks, and guarantee accurate design placement.
Expands Creative Options
Floating techniques present a realm of innovative possibilities in machine embroidery. By breaking free from the limitations of hoops, you’ll open up new avenues for design. Here’s how floating broadens your horizons:
- Tackle unconventional shapes effortlessly
- Explore layered designs
- Embroider on delicate fabrics without causing damage
- Achieve precise placement on pre-made items
Embrace this method to transcend the boundaries of your craft. With floating, you’ll find yourself on a journey of lifelong learning and innovation in the realm of embroidery.
Allows Embroidery on Small or Un-hoopable Items
Floating fabric opens up a world of unconventional embroidery possibilities for small-scale projects and un-hoopable items. You’ll master personalized baby items and tackle those tricky fabrics with ease. Here’s a quick comparison of hooping vs. floating for small projects:
| Aspect | Hooping | Floating |
|---|---|---|
| Compatibility | Limited | Versatile |
| Fabric Prep | Complex | Simple |
| Project Size | Restricted | Flexible |
| Machine Use | Standard | Adaptable |
| Creative Freedom | Constrained | Unlimited |
Say goodbye to square hoop limitations and hello to endless creativity!
Provides Secure Attachment Without Damaging Fabric
Floating fabric provides secure attachment without damaging delicate materials. Unlike hooping, which can stretch or mark fabrics, floating techniques offer gentler alternatives.
Use temporary adhesive sprays, painter’s tape, or sticky stabilizers to hold your fabric in place. For extra security, try a basting box or pins.
These methods work wonders on delicate apparel, ensuring your embroidery stays put without compromising the fabric’s integrity. It’s a game-changer for fragile or specialty materials!
Eliminates Hoop Marks on Finished Product
Floating embroidery secures your fabric without damage and eliminates those pesky hoop marks. You’ll love the professional finish it provides. Here’s why floating is a game-changer for fabric protection:
- No more visible hoop indentations
- Preserves delicate fabrics’ integrity
- Allows for seamless embroidery on challenging materials
Ensures Accurate Placement of Embroidery Design
Floating eliminates hoop marks while ensuring the precise placement of your embroidery design. You’ll gain greater control over fabric placement and design alignment.
By employing stabilization methods like temporary adhesives or basting boxes, you can achieve precise positioning. Floating accuracy is enhanced through proper tension control, allowing you to create stunning embroideries on even the most challenging items.
Master this technique, and you’ll discover a world of creative possibilities.
Hooping Vs. Floating
When embroidering, you have two main options for securing your fabric: hooping and floating. Hooping involves placing both the fabric and stabilizer within hoop frames, while floating allows you to place the fabric on top of a hooped stabilizer without directly hooping the fabric itself.
Hooping: Securing Fabric and Stabilizer Within Hoop Frames
While floating offers advantages, hooping remains a tried-and-true method. You’ll secure both fabric and stabilizer within the hoop frames, guaranteeing proper fabric tension.
Choose the right hoop size for your project and consider using double-sided tape for slippery fabrics. A hooping station can make the process easier, especially for beginners.
Floating: Placing Fabric on Stabilizer Without Hooping
Floating offers a unique approach to machine embroidery. You’ll hoop only the stabilizer, then place your fabric on top. This technique opens up a world of possibilities for tricky projects. Here’s why you might choose floating:
- Tackle those pesky small or oddly-shaped items
- Say goodbye to unsightly hoop marks
- Preserve delicate fabrics from hoop damage
- Embrace the freedom to embroider pre-constructed items
- Master the art of precise design placement
Floating Techniques
To float fabric for machine embroidery, start by hooping only the stabilizer and measuring your fabric to fit within the hoop guides. Secure the fabric using your preferred attachment method, such as temporary adhesive spray or pins, and make sure any extra fabric is kept away from the embroidery area to prevent interference during stitching.
Hoop Stabilizer Only
Now that you’ve decided to float your fabric, it’s time to hoop your stabilizer. This is the foundation of successful floating techniques.
Choose a stabilizer that’s appropriate for your project and fabric type. Hoop it tightly, ensuring it’s drum-taut.
For delicate fabrics, consider using adhesive-backed stabilizer.
Measure Fabric to Fit Hoop Guides
When floating fabric, precise measurement is imperative for hoop guide alignment. Select your stabilizer and measure your fabric to fit within the hoop’s boundaries. This guarantees proper positioning and prevents fabric shifting during embroidery. Here’s why accurate measurement matters:
- It gives you confidence in your design placement
- It reduces the risk of misaligned stitches
- It helps you manage extra fabric effectively
- It maximizes your embroidery area
- It sets you up for attachment method success
Experiment With Attachment Methods
When experimenting with attachment methods, consider your fabric and stabilizer thickness. For lightweight materials, try temporary adhesive sprays or sticky stabilizers. Heavier fabrics may require pins or a basting box.
Test different placement techniques to guarantee accurate positioning. Remember, your adhesive choices can impact the final result.
Be versatile with basting options, adjusting your approach based on the project’s unique needs. Don’t be afraid to mix methods for satisfactory results.
Keep Extra Fabric Away From the Embroidery Area
After selecting your attachment method, it’s essential to manage excess fabric. Keep it away from the embroidery area to prevent snags or accidental stitching.
For small item embroidery, carefully fold and secure loose fabric with pins or clips. This technique guarantees embroidery accuracy and protects delicate fabrics.
Floating Applications
You can use floating techniques to embroider shirts that are too small for your hoop, allowing you to add designs to baby clothes or tight-fitting garments. Floating is also ideal for odd-shaped items like stuffed animal ears or shoe tongues, giving you the flexibility to embellish unique projects with ease.
Embroidering Shirts Too Small for Hoop
Now that you’ve mastered floating techniques, let’s tackle embroidering shirts too small for hoops. By using the floating method, you can easily add designs to baby bibs, handkerchiefs, pillowcases, socks, and mittens. Here’s why you’ll love floating for small items:
- Express your creativity on tiny canvases
- Say goodbye to hoop frustration
- Transform everyday items into personalized treasures
- Impress friends with your embroidery wizardry
- Conquer the challenge of small-scale designs
Odd-shaped Items
When tackling odd-shaped items, floating’s your secret weapon. Attach fabric securely using temporary adhesives or pins, then leverage your machine’s basting box feature for extra stability.
This technique’s perfect for embroidering tricky shapes like stuffed animal ears or shoe tongues.
Alignment’s essential, so use hoop guides to position your design accurately.
Frequently Asked Questions (FAQs)
How to float fabric on an embroidery machine?
To float fabric on an embroidery machine, hoop the stabilizer, then secure the fabric on top using pins, temporary adhesive, or a basting box. Make sure the fabric stays flat and taut during stitching.
Does embroidery have to stay in the hoop?
Embroidery doesn’t have to stay in the hoop. You can float fabric by hooping only the stabilizer and attaching the fabric using pins, temporary adhesives, or a basting box, providing flexibility for small or un-hoopable items.
How to put embroidery fabric on hoop?
Place the fabric on the bottom hoop, align it carefully, then press the top hoop over, pushing them together snugly. Avoid over-tightening, make sure no wrinkles, and make necessary adjustments to make sure secure and smooth placement.
How to embroider something smaller than the hoop?
Think of floating like giving your fabric a flying carpet. Hoop stabilizer only, secure your small item on top with pins or temporary adhesive, and use a basting box feature for a precise stitch-out.
How to use floating in embroidery?
To use floating in embroidery, hoop the stabilizer, secure the fabric with pins, adhesive, or a basting box, and guarantee placement accuracy. This method suits small, odd-shaped, or delicate items, avoiding hoop marks and fabric damage.
Do you need to float to make embroidery possible?
You don’t always need to float fabric for embroidery, but it’s essential for small or odd-shaped items like tote bags. Floating prevents hoop marks, ensuring secure attachment without damaging delicate or thick fabrics.
How do you float a hoop in a sewing machine?
To float a hoop in a sewing machine, first hoop your stabilizer, then place your fabric on top, securing it with pins or temporary adhesive, and use a basting box feature to prevent movement during embroidery.
What is the difference between floating and embroidering?
Floating means attaching fabric to a hooped stabilizer with pins or adhesives, while embroidering involves securing both fabric and stabilizer in the hoop. Floating avoids hoop marks but can risk movement during stitching.
How do you float a fabric?
To float fabric, hoop a stabilizer only, then secure your fabric with pins, temporary adhesive, or a basting box. Make sure the fabric is smooth and aligned correctly before starting your embroidery design.
What is a float embroider?
A float embroider is a method where you attach fabric to a hooped stabilizer without hooping the fabric itself. This technique is ideal for small, delicate, or pre-constructed items, ensuring they remain undamaged.
How do I choose the right stabilizer?
Choose stabilizer based on fabric type and embroidery design. For lightweight fabrics, use water-soluble stabilizer. For stretchy materials, opt for cut-away stabilizer. Use tear-away stabilizer for stable fabrics. Confirm it’s sturdy enough for your design.
What fabrics are unsuitable for floating?
In machine embroidery, avoid floating stretchy fabrics like knits, delicate fabrics like silks, and heavy materials like denim or leather. These can shift, pucker, or tear, compromising your project’s quality.
What are common mistakes in floating embroidery?
Common mistakes in floating embroidery include improper attachment methods, insufficient stabilizer support, incorrect hoop size, failing to smooth out the fabric, and neglecting to test the basting box feature, all leading to shifting and inaccurate stitch placement.
How do I clean adhesive residue safely?
To safely clean adhesive residue, use a dab of rubbing alcohol on a soft cloth or a commercial adhesive remover. Gently rub the residue until it’s gone, then wash the fabric according to care instructions.
Are there alternative stabilizers for floating?
Did you know that 70% of embroiderers struggle with hoop marks on their finished products? You can avoid this issue by using alternative stabilizers for floating, such as fusible web, temporary adhesive sheets, or even tear-away stabilizers, which provide a secure hold without damaging your fabric.
Conclusion
Visualize ditching the constrictive hoops—floating transforms your embroidery experience.
This "how to float fabric machine embroidery tutorial" highlights securing techniques and helps you master embroidery on challenging surfaces.
Embrace the freedom that floating offers, from avoiding hoop marks to achieving perfect design placement.
Armed with these techniques, you’ll navigate small, odd-shaped items effortlessly.
Test different methods, keep extra fabric at bay, and you’ll elevate your machine embroidery projects efficiently and effectively.

