This site is supported by our readers. We may earn a commission, at no cost to you, if you purchase through links.
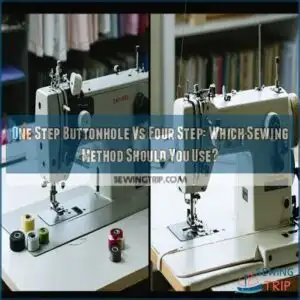
One-step buttonholes are fully automatic – you set the size once and your machine does everything with one button press.
Four-step buttonholes require you to manually control each side of the buttonhole, giving you more control but demanding more attention.
One-step is perfect for beginners or multiple identical buttonholes, while four-step gives you precision for custom work.
Your choice between one-step buttonhole vs four-step often depends on your machine’s capabilities, your skill level, and whether consistency or customization matters most to your project.
Table Of Contents
Key Takeaways
- One-step buttonholes are fully automatic—you set the size once and your machine does everything with one button press, making them ideal for beginners or when you need multiple identical buttonholes quickly.
- Four-step buttonholes give you complete manual control over each side of the buttonhole, offering more precision and customization options but requiring more attention and practice to master.
- Your choice depends on your machine’s capabilities, your skill level, and whether consistency (one-step) or customization (four-step) matters most to your project.
- Always test your buttonhole settings on scrap fabric first—this simple step builds your confidence and helps you achieve consistent results with either method.
Buttonhole Types Compared
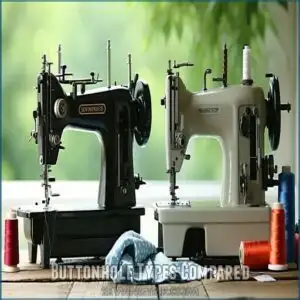
In the context of buttonholes, the main difference is how the sewing machine completes the task.
The 4-step method requires manual control at each stage, while the 1-step process does all the work for you in one go.
4. Step Buttonhole Process
The 4-step buttonhole process gives you complete control over buttonhole sewing.
It’s a step-by-step guide where you manually select and adjust stitches for each stage.
Here’s how it works:
- Sew one side using a mechanical machine.
- Create a custom-sized bottom tack before finishing.
- Repeat for the other side.
This method guarantees precision and user control, making it a reliable choice for buttonhole sewing.
1. Step Buttonhole Automation
Unlike the four-step buttonhole, the one-step buttonhole simplifies your sewing by automating the process.
With its presser foot and button slot, the sewing machine uses stitch automation for precise buttonhole sizing.
This automatic buttonhole method offers a speed advantage, as the machine completes the task in one go.
It’s perfect for anyone seeking consistency and ease with sewing machine automation.
Key Differences and Similarities
When choosing between a one-step buttonhole and a four-step buttonhole, it’s about automation vs. manual control.
The one-step automatic buttonhole is faster, with less user effort. The four-step manual buttonhole offers stitching steps for precision and customization options.
Both create durable, reliable results on a sewing machine buttonhole, but your preference depends on balancing speed with control. Some machines even offer adjustable stitch length for further customization.
Sewing Machine Buttonhole Features
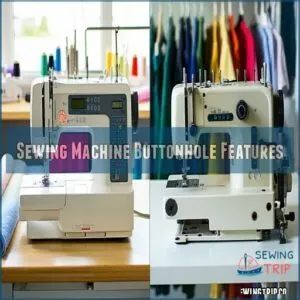
In the context of sewing machine buttonhole features, knowing your options can make your projects easier and more enjoyable.
From automated 1-step buttonholes to the manual precision of 4-step methods, each machine offers unique tools to match your sewing needs.
Janome Juno Machine Options
Janome Juno sewing machines fit every need, from beginners to pros.
The G Series offers reliable 4-step buttonhole capability, while the J Series shines with one-step buttonhole automation.
Key features include:
- G Series: precise, manual control.
- J Series: effortless, quick projects.
- Skill levels: beginner to advanced.
- Projects: clothing, crafts, or quilting.
Explore Janome Juno for versatility and feature comparison. Discover more about the Janome Juno G Series.
Brother Sewing Machine Buttonhole Methods
Brother sewing machines make buttonholes a breeze, whether you prefer the one-step or four-step method.
Their sewing machine buttonhole options include foot attachments and stitch settings for perfect results. Modern machines offer a one-step buttonhole option for efficient automation.
Follow tutorial resources for guidance.
To help you compare:
| Feature | One-Step Buttonhole | Four-Step Buttonhole |
|---|---|---|
| Automation | Fully automatic | Manual step adjustment |
| Speed | Faster | Slower but precise |
| Learning Curve | Easy to master | Takes practice |
| Customization | Limited | Highly customizable |
Machine Settings and Compatibility
Sewing machine settings determine how buttonholes are made, whether it’s a one step buttonhole or a detailed four step buttonhole.
Mechanical machines often favor four step options for precision, while electronic models simplify things.
Foot compatibility matters too—specific feet guarantee proper sizing, and checking stitch settings for buttonhole size is also important to explore brand differences in sewing machine buttonhole options to suit your needs.
Buttonhole Creation Techniques
Creating buttonholes can seem tricky, but it’s all about choosing the right method for your machine and skill level.
Whether you prefer the manual control of the 4-step or the ease of the 1-step, understanding their processes is key to getting perfect results.
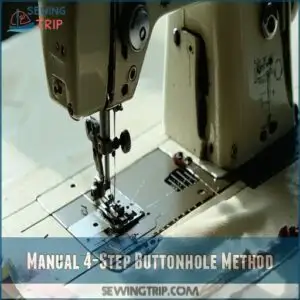
Manual 4-Step Buttonhole Method
The 4-step buttonhole method gives you full control. You pick each stitch and move manually through all four buttonhole steps: stitches down one side, a bar tack, stitches up the other, and a final tack.
It’s hands-on, precise, and ideal for custom sizing. Though slower, it’s great for personalizing projects.
Many sewers prefer manual buttonhole sewing for greater control.
- Manual Steps: Control every stage.
- Stitch Selection: Adjust settings manually.
- Bar Tacking: Adds strength.
- Custom Sizing: Perfectly fits unique buttons.
- User Control: More freedom for creativity.
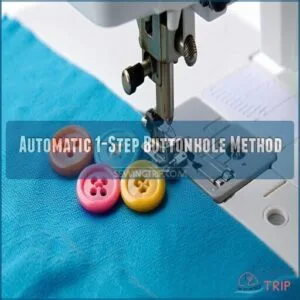
Automatic 1-Step Buttonhole Method
If you’ve tried the manual 4-step method, the one-step buttonhole feels like magic. It uses sensor accuracy to size the buttonhole perfectly to your button.
With sewing machine buttonhole automatic features, foot compatibility guarantees precision, while stitch density settings keep edges neat. Fabric feed stays consistent, saving time and effort.
For those seeking to upgrade, consider exploring options for purchasing a buttonholer. An automatic 4-step buttonholer can’t compete with this simplicity!
| Feature | Advantage | Why It Matters |
|---|---|---|
| Button Size | Perfect fit | Matches every button |
| Foot Compatibility | Steady placement | No slipping or shifting |
| Fabric Feed | Consistent motion | Smooth, even stitching |
The key benefits of this one-step buttonhole method include a perfect fit and smooth operation, making it a superior choice for sewing needs.
Tips for Mastering Buttonhole Techniques
Now that you’ve mastered the automatic method, let’s sharpen your buttonhole skills with these essential techniques. Even pros practice before tackling their final projects.
Here are 5 game-changing tips for perfect buttonholes:
- Use stabilizer under your fabric to prevent puckering
- Mark buttonhole positions precisely with washable markers
- Adjust thread tension for your specific fabric type
- Test foot pressure on scraps matching your project material
- Maintain consistent stitching speed for professional results
To avoid distorted buttonholes, consider stabilizer weight selection based on fabric. Whether you’re using one step buttonhole or 4step buttonhole methods, these buttonhole techniques will transform your projects from homemade to handcrafted!
User Experience and Preferences
Your choice between one-step and four-step buttonholes affects how you’ll interact with your sewing machine.
You’ll find that one-step offers speed and convenience while four-step gives you more control over each stage of the buttonhole process, particularly in terms of control.
Ease of Use and Familiarity
Familiarity breeds comfort in the context of buttonhole methods. Your prior experience largely determines which technique feels more intuitive.
The one step buttonhole offers a gentler learning curve for beginners, while the 4step buttonhole might feel more natural if you’ve already mastered it.
Check your sewing machine manual or a buttonhole tutorial to understand your machine’s specific design. User preference develops through method mastery and practice.
Precision and Customization Options
While knowing your machine makes buttonhole creation easier, having control over the final product matters most.
With 4-step buttonholes, you’ll enjoy greater precision for custom buttonhole size and stitch density adjustments, especially helpful with varying fabric thickness.
One-step buttonhole options offer less customization but consistent results.
Your sewing machine buttonhole settings can be adjusted for either method, though needle selection and thread tension require more manual tweaking with 4-step approaches when creating different buttonhole styles.
Convenience and Speed Considerations
While precision matters, your time is equally valuable when sewing.
One-step buttonholes shine in the convenience department, especially when you’re working on multiple projects.
- A one-step buttonhole takes about 15 seconds versus a four-step’s 45-60 seconds
- Automation benefits beginners who might feel intimidated by manual processes
- Batch sewing becomes substantially faster with one-step technology
- Project complexity doesn’t slow you down when your machine handles the timing
Your sewing machine buttonhole settings make all the difference when you’re racing to finish that shirt, and convenience is key in this process.
Buttonhole Sewing Best Practices
You’ll save yourself plenty of headaches by testing buttonhole settings on scrap fabric before working on your actual project.
Making a quick reference swatch with your preferred buttonhole settings can help you achieve consistent results every time.
Practicing With Scrap Fabric
After weighing your preferences for precision or speed, it’s time to put theory into practice.
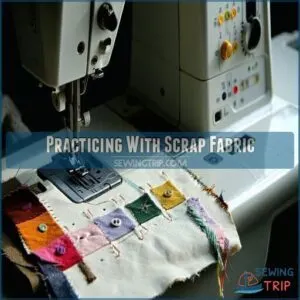
Always test your buttonhole types on scrap fabric before working on your actual project.
Create a buttonhole swatch with different stitch settings, tension adjustments, and thread choices to see what works best.
This simple step saves you headaches later and builds confidence with both one-step and four-step buttonhole methods on your sewing machine.
Adjusting Machine Settings
After practicing on scrap fabric, you’ll need to dial in your machine’s settings.
Adjust your stitch length shorter for denser buttonholes.
Check tension adjustment—too tight and your buttonhole puckers, too loose and it gaps.
For 1-step buttonholes, make certain of proper foot pressure and feed dog height.
With 4-step buttonholes, pay attention to needle position between stages.
Remember, your sewing machine’s manual is your best friend for specific buttonhole settings.
Proper setup includes choosing the right foot for the task, which is crucial for achieving perfect buttonholes with the right stitch length and tension adjustment to ensure a proper setup.
Frequently Asked Questions (FAQs)
What is the difference between a one step and 4 step buttonhole?
One-step buttonholes complete the entire process automatically without stopping.
While four-step buttonholes require you to manually progress through each stage (sides, top, and bottom tack) with the machine pausing between steps, which can be considered as a more manual process.
What is a 1 step buttonhole?
Just like a one-click checkout speeds up online shopping, a 1-step buttonhole completely automates the buttonhole creation process.
You’ll place your button in the special foot, and your machine does all the work automatically.
What are the two types of buttonholes?
The two main buttonhole types are one-step and four-step buttonholes.
You’ll find that one-step completes the entire process automatically, while four-step requires you to manually progress through each stage of creating the buttonhole.
What are the different types of buttonhole feet?
You’ll typically find two main buttonhole feet: the sliding buttonhole foot for four-step processes.
The one-step buttonhole foot has a button slot that automatically sizes your buttonhole based on your button’s dimensions.
Can buttonholes be sewn without special attachments?
It’s absolutely mind-blowing, but yes, you can create buttonholes without special attachments.
You’ll need to use a zigzag stitch, mark your buttonhole carefully, and sew slowly for control.
Practice helps perfect this technique.
How to repair or resize existing buttonholes?
To repair buttonholes, use matching thread and closely spaced zigzag stitches to reinforce edges.
For resizing, carefully open with a seam ripper and rebind edges.
You’ll need fray check for both methods.
What fabrics are challenging for buttonhole creation?
Nearly 85% of sewers struggle with slippery fabrics.
Your biggest challenges include silk, satin, knits, stretchy materials, lightweight sheers, thick denim, and layered fabrics with interfacing.
Stabilizers can help tame these tricky textiles.
Can buttonholes be hand-sewn effectively?
Yes, you can effectively hand-sew buttonholes using simple stitches like the blanket stitch. They’re often sturdier than machine-sewn ones and give your project a distinctive handcrafted look. Practice makes perfect!
Are vintage machines better for buttonhole sewing?
Vintage machines often give you more manual control for buttonholes, which some sewers prefer.
You’ll need more skill to use them, but they can create durable, precise results when you’ve mastered their mechanical simplicity.
Conclusion
Whether you choose a one-step buttonhole vs four-step method ultimately depends on your needs.
The lightning-fast convenience of one-step automation is perfect when you need consistent results across multiple buttonholes.
Meanwhile, four-step gives you incredible control for those special projects requiring precision.
Both methods have their place in your sewing arsenal.
Consider your machine’s capabilities, your skill level, and project requirements—then select the approach that’ll help you create professional-looking buttonholes with confidence, using the one-step or four-step method that best suits your needs.

