This site is supported by our readers. We may earn a commission, at no cost to you, if you purchase through links.
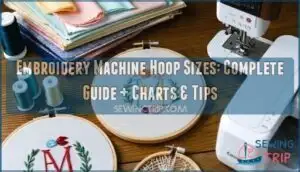 Embroidery machine hoop sizes range from tiny 2×2-inch hoops for monograms to massive 14×20-inch frames for full jacket backs.
Most machines support standard sizes like 4×4 inches (great for beginners), 5×7 inches for medium projects, and 6×10 or 8×12 inches for larger designs.
Your machine’s model determines compatibility, so always check before buying.
Matching the hoop to your project is key—too small, and your design won’t fit; too large, and fabric tension might suffer.
For beginners, 4×4 or 5×7 hoops hit the sweet spot.
Choosing the right hoop isn’t just technical—it’s the secret sauce to crisp, professional embroidery results.
Table Of Contents
Key Takeaways
- You’ll need to match the hoop size to your project’s design dimensions, ensuring it fits snugly to maintain fabric tension and prevent puckering.
- Hoop sizes don’t reflect the actual stitching area; for example, a 4×4 hoop provides only 3.94×3.94 inches of usable embroidery space.
- Different fabrics require specific hoop types and tension adjustments—delicate fabrics need gentle handling, while heavy materials need secure clamping.
- Always check your embroidery machine’s compatibility with hoop sizes and design formats to avoid stitching errors or misalignment.
Embroidery Hoop Sizes Explained
Understanding embroidery hoop sizes can initially seem confusing because the labeled dimensions don’t match the actual stitching area you’ll work with.
Understanding embroidery hoop sizes reveals the gap between what’s labeled and what you actually get to stitch.
You’ll discover that a 4×4 inch hoop actually provides a 3.94×3.94 inch embroidery field, and this difference occurs due to mechanical constraints that prevent stitching too close to the hoop’s edges.
Hoop Size Dimensions
When selecting embroidery hoops, hoop measurements don’t match actual embroidery fields—that’s where many crafters stumble.
Your 4×4 hoop only provides 3.94×3.94 inches of sewing area, not the full four inches you’d expect.
These hoop limits exist because machines need buffer zones around stitch bounds.
Always consult a hoop size chart before starting your project to avoid frustrating design constraints.
Embroidery Field Size
Understanding your embroidery field size is essential for design accuracy. The stitching area represents your actual workspace, not the hoop dimensions. A 4×4 hoop delivers only 3.94×3.94 inches of usable space due to stitch limits.
- Maximum embroidery area differs from labeled hoop size measurements
- Sewing fields require mechanical buffers to prevent needle collisions
- Hoop size charts reveal true embroidery capabilities for project planning
Common Hoop Sizes
Which hoop dimensions work best for your embroidery projects?
Here’s your go-to hoop size chart for standard embroidery machine hoops:
- 4×4 hoop: 3.94×3.94" sewing areas for logos and monograms
- 5×7 hoop: 5.12×7.09" embroidery fields for medium designs
- 6×10 hoop: 6.30×10.24" stitch limits for jacket backs
- 8×8 hoop: Perfect square dimensions for quilting blocks
- 8×10 hoop: Large projects with excellent hoop size compatibility
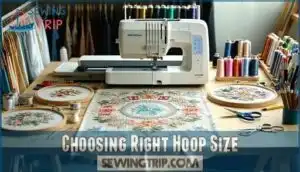
Choosing Right Hoop Size
Selecting the correct hoop size requires matching your design dimensions to the actual embroidery field, not the labeled hoop measurements, since a 4×4 hoop typically provides only 3.94×3.94 inches of usable stitching area.
You’ll need to take into account your project’s fabric type and thickness alongside the design size, as delicate materials require gentler tension while heavy fabrics demand secure clamping mechanisms.
Consider Project Size
Your project planning starts with measuring your design’s dimensions.
Choose embroidery hoop sizes that provide 1-2 inches beyond your design boundaries—this prevents fabric stress and maintains proper tension.
Small monograms work perfectly in 4×4 hoops, while jacket backs demand 6×10 embroidery machine hoops.
Design scaling becomes essential when your artwork exceeds stitch limits.
Always check your embroidery hoop size guide for compatibility between your project’s dimensions and your machine’s maximum hoop size capacity.
Fabric Type Importance
Different fabrics demand different approaches when selecting your embroidery hoop sizes. Delicate materials like silk or chiffon need gentle tension control to prevent damage, while denim requires firm grip to avoid slippage during stitching.
Your fabric selection directly impacts material compatibility with specific embroidery machine frames. Lightweight fabrics work best with spring-loaded hoops, whereas heavy materials need screw-type adjustments.
Understanding your fabric type helps determine proper stabilizer options and thread choice. Match hoop pressure to fabric weight—too tight damages delicate fibers, too loose creates puckering in your embroidery stitching area.
Hoop Size Compatibility
Your fabric’s dialed in, but now you’re facing the real test: hoop size compatibility. Not every design fits every hoop, and you can’t just stretch things to make them work. Embroidery hoop sizes have strict hoop limits that determine what’s possible.
Check these compatibility factors:
- Compare design dimensions against field measurements
- Verify embroidery machine hoop compatibility with your specific model
- Review embroidery constraints for format requirements (PES, JEF, etc.)
- Use size conversion tools for metric-to-inch calculations
- Test design scaling limitations before starting
Understanding the correct hoop size selection is vital for a successful project, and considering embroidery hoop sizes is essential for achieving the desired results. Smart planning prevents costly mistakes.
Hoop Size Measurements
You’ll encounter hoop measurements in both inches and millimeters, and understanding these dual systems prevents confusion when selecting designs or purchasing new hoops.
Converting between these measurement units becomes essential since manufacturers often list specifications differently, and your embroidery software may display dimensions in either format depending on your machine’s origin, which involves complete concepts and requires dual systems to be understood for preventing confusion, and this is crucial for selecting designs.
Inch Measurements
Understanding inch measurements gives you complete control over your embroidery projects.
A 4×4 hoop size actually provides a 3.94×3.94-inch embroidery field – that’s your real sewing area.
Check your measurement guide carefully because inch limits matter more than the label suggests.
Most embroidery machine hoop sizes follow this pattern, so always verify actual stitching dimensions before starting any design.
Millimeter Measurements
Metric conversions turn confusing hoop dimensions into crystal-clear measurements. When you’re working with millimeter measurements, precision becomes your best friend—no more guessing games with stitch limits or design placement mishaps.
Here’s your roadmap to mastering hoop dimensions:
- Standard millimeter sizes: 100x100mm (4×4"), 130x180mm (5×7"), 160x260mm (6×10")
- Measurement guides: Use metric rulers for exact hoop positioning and fabric alignment
- Embroidery machine hoop sizes chart: Cross-reference millimeters with your machine’s specifications
- Inches to millimeters conversion: Multiply inches by 25.4 for precise calculations
- Hoop size explained: Millimeter measurements eliminate guesswork in design planning
Conversion Tables
Quick hoop size conversion saves you from measurement headaches.
Your embroidery hoop size chart becomes your best friend when switching between inches to millimeters conversion.
A 4×4 hoop equals 100x100mm—simple unit conversion that prevents costly mistakes.
Keep size charts and measurement guides nearby for instant hoop comparisons.
Understanding stitch limits through proper size conversion means smoother projects every time.
Large Embroidery Hoops
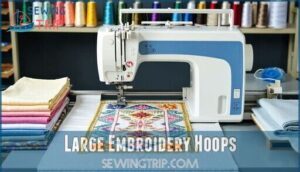
Large embroidery hoops, typically measuring 8×10 inches and above, open up ambitious projects like jacket backs, home décor items, and expansive quilt blocks that smaller hoops simply can’t accommodate.
You’ll find these substantial hoops essential for creating professional-quality designs that require maximum stitching area, though they demand precise stabilizer placement and careful fabric tensioning to prevent distortion across the extended embroidery field, which is crucial for achieving expansive quilt blocks.
Sizes Over 8×10
When you’re dealing with large embroidery hoops beyond 8×10 inches, you’re entering serious territory for big embroidery projects.
These extra sizes handle dimensions like 10 5/8" x 16" and even larger, perfect for oversized designs that demand space.
Your embroidery machine hoop sizes expand dramatically with models reaching 272mm x 406mm.
These jumbo stitches require substantial investment, but they open up creative possibilities that smaller hoops simply can’t match.
Check your embroidery hoop size chart before committing to these giants.
Understanding large embroidery options is vital for selecting the right equipment.
Suitable Projects
Large embroidery machine frames open up exciting possibilities for ambitious projects.
Here’s what you can create with expanded embroidery stitching area:
- Quilt Designs – Complex blocks and intricate patterns that showcase your maximum embroidery area
- Fashion Embroidery – Bold jacket backs and oversized logo placements
- Home Decor – Wall hangings, table runners, and decorative pillows
- Custom Gifts – Personalized blankets and Baby Projects with detailed motifs
These embroidery hoop sizes deliver creative freedom.
Machine Embroidery
Machine embroidery transforms when you’re working with larger hoops that accommodate ambitious projects.
Your embroidery software helps calculate ideal stitch patterns for expansive designs, while proper fabric selection prevents puckering across wider areas.
Different thread types perform better in large-format stitching, so test compatibility first.
Regular machine maintenance becomes more important with extended run times.
Check your machine’s specifications for maximum embroidery hoop sizes—most professional units handle machine embroidery hoops up to 12×8 inches effectively.
Medium Embroidery Hoops
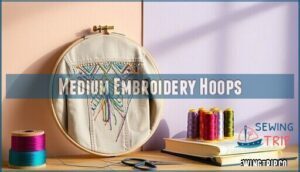
Medium embroidery hoops, ranging from 5×7 inches to 8×8 inches, provide the ideal balance between versatility and manageable project size for most embroiderers.
You’ll find these hoops perfect for jacket backs, tote bags, and pillow designs while still maintaining precise fabric tension and avoiding the intimidation factor that comes with larger hoop sizes.
Sizes 6-8 Inches
When selecting medium hoops in the 6-8 inch range, you’ll find the sweet spot between versatility and control.
A 6×10 hoop offers an embroidery field of approximately 5.7×9.45 inches, while an 8×8 hoop provides 7.87×7.87 inches of stitching area.
These embroidery machine hoop sizes handle most project types without overwhelming beginners.
Remember that hoop size limits affect your design possibilities, so maintain proper fabric tension to prevent puckering.
Hoop size conversion charts help you match designs to available space perfectly.
Understanding the importance of proper hoop sizes is essential for achieving professional-looking embroidery results.
Skill Level
Medium hoops open skill building opportunities for every embroiderer.
Beginner tips include starting with simple designs to master tension control and fabric positioning.
You’ll develop advanced techniques through practice projects like detailed florals or multi-color logos.
Expert advice suggests these embroidery hoop sizes bridge the gap between basic and complex work.
The 6-8 inch range offers perfect embroidery machine hoop frames for building confidence while exploring hoop size conversion and embroidery machine specifications for ideal embroidery hoop compatibility.
Small Embroidery Hoops
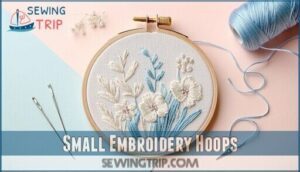
Small embroidery hoops, typically ranging from 3 to 5 inches, provide the precision you need for detailed monograms, logos, and intricate decorative elements while maintaining gentle fabric tension on delicate materials.
You’ll find these compact hoops perfect for beginning your embroidery journey, as they’re easier to handle and less likely to cause fabric distortion during the stitching process.
They are ideal for delicate materials, making them a great choice for those new to embroidery.
Sizes 3-5 Inches
Compact 3-5 inch hoops excel at precision work where every stitch counts. Your Hoop Selection becomes critical when tackling Small Designs that demand tight Fabric Tension without overwhelming delicate materials.
These small embroidery hoops respect Stitch Limits while maximizing the Embroidery Field for detailed work.
- Embroidery hoop sizes in this range handle monograms and logos perfectly
- Embroidery frame sizes stay manageable for intricate positioning and control
- Hoop size conversion charts help match your design specifications exactly
Delicate Fabrics
Delicate fabrics require finesse when selecting embroidery hoop sizes. Small hoops provide better control and reduce fabric stress during stitching.
- Adjust fabric tension gently to prevent stretching or distortion
- Choose appropriate stabilizer choice to support delicate materials effectively
- Select fine needle types that won’t damage fragile fibers
- Reduce embroidery speed for smoother, more precise stitching
- Match thread selection with fabric weight for desirable results
Beginner Projects
When moving from delicate fabrics to beginner-friendly projects, small embroidery hoops become your training ground.
Start with simple monograms, basic flowers, or small logos using 4-inch hoops from embroidery hoop sets. Focus on Project Planning and Fabric Selection while mastering Stitch Patterns—cotton works best for practice runs.
| Project Type | Recommended Hoop | Skill Building Focus |
|---|---|---|
| Monograms | 3-4 inch | Thread Colors coordination |
| Simple Flowers | 4-5 inch | Basic Stitch Patterns |
| Small Logos | 4 inch | Design Software basics |
Hoop Types and Selection
You’ll find three main hoop types for embroidery machines: screw hoops with adjustable tension control, clamp hoops that secure quickly for thick materials, and magnetic hoops that eliminate traditional clamping mechanisms.
Each type serves specific fabric requirements and project needs, so understanding their mechanics helps you choose the right hooping system for consistent stitch quality.
This understanding is crucial for selecting the appropriate hoop for your embroidery project, ensuring that you achieve the desired outcome with adjustable tension control.
Screw Hoops
Screw hoops give you complete Tension Control over your embroidery projects.
These Adjustable Clamps work with various Hoop Materials including wood, plastic, and metal Embroidery Frames.
Different Screw Types accommodate fabrics from delicate silk to heavy denim across all embroidery hoop sizes.
Understanding the role of embroidery hoop sizes is essential for achieving professional results.
- Feel confident tackling any fabric thickness with precision control
- Experience the satisfaction of perfectly tensioned, pucker-free stitching
- Enjoy the freedom to switch between hand and machine embroidery seamlessly
- Discover how proper tension transforms your embroidery quality instantly
- Master professional-level results with this fundamental hooping technique
Clamp Hoops
Clamp hoops snap into place faster than you can say "embroidery," making them ideal for tension control on thick fabrics.
These clamp types feature spring-loaded mechanisms that create superior fabric grip without constant adjustments. Hoop materials like reinforced plastic provide durability while maintaining consistent pressure.
When selecting clamp hoops for your embroidery machine hoop sizes, consider hoop size compatibility with your projects.
Follow these hooping tips: center your fabric, engage clamps evenly, and check embroidery hoop sizes match your design dimensions perfectly.
Understanding the importance of proper hoop sizing is vital for achieving professional-looking embroidery results.
Magnetic Hoops
Magnetic hoops revolutionize your embroidery experience with magnetic force instead of traditional clamps. These innovative embroidery machine hoops use magnetic materials to create perfect fabric grip without damaging delicate textiles. Hoop alignment becomes effortless, ensuring embroidery precision every time.
- No more hoop marks on precious fabrics
- Lightning-fast design changes boost productivity
- Gentle hold protects even the most fragile materials
Perfect magnetic embroidery solution for any hoop size project. The use of magnetic embroidery hoops enhances the overall embroidery experience.
Hooping Techniques
Proper hooping technique determines whether you’ll achieve professional-quality embroidery or face frustrating fabric puckering and thread breaks.
You must master fabric tension control, precise design centering, and stabilizer placement to maximize your machine’s potential and avoid costly project failures, which requires understanding of complete concepts.
Proper Fabric Tension
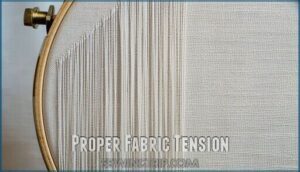
Getting your fabric tension just right prevents puckering and thread breaks.
Pull fabric taut like a drum after hooping, adjusting the screw for proper tension control.
Fabric stretch varies by material—knits need gentler hoop adjustment than woven cottons.
Your stabilizer should extend beyond the hoop edges, working with consistent thread tension for perfect stitch regulation across all embroidery hoop sizes.
Centering Designs
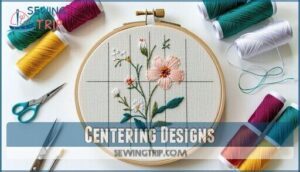
Perfect design alignment transforms your embroidery from amateur to professional.
Centering designs requires precision beyond eyeballing—use your hoop’s built-in grid lines and measurement marks. Mark fabric placement with removable chalk for consistent stitch placement accuracy.
Master these centering fundamentals:
- Match your embroidery design size exactly to your hoop’s actual stitching field
- Account for hoop size discrepancies between labeled dimensions and real embroidery area
- Maintain consistent fabric tension while positioning your design within the grid
- Double-check alignment before starting—repositioning mid-stitch ruins embroidery accuracy
These centering tips prevent costly mistakes and guarantee flawless results.
Securing Stabilizers
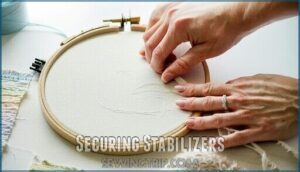
Once you’ve centered your design, securing stabilizers becomes your next priority.
Match your stabilizer types to each project’s needs—cut-away stabilizer for delicate fabrics, tear-away stabilizer for stretchy materials.
Your hoop tension control matters here; think of it like tuning a guitar string—too loose and everything shifts, too tight and fabric tears.
Proper fabric stabilization with correct stabilizer sizes guarantees smooth embroidery hoop size performance and prevents costly mistakes.
Troubleshooting Hoop Issues
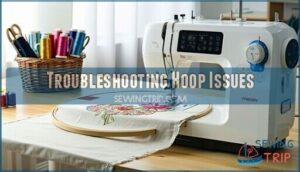
Even the most experienced embroiderers encounter frustrating hoop problems that can turn a perfect design into a puckered mess or cause fabric to slip mid-stitch.
You’ll master these common issues by understanding proper tension adjustment, fabric preparation techniques, and alignment methods that prevent costly mistakes and guarantee professional results every time.
Fabric Slippage
When fabric slippage strikes, you’ll notice stitch skipping and thread breakage ruining your design.
Poor fabric tension and inadequate hoop adjustment cause this frustrating issue.
Boost fabric grip by wrapping your hoop with twill tape or choosing textured surfaces.
Select proper stabilizer thickness and make certain your embroidery hoop size matches your project needs for ideal fabric stabilization.
Understanding the right hoop size options is vital for a successful embroidery project, which can be achieved by considering proper hoop sizes.
Puckering Distortion
Puckering distortion happens when fabric tension becomes unbalanced during stitching.
Adjust your hoop’s grip—too tight causes bunching, too loose allows fabric slippage. Check thread breakage patterns and reduce stitch density in problem areas.
Embroidery stretch often indicates poor hoop alignment or inadequate stabilizer. Fine-tune your embroidery tension control to eliminate hoop burn and achieve smooth results.
Off-Center Designs
When fabric shift ruins your embroidery design placement, it’s time to get strategic.
Off-center designs happen more often than you’d think, but fixing centering issues becomes second nature with practice.
Here’s your game plan for perfect design alignment:
- Mark center points using water-soluble pens before hooping
- Check embroidery hoop sizes match your design dimensions exactly
- Secure fabric properly to prevent stitch offset during stitching
- Use alignment marks on your hoop for consistent hoop placement
- Test embroidery hoop size conversion when switching between machines
Machine Compatibility
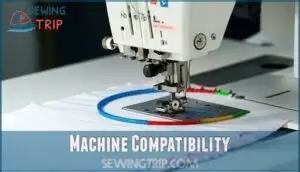
Your embroidery machine’s brand and model determine which hoop sizes you can use, as manufacturers design specific mounting systems and size limitations for each machine.
You’ll need to verify that your chosen hoop physically fits your machine’s arm clearance and connects properly to the machine’s hoop attachment mechanism before purchasing any new hoops, ensuring a proper connection.
Design Format Compatibility
Your embroidery machine speaks a specific digital language, and understanding design format compatibility prevents frustrating project failures. Each brand requires particular file formats to communicate properly with your machine.
Brother machines prefer PES files, while Janome units work best with JEF formats. Tajima and commercial machines typically use DST files as their standard.
When you’ve got mismatched formats, your machine simply can’t read the design instructions.
| Format | Machines Supported | Translation Required? | Usage Frequency | Notes |
|---|---|---|---|---|
| PES | Brother, Baby Lock | Sometimes | High | Most beginner-friendly |
| JEF | Janome | Rare | High | Great for home use |
| DST | Tajima, Multi-Brands | Sometimes | High | Industry standard |
| VIP | Husqvarna | Often | Moderate | Older machines prefer |
| EXP | Bernina | Sometimes | Moderate | Precise stitching |
Modern embroidery software handles format conversion automatically, but you’ll want to verify stitch limits and color codes match your machine’s capabilities before starting any project.
For ideal results, consider using built-in embroidery designs that are specifically crafted to your machine’s brand and model.
Machine Specific Formats
Understanding your machine’s native language prevents format frustration and failed projects.
Different brands require specific Format Types and File Extensions for proper communication.
Here’s your compatibility roadmap:
- Brother/Babylock machines: Use PES files with matching Machine Codes for seamless stitching
- Janome systems: Require JEF formats to maintain Stitch Limits and Design Scaling accuracy
- Pfaff/Husqvarna models: Accept multiple formats but verify embroidery machine compatibility first
Frequently Asked Questions (FAQs)
What size are Embroidery hoops?
Picture a sturdy frame cradling your fabric; embroidery hoops range from small 4×4 inches for monograms to large 8×12 inches for quilt blocks.
Always match the hoop’s sewing field to your design size.
How to set the hoop size in an embroidery machine?
To set the hoop size, access your machine’s settings menu, select the correct hoop size matching your project, and confirm.
Double-check your design fits the embroidery field to avoid stitching errors or misalignment.
How do I know if my embroidery machine is a hoop?
Check your machine’s specifications or manual for compatible hoop sizes.
Look for a hoop attachment area near the needle plate.
If it supports embroidery, it’ll list maximum hoop dimensions and stitching area.
Can I use a smaller embroidery hoop?
Why wrestle with oversized hoops? You can absolutely use a smaller embroidery hoop if your design fits its stitching area.
It’s perfect for tighter fabric tension, reducing puckering, and handling delicate or compact projects, which makes it ideal for delicate or compact designs.
What sizes do embroidery hoops come in?
Embroidery hoops come in various sizes, from small 4×4 inches for monograms to larger 8×12 inches for quilt blocks. Common options include 5×7 and 6×10 inches, each suited for different project needs.
Can you use a 5×7 hoop on a 4×4 embroidery machine?
You can’t use a 5×7 hoop on a 4×4 embroidery machine because the machine’s maximum embroidery field is limited to 4×4 inches.
Regardless of the physical hoop size you try to attach.
Which Brother embroidery machine has a 6×10 hoop?
Picture yourself crafting intricate designs with ease—the Brother Innov-ís NQ1700E offers a 6"x10" embroidery field, 258 built-in designs, and wireless capabilities, making it perfect for tackling larger, detailed projects.
The machine’s advanced embroidery design capabilities allow for greater creativity and precision.
What size is a 4×4 hoop?
A 4×4 hoop has an actual embroidery area of about 94 x 94 inches.
The labeled size reflects the outer dimensions, but the stitching field is slightly smaller due to machine and hoop constraints.
How do I know what size embroidery hoop to use?
Think of hoop size like picking the right tool for a job.
Match your design’s dimensions to the hoop’s embroidery field, ensuring it fits snugly to maintain fabric tension and prevent puckering during stitching.
What is the standard size for embroidery?
The standard embroidery hoop size varies, but 4×4 inches is a popular choice for beginners and small designs like monograms.
It’s versatile, budget-friendly, and fits most machines, making it a go-to option.
Conclusion
Think of embroidery machine hoop sizes as the frame for your creative masterpiece—too small or too large, and the balance is off.
By understanding dimensions, fabric types, and project needs, you’ll confidently select the ideal hoop for crisp, professional results.
Always match your machine’s compatibility and experiment with different hoop types to refine your technique.
Whether tackling delicate monograms or bold jacket designs, the right hoop transforms your vision into reality, stitch by stitch, creating a truly professional and creative masterpiece.
- https://www.embird.net/manual/0325whichhoop.htm
- https://shrsl.com/4q35l
- https://www.maggieframes.com/blogs/embroidery-blogs/understanding-hoop-sizes-for-machine-embroidery-projects
- https://blog.ricoma.com/2024/06/27/what-size-embroidery-hoop/
- https://www.sewtechstore.com/no/blogs/news/ultimate-guide-to-embroidery-machines-with-large-hoops-expert-comparisons-techniques

