This site is supported by our readers. We may earn a commission, at no cost to you, if you purchase through links.
 To adjust a pattern for sloping shoulders, start by identifying how much the shoulder slopes compared to the pattern.
Grab a muslin mock-up and pin out any excess fabric at the shoulder seam. Transfer this measurement to the pattern by trimming the shoulder slope downward at the armscye.
Be sure to redraw the shoulder seam smoothly, extending the neckline slightly. Don’t forget to make the same adjustments to the back piece for balance.
Add your seam allowance back in, and you’re good to go! For a polished fit, fine-tune the sleeve cap too. A small tweak can make a big difference, and it’s essential for a big difference in the overall fit, which requires a good understanding of pattern adjustment.
Table Of Contents
Key Takeaways
- Pinch excess fabric at the shoulder seam on a muslin mock-up, mark adjustments, and redraw the shoulder seam for a proper fit.
- Redraw the armhole curve and adjust the sleeve cap height to match the new shoulder slope and avoid pulling or gaping.
- Always transfer alterations to back pattern pieces for balance and add seam allowances after adjustments.
- Use muslin fabric to test fit changes before sewing the final garment for accuracy and smooth finishes.
Identifying Shoulder Slope
Figuring out your shoulder slope is easier than it sounds.
You’ll need to check the angle from your neck to your shoulder point to see if it’s square, sloped, or something in between.
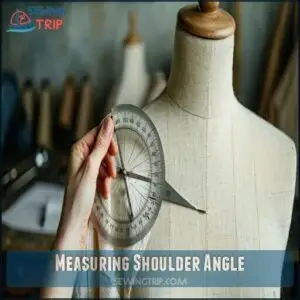
Measuring Shoulder Angle
Measuring your shoulder angle is key to perfecting sloping shoulder adjustments.
Measuring your shoulder angle is the secret to achieving a flawless, tailored fit every time.
Use a protractor or digital tools to guarantee accuracy, as individual variations matter. A small difference in shoulder slope can impact the fit.
Mark your neck’s base and shoulder tip, then measure the angle. Accurate measurements matter when creating garments.
Accurate shoulder slope measurement avoids sewing headaches later—think of it as your garment’s foundation! For more information on measurements, visit Accurate measurements matter.
Determining Shoulder Type
Getting your shoulder type figured out starts with observing your posture and how clothes sit.
Square shoulders form a sharp angle; sloped shoulders flow downward. Asymmetrical shoulders stand unevenly, often due to posture differences.
A proper shoulder fitting diagnosis highlights issues like neckline gaping or uneven hems.
Accurate shoulder slope diagnosis helps guide sloping shoulder adjustments, improving shoulder measurement and garment harmony.
Square Vs Sloped Shoulders
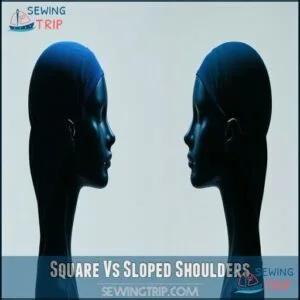
Square shoulders have a straighter angle, making garments jut up at the neckline with wrinkles near the collar.
Sloped shoulders, however, create armscye drooping, neckline wrinkles, and bodice gaping.
Shoulder fit impacts garment hang dramatically.
A proper shoulder adjustment, like a sloping shoulder adjustment, can fix these issues by matching a pattern’s shoulder slope to your unique shape for comfort and style.
Diagnosing Fit Issues
You can spot fit issues by looking for wrinkles, strain, or uneven seams around the shoulders.
Wrinkles and uneven seams at the shoulders hint it’s time for a sloping shoulder adjustment for a flawless, custom fit.
These signs often reveal whether your garment needs adjustments for sloped, square, or asymmetrical shoulders.
Common Fitting Problems
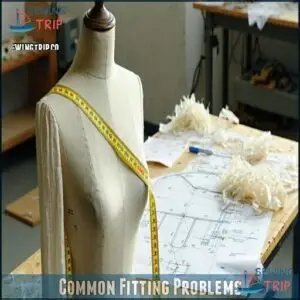
Shoulder fit problems can sneak up on you.
A sloping shoulder adjustment fixes common fitting issues like neckline gaping, sleeve drag, bodice wrinkles, or armhole binding.
Misaligned shoulder slope also leads to hemline imbalance, making garments look off.
Follow a shoulder adjustment tutorial to tackle these fitting struggles and guarantee your projects hang beautifully from top to bottom.
Wrinkles and Strain
Diagonal wrinkles, horizontal folds, or bodice tightness often point to shoulder fit problems.
Armhole strain or neckline gapping happens when the shoulder slope doesn’t match your frame.
Sloping shoulder adjustments fix these wrinkles and restore balance, think of it like adjusting a crooked picture frame—once realigned, everything hangs smoothly, and those pesky fitting issues disappear, which is why shoulder slope is crucial.
Asymmetrical Shoulders
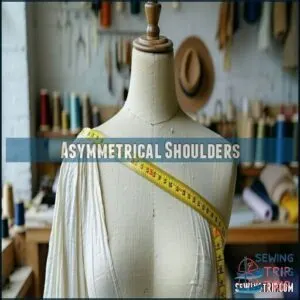
If wrinkles and strain signal uneven shoulders, start by diagnosing asymmetrical shoulders.
Each shoulder has its quirks—fit them individually. For a high shoulder, try padding solutions; for a lower shoulder, focus on blending seams.
Use muslin to spot-fitting challenges and transfer measurements for independent adjustments.
A precise sloping shoulder adjustment guarantees balanced shoulder fitting and smoother garment hang.
Adjusting Pattern Pieces
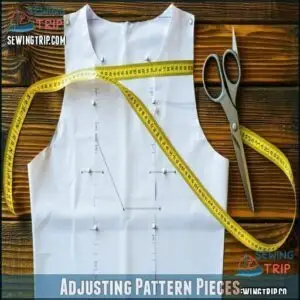
To adjust a pattern for sloping shoulders, you’ll need to fine-tune the shoulder seam and surrounding areas for a perfect fit.
By pinching, redrawing, and extending seams, you can align the pattern to your unique shape with ease.
Pinching Out Excess Fabric
Fixing a sloping shoulder isn’t hard. Start with a muslin and pinch out excess fabric near the shoulder edge.
This shows where fabric removal is needed for the right shoulder slope fix. Use pins to hold the adjustment, keeping the neckline smooth.
For best results, consider various sewing options. Once it looks balanced, mark the new seamline.
This pattern alteration guarantees a better fit, and is a simple way to achieve a proper shoulder slope fix.
Redrawing Shoulder Seam
To redraw the shoulder seam for a sloping shoulder adjustment, start by marking the new seam angle during a muslin fitting.
Blend the new line into the neckline smoothly while ensuring armhole recalibration.
Carefully cut along the adjusted line.
This pattern alteration helps match the shoulder slope perfectly, preventing strain or wrinkles and improving the overall fit effortlessly.
Remember to take into account natural shoulder location for accurate adjustments.
Extending Side Seams
After adjusting the shoulder slope, you’ll need to extend the side seams to maintain armhole length and prevent gaping.
Add fabric to the side seam under the arm, matching the amount added to the shoulder seam. Use a ruler for blending curves into the original armhole.
Torso redrafting guarantees your sewing pattern alteration achieves a smooth, seamless fit.
Advanced Adjustment Techniques
When basic shoulder adjustments aren’t enough, advanced techniques can help you achieve a precise fit.
These methods, like adjusting for forward shoulders or tweaking the sleeve cap, make all the difference for tricky slopes, utilizing advanced techniques to ensure the best results.
Forward Shoulder Adjustment
When your shoulder seam doesn’t line up naturally, a forward shoulder adjustment fixes it like a charm.
Shift the bodice’s shoulder seam forward, matching the sleeve cap to the new position.
Trim and tape pattern pieces, adding paper as needed to balance the change.
These small sewing pattern alterations create a smooth fit—no more awkward garment shifting or pulling!
Posterior Arm Joint Adjustment
If your arm joint angle pulls sleeves awkwardly, it’s time for a pattern adjustment.
Posterior arm joint adjustments target the shoulder slope, adding back shoulder ease and front shoulder addition to balance the fit.
This adjustment shifts the seam for shoulder blade room, it’s like giving your garment an arm joint upgrade—comfortable, precise, and perfectly fitted.
Sleeve Cap Adjustments
A smooth extension from adjusting shoulder seams includes tweaking the sleeve cap for a better fit.
Focus on these steps:
- Adjust sleeve cap height and grainline to balance sloping shoulder adjustments.
- Match armholes precisely to avoid bicep fit issues or ripples.
- Add sleeve ease by cutting the cap, shifting it slightly, and blending curves for a seamless pattern adjustment.
This process ensures a well-fitted sleeve that complements the overall garment, with attention to better fit and comfort.
Practical Tips and Tools
You’ll need the right tools and a bit of patience to adjust patterns for sloping shoulders effectively.
Using muslin fabric, selecting the correct pattern size, and keeping essentials like rulers and pins handy will make the process smoother.
Using Muslin Fabric
When working on a sloping shoulder adjustment, muslin fabric types help you see how the garment fits before sewing the final piece.
Check the muslin grain direction to guarantee accuracy, and use muslin marking tools to note changes.
Focus on muslin fitting ease, leaving room for sewing alterations. Clean muslin seam finishes make testing adjustments smoother and stress-free.
Different projects may call for various muslin options, which is an important consideration for achieving a professional finish.
Choosing Pattern Size
Start with your bust measurement to choose a pattern size, especially for tops or dresses.
Check size charts for accurate fits and evaluate how garment ease matches your body shape.
Sloping shoulder adjustments work best when you use a pattern fitting guide customized to your shoulder slope.
Remember, proper shoulder fitting simplifies pattern styles and guarantees smooth corrections later.
To guarantee the best fit, focus on your exact body measurements and ensure that you are using the correct measurements for your body type, which is crucial for a smooth correction.
Essential Tools and Materials
When you’re aiming for custom fit clothing, having the right tools makes pattern drafting a breeze.
Keep these handy:
- Muslin fabric for garment fitting and adjustments.
- A seam gauge, clear ruler, and extra paper to perfect your pattern pieces.
- Pins and sturdy fabric for testing those sewing tips, ensuring accuracy and neat results.
Using the correct tools helps with muslin fabric projects.
Finalizing Shoulder Adjustments
You’re almost done! Now, focus on trimming edges, adding seam allowances, and redrawing the waistline and armscye for a polished finish.
Be sure to save the original pattern pieces—it’s always handy to keep a backup.
Redrawing Waistline and Armscye
After tweaking pattern pieces for shoulder slope correction, it’s time to smooth things out.
Gently adjust the armhole by lowering the armscye if needed, blending the curves seamlessly.
Redraw the princess seams and waistline while ensuring natural flow.
This step refines the fit, so your garment hugs just right—no funky wrinkles or odd pulls in sight, achieving a perfect fit.
Trimming and Adding Seam Allowance
Precision matters when trimming seams after a shoulder slope alteration.
Use trimming techniques to tidy curved seams, leaving enough seam allowance width for adjustments. For facing adjustments, grade seams to reduce bulk and guarantee a smooth finish.
One might also consider adjusting shoulder seams for a more customized fit.
Take your time—accurate cutting is key when altering sewing patterns. Clean edges make shoulder adjustments blend seamlessly into your design, ensuring a smooth finish.
Preserving Original Pattern Pieces
Always trace patterns before altering sewing patterns for sloped shoulders.
Photocopying patterns or creating digital backups protects originals. Proper pattern storage keeps everything organized for future shoulder slope adjustments.
Document every alteration to track your shoulder slope adjustment journey. It’s like keeping a sewing diary—future you’ll thank you when pattern making feels like a breeze!
Frequently Asked Questions (FAQs)
Is there a way to fix sloped shoulders?
Fixing sloped shoulders is like reshaping a hanger for your clothes.
Add fabric at the shoulder seam’s end, blend it with the side seam, and adjust the armhole curve for a perfect fit.
What is the syndrome with sloping shoulders?
There isn’t a specific syndrome tied to sloping shoulders, but they can be a natural variation or linked to conditions like muscular dystrophy or scoliosis.
It’s mostly about how your body’s naturally shaped!
Why do my shoulders look sloped?
If your shoulders look sloped, picture a hanger tilted—your muscles, posture, or even genetics might cause it.
Weak shoulder muscles or rounded posture can exaggerate the slope, affecting how clothes fit and hang, which is a complete concept related to the appearance of sloped shoulders.
How can I adjust for rounded shoulders?
To adjust for rounded shoulders, shift the shoulder seam forward on your pattern.
Add fabric to the back seam while trimming the front.
Test with muslin to fine-tune, ensuring a smooth, natural fit.
What fabrics work best for sloping shoulders?
They say the right tools make all the difference.
For sloping shoulders, medium-weight fabrics like cotton or linen drape well, while knits offer flexibility.
Avoid stiff fabrics—they highlight fit flaws instead of smoothing them out.
How does shoulder adjustment affect sleeve fit?
When you adjust for sloping shoulders, it shifts the sleeve fit too.
Sleeves may need tweaking—like redrawing the armhole curve or adjusting the cap height—to avoid pulling, gaping, or uncomfortable tightness.
It’s worth it!
Can shoulder adjustments fix neckline drooping issues?
Droopy necklines aren’t just annoying—they’re like a bad haircut for your clothes.
Shoulder adjustments can fix this by aligning your neckline properly, ensuring it hugs your neck instead of flopping or gaping awkwardly, which makes Shoulder adjustments a key solution.
Are there shortcuts for quick shoulder slope adjustments?
If you’re in a pinch, pin excess fabric at the shoulder edge of your muslin, mark the adjustment, and redraw the seam line.
It’s like a quick shoulder tune-up—simple and effective!
Conclusion
Funny how such a small detail like sloping shoulders can cause big headaches, right?
By learning how to adjust a pattern for sloping shoulders, you’ll solve those fit issues and get clothes that feel custom-made.
Just tweak the shoulder seam, refine the sleeve cap, and balance the back piece for a polished look.
Don’t skip the muslin test—it’s a lifesaver!
With these steps, you’re set to master pattern adjustments and enjoy sewing with confidence. Happy stitching!

