This site is supported by our readers. We may earn a commission, at no cost to you, if you purchase through links.
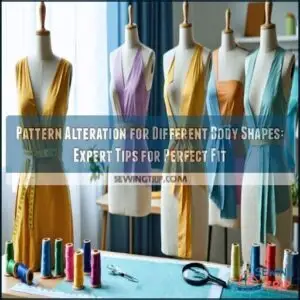
Whether you’re tweaking for fuller hips, a defined waist, or broader shoulders, adjustments like dart placement, slash-and-spread techniques, and length alterations make a world of difference.
For curves, modify darts to hug your silhouette better; for length, don’t forget to align the grainline—it’s the backbone of good fit!
Think of it as customizing your favorite recipe: a pinch here, a tuck there, to craft patterns that fit like a glove while keeping your personal flair intact.
With practice, you’ll craft patterns that fit perfectly, making all the difference in your fashion creations.
Table Of Contents
Key Takeaways
- Know your measurements and body shape to make pattern alterations that fit perfectly—it’s the foundation of great sewing.
- Use techniques like slash-and-spread and dart adjustments to customize patterns for your curves, length, and proportions.
- Always test your adjustments with a muslin to spot fit issues before cutting your fabric, saving time and effort.
- Preserve the grainline and original proportions while making changes to ensure your garment’s structure and style stay balanced.
Body Shape Identification
Figuring out your body shape is like finding the key to discovering patterns that truly fit—once you know, everything clicks.
Discover your body shape and unlock the secret to patterns that fit and flatter effortlessly—because confidence starts with the perfect fit.
Whether you’re pear-shaped, apple-shaped, hourglass, or more rectangular, recognizing these traits helps you make alterations that bring your vision to life, and this is crucial for understanding how to dress in a way that flatters your figure.
Recognizing Pear Shape Characteristics
If your hips are wider than your smaller bust, with sloping shoulders, a defined waist, and full thighs, you’ve got a pear shape.
This body shape often calls for pattern adjustments to balance proportions, especially around the hip width.
Tackle fitting issues by altering patterns to highlight your waist while accommodating your curves for a flattering fit.
For pear shapes, consider using structured, medium-weight fabrics to balance curves.
Identifying Apple Shape Features
When understanding an apple shape, think broader shoulders, a fuller bust, and a shorter torso length, often with less waist definition.
Focus on bust accommodation and balancing the silhouette, highlighting shoulder width while gently skimming over fitting issues with body shape analysis.
Use accurate body measurements to emphasize comfort over restriction, creating a flattering, harmonious shape that feels uniquely yours.
Understanding Hourglass Figure
Picture an hourglass shape, where balanced proportions and a defined waist grab attention.
If this is you, curve accentuation is your hallmark! Focus on body shape adjustments like dart manipulation to enhance the fit.
Body measurements are key—don’t skip the details.
Fit challenges arise, but with smart garment selection, smoothing fitting issues becomes a breeze!
Determining Rectangle Body Type
If your body shape feels more like a ruler—straight up and down without much waist definition—you’ve got a rectangle shape.
To enhance your silhouette, focus on adding curves with darts or strategic seamlines.
Opt for garment styles that emphasize the waist, and choose fabrics with structure or stretch.
Accurate body measurements guarantee body shape adjustments eliminate fitting issues seamlessly.
Measuring Body Proportions
Getting your body proportions right isn’t as scary as it sounds, but it does take some patience and good measurements.
Master your body proportions with patience—precise measurements unlock a flawless fit and transform your sewing into wearable art.
With a tape measure and a bit of focus, you’ll be set up to create designs that actually fit—you know, without the “close but not quite” surprise at the end!
Taking Accurate Bust Measurements
Grab your measuring bra and tape—it’s time to find your upper bust and full bust.
Stand straight, wrap the tape snugly (but not tight) under your arms for the upper bust, and around the fullest part for the full bust.
Accurate bust placement guarantees better muslin testing and helps nail bust adjustments made to fit your body shape.
Measurement techniques matter!
Measuring Waist and Hip Circumference
Now let’s tackle waist and hip measurement! For waist measurement, wrap the tape snugly around your natural waist—usually where your torso bends.
For hip measurement, circle the widest part of your hips. Remember, Measurement Accuracy matters!
Circumference Ratios between waist and hips help highlight Waist Definition and Hip Placement, showing how your unique body shape influences fit. Accurate measurements require a quality measuring tool. It’s easy—promise!
Calculating Body Length and Sleeve Length
Getting accurate measurements for body length and sleeve length makes all the difference in pattern alteration.
Measure torso length from the base of your neck to your waistline, noting armscye depth for proper fit.
For sleeves, measure from your shoulder point to the wrist, ensuring bicep adjustments fit comfortably.
These body measurements guarantee patterns reflect your true body proportion beautifully, and are essential for a proper fit.
Comparing Measurements to Size Charts
Once you’ve measured body length and sleeve length, grab a size chart—it’s your secret weapon!
Comparing your body measurements guarantees a snug fit with no surprises.
Watch for these:
- Pattern Ease: Patterns include extra room for comfort.
- Bust Discrepancy: Match bust-to-pattern proportions.
- Hip Placement: Align hips and garment length for balance.
Size charts are lifesavers!
Pattern Alteration Techniques
When you’re tackling pattern alterations, a few clever techniques can work magic on fit and style.
From adding room with the slash-and-spread method to shaping curves with precise dart adjustments, it’s all about creating garments that feel custom-made just for you.
Slash and Spread Method
The slash and spread method is perfect for adding width, length adjustments, or creating fabric volume.
Cut the pattern, spread it, and add your desired size—it’s that simple!
Whether you’re shaping complex curves or repositioning darts, this pattern alteration technique is a lifesaver.
Many use it to create a unique slash pattern.
| Action | Purpose |
|---|---|
| Cut pattern | Create modification points |
| Spread pieces | Add width or length |
| Reinforce edges | Maintain stability |
| Adjust darts | Refine shape |
| Redraw outline | Confirm accurate dimensions |
Dart Adjustments for Curves
To perfect dart placement for bust shaping and waist definition, focus on curve accommodation. Keep dart tips about an inch from the bust apex to avoid "pointy" shapes.
For body shape fitting, blend darts evenly; don’t crowd adjustments. A full bust adjustment? Spread volume smartly for better pattern alteration.
Taking accurate measurements guarantees better garment fit. Fitting adjustments guarantee a polished, comfortable result, ensuring a great fit through better pattern alteration!
Length Adjustments and Grainline Alignment
When adjusting length, start by identifying your torso or sleeve length needs.
Use the pattern’s designated lines for hemline adjustments, ensuring pattern balance and grainline integrity. Mark new seamlines carefully to preserve body proportions.
Always double-check the grainline—it’s your guide for fabric alignment. Think of it as the spine of your project, keeping everything upright, with pattern balance being crucial.
Seam Allowances and Construction
Seam allowances can make or break your project, so don’t skimp on them! Prioritize precision for smooth armhole seams and curved seams.
Follow these tips:
- Understitch curved seams for crisp edges.
- Grade seams to reduce bulk.
- Pivot perfectly at corners.
- Align seamlines carefully, especially with patterns.
- Use fun seam finishes—pinked, serged, or bound for flair!
By following these guidelines, you can ensure that your project turns out well, with smooth seams that add to its overall quality.
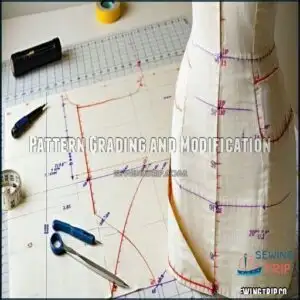
Pattern Grading and Modification
In the context of resizing patterns, you need to balance accurate adjustments with maintaining the garment’s original proportions.
Don’t worry if it feels tricky at first—practice, patience, and a sharp pencil will help you shape patterns that fit your body perfectly!
Resizing Patterns for Different Sizes
When resizing patterns, think of it as a dance between precision and creativity.
Grading principles guarantee proportions stay true, while ease adjustments bring comfort.
Use muslin fitting to test changes.
Blend sizes for a custom fit, focusing on body measurements.
Here’s a quick reference:
| Grading Step | Purpose | Tip |
|---|---|---|
| Length Adjusting | Fit torso | Keep grainline straight |
| Width Spacing | Shape adjustments | Slash patterns evenly |
| Dart Refinement | Contour curves | Align to fullest points |
| Seam Rechecking | Verify joins | Seam allowances are critical |
| Final Muslin Fit | Confirm proportions | Test before cutting fabric |
Maintaining Proportions and Balance
When resizing patterns, achieving balance and proportion is like fine-tuning an orchestra—you’re ensuring every piece works in harmony.
Symmetry adjustments maintain garment balance, while proportionate grading refines the silhouette.
Pay attention to visual harmony by keeping body proportions in check.
Pattern alteration isn’t just math; it’s fitting art, making sure every curve and straight edge sings together.
Adjusting for Individual Body Differences
Every body is its own masterpiece, and pattern alteration helps your clothing fit like it’s meant for you.
Start with muslin fitting to spot unique alterations early. Tweak for body variations with ease adjustments, like a full bust adjustment if needed.
Remember that accurate body measurements are key to a perfect fit. Always double-check body measurements against pattern standards to keep proportions balanced and guarantee perfect pattern fitting for your one-of-a-kind form.
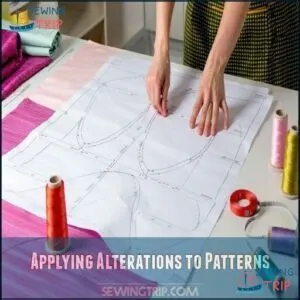
Applying Alterations to Patterns
When you’re ready to apply your alterations, focus on transferring your changes carefully to the final pattern, making sure everything lines up perfectly.
A little patience now saves you from fitting headaches later, and hey, who doesn’t love a garment that feels custom-made just for them?
Transferring Adjustments to Final Pattern
To lock in your hard work, transfer muslin adjustments to the final pattern using tracing techniques.
Preserve pattern integrity as you redraw seamlines and darts. Confirm adjustment permanence by smoothing edges and blending changes naturally.
For transferring patterns effectively, consider using specialized tracing supplies.
Remember, pattern alterations techniques keep the final pattern clean and accurate. Double-check markings, because successful pattern fitting and perfect final results depend on these careful steps!
Checking Fit and Silhouette
Testing the fit is like meeting an old friend—you’ll know right away if something’s off.
Start with a muslin evaluation to spot silhouette changes. Check the grainline for balance, ensuring no twists.
Ease allowance matters; too tight? Adjust it. Examine for smooth silhouette shaping.
Making Final Alterations for Perfect Fit
Double-check your muslin fitting to nail down final touches.
Use refinement techniques to tweak pattern alterations—like adjusting grainline alignment or easing tight areas for comfort. Verify ease allows proper movement without strain.
Remeasure body measurements to confirm sewing adjustments are accurate. Accurate measuring tools, including flexible measuring tape, are essential for this step.
These last checks guarantee a flawless fit, creating garments you’ll love wearing as much as making, with proper movement and accurate measuring tools, ensuring a great sewing experience with ease.
Documenting Measurements and Alterations for Future Reference
Keeping alteration logs isn’t just handy—it’s a game-changer.
Jot down body measurements, pattern adjustment details, and style evolution insights.
Digital documentation works wonders; snap photos, update measurement records, and organize them neatly.
Use apps or binders to preserve pattern adjustment documentation for future tweaks.
Trust me, consistent body measurement recording guarantees accurate fits every time, so you’re always ahead of the game!
Frequently Asked Questions (FAQs)
What is pattern alteration?
Pattern alteration means tweaking sewing patterns to fit your unique shape and size.
It’s like personalizing a recipe—adjusting darts, seams, and lengths guarantees your clothes look and feel just right, like they’re made to measure!
What is fitting & pattern alteration?
Fitting guarantees clothes hug your body just right, while pattern alteration tweaks designs for your unique shape.
It’s like sculpting fabric to fit you perfectly—goodbye awkward bulges, hello confidence!
It’s easier than it sounds!
What are the different methods for altering patterns?
You can alter patterns by slashing and spreading for width, folding to shorten, or blending sizes for curves.
Use darts to add shape, and always test with a muslin—it’s like your sewing dress rehearsal!
How do I make a muslin pattern alterations?
Start by sewing a test muslin using long basting stitches, then tweak seams, darts, and fit.
Mark changes directly on the fabric, unpick stitches, and transfer adjustments back to the original pattern, focusing on complete concepts to ensure a proper fit.
Why should you learn sewing alterations?
Learning sewing alterations is like discovering a superpower—you save money, rescue ill-fitting clothes, and create custom pieces that fit perfectly.
It’s fun, empowering, and lets you turn off-the-rack into made-for-you!
Why do I need pattern alterations?
You need pattern alterations because patterns aren’t one-size-fits-all.
They’re like cookie cutters, but bodies aren’t cookies!
Adjusting them guarantees a perfect, custom fit, making your clothes feel like they’re made just for you, with a custom approach to clothing.
How to adjust a pattern for different sizes?
Think of pattern sizing like solving a puzzle—add width by slashing and spreading for larger sizes, or overlap and trim for smaller ones.
Always match seamlines, redraw curves, and test with a muslin!
What are the rules for pattern alteration?
Pattern alteration rules focus on preserving grainlines, maintaining proportions, and matching design style.
Always adjust pieces consistently, blend lines smoothly, and prioritize changes that retain comfort, movement, and the original pattern’s balance, ensuring that the alterations are made to retain comfort and maintain the original pattern’s balance.
What is pattern modification?
Pattern modification means tweaking sewing patterns to fit your body like a glove.
It’s like turning a standard recipe into your signature dish, and you adjust lengths, widths, or shapes, making clothes uniquely yours.
What are the two basic pattern manipulation techniques?
Two basic pattern manipulation techniques are the slash-and-spread method, where you cut and spread the pattern to add width.
The pivot method, where you rotate the pattern to adjust dimensions without cutting, is another technique used in pattern manipulation.
Conclusion
Imagine slipping into an outfit that feels like it was made just for you—that’s the magic of mastering pattern alteration for different body shapes.
By understanding your unique proportions, using techniques like dart adjustments and slash-and-spread, and paying attention to details like grainline alignment, perfect-fit clothing is within your reach.
Don’t rush; think of it as a creative journey. With practice and patience, you’ll craft pieces that flatter, fit, and show off your one-of-a-kind style.

