This site is supported by our readers. We may earn a commission, at no cost to you, if you purchase through links.
 Fixing a gaping neckline involves strategic pattern adjustments to eliminate extra fabric and guarantee a smooth fit.
Start by identifying the cause—like a hollow chest, narrow shoulders, or a pattern that’s slightly too large.
One simple technique is to pinch out the excess fabric on your pattern at the neckline and taper it back into the seams.
Sometimes, redrawing the neckline curve or adjusting the shoulder seams works like a charm.
Don’t forget to update facings or linings for consistency.
It’s all about making the fabric cooperate with your body’s curves—much like settling a negotiation.
Ready for smoother stitches?
Table Of Contents
Key Takeaways
- Pinch out excess fabric on your pattern around the neckline and taper it into seams to eliminate gaping.
- Redraw neckline curves and adjust shoulder slopes for a smoother and more balanced fit.
- Use lightweight linings and appropriate interfacing weight to enhance neckline stability and drape.
- Prewash fabrics and apply stay stitching to prevent shrinkage, stretching, or distortion in the neckline area.
Causes of Gaping Neckline

You’ll often find your neckline standing away from your chest due to hollow chest shape, narrow shoulders, incorrect pattern size, or bust cup size mismatch.
Neckline gaping often stems from hollow chest shapes, narrow shoulders, or pattern mismatches—fixes lie in strategic alterations and adjustments.
Understanding these common causes helps you target the right alteration technique, saving you from the dreaded "peek-a-boo" effect.
That happens when you lean forward in your favorite top, which can be frustrating and affect the overall appearance of the garment, emphasizing the need to address the "peek-a-boo" issue for a better fit.
Hollow Chest Shape
Posture sleuths, if your tops seem to float away from your chest, a hollow chest shape might be the culprit.
This common anatomical variation occurs when your upper chest curves inward rather than projecting forward.
Four telltale signs of hollow chest fit issues:
- Fabric pools below your collarbone
- Neckline stands away despite correct bust fit
- Measurement accuracy varies between standing and seated positions
- Muslin fitting reveals consistent gaping across garment styles, which can be a clear sign of a fit issue.
Narrow Shoulders
Narrow shoulders are often the hidden culprits behind that annoying gaping neckline in your garments.
When your shoulder width is narrower than the pattern assumes, excess fabric pools around your neckline, creating unflattering gaps.
This fitting challenge affects your garment’s drape substantially, making tops and dresses sit awkwardly.
The good news? A simple shoulder slope adjustment or armhole shape modification can resolve this issue completely.
Incorrect Pattern Size
The classic culprit behind your gape neckline might be simply choosing the wrong pattern size.
When your measurement accuracy is off or you’re relying on outdated sizing charts, you’ll often end up with excess fabric around the neckline.
Pattern grading between sizes is vital, as multi-size patterns offer flexibility.
Remember, proper ease allowance varies by garment type—what works for a blouse won’t necessarily work for a dress, and understanding this is key to avoiding issues like excess fabric, which can be resolved with the right pattern grading.
Bust Cup Size Mismatch
While the right pattern size might be close, cup size mismatch can wreak havoc on your neckline fit.
When your bust is fuller than the pattern allows, excess fabric has nowhere to go but outward, creating that annoying gape.
A full bust adjustment redistributes volume properly, solving what simple size changes can’t fix, and affects apex placement and causes neckline distortion throughout.
Pattern Alteration Techniques
You’ll find that fixing a gaping neckline is easier than wrestling with safety pins before an important event.
By learning these precise pattern adjustment techniques, you’ll transform frustrating fit issues into professional-looking garments that sit perfectly against your chest, achieving a professional-looking finish.
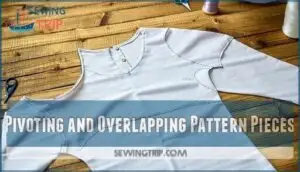
Pivoting and Overlapping Pattern Pieces
When faced with a gaping neckline, mastering the pivot-and-overlap technique can transform your sewing projects.
Master the pivot-and-overlap technique to turn frustrating neckline gapes into perfectly tailored, professional-looking garments.
To begin, select a pivot point near the problem area, typically at the shoulder or bust apex. Hold this spot with a stiletto or pin while rotating pattern pieces until seams align properly.
For precise pattern alteration, slide pieces along predetermined lines, overlapping by the exact measurement needed to eliminate gaping. A pivot point stiletto can be useful for this step.
Don’t forget to tape everything securely afterward, ensuring a secure and proper fit, and making the most of your sewing projects.
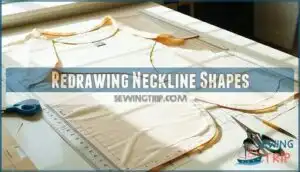
Redrawing Neckline Shapes
Once you’ve pivoted your pattern pieces to remove excess fabric, it’s time to focus on redrawing your neckline for a polished finish. Creating smooth, symmetrical curves requires both technical skill and artistic interpretation.
Follow these steps for perfect neckline shaping:
- Use curved drafting tools to trace new neckline edges
- Verify curve aesthetics flow naturally at all transition points
- Check neckline symmetry by folding pattern pieces
- Test different design variations before finalizing your pattern alteration
Your neckline contouring should gradually blend with existing lines, creating a curve that’s both beautiful and functional. A sewing ruler can help achieve precise curves.
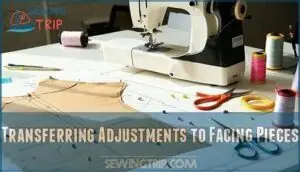
Transferring Adjustments to Facing Pieces
Now that you’ve redrawn your neckline shapes, don’t forget your facings need the same love.
For perfect facing alignment, place dressmaker’s tracing paper between layers and run a tracing wheel over your adjusted lines.
You can also fold along center lines, pin matching sides, and hand baste for consistent adjustments.
Remember to modify all pattern pieces that cross your blending point—fronts, backs, linings, and center front facing—for that professional finish without any telltale gaping.
To guarantee a balanced fit, consider adjusting shoulder slope during this process.
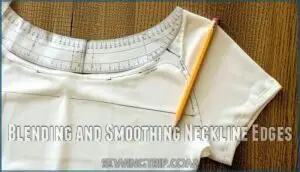
Blending and Smoothing Neckline Edges
Now that you’ve properly transferred your adjustments to the facing pieces, let’s smooth out those necklines.
After making pattern alterations, you’ll notice some jagged edges that need refinement.
Using a curved ruler, blend those choppy lines into graceful curves for a professional finish.
Think of neckline smoothing as erasing the evidence of your fixes—nobody needs to know your pattern needed reshaping!
This edge finishing step guarantees your garment looks store-bought, not homemade.
Fabric and Interfacing Considerations
You’ll be amazed at how your fabric and interfacing choices can make or break your neckline fit, especially when fighting that pesky gaping problem.
Your materials need to work with your pattern adjustments, not against them, so you can create garments that fit like they were made just for you, with a good neckline fit.
Choosing Lighter Lining Fabrics
Now that you’ve tackled pattern adjustments, let’s look at fabric choices that can help your neckline behave.
Lightweight linings are your secret weapon against gaping in delicate fabrics.
When working with woven fabrics, a lighter lining improves drape and reduces gaping by allowing the neckline to follow your body’s contours naturally.
Remember, your lining should always be lighter than your outer fabric for proper neckline weight balance, and this is crucial for achieving a good fit with delicate fabrics.
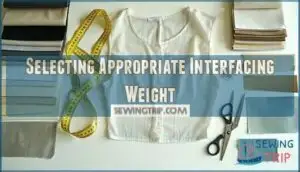
Selecting Appropriate Interfacing Weight
The right interfacing weight acts as the unsung hero in your battle against gaping necklines.
Selecting compatible interfacing guarantees your neckline maintains structure without becoming rigid or floppy.
When choosing interfacing weight, consider:
- Match interfacing weight to your fabric weight for natural drape
- Choose lighter interfacing when in doubt – you can always double up
- Test interfacing on fabric scraps before committing
- Avoid heavy interfacing on lightweight fabrics to prevent unnatural stiffness.
Many projects benefit from using fusible options, which can be a key solution for maintaining the right balance between structure and flexibility.
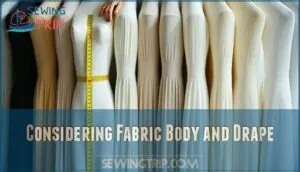
Considering Fabric Body and Drape
The fabric you select plays a vital role in how your neckline behaves.
Lighter fabrics with good drape will naturally hug your body, while stiffer materials may stand away and create gaping.
Before cutting your final garment, try drape testing by hanging fabric samples over your shoulder.
Consider grain direction too—bias-cut fabrics offer more flexibility around curves, potentially reducing neckline gaping without extensive pattern alterations.
Understanding how grain impacts drape is essential for achieving the desired effect.
This understanding will help you make informed decisions about your fabric choice and pattern alterations to ensure a well-fitting garment.
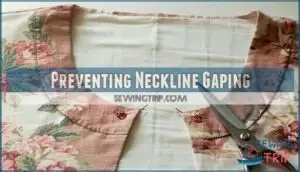
Preventing Neckline Gaping
Neckline gaping can ruin the fit of an otherwise perfect garment, but simple preventative steps make all the difference.
By prewashing fabrics, stay stitching edges, and using interfaced facings, you’ll guarantee a smooth, gap-free finish every time, which is crucial for a perfect garment.
Selecting Appropriate Clothes
Choose clothes that suit your body size, style preferences, and occasion appropriateness to reduce neckline gape.
V-necks complement fuller busts, while scoop necks flatter slender frames.
Consider garment construction for adjust neckline fit—looser fits or stretchy fabrics work best.
Prioritize personal comfort and neckline fitting over trends, ensuring the garment’s design won’t fight your natural shape, and focus on natural shape.
Prewashing Fabrics
Before starting a pattern alteration, prewashing fabrics prevents surprises later.
It accounts for shrinkage allowance, color bleeding, and fabric stability.
Ever had a top fit perfectly but shrink or stretch later? That’s avoidable!
Prewashing softens fibers, reduces wrinkle prevention hassles, and guarantees fabric stretch won’t sabotage your neckline gape fix.
Think of it as hitting “reset” on your materials.
Applying Stay Stitching
Stay stitching is a lifesaver for stabilizing curves and preventing stretch in neckline sewing.
Use these steps:
- Stitch just inside the seam for support.
- Set stitch length to medium for smooth fabric handling.
- Maintain consistent thread tension while sewing.
- Stitch directionally, following the neckline’s curve.
This simple sewing technique secures fabric shape during neckline alterations, reducing neckline gaping effortlessly with stay stitching and proper thread tension!
Using Interfaced Facings
A well-crafted neckline facing can work wonders for stability.
Use the right interfacing types to match your fabric’s weight, avoiding stiffness or bulk.
Neatly finish edges for a polished look, and consider facing alternatives like bias tape for lightweight fabrics.
Proper facing shapes and careful neckline structure adjustments will keep gaping at bay, ensuring comfort and style blend beautifully.
Consider that hollow chest issues can also contribute to a gape.
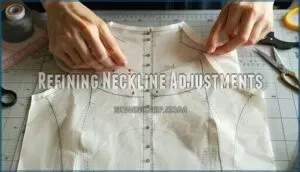
Refining Neckline Adjustments
You’ll learn how to refine neckline adjustments for a flawless fit by focusing on precision and smart techniques.
With careful tracing, shoulder slope tweaks, and smooth finishing, you can say goodbye to frustrating gapes, achieving a flawless fit.
Tracing Patterns
Think of tracing patterns as your secret weapon for pattern preservation.
By copying onto fresh paper, you gain revision possibilities for future alterations and adjustment iterations. Digital tracing even adds precision for a foolproof neckline gaping fix. Accurate measurements prevent gaping issues.
- Benefits of pattern tracing:
- Keeps originals intact.
- Encourages experimentation safely.
- Simplifies learning pattern alteration techniques.
- Reduces risks of ruining designs.
- Lets you retry neckline alteration easily.
Ensuring Smooth Shoulder Slope
Sometimes, an uneven shoulder angle can sabotage your neckline balance.
Adjusting the shoulder slope guarantees smooth armhole integration and prevents gaps.
Blend the slope into the pattern for a seamless drape assessment.
This small pattern alteration works wonders, especially if you’ve noticed neckline gaping.
Tweak this detail, and watch your neckline sit perfectly without extra fuss!
Finalizing Neckline Adjustments
Once your shoulder slope fits smoothly, it’s time to finalize those neckline adjustments.
Test everything with Toile Testing to catch lingering neckline gape. Use Blending Changes to shape edges, ensuring a Custom Fit.
Precise Stitching transforms pattern modification into timeless garments. With neckline adjustments refined, your pattern making adjustments create a polished design that’ll fit like it was made just for you, using techniques like Toile Testing.
Frequently Asked Questions (FAQs)
Can a woven top fit a gaping neckline?
A gaping neckline can feel like wearing a top with its own agenda,
but yes, a woven top can fit perfectly by adding darts, adjusting the pattern, or using interfaced facings to refine the shape.
How do you fix a gaping neckline?
To fix a gaping neckline, pinch out excess fabric, transfer adjustments to your pattern, and redraw the neckline curve.
You can also add darts, elastic, or stay tape for a sleek, gap-free finish.
What does a gaping neckline mean?
Did you know 40% of poorly fitted tops show neckline gaps?
A gaping neckline happens when fabric lifts off the chest due to issues like hollow chests, narrow shoulders, or incorrect garment patterns.
Why do I have a gaping back neckline?
Your back neckline gaps when the garment’s pattern doesn’t contour smoothly to the curve of your upper back.
Common culprits include improper pattern fit, fabric stretching, or a swayback altering the garment’s drape.
Can a gaping neckline ruin your outfit?
Did you know 70% of fit issues stem from necklines?
A gaping neckline can distract from your outfit’s charm, making it look unpolished.
With simple tweaks, though, you’ll transform it into a perfect fit.
Why do you adjust the front and back neckline?
You adjust the front and back neckline to create balance and guarantee the garment sits properly.
Ignoring either side can lead to gaps, awkward pulling, or uneven drape, making your outfit look unfinished or uncomfortable.
How to fix a gaping boat neckline without sewing?
Don’t worry—it happens to the best of us.
Use fashion tape or double-sided tape to secure the neckline to your skin.
You can also add a necklace or scarf to disguise any gaping.
How to fix a gaping V neck dress?
To fix a gaping V-neck dress, try adding small darts near the neckline or tacking with invisible stitches.
For a no-sew solution, use double-sided tape or fashion tape to secure the neckline.
How to fix a gaping top of a dress?
It’s funny how necklines seem to have a mind of their own.
Pinch out excess fabric, tape it as darts or overlap seams, then adjust your pattern and facing pieces for a sleek finish.
What causes a gaping neckline?
A gaping neckline happens when fabric doesn’t lay flat against your chest.
It’s often caused by factors like a hollow chest, narrow shoulders, incorrect pattern size, or mismatch in bust cup size and garment shape.
Conclusion
Fixing a gape neckline isn’t sorcery, though it might feel like wrestling fabric into a truce.
With precise pattern alteration for a gape neckline—whether pivoting patterns or redrawing curves—you’ll achieve a smooth, polished fit.
Tackle the causes first, then let small tweaks, like stay stitching or interfaced facings, work their magic.
Don’t forget to adjust facings and linings for consistency—you’ve got this! Sewing’s about patience and a touch of strategy, so embrace the challenge stitch by stitch.

