This site is supported by our readers. We may earn a commission, at no cost to you, if you purchase through links.

Start by measuring your bicep’s widest part and compare it to the pattern, adding ease for comfort and movement. For a snugger fit, trim the sleeve pattern; for more space, use the slash-and-spread method—cut the pattern, spread it evenly, and redraw smooth curves.
Need more armhole room? Lower or widen it, but don’t forget to check the bodice fit!
Always keep seam lines and notches intact—it’s like a puzzle; everything has to match up. Small changes can lead to a perfectly fitted sleeve!
Remember, it is crucial to maintain the integrity of the garment’s design, ensuring that all adjustments are made with consideration for the overall bodice fit and the seam lines.
Table Of Contents
Key Takeaways
- Measure your bicep at its widest point with a relaxed arm and always add ease for comfort, especially for non-stretch fabrics.
- Use the slash-and-spread method to adjust sleeve width, ensuring symmetry and maintaining the sleeve cap’s shape.
- Align sleeve notches and seams carefully to prevent twisting or mismatched connections during assembly.
- Consider fabric type and end-use to adjust ease, volume, or length, ensuring the sleeve fits comfortably and matches the garment’s design.
Measuring Sleeve Size
Getting the right sleeve size starts with measuring your bicep at its fullest point while your arm stays relaxed.
Measure your bicep at its fullest with a relaxed arm—comfort starts with precision!
Don’t forget to add ease for comfort, especially if you’re working with woven fabrics or planning to layer.
Calculating Bicep Circumference
Measuring your bicep circumference helps guarantee an accurate fit for sleeve adjustments.
Always relax your arm for natural results and stay consistent with your technique.
- Use a flexible tape around the widest upper arm point.
- Ensure the tape is snug but not tight.
- Measure before exercise to prevent muscle inflation.
- Keep tape parallel to the floor.
- Recruit a helper for precision.
Adding Ease Allowances
Once you’ve got your bicep measurement, it’s time for a sleeve adjustment.
Ensure a perfect fit by adding ease to your sleeve pattern—comfort and movement are always worth the effort.
Add 1½–2″ for woven fabrics or 1″ for knits—comfort standards matter!
Winter layering? Add extra ease to the pattern for sweaters.
Sleeve ease adjustment guarantees smooth sleeve fitting. Remember, pattern alteration for sleeve ease depends on fabric and intended use.
Prioritize movement and comfort!
Considering Fabric Type
When tweaking your sleeve pattern, think about fabric type.
Knit vs. woven matters—knits stretch, requiring less ease.
Woven fabrics need extra room since they don’t stretch.
Drape and flow affect how the sleeve falls, while heavier weights add structure.
Texture impacts comfort and movement.
Consider each fabric’s stretch factor before starting any pattern alteration or sewing techniques.
Understanding fabric weight considerations is essential for achieving the desired sleeve structure.
Basic Sleeve Adjustments
Getting the right sleeve fit starts with making small but precise adjustments to your pattern.
By tracing the original sleeve cap, spreading the pattern evenly, and keeping symmetry in check, you’ll guarantee your sleeves fit comfortably and look polished.
Tracing Original Sleeve Cap
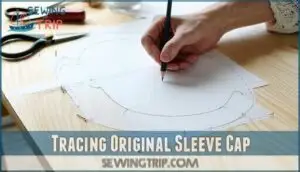
To start any sleeve alteration, accurate tracing of the original sleeve cap is key.
Pin your sleeve pattern to paper, carefully trace the cap, and preserve the armhole’s original shape.
This guarantees symmetry assurance and serves as a reliable reference point.
Consider sleeve cap products for assistance.
Remember, precise pattern tracing prevents fit issues and helps with seamless integration into your garment’s overall design.
Spreading Sleeve Pattern
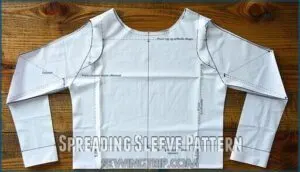
To adjust your sleeve pattern width, cut along the vertical and horizontal lines up to the seam allowance.
Carefully spread the pattern, guaranteeing pivot point accuracy and even sleeve spreading. Expect slight sleeve cap droop—normal during this process.
Rely on your traced cap to maintain armhole shape. Seam allowance pivoting guarantees smooth adjustments for precise sleeve pattern modification, ensuring a smooth adjustment process.
Maintaining Symmetry
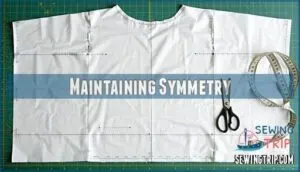
Maintaining symmetry during sleeve alterations guarantees a professional finish.
Focus on balanced expansion and consistent curves.
Follow these tips:
- Spread the pattern equally on both sides for mirrored adjustments.
- Check volume distribution by comparing each slice.
- Use a ruler for smooth, consistent curves.
- Perform a visual inspection for alignment.
- Adjust the sleeve pattern gradually to avoid uneven results, ensuring a professional finish.
Altering Sleeve Patterns
When altering sleeve patterns, you’ll use techniques like slashing and spreading to adjust their width and shape.
These methods guarantee your sleeves fit comfortably while maintaining balance with the bodice.
Slashing and Spreading Technique
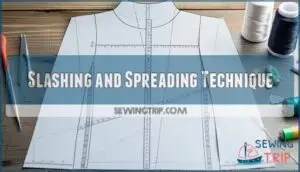
Take your sleeve pattern and use the slash and spread method to add width or adjust fit.
Carefully cut through the lines in your pattern, spreading sections to introduce volume.
Pay attention to symmetry concerns while ensuring the cap height remains intact for proper bodice alignment.
This technique supports style variations and straightforward sleeve modifications for perfect pattern alteration.
You can find products related to the slash spread method.
Modifying Cap Width and Height
Tweaking sleeve cap height or width makes a big impact on fit.
To widen the cap, spread the sleeve pattern at the widest point, but keep it symmetrical.
Adjust cap height by slashing and spreading above the underarm.
These sleeve alteration techniques facilitate proper volume distribution and armhole matching.
Understanding natural shoulder location is vital for accurate sleeve adjustments.
Follow ease standards carefully to maintain a balanced, comfortable fit.
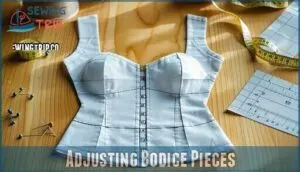
Adjusting Bodice Pieces
When tweaking the sleeve cap, remember it impacts the armhole alignment.
Bodice adjustments keep everything snug. For big sleeve changes, widen the armscye by adding at the underarm, tapering near the waist.
Too tight? Adjust bust, back width, or shoulder slope on the bodice pattern.
Always balance bodice length so the sleeve cap fits effortlessly, ensuring a proper fit.
Advanced Sleeve Techniques
You can completely transform your sleeve patterns by mastering advanced techniques like adding volume and altering lengths.
These methods let you create unique styles, from puffed sleeves to elegant flares, all while ensuring a precise fit.
Adding Volume to Sleeve Patterns
Adding volume to your sleeve pattern starts with the slash-and-spread method.
Carefully cut vertical lines, then spread them evenly to achieve your desired sleeve volume.
Balance is key—volume distribution effects impact how the sleeve design looks and feels.
Whether you’re lifting the sleeve cap or adjusting sleeve styles, precise drafting guarantees a polished, functional fit every time.
Creating Puff and Flared Sleeves
Creating puffed sleeves or flared sleeves starts with precise sleeve pattern adjustments.
For puffed sleeves, add sleeve volume at the cap or hem for fullness.
Flared sleeves focus on sleeve shape, emphasizing flared length and un-gathered edges.
Volume placement is key—spread patterns wide enough to define hem width, aligning sleeve styles for balance and a polished look.
The key to achieving the desired effect lies in the details, including the careful consideration of sleeve volume.
Modifying Sleeve Length and Style
Changing sleeve length or style adds personality to any garment.
Trim or extend Sleeve Hemlines for seasonal versatility. Play with Cuff Styles or add flair with Sleeve Fullness.
Style Swapping, like turning a plain sleeve into a bell or bishop sleeve, is simple.
For adjustments without sewing, consider using hemming tape.
Decorative Elements, like lace or pleats, can elevate your sleeve alteration, making even small tweaks feel impactful.
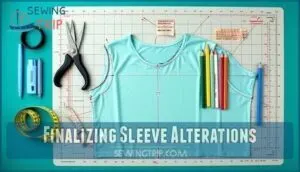
Finalizing Sleeve Alterations
You’re almost done, but don’t skip the final steps to confirm your sleeve pattern is ready to use.
Check your notches, transfer all markings, and update the pattern pieces so everything matches smoothly during construction.
Checking Notches and Seams
Check notch alignment and make certain seam matching for smooth connections.
Pay close attention to curve accuracy around the armhole seam—it prevents gaps. Angle adjustments might be needed for clean passages.
Blend seam lines carefully along sleeve patterns to avoid uneven edges. Precise alignment during sleeve alteration confirms your pattern alteration fits like a charm, making all your effort worthwhile!
Transferring Markings and Lines
Once your seams are checked, focus on transferring pattern markings.
Use tracing paper and a tracing wheel or carbon paper for accurate transfers. Symmetry checks make certain both sides match perfectly.
Marker lines help highlight key details like notches. Remember to take into account shoulder seam placement for accurate adjustments.
Don’t forget to keep your pattern labeling clear—it avoids mix-ups later. Precision here makes sewing smoother and frustration-free!
Updating Pattern Pieces
Once markings and lines are transferred, it’s time to finalize the updates.
Trace hemlines neatly, double-check and transfer notches accurately, and carefully adjust seams for a clean finish.
Consider using specialized pattern tools for greater accuracy.
Don’t forget to update the name on your pattern pieces to avoid confusion during sewing, and mastering these sleeve pattern alterations makes your sleeve adjustments precise and stress-free!
Frequently Asked Questions (FAQs)
How to change sleeves on a pattern?
Think of sleeves like puzzles; you’ll cut and spread the pattern to adjust width, length, or style.
Use horizontal and vertical guide lines, maintain symmetry, and make certain the sleeve cap fits the armhole perfectly.
What is the formula for sleeve pattern?
To draft a sleeve pattern, measure your bicep, arm length, and wrist.
Divide the sleeve cap into equal slices using vertical and horizontal lines, then adjust for ease, fit, and style preferences, considering complete concepts to ensure a well-fitted sleeve.
How to make sleeve adjustment?
Picture unfolding a map—making sleeve adjustments is similar.
Slash across the pattern, spread it to add width, and maintain symmetry for comfort.
Don’t forget, tweak the armhole slightly for a flawless fit.
How to make a sleeve pattern fuller?
To make a sleeve pattern fuller, slash it vertically and horizontally, then spread it apart evenly to add desired width.
Maintain symmetry, redraw curves, and verify the original sleeve cap fits the armhole properly, ensuring that the symmetry is preserved to achieve the desired fit.
How can I adjust sleeve patterns for asymmetrical arms?
Start by tracing each sleeve separately.
Measure both arms carefully, adding extra ease where needed. Split and spread asymmetrically for a custom fit.
Adjust the bodice armholes to align, ensuring smooth seams and balanced movement.
What are tips for altering set-in sleeve angles?
Adjusting set-in sleeve angles? First, align shoulder and bodice seams for balance.
Check armhole shape and trim excess fabric carefully. Slightly rotate the sleeve cap if needed.
Small tweaks guarantee comfort and maintain arm mobility.
How do I correct a twisting sleeve issue?
Don’t worry, twisted sleeves happen to everyone.
Check if the grainline matches the fabric’s straight grain. Also, make certain sleeve notches align perfectly with the bodice.
Rework seam alignment for a smooth, balanced drape.
How to ensure cuffed sleeve hems stay balanced?
To keep cuffed sleeve hems balanced, fold carefully along the marked lines, pressing firmly.
Pin evenly around the cuff, ensuring symmetry.
Sew with consistent tension, and double-check alignment before finishing. A little patience goes a long way, and this attention to detail will help keep the hems balanced.
Can sleeves be altered for posture adjustments?
When posture shifts shoulders forward or backward, sleeve fit changes too.
You can tweak the sleeve cap height and adjust armhole placement to match.
It’s like tailoring movement, ensuring the sleeve aligns with every posture perfectly.
Conclusion
Transforming a sleeve that doesn’t fit can feel like building the Taj Mahal, but armed with these pattern alteration tips for sleeves, you’ll get the perfect fit.
Measure carefully, tweak patterns methodically, and always keep seam lines intact to guarantee a smooth assembly.
Don’t neglect the bodice fit—it ties everything together.
Whether you’re adding ease, adjusting sleeve caps, or creating stylish flares, every step matters, and you should take your time, following the steps to ensure a good outcome, and enjoy sewing sleeves that fit beautifully!


