This site is supported by our readers. We may earn a commission, at no cost to you, if you purchase through links.
 Learning how to sew a flat felled seam creates those super-strong joints you see on quality jeans and work shirts.
You’ll start by sewing two fabric pieces with wrong sides together, then trim one seam allowance shorter than the other. Next, fold the longer allowance over the trimmed edge and press it flat.
Finally, topstitch along the folded edge to lock everything in place. This technique encases all raw edges, preventing fraying while creating a clean finish on both sides.
It’s like building a tiny fabric sandwich that won’t fall apart. The secret lies in getting your measurements and pressing just right.
Table Of Contents
Key Takeaways
- You’ll create the strongest seam by placing fabric wrong sides together, sewing with a 1/2-inch allowance, then trimming one side to 1/4-inch – this sets up the foundation for encasing all raw edges and preventing fraying.
- Press and fold the longer seam allowance over the trimmed edge, then topstitch close to the fold – this locks everything in place and creates that professional finish you see on quality jeans and work shirts.
- Choose medium-weight fabrics like cotton and denim for best results – lightweight or slippery materials make the technique harder to master, while heavier fabrics work beautifully with this method.
- Use a felling foot and test your thread tension on scraps first – specialized tools make the process easier and consistent, while proper tension prevents puckering and thread jamming during construction.
Flat Felled Seam Basics
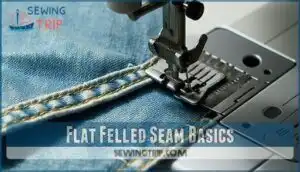
You’ll find flat felled seams on your favorite jeans and sturdy work shirts because they’re one of the strongest seam finishes available.
This technique traps all raw edges inside the seam, then presses everything flat and stitches it down for a clean, professional look that won’t fray even after countless washes, providing a strongest seam finish.
Definition and Characteristics
What makes a flat felled seam the gold standard for garment durability?
Flat felled seams create unbreakable bonds by trapping raw edges inside folded layers, delivering professional strength that outlasts countless washes.
This flat felled technique creates superior seam strength by enclosing raw edges completely within folded fabric layers.
The flat felled method produces exceptional seam appearance while serving as both functional edge enclosure and attractive design feature.
For a quicker alternative, consider exploring a faux flat felled technique.
Your flat felled instructions will yield professional results that withstand repeated washing and wear.
Suitable Garments and Fabrics
You’ll find flat felled seams work beautifully with denim for ultimate durability, making them perfect for jeans that need to last.
This durable seam sewing method shines on shirt fabrics like cotton and linen, preventing fraying while adding strength.
Try it on jacket materials, activewear options, and even as decorative applications on casual wear for that sporty, professional finish.
These seams are commonly found on durable denim jeans, which utilize durable construction and ultimate comfort.
Comparison to Other Seam Finishes
You’ve learned which garments benefit most from flat felled seams.
Now let’s see how this technique stacks up against other popular seam finishes. Understanding these differences helps you choose the right method for each project.
Here’s how flat felled seams compare to other finishing techniques:
- French seams create enclosed edges but add bulk, while flat felled seams lie completely flat
- Bound seams and Hong Kong finishes look polished but require bias tape and extra steps
- Serged seams work quickly but can’t match the strength comparison that makes flat felled seams perfect for heavy-duty items
Sewing Flat Felled Seams
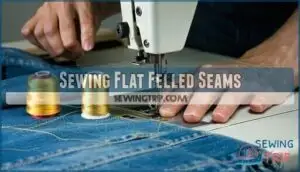
Ready to tackle your first flat felled seam? You’ll find this technique surprisingly manageable once you understand the process.
Start by choosing your fabric wisely – cotton and denim work beautifully, while slippery materials can be tricky for beginners. Your thread tension matters more than you might think, so test it on scraps first.
Consider investing in a felling foot for your machine. This specialized attachment makes sewing flat felled seams much easier and more consistent.
You’ve got design options too – place the enclosed seam on the right side for a visible detail or hide it on the wrong side for subtle strength.
The flat felled seam tutorial process involves several steps, but don’t worry about memorizing everything yet. Whether you’re working on straight lines or curved seams, the basic flat felled seam instructions remain the same. Practice makes perfect with this sewing flat felled technique.
Preparing Fabric and Seam
Before you start stitching your flat felled seam, you’ll need to prewash and iron your fabric to prevent shrinkage surprises later.
Next, you’ll cut your fabric pieces carefully and align their edges perfectly, since wonky alignment leads to wonky seams that’ll make you want to start over, which involves wonky seams.
Prewashing and Ironing Fabric
Your flat felled seam success starts with proper fabric preparation. Prewash your fabric to prevent shrinkage prevention issues and color bleeding later. This step guarantees fabric stability during construction and washing.
Proper prep work prevents sewing disasters—prewash your fabric for flat felled seam success that lasts.
Using a quality prewash solution can further enhance fabric preparation.
- Test iron temperature on scraps before pressing your main fabric pieces
- Remove all wrinkles completely – they’ll interfere with accurate seam construction
- Let fabric cool completely before handling to maintain crisp edges and ensure a successful seam.
By following these steps, you can ensure your fabric is well-prepared for the sewing process, which is crucial for a successful seam.
Cutting and Aligning Fabric Pieces
Once your fabric’s prepped, precision becomes your best friend.
Cut along the fabric grain for stability and use sharp scissors to prevent fraying at the raw edge.
When matching patterns, align them carefully before cutting your seam allowance.
Lay pieces flat on your cutting surface, smoothing out wrinkles to prevent slippage during alignment techniques for your flat felled seam construction.
Pinning Edges for Accuracy
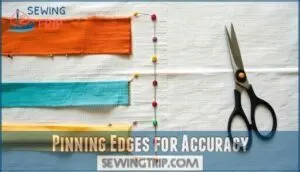
Once you’ve cut your fabric pieces, pin placement becomes your best friend for preventing fabric shift during sewing.
Place pins perpendicular to your seam line, spacing them consistently every 2-3 inches.
For curved seams, pin more frequently to maintain accuracy.
Consider pin alternatives like wonder clips for thick fabrics.
This flat felled seam technique requires precise alignment for professional results.
Sewing edges neatly is essential, and edge stabilization guarantees fabric stays intact, which is crucial for professional results and achieving a neatly finished product with precise alignment.
Constructing Flat Felled Seams
Now you’ll stitch your fabric pieces together using a 1/2 inch seam allowance, then trim one side to 1/4 inch and press the seam flat.
Next, you’ll fold the wider seam allowance over the trimmed edge and topstitch close to the fold to lock everything in place, which involves a process to secure the seam, and this is done by making a fold.
Sewing Seam Allowances
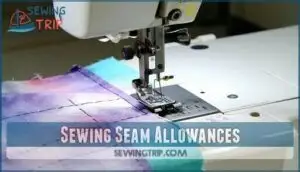
With your fabric pieces properly aligned, you’re ready to create that first vital stitch.
Place fabric pieces with wrong sides together and sew using a 1/2-inch seam allowance. This flat felled seam method requires precision from the start.
- Maintain consistent seam allowance throughout the entire stitch line
- Keep fabric layers aligned to prevent shifting during sewing
- Use matching thread for professional results in your flat felled seam tutorial
- Sew slowly on curved seams to maintain accuracy and control
- Check stitch quality regularly to confirm even tension and spacing
Trimming and Pressing Seam Allowances
After sewing your seam, grab your scissors for some strategic trimming. Cut 3/8" off one seam allowance, leaving the other untouched.
This allowance minimization creates bulk reduction while maintaining structure. Press the seam open with your iron, ensuring edge alignment.
A similar technique is used in a faux flat felled seam. Consistent pressing sets the foundation for accurate folding in your flat felled seam construction ahead, which is crucial for a professional finish.
Folding and Topstitching Seam
Now you’re ready for the final steps that make your flat felled seam shine.
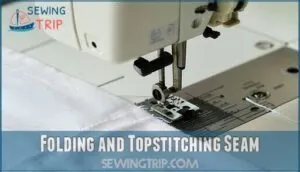
Seam Allowance Folding requires precision—fold the untrimmed edge over the trimmed one, encasing raw edges completely.
This flat felled seam technique creates clean lines through:
- Accurate Topstitching close to the folded edge
- Curved Seam Folding with gentle pressure for smooth results
- Preventing Tunneling by maintaining consistent seam tension
Advanced Techniques and Tips
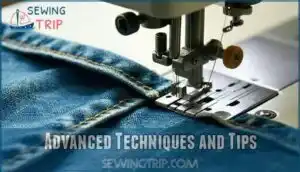
Once you’ve mastered the basic flat felled seam, you’ll want to learn some pro tricks that’ll make your sewing smoother and your results even better.
These advanced tips will help you handle tricky fabrics, prevent common problems like puckering, and use special tools that make the whole process easier.
Using Specialized Feet and Tools
While your basic machine can handle flat felled seams, specialized tools make the job easier.
A felling foot rides smoothly over raised seam layers, guiding your stitching perfectly.
Seam guides help maintain consistent width, while wonder tape or glue basting holds folded edges in place.
Using a specialized presser foot can greatly enhance the process.
These sewing tools transform tricky flat felled seam technique into manageable steps for any flat felled seam tutorial.
Minimizing Fraying and Puckering
Beyond tools, fabric stabilization prevents most flat felled seam problems.
Check your grain direction before cutting – off-grain pieces cause puckering no matter your technique.
Make tension adjustments on test scraps first, especially with lightweight fabrics.
A felling foot won’t fix poor seam allowances or rushed prep work.
Minimize fraying by cutting clean edges and handling fabric gently throughout construction, ensuring a smooth process with clean edges and gentle handling.
Troubleshooting Common Issues
Thread jamming happens when you’re forcing too much bulk through dense fabric – reduce tension and switch to finer thread for puckering solutions.
Uneven seams result from trimming too close; maintain 1/8-inch minimum for stability. Control fraying by matching thread weight to fabric choice.
When tackling curved seams, clip allowances carefully. Regular maintenance can prevent many issues.
Practice these flat felled seam tips on scraps first.
Frequently Asked Questions (FAQs)
How to do a flat felled seam step by step?
Like building a fortress wall, you’ll create an unbreakable seam.
Pin fabric wrong sides together, stitch half-inch from edge, trim one allowance to quarter-inch, fold wider side over, press, then topstitch close to the fold.
What is the difference between a French seam and a flat felled seam?
French seams enclose raw edges by sewing twice with fabric folded, creating a neat inside finish.
Flat felled seams trim one edge, fold the other over it, then topstitch, making them stronger and more visible.
What are the benefits of a flat felled seam?
You’ll get the strongest seam finish available with flat felled seams.
They completely enclose raw edges, preventing fraying and creating durability that withstands countless washes.
Perfect for jeans, they’re both functional and decorative.
Can flat felled seams be made on curves?
Curving through fabric isn’t impossible.
You can absolutely create flat felled seams on curves, though they require more patience and skill than straight seams.
Take your time, ease carefully, and expect a learning curve.
What thread weight works best for topstitching?
You’ll want heavier thread for topstitching flat felled seams.
Weight 40 cotton or polyester works well, though weight 30 creates bolder lines.
Match your thread to fabric weight—heavier fabrics need stronger thread for durability.
How do you handle stretchy knit fabrics?
Like taming a wild horse, stretchy knits need gentle handling.
Skip flat felled seams entirely—they’ll pucker and distort.
Instead, use a serger, twin needle, or zigzag stitch that moves with the fabric’s natural stretch.
Can you use a serger for construction?
You can use a serger for flat felled seam construction, but it’s not the traditional method.
Serge first, then press to one side and topstitch for a "lazy" alternative that still prevents fraying.
Whats the minimum seam allowance needed successfully?
You’ll need at least 5/8 inch seam allowance for flat felled seams to work properly.
Half-inch allowances can work but leave little room for trimming and folding, making the process trickier and less forgiving.
Conclusion
Picture your finished garments standing the test of time, seams intact after countless washes and wear.
Mastering how to sew a flat felled seam transforms your sewing from amateur to professional quality.
You’ve learned the essential steps: aligning fabric pieces, trimming allowances, folding precisely, and topstitching securely.
This bulletproof technique creates those strong, clean seams found on premium denim and workwear.
Practice makes perfect, so grab some scrap fabric and start building your flat felled seam skills today.

