This site is supported by our readers. We may earn a commission, at no cost to you, if you purchase through links.
This specialized foot automatically folds raw edges twice, creating professional-looking hems on scarves, napkins, and lightweight fabrics.
Start by trimming fabric edges cleanly, then feed the material into the foot’s metal funnel at a consistent angle.
The trick is finding the right rhythm—too fast and you’ll jam the fabric, too slow and it won’t feed properly.
Choose the correct foot width for your project, typically 2mm for delicate fabrics and 4mm for heavier materials.
Once you nail the technique, common mistakes become easy fixes.
Table Of Contents
Key Takeaways
- You’ll achieve professional-looking narrow hems by using the rolled hem foot‘s curved channel to automatically fold lightweight fabrics like chiffon and silk while maintaining steady tension and consistent feeding speed.
- You must prepare your fabric properly by trimming edges cleanly with a rotary cutter and selecting the correct foot width—2mm for delicate fabrics and 4mm for heavier materials—to prevent jamming and ensure smooth operation.
- You’ll need to adjust your sewing machine settings including a straight stitch length around 2.0, proper thread and needle selection that matches your fabric weight, and tension adjustments to prevent puckering or loose stitches.
- You can troubleshoot common issues like wrinkled hems by checking machine tension, using steam ironing with press-and-lift motions, and practicing corner techniques by stopping with the needle down and pivoting carefully for curves and sharp angles.
Rolled Hem Foot Overview
A rolled hem foot is a specialized sewing machine attachment that creates narrow, professional-looking hems on lightweight fabrics like chiffon, voile, and silk.
You’ll save time and achieve consistent results when hemming delicate materials, as this foot automatically folds the fabric’s raw edge twice while you stitch, creating professional-looking hems with ease, and ensuring a narrow finish.
Fabric Selection Guidelines
Your narrow rolled hem foot works best with lightweight fabrics like chiffon, voile, and silk.
Fabric weight matters most—think delicate fabrics that drape beautifully rather than heavy canvas or denim.
Consider fiber content and weave structure when making your fabric selection.
Sheer materials with fine weaves create the most elegant results, while proper fabric handling prevents frustrating snags during hemming.
Hem Foot Functionality
The magic happens through ingenious foot mechanics that transform your sewing machine presser foot into a hemming speed wizard.
Unlock professional hemming magic with ingenious foot mechanics that turn your sewing machine into a hemming wizard.
Your narrow rolled hem foot creates automatic fabric curl through its specially designed channel, achieving perfect double folding without manual pressing.
This sewing machine foot functionality streamlines edge streamlining, making your rolled hem foot tutorial sessions incredibly efficient and professional-looking every time.
Benefits of Rolled Hem Foot
You’ll save precious time with this rolled hem foot tutorial, creating professional finish hems in minutes instead of hours.
This sewing machine foot delivers consistent hems on delicate fabrics like chiffon and silk.
Perfect for ruffle edges and narrow rolled hem projects, it eliminates tedious hand-pressing.
The technique is ideal for lightweight knit fabrics, offering flexibility and ease.
Master this sewing machine feet technique for flawless results every time, with a professional finish.
Choosing Right Hem Foot
You’ll find rolled hem feet available in different widths, typically 1/8 inch and 1/4 inch, so select the size that matches your fabric weight and desired hem appearance.
Consider your fabric type and sewing machine compatibility when purchasing, as lighter fabrics work best with narrower feet while your machine’s attachment system determines whether you need snap-on or screw-on varieties, which is crucial for sewing machine compatibility.
Hem Foot Width Options
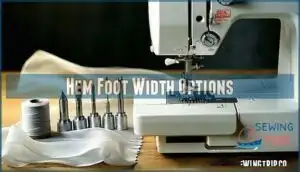
Rolled hem feet come in different hem width options, typically 1/8 inch and 1/4 inch varieties.
Your narrow rolled hem foot choice depends on your project needs.
Smaller widths work better for curved hems and delicate fabrics like chiffon.
Larger widths suit straight edges on medium-weight materials.
Consider your sewing machine feet compatibility when selecting the right narrow hem foot width; remember to check if you have a high or low shank machine for compatibility.
Fabric Type Considerations
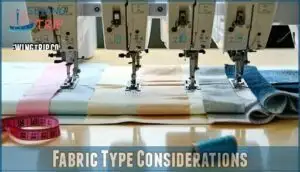
Understanding your fabric’s personality determines success with the rolled hem foot.
Your fabric’s personality holds the secret to rolled hem mastery—choose wisely for flawless results.
Lightweight fabrics like chiffon and silk work brilliantly, while heavy fabrics like denim won’t cooperate.
Test fraying fabrics first—they’ll challenge your patience.
Choose matching needle selection for your material’s weight.
Practice fabric testing on scraps before committing to your project, ensuring your sewing machine fabric handling stays smooth throughout.
This foot is also known as a narrow hemmer foot on some machines, which aids in smooth handling.
Machine Compatibility
Most rolled hem foot brands work with popular machine models like Singer and Brother through universal feet designs.
Check your sewing machine shanks first – about 90% use low shank systems. If your presser foot snaps on easily, you’re likely compatible.
For older machines, adapter usage might be necessary. When in doubt, measure your shank height for perfect sewing machine compatibility.
These feet enhance projects with professional, polished hems.
Preparing Fabric Edges
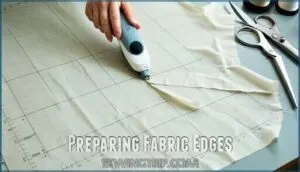
Before you start hemming with your narrow rolled hem foot, you’ll need to prepare your fabric edges properly to guarantee smooth, professional results.
Clean, straight edges prevent jamming and create the foundation for those perfect narrow hems you’re after, ensuring a professional finish.
Trimming Fabric Edges
Clean edges make all the difference when using your rolled hem foot.
Always trim fabric with a rotary cutter for precision—jagged scissors won’t cut it. For fabrics prone to fraying, complete your pre-hemming trimming immediately before sewing.
Sharp edge finishing tools prevent unraveling that can jam your narrow hem foot. Clean edge importance can’t be overstated for successful narrow hem sewing technique.
Using a precision cutting tool guarantees clean lines.
Pressing Fabric Folds
After trimming your fabric edges cleanly, you’ll need to create precise folds for your rolled hem foot success.
Press a 1/8-inch fold to the wrong side using appropriate iron temperature for your fabric type. Steam usage helps set the fold, but avoid excessive moisture on delicate materials.
Press another 1/8-inch fold over the first, ensuring fold consistency. These pressing tools and rolled hem technique preparation steps are essential for your narrow hem sewing tutorial results.
Preventing Fraying
Some fabrics unravel faster than you can say "oops."
Before using your rolled hem foot, apply Fray Check to raw edges or run a quick zigzag stitch as your serging alternative.
These fabric stabilizers prevent disaster mid-project.
For stubborn materials, cut edges immediately before hemming—timing matters.
Edge finishing techniques keep your rolled hem technique smooth and your sewing machine happy, ensuring a smooth and happy sewing experience.
Setting Up Sewing Machine
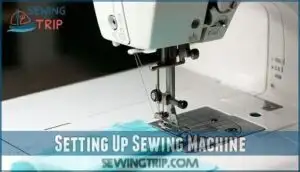
Before you start hemming, you’ll need to attach the rolled hem foot to your machine.
This will require adjusting a few settings for best results, including choosing a straight stitch with a shorter length around 2.0.
You should also select thread and needle sizes that match your fabric weight.
Installing Rolled Hem Foot
First, remove your standard presser foot by lifting the presser foot lever and releasing the foot attachment.
Most rolled hem feet feature snap-on ease for quick installation, while older machines use screw types.
Check machine compatibility before securing tightly. The narrow hem foot should click firmly into place.
Once your sewing machine foot installation is complete, you’re ready to create perfect hems.
Selecting Stitch Length
For successful narrow hems with your rolled hem foot, you’ll want to adjust your sewing machine’s stitch length to around 2.0.
This shorter setting creates better stitch density and seam strength while preventing puckering on delicate fabrics.
The compact stitches work perfectly with your narrow hem foot, ensuring fabric thickness doesn’t compromise your hem’s professional appearance.
A shorter stitch length, such as 1.5-2mm, may be needed for lightweight fabric needs.
Thread and Needle Selection
After adjusting your stitch length, proper thread weight and needle selection directly impacts your hem’s success.
You’ll want thread that disappears into your fabric while supporting clean stitches.
Essential needle selection and thread pairing guidelines:
- Use 70/10 needles for lightweight fabrics with fine thread weight
- Match thread color precisely to fabric for seamless color matching
- Choose polyester thread for superior strength and fabric compatibility
- Test needle type on scraps before final stitching
- Replace needles frequently to maintain high-quality stitch quality
Selecting the right materials is vital, so consider using specialized rolled hem thread for superior results.
Creating Narrow Hems
Now you’ll learn the essential steps to create professional narrow hems using your rolled hem foot.
You’ll discover how to feed fabric properly into the foot’s curved channel, guide it smoothly for consistent results, and prevent the common problem of fabric clogging that can ruin your hemming progress.
Feeding Fabric Into Foot
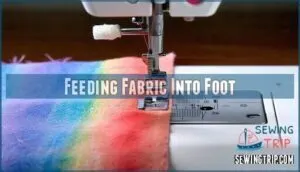
Now that your machine’s ready, it’s time to master fabric feeding. Start by finger-pressing your fabric edge twice, creating that essential ⅛-inch fold.
Pin this fold and place it under your rolled hem foot. Lower the presser foot and stitch your first four stitches while holding the threads.
Stop with your needle down, then gently insert the folded fabric into the foot’s curl for smooth fabric feeding.
Guiding Fabric for Even Hem
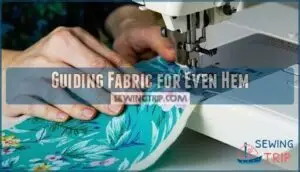
Once you’ve got the fabric started, your hand positioning becomes essential for consistent feeding.
Think of yourself as a conductor guiding an orchestra – smooth, deliberate movements create the perfect rolled hem.
- Keep your left hand 4-6 inches ahead of the rolled hem foot
- Apply gentle fabric tension without pulling or forcing the material
- Maintain straight alignment by watching the fabric edge enter the foot’s curl
- Reposition your guiding hand frequently to prevent awkward stretching during longer hems
Avoiding Clogging
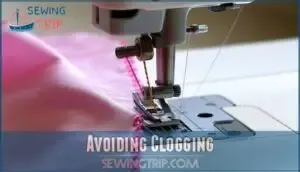
Keep your rolled hem foot running smoothly by preventing fabric buildup that’ll jam your sewing machine.
Don’t let thread tails accumulate around the foot’s scroll mechanism. Stop periodically for scrap removal and foot cleaning to maintain proper guidance.
Feed fabric steadily without forcing it through—this sewing machine foot works best when you trust its natural flow for achieving that perfect rolled hem finish, and remember to maintain proper guidance.
Troubleshooting Common Issues
When you’re learning to use a rolled hem foot, you’ll likely encounter a few bumps along the way, from wrinkled hems to tricky corners that won’t cooperate.
Don’t worry—these common issues have straightforward solutions that’ll get you back to creating perfect hems in no time.
Dealing With Wrinkled Hems
Wrinkled hems happen when your sewing machine tension needs adjustment or you’re pulling fabric too aggressively.
Steam ironing can revitalize your rolled hem’s appearance—press down and lift repeatedly rather than dragging the iron.
Check your needle sharpness too, as dull needles create puckering, and consider using a fabric stabilizer to help with lightweight fabrics that tend to wrinkle during the hemming process, which can be improved with proper steam ironing.
Sewing Corners and Curves
Mastering corners and curves with your rolled hem foot requires patience and technique.
Sharp corners need mitered corners or two-pass sewing, while curved hemming demands gentle fabric manipulation at pivot points.
- Stop with needle down when approaching corner finishes
- Lift presser foot and rotate fabric 90 degrees carefully
- Use tweezers for precise fabric manipulation around tight curves
- Practice curved hems on scrap fabric before final projects
- Slow stitching speed prevents bunching at pivot points, ensuring a smooth finish with gentle fabric handling.
Adjusting Machine Tension
Your sewing machine tension directly affects stitch appearance when using a rolled hem foot.
If stitches look loose or tight, adjust the tension dial gradually.
Test stitching on fabric scraps helps determine ideal settings for different thread types and fabric compatibility.
Most lightweight fabrics need slightly reduced tension.
Always check your sewing machine stitch settings before starting your rolled hem project.
Mastering Rolled Hem Technique
You’ve learned the basics of using your rolled hem foot, but consistent practice transforms good technique into effortless skill.
With regular use on scrap fabric and proper finishing techniques, you’ll create professional-looking hems that rival store-bought garments every time, making your work truly professional.
Practicing on Scrap Fabric
Start your rolled hem foot journey by gathering fabric waste from previous projects.
Test different stitch settings on various material scraps to understand how your sewing machine responds. Practice technique refinement through repetition, comparing results between lightweight cottons and sheers.
Remember that tension adjustment is critical for achieving a flawless finish. This hands-on approach builds confidence while discovering ideal settings for hem consistency across different fabric types before tackling your final project, which requires technique refinement.
Using Steam Iron for Finishing
Your rolled hem foot work deserves the perfect finishing touch.
Set your iron to appropriate steam settings based on fabric type—delicate fabrics need lower heat.
Use gentle press-and-lift motions for wrinkle removal and hem revitalization.
The steam transforms puckered seams into crisp, professional edges.
This ironing technique completes your sewing hem tutorial, giving your rolled hem guide that polished, store-bought appearance, with a finishing touch that makes it look like it was made with gentle care.
Tips for Smooth Hemming Process
Several key sewing tips will transform your rolled hem foot experience from frustrating to flawless.
Consistent feeding prevents bunching while tension tweaking eliminates loose stitches.
For cornering techniques, stop with needle down and pivot carefully.
Fabric stabilizers help slippery materials behave.
Practice benefits can’t be overstated—master these fundamentals on scraps before tackling your final project, and you will find that consistent feeding and proper technique make all the difference.
Frequently Asked Questions (FAQs)
How do you make a narrow hem with a rolled hem foot?
Transform your sewing game forever by finger-pressing fabric’s edge twice at ⅛-inch, positioning it under the rolled hem foot’s curved channel.
Then stitching steadily while letting the foot’s spiral guide the fabric into a perfect narrow hem.
How do you sew a narrow hem?
Fold your fabric edge twice, each fold about 1/8 inch wide.
Press with an iron to set the creases.
Stitch close to the inner fold using a straight stitch to secure the narrow hem.
Can you use a rolled hem foot?
Yes, you can use a rolled hem foot to create professional narrow hems quickly.
It’s perfect for lightweight fabrics like chiffon and voile, automatically folding the raw edge while you stitch for consistent results, using a rolled hem foot.
How do you Hem a rolled hem?
You’ll fold your fabric edge twice, about ⅛ inch each time, then stitch close to the inner fold.
The rolled hem foot’s curved channel automatically guides the fabric, creating a neat, narrow double-folded hem.
What is a narrow hem foot?
A narrow hem foot is a specialized sewing machine attachment that creates precise, professional-looking hems on lightweight fabrics.
It automatically folds fabric edges into tiny, neat rolls while you stitch, eliminating tedious hand-pressing steps, which involves a specialized sewing machine attachment that creates professional-looking hems.
What is a rolled hem foot also known as?
You’ll hear this versatile attachment called a narrow hem foot or hemmer foot.
These names are interchangeable, so don’t get confused when shopping or reading tutorials – they’re all the same tool.
Can rolled hem foot work on thick fabrics?
Rolled hem feet don’t work well on thick fabrics like canvas or denim.
You’ll struggle with bulky materials since the foot’s designed for lightweight fabrics like chiffon and voile that fold easily through its curved channel.
How to remove rolled hem foot safely?
Ready to switch feet without breaking your machine?
First, raise your needle and presser foot lever completely.
Gently pull the rolled hem foot straight toward you until it snaps off the ankle shank.
What causes uneven rolled hem stitching patterns?
Uneven stitching happens when you’re not feeding fabric consistently into the foot’s scroll, using incorrect tension settings, or rushing the process.
Keep steady pressure, adjust tension, and maintain consistent fabric guidance for smooth results.
Does rolled hem foot work with serger machines?
No, rolled hem feet don’t work with serger machines.
They’re designed specifically for regular sewing machines.
However, sergers can create rolled hems using their built-in rolled hem settings and special plates.
Conclusion
Mastering this narrow rolled hem foot tutorial transforms your sewing from horse-and-buggy basic to modern precision.
You’ve learned fabric selection, proper setup, and troubleshooting techniques that’ll save hours of hand-hemming.
Practice on scraps first, then tackle those silk scarves and linen napkins with confidence.
Remember, steady feeding and consistent tension prevent most problems.
Your hems will look professionally finished every time.
With these skills, you’ll wonder how you ever hemmed without this essential foot attachment.

