This site is supported by our readers. We may earn a commission, at no cost to you, if you purchase through links.
Cotton, linen, and evenweave fabrics like Aida cloth work best for most projects.
Natural fibers hold stitches better than synthetics, while medium-weight fabrics provide the perfect balance of stability and workability.
Thread count affects how smoothly your needle glides – higher counts work well for detailed designs, while lower counts suit bold patterns.
Don’t forget to pre-wash your fabric to prevent shrinkage disasters later.
The right fabric choice can make or break your embroidery masterpiece, and there’s more to this story than meets the eye.
Table Of Contents
Key Takeaways
- Choose the right fabric type – You’ll get the best results with natural fibers like cotton and linen over synthetics, and woven fabrics over knits for stability and precise stitch placement.
- Match thread count to your design complexity – You’ll want 150-250 threads per inch for most projects, with higher counts for detailed work and lower counts for bold, simple patterns.
- Select appropriate fabric weight – You’ll need lightweight fabrics for delicate stitches, medium-weight for most projects, and heavyweight for dense, thread-heavy designs to prevent sagging and puckering.
- Pre-wash and stabilize your fabric – You’ll avoid shrinkage disasters by washing fabric first, then use proper stabilizers to prevent puckering and maintain professional-looking results.
Fabric Types Matter
Your fabric choice sets the foundation for successful embroidery, determining whether your stitches will shine or struggle.
Understanding the key differences between woven and knit fabrics, natural versus synthetic fibers, and specialty options like evenweave will help you match the perfect material to your project’s needs.
Woven Vs Knit Fabrics
Why choose between woven stability and knit flexibility when you can master both?
Woven fabrics offer superior stability for precise embroidery applications, making them ideal for detailed designs requiring minimal fabric stretch.
Choose woven fabrics for crisp, professional embroidery with zero distortion—your stitches will thank you.
Knit fabrics provide flexibility that accommodates body movement but require careful stitch considerations to prevent distortion.
Understanding fabric weave impacts your embroidery success—woven fabric embroidery delivers crisp lines while knit fabric embroidery needs stabilizers for superior results.
Considering the stretchiness of knits, it’s important to understand that weft knits offer elasticity, making them ideal for casual wear.
Natural Vs Synthetic Fibers
When choosing between natural fibers and synthetic fabrics for embroidery projects, you’re weighing tradition against innovation.
Natural fibers like cotton and linen offer superior breathability and fiber texture, making them ideal for hand embroidery.
However, synthetic fabrics excel in fiber durability and cost-effectiveness.
Fiber blends combine both worlds, balancing sustainability concerns with performance.
Consider your project’s lifespan when selecting embroidery fabric types. Many synthetic options are petroleum based materials and non-biodegradable.
Evenweave Fabrics for Embroidery
Evenweave fabrics create the perfect foundation for precision embroidery, offering consistent thread spacing that makes counting stitches feel like second nature.
These fabrics feature identical thread thickness and spacing, creating a stable canvas for your creative vision.
Evenweave Benefits that’ll transform your embroidery:
- Perfect stitch placement – The regular grid eliminates guesswork, letting you focus on bringing your design to life
- Versatile thread coverage – Works beautifully with both fine and thick threads, adapting to your artistic needs
- Enhanced stitching techniques – Enables precise cross-stitch, pulled thread work, and counted thread embroidery
- Durable blends explored – Available in cotton, linen, and synthetic combinations for every project requirement
Whether you’re tackling delicate lacework or bold geometric patterns, evenweave fabrics provide the fabric stability embroidery demands, making them essential among embroidery fabric types for serious crafters.
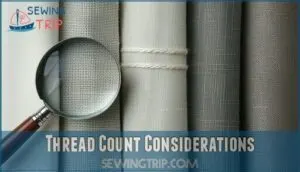
Thread Count Considerations
Thread count measures how many threads are woven into each square inch of fabric, and it’s one of your most important considerations when selecting embroidery fabric.
Understanding thread count helps you choose the right fabric density for your project’s complexity and guarantees your stitches appear clean and professional, which is crucial for a professional look.
What is Thread Count
Thread count measures how many threads are woven per square inch of fabric, creating the foundation for fabric density and stability.
Think of it as fabric’s fingerprint – higher counts mean tighter weaves and smoother surfaces.
For embroidery, thread count directly impacts your stitching experience and final results.
Understanding fabric density helps you match the right base to your design’s complexity and weight requirements, which is crucial for a successful embroidery project with a smoother surface.
Thread Count for Smooth Embroidery
Perfect thread count range for smooth embroidery sits between 150-250 TPI, creating that sweet spot where your needle glides effortlessly while maintaining fabric stability.
Find that perfect thread count sweet spot where your needle dances through fabric like butter.
Higher counts mean smoother surfaces, but don’t go overboard—you’ll fight every stitch.
Here’s what makes thread count your embroidery game-changer:
- Fabric density impact: Tighter weaves support heavy stitching without sagging
- Stitch definition: Smooth surfaces showcase thread colors more vibrantly
- Weave smoothness: Higher counts prevent threads from sinking into fabric gaps
- Embroidery detail level: Fine weaves allow precise, clean stitch placement
- Fabric stability: Dense weaves hold hoop tension better, reducing puckering
For intricate designs, consider how design complexity matters.
Your fabric selection directly affects how professional your finished piece looks—thread count isn’t just numbers on a label.
Thread Count for Detailed Designs
For intricate embroidery needs, you’ll want a high thread count fabric—ideally 200+ threads per inch. This fabric density impact creates the stable foundation your detailed work demands.
When thread thickness ratio meets ideal stitch definition, your needle painting and fine details won’t get lost in loose weaves.
Consider fabric texture carefully; tighter weaves support precision better than looser ones during fabric selection, which is crucial for achieving precision and maintaining stable foundation.
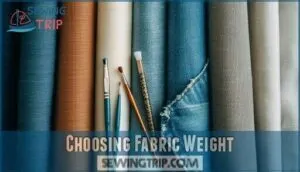
Choosing Fabric Weight
Fabric weight acts like the foundation of your embroidery project, determining how well your design will hold up and look once finished.
You’ll want to match your fabric’s weight to your design’s complexity, since lightweight fabrics work best for delicate stitches while heavyweight options can handle dense, thread-heavy patterns without sagging.
Lightweight for Delicate Designs
When selecting fabric for hand embroidery featuring delicate stitches, lightweight options like silk, cotton voile, or sheer fabrics create stunning results.
Your needle selection and stabilizer choice become essential for preventing puckering. Consider these delicate fabrics for intricate work:
- Silk organza – translucent beauty for ethereal designs
- Fine cotton lawn – crisp texture with gentle drape
- Linen handkerchief weight – classic elegance with natural character
Fine threads complement lightweight suitable embroidery fabrics perfectly, ensuring your fabric weight embroidery maintains professional quality without overwhelming the delicate foundation.
To avoid fabric distortion, remember to maintain grainline accuracy.
Medium-Weight for Most Projects
Medium-weight fabrics strike the perfect balance for most embroidery projects.
These fabrics offer excellent fabric stability while accommodating various stitch density levels without puckering or distortion.
Your thread choice works smoothly with medium-weight materials, making hooping techniques more manageable.
Cotton twill, linen blends, and cotton canvas provide ideal project suitability for beginners and experienced embroiderers alike, supporting diverse fabric choices without overwhelming your design, and allowing for excellent fabric stability.
Heavyweight for Dense Designs
When you’re working with densely packed designs like satin stitch fills or heavy goldwork, heavyweight fabrics become your best friend.
These sturdy materials won’t buckle under pressure from multiple thread layers. Canvas, duck cloth, and heavy cotton provide the fabric strength needed for complex projects.
Dense stitching requires serious fabric support to prevent puckering and maintain stitch stability. Your embroidery’s longevity depends on choosing fabric density that matches your design complexity, which is crucial for the overall longevity of your work.
Fabric Preparation Tips
Proper fabric preparation can make or break your embroidery project, turning potential disasters into stunning successes.
You’ll want to tackle three essential steps before you even thread your needle: pre-washing to prevent shrinkage surprises, ironing for that perfectly smooth canvas, and choosing the right stabilizers to keep everything in place.
This preparation includes ironing for a smooth canvas and choosing the right stabilizers.
Pre-Washing for Shrinkage Prevention
Pre-washing your fabric before embroidery prevents costly mistakes down the road.
Most fabrics shrink up to 90% after their first wash, so you’ll want to test your Shrinkage Percentage beforehand.
Use lukewarm Water Temperature with mild Detergent Choice, avoiding Fabric Softeners that can leave residue.
To further minimize shrinkage, consider cooler water temperatures.
Air-dry or use low heat Drying Methods to prevent fabric distortion and stretching during this fabric preparation step.
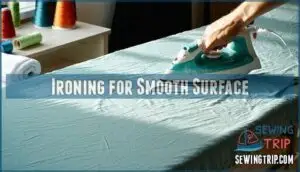
Ironing for Smooth Surface
Iron your fabric flat before embroidering to create the perfect foundation for precise stitching.
Set your ironing temperature according to fabric type—cotton handles high heat, while synthetics need lower settings.
Use steam for natural fibers and dry heat for delicate materials.
Press, don’t drag, to prevent fabric distortion.
Quality ironing equipment and proper fabric handling guarantee smooth, professional results with the right technique, ensuring a good foundation for embroidering.
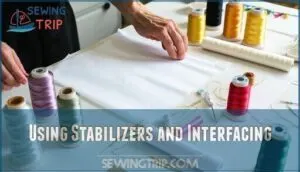
Using Stabilizers and Interfacing
After achieving a perfectly smooth surface through ironing, you’ll need stabilizers and interfacing to prevent puckering and maintain stitch quality. These invisible heroes work behind the scenes, supporting your fabric during the embroidery process.
- Stabilizer Types: Choose tearaway stabilizers for stable wovens, cutaway stabilizers for stretch fabrics, washaway stabilizers for delicate materials, and adhesive stabilizers for difficult-to-hoop items
- Interfacing Weights: Match light interfacing to delicate fabrics, medium weight for everyday projects, and heavy interfacing for dense embroidery designs
- Preventing Puckering: Layer stabilizers beneath your fabric and use topping on textured surfaces to maintain crisp stitch definition
- Hoop Placement: Position stabilizer smoothly in the hoop first, then add fabric to prevent shifting during stitching
- Tear-Away vs. Cut-Away: Remove tear-away after stitching for temporary support, leave cut-away permanently attached for ongoing stretch fabric stability. Many crafters find tearaway stabilizer options particularly useful.
Specialty Fabrics Explained
Beyond standard cotton and linen, specialty fabrics reveal unique embroidery possibilities that can transform your projects from ordinary to extraordinary.
These specialized materials each bring distinct characteristics that make certain techniques shine while presenting their own set of challenges to master.
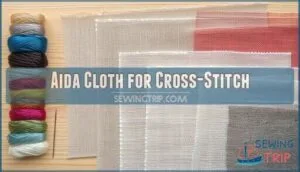
Aida Cloth for Cross-Stitch
Cross-stitch magic starts with Aida cloth, the grid-like counted thread fabric that makes stitching a breeze.
You’ll find various Aida count sizes from 11 to 18, affecting your cross-stitch patterns’ detail level.
Choose from multiple Aida color options to complement your design, and note that Aida’s evenly spaced holes simplify counting for beginners.
This embroidery fabric withstands gentle washing and frames beautifully, making it perfect for fabric considerations in your next project.
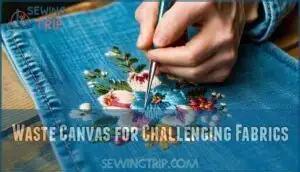
Waste Canvas for Challenging Fabrics
While Aida cloth works perfectly for traditional cross-stitch projects, waste canvas opens doors to embroidery on challenging fabrics like t-shirts, denim, and knits.
This temporary, water-soluble grid dissolves after stitching, leaving your design intact on the original fabric.
Here’s how to master waste canvas techniques:
- Canvas Removal: Wet thoroughly to dissolve glue, then extract threads with tweezers
- Fabric Compatibility: Works on stretchy, fine, or uneven materials unsuitable for direct counting
- Stitching Techniques: Avoid piercing canvas threads to simplify removal process
- Design Transfer: Cut canvas 2-3 inches larger than your intended embroidery area
This method transforms any fabric into an embroidery canvas, perfect for personalizing garments and accessories.
Many crafters find specialty embroidery supplies are essential.
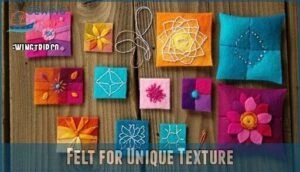
Felt for Unique Texture
While felt offers a forgiving, non-fraying surface for embroidery, its thick texture requires careful consideration of design choices and techniques.
You’ll find felt’s stable structure eliminates hooping needs, but its thickness limits intricate details.
Choose wool felt for heirloom pieces or synthetic versions for practice projects and children’s crafts.
| Aspect | Wool Felt | Synthetic Felt |
|---|---|---|
| Felt Types | Natural fibers, premium quality | Acrylic/polyester blend, budget-friendly |
| Felt Thickness | 1-3mm, dense weave | 1-2mm, uniform consistency |
| Needle Considerations | Sharp needles, size 16-18 | Universal needles, size 14-16 |
| Design Limitations | Avoid dense fills, use outline stitches | Simple designs work best |
| Care Instructions | Hand wash cold, air dry | Machine washable, low heat |
Advanced Fabric Techniques
You’ll encounter situations where standard fabrics won’t cut it for your embroidery vision.
These advanced techniques let you transform ordinary materials into extraordinary canvases, whether you’re dyeing your own fabric, handling silk with kid gloves, or turning old denim into embroidered art. These advanced techniques let you transform ordinary materials into extraordinary canvases.
Fabric Dyeing and Painting
Creating custom backgrounds through fabric dyeing and painting opens exciting possibilities for your embroidery projects.
These techniques let you achieve unique color effects that commercial fabrics can’t match, from subtle gradients to bold artistic statements. You can easily source essential dyeing materials online.
- Dyeing Techniques: Natural dyes from plants create earthy tones, while synthetic dyes offer vibrant, consistent colors with better color fastness
- Painting Methods: Fabric paint provides precision control, acrylic mixed with textile medium offers durability, and watercolors create vintage effects
- Design Integration: Apply background colors before embroidering to prevent thread color changes, unless you want contrasting effects
Working With Delicate Fabrics
Delicate fabrics like silk and sheer materials require gentle handling during embroidery.
You’ll need water-soluble stabilizers to prevent puckering, sharp needles to minimize fabric damage, and reduced tension control to avoid distortion.
Test needle selection on fabric scraps first.
Silk embroidery demands patience—rushing tears these precious materials, ruining hours of work.
Upcycling Unconventional Materials
Vintage linens, old t-shirts, and worn denim offer fresh canvas for embroidery upcycling projects.
Material sourcing from thrift stores provides affordable fabric choices while supporting embroidery waste reduction. Design adaptation requires evaluating fabric strength and texture before stitching.
Durability concerns arise with thin materials, so reinforce weak areas. Aesthetic considerations include working with existing colors and patterns.
Stitching challenges emerge from fabric irregularities, but embroidery repurposing transforms forgotten textiles into treasured pieces using fresh canvas.
Optimizing Fabric Selection
You’ll discover that optimizing fabric selection transforms your embroidery from amateur to professional-looking results.
Smart fabric choices guarantee your designs stay crisp, your threads behave properly, and your finished pieces last for years to come, which is why professional-looking results are achievable with the right fabric.
Matching Fabric to Design
Smart embroidery fabric selection starts with understanding your design’s requirements.
Your design complexity dictates whether you’ll need a stable base or flexible surface for best results.
- Design Complexity: Choose tightly woven fabrics for intricate patterns, looser weaves for simple designs
- Fabric Texture: Match smooth surfaces to detailed work, textured fabrics to bold, sparse embroidery
- Color Harmony: Select fabric colors that enhance your thread palette without competing for attention
- Stitch Density: Heavy stitch density requires sturdy fabrics like linen; lighter work allows delicate options
Considering Fabric Strength and Durability
Strong fabric strength and durability prevent your embroidery from falling apart after countless washes and wear.
Check fiber composition first – natural fibers like cotton and linen offer better tear resistance than synthetic blends.
Test fabric’s abrasion resistance by rubbing a corner between your fingers.
Dense stitch patterns require fabrics with higher tensile strength to avoid puckering, and consider reinforcement techniques like interfacing for heavy designs that’ll stress the base material.
Balancing Quality and Cost in Fabric Choice
You can achieve affordable luxury by selecting medium-weight quilting cotton, which delivers quality results without premium pricing.
Consider durability investment—higher-quality fabrics cost more upfront but provide better project longevity and fewer replacements.
Explore fiber alternatives like cotton-linen blends for balanced performance, and consider budget blends that offer cost savings, though pure natural fabrics typically yield superior embroidery results and long-term value.
Frequently Asked Questions (FAQs)
What fabrics cannot be embroidered?
While many think certain fabrics are "off-limits," almost any fabric can be embroidered with proper preparation.
However, extremely delicate fabrics like fine tulle, very stretchy materials, and heavily textured surfaces require special techniques and stabilizers.
What are the quality requirements for embroidery?
You’ll need proper fabric weight, thread count between 150-180, and stable grain direction.
Choose medium-weight fabrics for most projects, test thread tension, and verify your design matches the fabric’s strength to prevent puckering or distortion.
Verify that your design matches the fabric’s strength to ensure a successful project.
What to put under fabric for embroidery?
78% of professionals consider stabilizers essential for preventing puckering.
You’ll want to place a stabilizer or interfacing underneath your fabric – it supports stitches, prevents distortion, and keeps your embroidery looking crisp and professional.
How do I prevent fabric from fraying during embroidery?
Apply fray-preventive measures before you start stitching.
Use pinking shears to cut zigzag edges, apply liquid seam sealant along raw edges, or secure with masking tape for temporary protection during your embroidery project.
What causes fabric puckering and how to fix it?
Fabric puckering happens when you use improper hooping tension, skip stabilizers, or choose thread that’s too thick for your fabric.
Fix it by re-hooping with drum-tight tension, adding appropriate stabilizer, and selecting matching thread weight.
Can I embroider on stretchy athletic wear fabrics?
You’ve hit the jackpot with athletic wear! Yes, you can embroider on stretchy fabrics, but they need proper stabilizers and ballpoint needles to prevent runs and puckers.
How do I choose needles for different fabric types?
Choose sharp needles for tight weaves, ballpoint for knits, and universal for blends.
Match needle size to fabric weight—lightweight gets size 70-80, medium-weight uses 80-90, heavyweight needs 90-110 for clean penetration.
Conclusion
Making the right fabric choice transforms your embroidery from ordinary to extraordinary.
Understanding fabric considerations for embroidery guarantees your projects withstand time and handling while showcasing your skills beautifully. You’ve learned that thread count, fiber type, and weight work together to create the perfect foundation for your stitches.
Remember to pre-wash your fabric and consider your design’s complexity when selecting materials. With these fundamentals mastered, you’re ready to tackle any embroidery project with confidence and create stunning pieces that’ll impress everyone.
- https://www.bethcolletti.com/blog/6-great-fabrics-to-use-for-hand-embroidery-projects
- https://practicalembroidery.eu/embroidery-fabrics/
- https://www.cre8iveskill.com/blog/top-ten-fabrics-for-machine-embroidery-designs
- https://egausa.org/the-beginners-guide-to-embroidery-fabrics/
- https://www.bernina.com/en-US/Learn-Create-US/Embroidery-Tips-Tricks/Choosing-the-right-design-for-your-fabric

