This site is supported by our readers. We may earn a commission, at no cost to you, if you purchase through links.

Start with medium stitch density (0.4-0.6mm for most fabrics), balanced thread tension, and appropriate needle size.
Adjust machine speed based on detail level – slower for intricate work, faster for simple fills.
Test settings on sample fabric first, since cotton needs different parameters than delicate silk or stretchy knits.
Your bobbin tension should complement upper thread tension to prevent puckering or loose stitches.
Remember, even experienced embroiderers sometimes battle tension gremlins that turn beautiful designs into frustrated sighs, and it’s about finding the right balance for beautiful designs.
Table Of Contents
Key Takeaways
- Test your settings first – Always run a sample on scrap fabric before starting your actual project, since 68% of embroidery problems come from incorrect stitch settings rather than machine issues.
- Master the density sweet spot – Set your stitch density between 0.4-0.45mm for most fabrics to prevent puckering while ensuring proper thread coverage and professional results.
- Balance your thread tension – Start with upper thread tension at 4 (range 2-6) and adjust until you see slight upper thread visibility on the fabric’s underside without loops or puckering.
- Match your needle to your project – Choose a needle size based on thread weight and fabric type, replacing needles every 8-10 hours of stitching to prevent thread breaks and skipped stitches.
Stitch Density Basics
Stitch density determines how many stitches your embroidery machine places per square inch, directly affecting your design’s appearance and durability.
You’ll need to master this fundamental setting to achieve professional results that won’t pucker your fabric or create thread buildup, ensuring a high-quality finish with the right density.
Measuring Stitch Density
Stitch density measures how many stitches you’ll place per square inch, typically calculated using SPI Calculation methods.
Your embroidery software settings display this as points between stitch rows—lower numbers mean higher density and better coverage quality.
Most density tools show 0.4 to 0.45mm spacing for ideal stitch density on average fabrics, though fabric impact varies substantially between materials.
Understanding basic embroidery stitch techniques, such as those involving stitch density control, is essential for achieving perfect results in embroidery projects, which requires a good grasp of stitch density and embroidery software.
Optimal Density Ranges
Most embroidery designs achieve ideal stitch density between 0.4 to 0.45mm spacing. You’ll find this sweet spot prevents fabric distortion while ensuring proper thread coverage.
Satin stitches work best at 0.3-0.6mm density, while fill stitches typically start at 0.4mm.
Always adjust density measurement based on fabric compatibility and design complexity to maintain professional results. Excessive density can lead to issues, so consider fabric suitability carefully.
Fabric and Design Considerations
Your fabric choice directly impacts stitch density settings. Delicate fabrics like silk need higher density for proper coverage, while sturdy denim handles lower density well.
Design complexity also matters – intricate patterns require precise stabilizer usage and careful thread weight selection.
When layering designs, adjust your stitch settings based on fabric compatibility and embroidery stabilizer types to prevent puckering.
Thread Tension Settings
Perfect thread tension prevents puckering and guarantees professional-looking embroidery results.
You’ll need to balance upper and bobbin tensions based on your fabric type and thread weight to achieve smooth, consistent stitches.
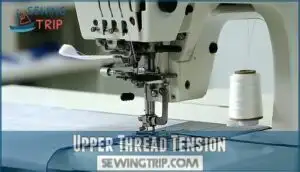
Upper Thread Tension
Getting your embroidery machine’s upper thread tension right transforms frustrating stitching sessions into smooth sailing.
Set your tension dials between 2-6, starting at 4 for most embroidery thread types.
Perfect tension shows slight upper thread visibility on the fabric underside without creating thread loops.
When tension troubleshooting reveals bobbin interaction issues, adjust gradually—small changes prevent embroidery tension disasters that’ll have you pulling your hair out.
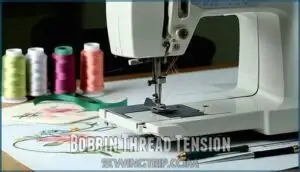
Bobbin Thread Tension
Unlike upper thread tension which you adjust frequently, bobbin tension rarely needs modification.
Most embroidery machines ship with pre-wound bobbins set at ideal tension for standard embroidery thread weight. Your bobbin case type determines available adjustments – some feature tiny screws for fine-tuning, while others stay fixed.
When bobbin tension tools become necessary, make micro-adjustments carefully since over-tightening creates thread breaks and loose tension causes looping underneath your fabric.
If you want to guarantee precise calibration, consider using a specialized TOWA gauge.
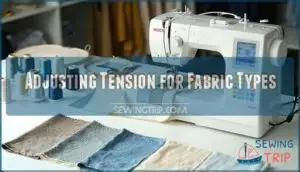
Adjusting Tension for Fabric Types
Different fabric types demand specific tension adjustments for ideal embroidery results.
Delicate fabrics like silk need lighter tension settings around 2, while heavy fabrics require tighter settings between 4-5.
Knit fabric tension differs from woven fabric tension due to stretch properties.
Understanding embroidery thread tensions is essential for achieving well-formed stitches.
When tension troubleshooting, test your embroidery machine stitch settings on scrap material first to prevent costly mistakes.
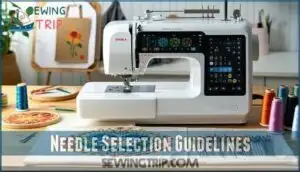
Needle Selection Guidelines
Your needle choice directly impacts stitch quality, thread performance, and fabric protection in every embroidery project.
The right needle prevents thread breaks, skipped stitches, and fabric damage while ensuring professional results.
Choosing The Right Needle
Your needle selection forms the foundation of professional embroidery results. Choose embroidery needles with larger eyes and special scarf designs that prevent thread shredding.
Match needle size to thread weight—size 75/11 for standard rayon threads, 90/14 for heavier decorative threads. Consider specific needle dimensions for superior results.
Sharp points work best on woven fabrics, while ballpoints suit knits perfectly, making the right choice crucial for achieving embroidery success.
Factors Influencing Needle Choice
Multiple factors determine your embroidery needle choice, and understanding these connections helps prevent costly mistakes.
Your fabric type sets the foundation—heavy denim demands larger needles while delicate silk requires smaller ones.
Thread weight pairs directly with needle size using the 40% rule.
- Fabric Type: Match needle point to material—ballpoint for knits, sharp for wovens, wedge for leather
- Thread Weight: Heavier threads need larger needle eyes to prevent breakage and shredding
- Design Complexity: Dense patterns require sturdy needles that won’t bend under pressure
- Stabilization Needs: Poor stabilization increases needle stress, demanding more durable options
Needle Maintenance and Replacement
Your embroidery machine needle works harder than you might think, piercing fabric thousands of times per project.
Replace needles every 8-10 hours of stitching or when you notice thread breakage, skipped stitches, or poor stitch quality. Understanding needle sizes is essential for superior performance with different fabrics.
| Signs to Replace | Storage Tips | Brand Comparison |
|---|---|---|
| Bent or damaged tip | Store in original cases | Schmetz: Premium quality |
| Frequent thread breaks | Label by type/size | Organ: Budget-friendly |
| Skipped stitches | Keep away from moisture | Madeira: Specialty options |
Check your needle before each project – a dull or damaged machine needle causes more embroidery troubleshooting headaches than any other factor.
Proper embroidery machine maintenance includes rotating fresh needles regularly, extending your needle lifespan through careful storage solutions, and preventing costly needle breakage that can damage your machine’s timing.
Machine Speed Adjustments
Finding the right machine speed transforms your embroidery from amateur to professional quality.
You’ll discover that adjusting speed based on your fabric type, thread weight, and design complexity prevents costly mistakes while maximizing your machine’s precision capabilities, which is crucial for achieving professional quality embroidery.
Factors Influencing Speed Adjustment
Several critical factors determine your embroidery machine’s ideal speed settings for flawless results.
Fabric type affects how quickly your machine can stitch—delicate materials need slower speeds to prevent puckering.
Design complexity requires careful speed control; intricate patterns demand precision over pace.
Thread weight influences embroidery speed control, with heavier threads needing reduced speeds.
Machine stability and operator skill level directly impact your embroidery machine optimization and stitch quality outcomes.
Understanding the importance of speed control mechanisms is vital for achieving perfect embroidery results.
Optimal Speed Ranges for Precision
Your machine’s sweet spot for precision stitching sits between 600-750 stitches per minute.
This ideal range balances speed with embroidery machine settings accuracy, preventing thread breaks and uneven stitches.
Commercial machines can push 1,200 SPM, but precision suffers.
For delicate fabrics, drop to 400-600 SPM.
Machine calibration guarantees consistent results within these ranges for efficient embroidery production.
Adjusting Speed for Complex Designs
Complex patterns demand slower speeds for best results.
Reduce your machine’s speed to 400-600 SPM when working intricate details or dense fills.
Speed control becomes your ally for stitch precision – rushing through elaborate designs sacrifices quality.
Dense areas need patience; lighter sections can handle faster speeds.
Adjust embroidery machine settings based on pattern complexity for professional outcomes to ensure the best results, considering the need for patience in dense areas.
Embroidery Stitch Settings
You’ll master embroidery by understanding how different stitch types require specific settings to achieve professional results.
Each stitch type—running, satin, and fill—has unique parameters that directly impact your design’s quality and durability.
Running Stitch Settings
Perfect machine speed sets the stage for ideal running stitch settings.
Your stitch length control should range from 2.0mm to 2.5mm for most applications, with fabric prep determining final adjustments.
Thread choice affects running speed substantially—heavier threads need slower speeds.
- Stitch Length: Keep between 2.0-2.5mm for balanced coverage and strength
- Thread Choice: Match weight to fabric thickness for consistent tension
- Fabric Prep: Stabilize properly to prevent distortion during stitching
- Running Speed: Reduce speed 20% when using specialty threads for better stitch quality
These embroidery stitch settings create clean lines without compromising stitch density settings or stitch type selection effectiveness.
Understanding embroidery machine capabilities is vital for achieving professional results.
Satin Stitch Settings
Satin stitches demand precision for professional results.
Set your satin width between 2mm and 7mm for ideal coverage without fabric distortion.
Adjust stitch density settings to 0.0-0.4 for smooth, even borders.
Choose quality thread that matches your fabric weight.
Fine-tune stitch length control based on your design’s complexity and your embroidery machine stitch settings for consistent stitch quality settings.
Fill Stitch Settings
Fill patterns demand precise density control for professional thread coverage across large areas.
Your embroidery machine’s fill stitch settings directly impact fabric fill quality and object fills performance.
Here’s what transforms amateur work into commercial-grade results:
- Set density between 0.4-0.45mm for ideal thread coverage without fabric distortion
- Choose tatami patterns for consistent fill patterns across varied fabric types
- Adjust angle settings to prevent thread buildup in high-density areas
- Monitor stitch quality settings during long runs to maintain embroidery stitch quality
- Test stitch optimization on sample fabric before committing to full production runs
Remember: stitch density controls everything from durability to visual impact in your finished pieces.
Advanced Stitch Settings for Complex Designs
Building on fill stitch foundations, you’ll access advanced embroidery machine stitch settings for complex designs through strategic stitch optimization and density control.
Underlay stitches provide essential support, preventing puckering in intricate patterns, while manual entry/exit point control reduces thread jumps.
Automatic stitch modes enhance thread management, and advanced digitizing software enables embroidery calibration through optimized stitch sequencing.
Combining running, satin, and fill techniques creates dimensional depth, and regular simulation guarantees your embroidery machine optimization delivers professional results every time.
Frequently Asked Questions (FAQs)
How do you make a good machine embroidery design?
Create your design using proper stitch density (4-45), choose appropriate stitch types (running, satin, fill), select quality stabilizer, set correct machine tension, and test on scrap fabric first.
How to change stitch density in embroidery machine?
You’ll change stitch density through your embroidery digitizing software by adjusting the density settings for each stitch type, typically ranging from 4 to 45 for ideal coverage.
Why should you learn machine embroidery stitch types?
Understanding different stitch types transforms your embroidery from amateur attempts into professional-quality designs.
You’ll troubleshoot problems faster, select ideal stitches for specific fabrics, and create durable, visually stunning pieces that won’t pucker or distort, which is a result of understanding complete concepts.
How do I choose a machine embroidery needle?
Choose your needle based on fabric weight, thread type, and design complexity.
Match needle size to thread weight – heavier threads need larger needles.
Replace needles regularly for consistent stitch quality and fewer breaks, ensuring a smooth sewing experience with fewer interruptions.
How do embroidery stitches work?
Embroidery stitches penetrate fabric using synchronized needle and thread movements. Your machine creates three main types: running stitches for outlines, satin stitches for borders, and fill stitches for large areas.
How embroidery is done on different clothes?
Different fabrics require customized approaches for superior embroidery results.
You’ll adjust stitch density, stabilizer choice, and needle selection based on material weight, stretch, and texture to prevent puckering and guarantee professional-quality finished pieces.
What setting do you set a sewing machine for embroidery?
Set your machine to straight stitch mode, lower feed dogs, install an embroidery foot, and adjust tension between 2- Use embroidery needles and maintain moderate speed for precision.
What tension should I set my embroidery machine at?
Like Goldilocks finding the perfect porridge, you’ll want your tension "just right" – typically between 2-6, with 4 as your starting point.
Adjust until upper thread barely shows on fabric’s underside for ideal results.
What stitch setting should I use?
Your ideal stitch length depends on the technique you’re using.
For running stitches, stick with 0-5mm for most projects.
Satin stitches work best at 0-4mm density, while fill patterns typically start at 8 points and adjust from there, which involves understanding the technique you’re using.
How do I calibrate my embroidery machine?
Think of calibration as tuning a guitar – everything must work in harmony.
Clean your machine thoroughly, replace the needle, and check thread path alignment.
Test tension settings on scrap fabric, adjusting upper thread tension between 2-6 until stitches lay flat without puckering or loose loops.
Conclusion
Studies show that 68% of embroidery problems stem from incorrect stitch settings rather than machine malfunctions.
Mastering embroidery machine stitch settings transforms your projects from frustrating experiments into professional-quality results.
You’ve learned that proper stitch density, balanced thread tension, correct needle selection, and appropriate machine speed work together like a well-orchestrated team.
Remember to test your settings on sample fabric first—it’s the difference between success and starting over.
With these fundamentals mastered, you’ll create beautiful embroidered pieces consistently.
- https://www.digitizingmadeeasy.com/machine-embroidery-stitch-types/
- https://www.digitemb.com/blog/how-to-select-stitch-type/
- https://stashbandit.net/understanding-stitch-length/
- https://www.echidnasewing.com.au/article/embroidery/understanding-density/
- https://oesd.com/embroidery-density-stitch-count-and-size/

