This site is supported by our readers. We may earn a commission, at no cost to you, if you purchase through links.
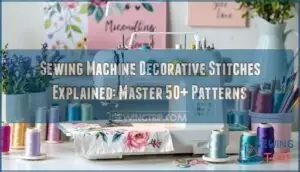 These stitches range from functional blanket stitches that finish edges beautifully to purely decorative florals and geometric patterns.
You’ll find utility stitches combining strength with style, embellishment patterns for adding flair, and specialty options like scallops for heirloom techniques.
Success depends on matching stitch density to fabric weight—dense patterns need stabilizer on lightweight materials, while open designs work great on heavier fabrics.
Thread choice matters too: rayon adds shine, cotton provides durability, and metallic threads create dramatic effects.
Proper needle selection and tension adjustments prevent frustrating breakage and puckering.
The real magic happens when you start layering different patterns and experimenting with color combinations to create signature looks.
Table Of Contents
Key Takeaways
- Choose the right stitch for your fabric – Match dense patterns with stabilizer on lightweight materials, while open designs work perfectly on heavier fabrics without extra support.
- Master your machine setup – Use specialized presser feet, like satin stitch or open embroidery feet, and adjust tension to 2-3 for smooth decorative stitching results.
- Select appropriate threads and needles – Pair rayon for shine, cotton for durability, or metallic for drama with matching needle sizes (75-90 for most stitches).
- Layer and combine patterns strategically – Create custom designs by mixing dense and open stitches, experimenting with contrasting thread colors, and using proper guidelines for professional-looking results.
Choosing Decorative Stitches
You’ll find hundreds of decorative stitches on modern machines, from delicate feather patterns to bold geometric designs.
Understanding which stitches work best for your fabric and project goals will transform your sewing from basic construction to professional-looking artistry.
Types of Decorative Stitches
Your sewing machine houses an impressive arsenal of decorative stitch patterns, each designed for specific creative purposes.
Satin Stitch creates dense, smooth finishes perfect for appliqué work, while Feather Stitch adds delicate, branching details to heirloom projects.
Scallop Edge stitches form graceful curves along fabric borders, and Geometric Patterns provide structured designs for modern quilting.
Motif Stitches feature recognizable shapes like hearts or flowers for themed embellishments, including the use of Scallop Edge stitches.
Dense and Open Stitches
Understanding decorative stitch patterns starts with recognizing two main categories. Dense stitches create raised, textured surfaces through closely-packed thread, while open stitches form lighter, airy designs with spaced elements.
Dense stitches build texture; open stitches create delicate, airy patterns perfect for different project needs.
Stitch Density affects your project’s final appearance:
- Dense stitches (satin stitches, zigzag variations) build thick thread layers for bold texture
- Open stitches maintain fabric flexibility while adding decorative elements
- Mixed patterns combine both types for dimensional contrast
Dense stitches require stabilization to prevent fabric puckering, while open stitches work well on lightweight materials without extra support.
Selecting Stitches for Projects
Matching your fabric choice and project planning to specific decorative sewing stitches guarantees professional results.
Consider stitch density requirements and design elements when selecting patterns.
| Project Type | Recommended Stitch | Best Fabric |
|---|---|---|
| Garment hems | Blanket or scallop stitch | Cotton, linen |
| Quilting borders | Geometric patterns | Cotton quilting fabric |
| Home décor | Satin or feather stitch | Canvas, denim |
| Appliqué work | Open decorative stitches | Lightweight cotton |
Your sewing machine decorative stitches guide should match fabric weight with stitch complexity—dense stitches work best on stable fabrics.
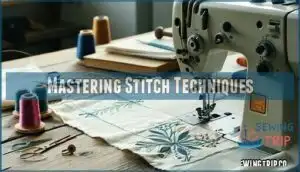
Mastering Stitch Techniques
Perfect thread tension and proper stabilization transform mediocre decorative stitches into professional results.
You’ll master these fundamental techniques by understanding how thread weight, needle selection, and fabric preparation work together to create flawless decorative patterns.
Thread Selection and Tension
When selecting thread for decorative stitches, your thread weight choice dramatically impacts stitch quality.
Heavy 12wt threads create bold texture while 40wt delivers smooth balance.
Polyester offers durability with high sheen, rayon provides vibrant softness, and cotton gives matte traditional appearance.
Match thread types between needle and bobbin for consistent results.
Adjust tension control by loosening top thread slightly for satin stitches, preventing bobbin show-through while maintaining proper stitch formation.
To achieve superior stitch quality, consider the importance of proper thread tension settings for your sewing projects.
Needle Types and Sizes
Your needle choice directly impacts stitch quality and thread performance.
Sharp needles prevent thread breakage and guarantee clean penetration through fabric layers.
Use standard needle sizes 75-90 for most decorative stitches, while specialized heirloom needles create intentional holes in delicate fabrics.
Match needle types to thread types and fabric choices—embroidery needles work best with rayon threads, while Microtex needles handle fine cottons beautifully.
Fabric Stabilization Methods
Proper fabric stabilization prevents puckering and guarantees clean decorative stitches.
Choose your sewing machine stabilizer based on fabric weight and stitch density.
Watersoluble stabilizer like Solvy works perfectly for delicate fabrics, while Sullivans Fabric Stabilizer provides excellent fabric support for heavier materials.
- Interfacing Techniques: Iron-on stabilizers bond permanently for structured fabric support and tension control
- Stabilizer Types: Tear-away varieties remove easily after stitching without leaving residue behind
- Puckering Prevention: Apply stabilizer before stitching to maintain fabric shape and stitch quality
Setting Up Sewing Machine
Getting your sewing machine ready for decorative stitches requires swapping out your standard presser foot.
You’ll need to adjust stitch length and width parameters to match your chosen pattern and fabric weight.
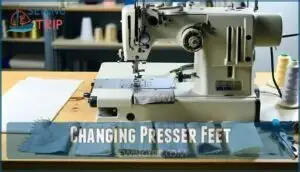
Changing Presser Feet
Switching to the right presser foot transforms your decorative stitching from frustrating to fantastic. Your sewing machine’s standard zigzag foot won’t cut it for dense satin stitches—you’ll need specialized feet that accommodate wider stitch patterns and provide better stitch visibility.
| Presser Foot Types | Best For | Key Feature |
|---|---|---|
| Satin Stitch Foot | Dense decorative stitches | Wide groove underneath |
| Open Embroidery Foot | Intricate patterns | Clear visibility of stitching |
| Braiding Foot | Couching and trim attachment | Multiple thread guides |
| Wing Needle Foot | Heirloom stitches | Accommodates specialty needles |
Most decorative stitch feet feature wider openings and grooved soles that prevent thread buildup from jamming your fabric. Check your machine’s foot compatibility before purchasing—snap-on and screw-on systems aren’t interchangeable.
The right foot attachment guarantees smooth fabric guidance and prevents those annoying thread nests that make you want to throw your project across the room. Using the correct Satin Stitch foot is essential for achieving professional-looking results.
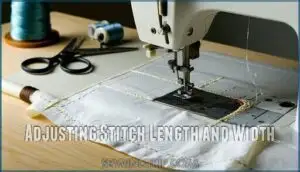
Adjusting Stitch Length and Width
Once you’ve attached the right presser foot, you’ll need to fine-tune your sewing machine stitch length and width for perfect decorative results.
These stitch settings control both appearance and quality.
Here’s your machine calibration checklist:
- Test stitch density – Start with 2.5mm length for balanced coverage
- Adjust stitch width – Keep under 5mm to prevent fabric stretch
- Check thread control – Shorter lengths need reduced stitch tension
- Monitor fabric behavior – Dense stitches may cause puckering
- Save tension settings – Note successful combinations for future projects
Understanding stitch length basics is vital for achieving superior results.
Creating Decorative Stitch Designs
Now you’re ready to transform basic machine stitches into stunning decorative elements that’ll make your projects stand out.
The secret lies in combining different stitches strategically and using proper guidelines to achieve professional-looking results every time, which involves combining different stitches strategically.
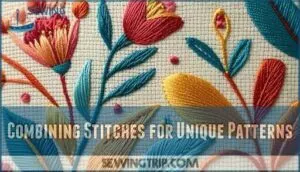
Combining Stitches for Unique Patterns
Stitch blending transforms ordinary projects into masterpieces by combining decorative stitching patterns.
Layer dense satin stitches beneath open geometric designs for stunning texture combos.
Try pattern mixing with florals and leaves, or experiment with color blocking using contrasting threads.
Your sewing machine decorative stitches become custom artworks when you stack different stitch combinations creatively.
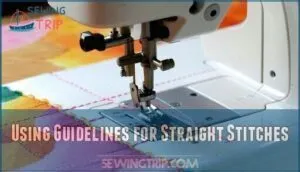
Using Guidelines for Straight Stitches
Achieving perfectly straight decorative stitches requires proper Fabric Marking and Stitch Alignment techniques.
Mark your fabric with water-soluble markers or chalk to create clear guidelines before starting your sewing machine decorative stitches.
These visual references guarantee consistent Stitch Placement and create professional Straight Edges.
Your Guided Sewing approach transforms wobbly attempts into polished results that’ll make you proud.
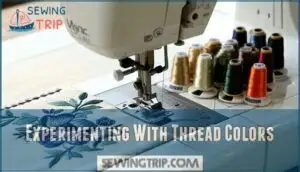
Experimenting With Thread Colors
Thread color choices transform ordinary decorative stitches into stunning design elements.
Experiment with high-contrast hue combinations—navy thread on cream fabric creates striking definition.
Try variegated embroidery threads for multi-tonal tint effects that shift along seam lines.
Consider thread weights when planning shade selection; heavier threads produce bold statements while lighter weights offer subtle accent work for sewing machine embroidery projects.
Understanding embroidery thread sets is essential for achieving desired color combinations and effects in decorative stitching.
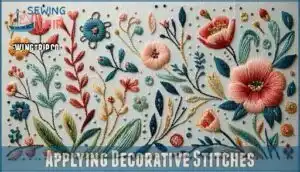
Applying Decorative Stitches
You’ll transform plain projects into stunning showpieces once you master where and how to apply decorative stitches effectively.
Whether you’re embellishing garment hems, adding quilting accents, or personalizing items with monograms, the right stitch placement creates professional-looking results that’ll make your friends wonder if you bought it from a boutique.
Garment Embellishments
Decorative stitches transform plain garments into personalized showpieces.
Focus on strategic Stitch Placement along collars, cuffs, and hems for maximum impact.
Your Fabric Choice determines which decorative stitches work best—lightweight fabrics need stabilizers while denim handles dense patterns beautifully.
Popular Embellishment Ideas include feather stitches on children’s clothing and geometric borders on shirt yokes. These Sewing Tips guarantee professional results every time.
Quilting and Home Decor Accents
Transform your quilting and home decor projects with decorative machine stitches that add texture and visual appeal.
Use feather stitches along quilt borders, blanket stitches on pillowcase edges, or honeycomb patterns on table runners.
Dense satin stitches create bold fabric embellishments, while open geometric patterns provide subtle decorative edges.
Your sewing machine’s built-in embroidery stitches turn ordinary home textiles into personalized masterpieces.
Monogramming and Personalization
Monogram fonts and lettering styles transform ordinary items into personalized gifts through custom embroidery.
Your sewing machine’s built-in alphabet stitches create professional name tags and monograms on towels, bags, or clothing.
Practice lettering on scrap fabric first, adjusting stitch width and density for clean results.
Personalization adds that special touch that makes handmade projects truly memorable and uniquely yours.
Troubleshooting Common Issues
Even experienced sewists encounter hiccups when working with decorative stitches—thread breaks, fabric bunches up, or stitches skip unexpectedly.
Understanding these common problems and their solutions will save you time and frustration while keeping your projects looking professional.
This knowledge will help you troubleshoot and fix issues, thereby saving you time and frustration.
Thread Breakage and Tension
Excessive tension causes thread breakage during decorative stitching. Your sewing machine tension dial should typically read 4-5, but specialty threads need custom settings.
Check needle size—90/14 works for metallic threads, 80/12 for lightweight options. Dull needles create thread fraying and skipped stitches.
Re-thread completely after each break to guarantee proper seating and eliminate tension issues. Proper thread tension adjustment is vital to prevent these common problems, and you can find more information on this topic at thread tension adjustment, which is crucial for preventive measures and understanding common problems.
Fabric Bunching and Distortion
Bunching occurs when fabric gathers or puckers during decorative stitching, creating unsightly distortions.
Poor fabric stability and incorrect thread tension are primary culprits that compromise seam accuracy.
Prevent bunching with these techniques:
- Use proper stabilizer – Apply tear-away or water-soluble stabilizer to maintain fabric tension and prevent distortion during complex stitching
- Adjust stitch width – Reduce stitch width on lightweight fabrics to minimize stress and maintain fabric stability
- Check thread tension – Balance top and bobbin thread tension to prevent fabric pulling and guarantee smooth fabric embellishments
Skipped Stitches and Wonky Designs
Skipped stitches and wonky designs often stem from dull or incorrect needles.
Machine calibration problems create uneven stitch alignment, while tension issues cause irregular patterns.
Replace your needle first—it’s the cheapest fix.
Check thread breakage patterns; they reveal fabric distortion problems.
Your sewing machine decorative stitches guide should list proper needle types for each pattern.
Clean your machine thoroughly and test stitch selection on scraps before troubleshooting further mechanical issues, focusing on proper needle types and thread breakage patterns.
Advanced Decorative Stitching
Once you’ve mastered basic decorative stitches, you’re ready to explore advanced techniques that transform ordinary projects into stunning works of art.
These sophisticated stitches require precise machine settings and specialized needles, but they’ll give your sewing the professional finish that separates amateur work from expert craftsmanship.
Heirloom and Wing Needle Stitches
Wing needle stitches create stunning vintage details by forming deliberate holes in fabric.
These specialty needles spread fibers apart, producing lace effects reminiscent of hand-pulled threadwork.
Heirloom stitching combines wing needle techniques with embroidery stitches like satin stitch for elegant results.
Use open-weave fabrics and fine thread for best outcomes.
These decorative stitches transform ordinary projects into treasured heirloom pieces with authentic old-world charm.
Mastering advanced embroidery stitches is essential for achieving intricate and beautiful designs with authentic old-world charm.
Geometric and Border Stitches
Geometric patterns and border designs transform plain edges into architectural masterpieces.
These repetitive, structured stitches create fabric frames that guide the eye along seams and hems.
You’ll find triangles, diamonds, and zigzag combinations that add mathematical precision to your projects.
Border stitches work perfectly for edge embellishments on tablecloths and curtains.
Master stitch combinations by adjusting width settings to create unique geometric patterns that complement your fabric’s natural lines, and explore how these patterns can enhance your projects with mathematical precision.
Motif and Scallop Stitches
Through careful needle threading, motif stitches transform fabric into storytelling canvases.
These sewing machine decorative stitching patterns create hearts, stars, and leaves with precise stitch density control.
Scallop edges add feminine touches to hems and borders, while motif patterns bring personality to any project.
Choose stable fabric choices for crisp embellishment ideas.
Your decorative stitches become artistic expressions when you master these scallop stitch and motif stitches techniques, using precise stitch density control.
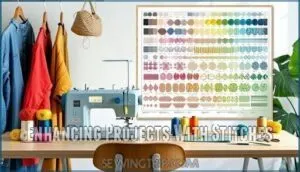
Enhancing Projects With Stitches
Decorative stitches transform ordinary projects into stunning showpieces by adding layers of texture, visual appeal, and personal flair that catch the eye.
You’ll discover how strategic stitch placement creates professional-looking results that elevate everything from simple garments to home décor pieces.
Adding Texture and Dimension
Decorative stitches transform flat fabric into tactile masterpieces through strategic Fabric Layering and varying Stitch Density. Your sewing machine stitches create Texture Effects that make projects pop off the surface, turning ordinary seams into Dimensional Embellishments.
Master these stitch techniques to add Visual Depth that begs to be touched. Understanding fabric texture options is essential for selecting the right materials for your projects.
- Dense satin stitches build raised ridges that catch light beautifully
- Open decorative patterns create subtle shadow play across fabric surfaces
- Layered stitching combinations produce complex dimensional effects
- Varied thread weights add contrasting texture elements to your designs
Creating Visual Interest and Contrast
How do you transform ordinary sewing projects into eye-catching masterpieces?
Strategic Color Contrast amplifies decorative stitches against fabric backgrounds.
High-contrast threads create bold Visual Hierarchy, while matching colors blend subtly.
Combine dense satin stitches with open feather patterns for dynamic Texture Mixing.
Vary stitch direction and spacing to establish rhythm.
Layer different Stitch Variations through Pattern Blending techniques for sophisticated depth and visual impact.
Personalizing Projects With Decorative Stitches
Through thoughtful stitch customization and strategic thread selection, you’ll transform ordinary projects into personalized masterpieces.
Decorative stitches become your signature when you master stitch placement for design enhancement.
Your sewing machine decorative stitches guide enables fabric embellishment that reflects your unique style, allowing for personalized sewing that speaks to you—whether monogramming initials or adding whimsical motifs that make every project distinctly yours.
Frequently Asked Questions (FAQs)
What are decorative stitches used for in sewing?
Modern sewing machines offer over 50 decorative stitch patterns on average.
You’ll use these fancy stitches to enhance garments with elegant details along hems and collars, personalize home décor items, create eye-catching quilting accents, and add texture to pockets or seams.
What is the difference between practical and decorative stitches?
Practical stitches hold your fabric together—straight seams, buttonholes, hems.
Decorative stitches add flair and personality to your projects.
Think of practical as the backbone; decorative as the jewelry that makes everything shine.
What kind of thread to use for decorative stitches?
Use polyester or rayon embroidery thread with a size 75 embroidery needle. These threads create vibrant colors and smooth finishes. Adjust your machine’s top tension to 2-3 for ideal results.
Can decorative stitches work on vintage machines?
Like a classic car that still purrs beautifully, vintage machines can absolutely handle decorative stitches.
Your older machine’s built-in patterns work perfectly with proper stabilizer, appropriate needles, and tension adjustments.
Test settings first for best results.
How to clean decorative stitch mechanisms properly?
Turn off your machine and unplug it first.
Remove the needle and presser foot, then use a small brush to clear lint from stitch mechanisms.
Oil moving parts according to your manual’s specifications for smooth operation.
What causes decorative stitches to look uneven?
Uneven decorative stitches stem from incorrect tension settings, dull needles, inadequate stabilizer, or inconsistent fabric feeding.
You’ll also see problems when thread weight doesn’t match your needle size or fabric type.
Can you use metallic thread for decorative stitches?
Metallic thread works beautifully for decorative stitches, but you’ll need a larger needle (size 90-100), slower stitching speed, and reduced top tension to prevent breakage and achieve smooth results.
How to store samples of decorative stitches?
A stitch in time saves nine—organize your decorative stitch samples in a binder with clear sleeves.
Label each sample with stitch settings, thread type, and fabric used for easy reference and replication.
Conclusion
Like a painter with an endless palette, you now hold the keys to transforming ordinary fabric into extraordinary art. Understanding sewing machine decorative stitches explained opens doors to countless creative possibilities.
Whether you’re adding subtle texture to garments or creating bold statement pieces, these techniques give you professional-level results.
Start with basic utility stitches, then gradually experiment with complex combinations. Remember that practice makes perfect—each project teaches you something new about thread behavior, fabric interaction, and design balance, leading to professional-level results.
- https://thequiltshow.com/quiltipedia/what-are-decorative-stitches
- https://createwhimsy.com/projects/understanding-your-decorative-sewing-machine-stitches/
- https://www.nationalquilterscircle.com/post/exploring-decorative-stitches-on-your-sewing-machine
- https://www.reddit.com/r/sewing/comments/13a0evy/any_fun_ideas_on_what_i_could_use_these_stitches/
- https://sewingmastery.com/enchanting-stitches/

