This site is supported by our readers. We may earn a commission, at no cost to you, if you purchase through links.
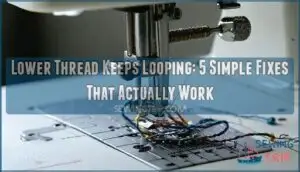
Start by checking your upper thread tension – it’s often too tight, causing the lower thread to pull up and create loops on your fabric’s underside. Adjust your tension dial one notch at a time until the threads lock properly between fabric layers.
Next, examine your bobbin installation. The thread should unwind counterclockwise, and your bobbin case needs proper seating. A bent or dull needle can also create loops by failing to pierce fabric cleanly.
Table Of Contents
Key Takeaways
- Check your upper thread tension first – when it’s too tight, it pulls the lower thread up and creates loops underneath your fabric, so adjust your tension dial one notch at a time until threads lock properly between fabric layers
- Verify your bobbin’s installed correctly with thread unwinding counterclockwise and the bobbin case seated flat – over 60% of looping issues stem from backwards or wobbly bobbin placement
- Replace bent or dull needles immediately since they can’t pierce fabric cleanly and disrupt the delicate thread interlocking process that prevents loops from forming
- Always thread your machine with the presser foot up so thread seats properly in the tension discs – threading with the foot down creates zero tension and causes instant looping problems
Tension Settings Matter
When your lower thread keeps looping, tension settings are usually the culprit behind this frustrating problem.
Most sewing machines need tension settings between 3-6, with 4-5 working best for standard fabrics.
Proper Tension Balance
Thread tension creates the foundation for proper stitch formation.
When your upper and lower threads achieve perfect tension balance, they interlock precisely at the fabric’s center, creating strong seams with balanced stitches.
Poor tension balance causes one thread to dominate, pulling the other to the wrong fabric surface and creating those frustrating loops you’re seeing, which can be attributed to a lack of tension balance and results in weak seams due to imbalanced stitches.
Incremental Tension Adjustments
Making small adjustments prevents over-correction that creates new problems. Fine-tuning tension requires patience, but the payoff is worth it. Newer machines often have sophisticated tension assembly to control thread pressure.
- Start with quarter-turn increments on your tension dial – dramatic changes often make looping thread fix attempts worse
- Test each adjustment on scrap fabric before committing to your project piece
- Document successful settings for different thread weights and fabric combinations
Balanced stitches hide knots between fabric layers, eliminating those frustrating bobbin thread problems that plague many sewers.
Common Tension Issues
With different fabric types demanding specific thread balance settings, your sewing machine tension problems often stem from mismatched adjustments.
Heavy fabrics need higher looper tension than delicate materials, while tension discs collect lint that disrupts thread flow.
When lower thread issues create weak seam strength, check if your bobbin thread problems match the fabric weight you’re using.
Regular maintenance can prevent persistent tension issues, which is a critical aspect of sewing, and addressing these issues can help resolve persistent problems.
Bobbin Installation Checks
If you’ve checked your tension settings and still see loops in your lower thread, your bobbin is likely the culprit.
Over 60% of lower thread looping issues stem from incorrect bobbin installation, making this your next logical troubleshooting step.
**Don’t let a backwards bobbin sabotage your perfect project – proper installation is everything.
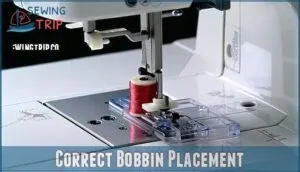
Correct Bobbin Placement
Your bobbin’s proper placement determines whether you’ll get smooth stitches or frustrating thread nests.
Here’s what guarantees perfect bobbin installation:
- Check bobbin size – Use only manufacturer-recommended bobbins to prevent bobbin wobbling
- Insert thread counterclockwise – This direction prevents immediate thread looping issues
- Ensure flat seating – The bobbin shouldn’t wobble or create thread resistance
- Test through needle plate – Thread should pull smoothly without catching
- Verify bobbin case alignment – Improper placement causes persistent lower thread issues
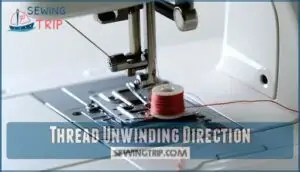
Thread Unwinding Direction
Once you’ve got the bobbin seated properly, check which direction the thread unwinds.
Your bobbin thread should pull counterclockwise from the spool to prevent thread looping issues.
If the thread delivery feels jerky or creates unwinding issues, you’ve likely got the spool orientation backwards.
Flip the bobbin over and test again – smooth, consistent feed means you’ve nailed the correct bobbin rotation for ideal thread tension.
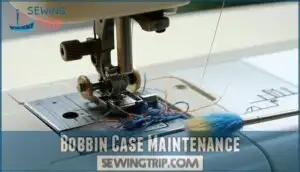
Bobbin Case Maintenance
Neglect in bobbin case maintenance creates a cascade of sewing machine troubleshooting headaches.
Regular case cleaning prevents lint buildup that disrupts thread tension and causes thread looping.
Here’s your maintenance checklist:
- Hook inspection for burrs removal using fine sandpaper
- Tension spring cleaning with soft brush, never compressed air
- Oiling mechanism following manufacturer guidelines for smooth operation
Monthly bobbin cleaning routine eliminates most bobbin case issues before they start.
Verify you’re using the correct bobbin type for your machine to prevent further issues.
Needle Condition Importance
Your sewing machine’s needle might be the silent culprit behind persistent thread looping issues.
A bent, dull, or incorrectly sized needle disrupts the delicate thread interlocking process, causing frustrating loops that no amount of tension adjustment can fix, which can be attributed to the delicate nature of the sewing process.
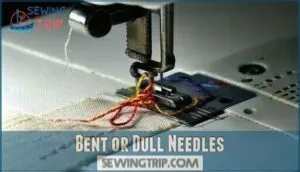
Bent or Dull Needles
A damaged needle acts like a tiny wrecking ball in your sewing machine.
Even a tiny bent needle creates chaos in your sewing machine’s delicate threading system.
During needle inspection, look for bent tips or dull points that cause fabric damage and thread snagging.
These needle problems create skip stitches and bottom thread looping because the needle can’t properly pierce fabric.
Replace needles regularly to prevent bending and solve sewing machine troubleshooting issues before thread tension problems worsen.
Regularly replacing your needles can help avoid common sewing frustrations and this is a key step in preventing thread tension problems and ensuring a smooth sewing experience with properly functioning needles.
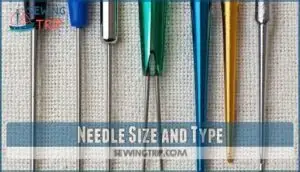
Needle Size and Type
When matching needle size to fabric compatibility, you’re avoiding needle problems before they start.
A 70/10 needle works perfectly for lightweight silks, while heavy denim demands a 100/16.
Thread weight matters too—thick threads need larger needle eyes.
Different needle systems and brand differences can affect performance, so proper needle selection prevents looping issues entirely, which is crucial for avoiding needle problems and ensuring the use of the right needle.
Regular Needle Replacement
Fresh needles are your sewing machine’s best friend for preventing thread looping.
Replace needles every 6-8 hours of sewing or when switching fabric types.
A dull needle creates tension problems that cause bobbin tension issues and performance impact.
This simple needle replacement habit delivers massive cost savings by preventing costly repairs.
Your ideal frequency depends on fabric weight—heavier materials demand more frequent changes.
Safe needle disposal keeps your workspace safe.
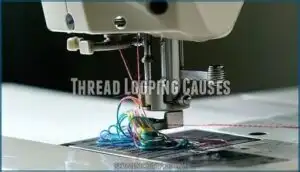
Thread Looping Causes
Understanding why your lower thread loops helps you fix the problem faster than randomly adjusting settings.
Most looping issues stem from three main causes: upper tension problems, incorrect threading, or bobbins installation errors.
Upper Tension Issues
Your upper tension controls the thread’s grip through the tension dial.
When it’s too tight, you’ll see thread looping underneath your fabric. Too loose, and loops appear on top.
Start with your tension dial at 4-5 for most fabric type and thread weight combinations. Make small adjustments while test stitching – the thread path should flow smoothly without pulling.
Proper tension troubleshooting saves hours of frustration with your sewing machine tension settings, ensuring smooth operation and efficient use.
Lower Thread Problems
Lower thread problems can really throw off your sewing game.
When your bobbin tension isn’t properly calibrated, thread quality deteriorates, or machine maintenance gets neglected, serger looping becomes inevitable.
These issues directly impact stitch formation:
- Improper bobbin tension creates uneven thread delivery
- Poor thread quality increases drag and inconsistencies
- Dirty bobbin cases hinder smooth thread flow
- Overwound bobbins disrupt consistent feeding, causing sewing machine problems
Incorrect Threading
Improper Threading Order creates chaos in your machine’s delicate balance.
When you thread with the Presser Foot down, your thread won’t seat properly in the Tension Discs, creating zero thread tension.
This leads to immediate thread looping underneath your fabric.
Always raise the presser foot before threading to guarantee your Thread Path flows correctly through each tension point, preventing Tangled Thread and bobbin issues.
Following the machine’s numbered threading path can prevent many common errors, ensuring a smooth threading process and reducing the risk of thread looping and bobbin issues.
Troubleshooting Techniques
When your lower thread keeps creating loops, these targeted troubleshooting techniques will help you identify and fix the root cause quickly.
Start with these systematic approaches to restore smooth stitching and eliminate frustrating thread tangles.
Adjusting Tension Dial
When struggling with thread looping, start making tension increments between dial numbers 3-6.
Test each adjustment on fabric scraps before committing to your project.
If loose bottom thread creates loops underneath, you’ll need tightening tension by turning the dial to higher numbers.
For loops appearing on top, try loosening tension instead.
Small adjustments make big differences in sewing machine tension control.
Cleaning Bobbin Area
Dirt and lint buildup in your bobbin area creates tension problems that cause loops.
Remove your bobbin case and use a small brush or canned air for thorough lint removal.
Clean the hook assembly, checking for debris inspection around all moving parts. A bobbin case brush helps with this task.
Wipe down the bobbin case and surrounding areas with a lint-free cloth. Regular sewing machine maintenance prevents these issues from recurring, which is a key part of overall machine care.
Replacing Damaged Parts
When cleaning doesn’t solve persistent thread looping, worn components may need replacement.
Damaged bobbin case springs, hook assembly wear, or needle bar issues create mechanical problems that adjustments can’t fix.
Look for visible burrs, bent tension springs, or cracked feed dog components.
Replace these inexpensive parts following your machine manual’s guidance to restore proper stitch formation.
A key factor is incorrect needle type, which can contribute to these issues.
Frequently Asked Questions (FAQs)
What happens if you thread the lower looper first?
Threading your lower looper first disrupts the proper sequence and can create tension imbalances.
You’ll likely experience thread tangling, uneven stitches, and difficulty maintaining proper thread flow through the machine’s threading path, which can lead to issues such as uneven stitches and difficulty with thread flow.
Why is my thread looping?
Your thread’s looping because your tension’s off-balance. Check if your upper tension’s too loose or tight, rethread properly with presser foot up, and clean out any lint from tension discs.
What should I do if the lower looper thread keeps unthreading?
Replace old or poor-quality needles and thread immediately.
Check that you’re using fresh, compatible thread for your machine.
Make certain needles are properly inserted and positioned correctly in the needle bar to prevent unthreading issues.
How do you rethread the lower looper?
First, consult your machine manual for specific threading paths.
Pull thread through the lower looper threading points in sequence, following the numbered guides or color-coded path clearly marked on your serger.
What happens if you thread the lower looper after the needles?
Ironically, threading the lower looper after needles won’t ruin anything, but you’ll create tension imbalances and poor stitch formation.
Threading order matters—needles first guarantees proper thread paths and prevents threading complications that’ll frustrate you.
How do I know if my lower looper thread is too loose?
When your lower looper thread appears loose, you’ll notice loops forming on the bottom surface of your fabric.
The stitches look uneven, and thread doesn’t lay flat against the material’s edge properly, which can be a sign of a loose thread issue.
Why does my bottom thread keep looping?
Ever wonder why your stitches look messy underneath?
Your upper thread tension’s likely too loose, creating loops on the fabric’s bottom.
Check if you’ve threaded properly through tension discs with presser foot up.
Why does thread keep coming out of the lower looper?
Thread slips out of your lower looper when tension’s too loose, the threading path’s wrong, or the needle’s damaged.
Check your threading sequence, tighten the looper tension slightly, and replace any bent needles.
Why does thread keep jamming under fabric?
Your upper thread tension is likely too loose, causing thread to bunch underneath.
Tighten the tension dial gradually, check you’re threading between tension discs properly.
Make certain your presser foot’s up when threading.
Can wrong thread weight cause constant looping?
Like a perfectionist chef balancing flavors, you’ll find wrong thread weight creates constant tension chaos.
Heavy thread on lightweight fabric overwhelms your machine’s delicate balance, causing persistent loops that’ll drive you crazy until you match weights properly, which is crucial to avoid constant tension.
Conclusion
Like a perfectly tuned orchestra where every instrument must harmonize, your sewing machine requires precise coordination between upper and lower threads.
When your lower thread keeps looping, you’re witnessing a mechanical conversation gone wrong. These five fixes address the most common culprits: tension imbalances, improper bobbin installation, worn needles, threading errors, and maintenance neglect.
By methodically checking each component, you’ll restore smooth stitching. Remember, most looping issues stem from tension problems, so start there first.
With patience and these targeted solutions, you’ll eliminate those frustrating loops and return to consistent, professional-quality sewing results.
- https://sewingmachineshop.com/sewing-machine-troubleshooting-thread-loops/
- https://www.youtube.com/watch?v=dZXJiMzjM7E
- https://pubs.nmsu.edu/_c/C202/index.html
- https://support.handiquilter.com/hc/en-us/articles/115002418547-Top-thread-looping-on-back-of-quilt
- https://www.reddit.com/r/sewhelp/comments/rr1khs/how_to_fix_looping_thread_on_back_of_fabric/

