This site is supported by our readers. We may earn a commission, at no cost to you, if you purchase through links.

Start with your machine’s default setting (usually 4-5) for medium-weight cottons, then tweak from there.
Lightweight fabrics like chiffon need lower tension (2-3) to prevent puckering, while thick denim demands higher settings (6-8) to penetrate all layers.
Stretchy knits work best with medium tension and a ballpoint needle.
Test on fabric scraps first – the top and bottom threads should lock perfectly in the fabric’s center, creating balanced stitches without loops or pulls.
Getting this right saves hours of frustration and prevents that sinking feeling when your perfect seam falls apart, which is why finding the right tension is a critical step and ensures a perfect seam, making it a key part of the sewing process to achieve professional results.
Table Of Contents
Key Takeaways
- Start with your machine’s default tension setting (4-5) for cotton, then adjust down to 2-3 for lightweight fabrics like chiffon to prevent puckering, or up to 6-8 for thick materials like denim
- Always test on fabric scraps first – you’ll know tension’s right when top and bottom threads lock perfectly in the fabric’s center without loops or pulls showing on either side
- Match your needle size and type to your fabric weight, and remember that different thread types (cotton vs. polyester) need different tension settings even on the same fabric
- Keep your machine clean and well-maintained since lint buildup in tension discs causes most tension problems – rethread completely and clean before adjusting dials
Fabric Type Tension
Different fabrics need specific tension settings to create perfect stitches without puckering, bunching, or thread breaks.
You’ll save time and frustration by learning how each fabric type responds to tension adjustments, which is a complete concept in understanding fabric and tension.
Lightweight Fabrics Require Lower Tension
When working with lightweight fabrics like silk or chiffon, you’ll need lower tension settings between 2-3 to prevent puckering.
These delicate materials can’t handle aggressive thread pull, so adjusting tension downward keeps your stitches smooth.
Use a 70/10 needle size with matching thread weight, and consider reducing stitch length to 1.5-2.4mm.
One should also pre-wash to prevent future fabric shrinkage, and your presser foot pressure might also need lightening for ideal fabric tension adjustment results.
Thick Fabrics Need Higher Tension Settings
When you’re sewing denim, leather, or canvas, you’ll need higher tension settings between 4-6 to handle these heavy materials.
Your sewing machine tension must work harder to pull thick threads through dense fibers.
Without proper adjusting tension, you’ll get loose stitches that won’t hold.
Higher settings prevent seam puckering and create strong, professional results on challenging fabrics.
Stretchy Fabrics Demand Medium Tension
Stretchy fabrics like lycra and spandex require a delicate balance—too tight and you’ll create puckers, too loose and stitches won’t hold.
Medium tension settings between 2-3 work best for most knit fabrics, allowing natural elasticity while maintaining stitch integrity.
Here’s your stretchy fabric game plan:
- Start with tension setting 2.5 – This sweet spot handles most lycra and spandex blends without fighting the fabric’s natural give
- Use a ballpoint needle – It slides between fibers instead of piercing them, reducing stress on both thread and material
- Test your serger tension first – Stretchy fabrics love overlock stitches, so dial in those settings before switching to your regular sewing machine
When adjusting tension for these materials, remember that elasticity changes everything.
Your sewing machine tension needs to accommodate the fabric’s stretch without creating weak spots or distortion.
Tension Settings Guide
You’ll discover that most general fabrics work best with tension settings between 4-5, but don’t worry if your machine’s sweet spot differs slightly.
Understanding how to adjust these baseline settings for specialty materials will transform your sewing from frustrating to fantastic.
Standard Tension Settings for General Fabrics
Most sewing machine tension settings work best in the 4-5 range for basic fabrics like cotton and polyester.
Your machine’s factory presets handle these materials well as initial settings. Start here, then make small adjustments using test swatches.
This ideal range covers medium-weight fabrics perfectly, giving you a solid foundation before tweaking settings for specific projects.
Adjusting Tension for Specialty Fabrics
Beyond standard cotton and polyester, specialty fabrics demand precise tension adjustments for professional results.
Leather tension requires settings between 4-6 to prevent needle damage, while metallic thread needs ultra-loose tension around 1-2 to avoid breakage.
Knit fabrics perform best at 3-4 for stretch retention.
Velvet settings should stay around 2-3 to prevent pile crushing, and denim adjustments vary by weight—lightweight needs 2.5-3, heavyweight requires 4-5 for proper penetration.
Using a Tension Chart for Reference
A tension chart acts like your sewing GPS, guiding you toward perfect stitches every time.
Chart interpretation becomes second nature when you match fabric types with recommended tension settings. Most machines include troubleshooting guides showing fabric matching strategies and thread compatibility requirements.
Regular maintenance can prevent common tension problems.
Remember, machine specifics vary between brands, so your tension guide serves as your starting point, not gospel.
Thread Tension Factors
When you’re sewing different fabrics, several hidden factors beyond just the fabric itself affect how you should set your thread tension.
Your thread’s weight and material type play a bigger role than you might expect—cotton thread behaves differently than polyester, and thick decorative threads need completely different settings than your standard sewing thread.
Thread Weight and Type Influence Tension
Your thread choice directly impacts sewing machine tension settings. Different thread types behave uniquely under pressure, requiring specific adjustments for ideal stitch formation.
Thread choice makes or breaks your stitches—cotton, polyester, and decorative threads each demand their own tension sweet spot.
Cotton threads offer thread elasticity, needing gentler settings to prevent fabric damage, while polyester maintains tension consistency across various fabric types. Incorrect threading is a common cause of tension issues.
- Thread thickness: Heavier 30-40wt threads need higher tension than lighter 50-60wt options
- Thread types: Cotton requires lower settings due to natural stretch, polyester needs balanced tension
- Thread weight compatibility: Match thread weight to fabric density for consistent results
- Needle matching: Proper thread-to-needle sizing prevents tension fluctuations and breakage
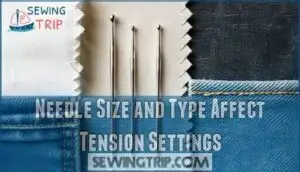
Needle Size and Type Affect Tension Settings
Choose your needle like picking the right key for a lock—the wrong size creates tension headaches. Matching needle size to fabric thickness prevents fabric damage and maintains stitch quality.
Too small needles cause thread breakage, while oversized needles leave visible holes.
| Fabric Type | Needle Size | Needle Type |
|---|---|---|
| Lightweight (silk, chiffon) | 70/10 – 80/12 | Universal/Sharp |
| Medium (cotton, linen) | 80/12 – 90/14 | Universal |
| Heavy (denim, canvas) | 90/14 – 110/18 | Denim/Heavy |
| Stretch (knits, lycra) | 75/11 – 90/14 | Ballpoint/Stretch |
Proper needle selection reduces sewing machine tension adjustments needed across different thread types and fabric combinations. Understanding specific needle dimensions is vital for achieving superior sewing results with the right needle size and fabric type.
Environmental Factors Like Humidity and Temperature
Your workspace’s humidity and temperature dramatically affect thread behavior and machine performance. High humidity softens threads while cold rooms stiffen them, throwing off your carefully adjusted tension settings for different fabrics.
A sewing room hygrometer helps maintain ideal conditions.
- Humidity effects: Above 60% humidity causes cotton fabrics to swell, requiring tension adjustments
- Temperature impact: Cold workspaces harden thread and lubricants, creating uneven delivery
- Seasonal adjustments: Monitor your sewing room with a hygrometer and thermometer for consistent results
- Machine calibration: Test tension on scraps whenever environmental conditions shift more than 5 degrees or humidity changes
Adjusting Tension Techniques
You’ll need to master three key techniques to achieve perfect tension balance across different fabric types.
Fine-tuning your tension settings through top thread adjustments, bobbin modifications, and proper dial usage transforms frustrating sewing sessions into smooth, professional results.
Increasing or Decreasing Top Tension
Fine-tuning your sewing machine tension creates professional results. Most machines feature a numbered tension dial where higher numbers increase thread tightness.
Start with your machine’s standard setting, then make incremental adjustments of half-steps while testing on fabric scraps. Understanding sewing machine tension problems is essential for achieving consistent stitch quality.
| Tension Issue | Dial Direction | Visual Result | Fix Action |
|---|---|---|---|
| Bobbin thread visible on top | Decrease (-) | Tight, puckered stitches | Lower by 0.5-1 |
| Loose, loopy top stitches | Increase (+) | Thread bunching below | Raise by 0.5-1 |
| Balanced stitches | No change | Even lock on both sides | Document setting |
| Automatic tension issues | Manual override | Inconsistent results | Switch to manual mode |
Remember that automatic tension systems can’t read your mind. When balancing top and bottom threads, small tweaks make big differences. Test each adjustment on your actual project fabric before committing to long seams to achieve professional results and ensure even lock on both sides of the fabric.
This process requires patience and attention to detail to master the art of sewing machine tension adjustment and to understand the importance of manual override in certain situations.
Adjusting Bobbin Tension for Even Stitches
Most modern sewing machines use spring-loaded bobbin case types for precise tension adjustment.
When looping bottom thread appears, you’ll need tension testing methods like the drop test – dangle your bobbin case by thread for slow descent.
Turn the small screw clockwise to increase bobbin tension, counterclockwise to decrease.
Match your bobbin thread weight to top thread, ensuring consistent bobbin winding prevents stitch quality issues.
For precise calibration, consider using a TOWA bobbin gauge.
Using a Manual or Digital Tension Dial
Your sewing machine tension dial acts as the control center for perfect stitches. Modern machines offer manual dials or digital presets, each requiring different approaches for ideal results.
Here’s how to master your tension controls:
- Manual Override Systems – Turn the dial in small increments, testing on fabric scraps to find the sweet spot for each project
- Digital Presets – Select fabric-specific settings first, then fine-tune using manual override when sewing different fabrics or adjusting for knits
- Dial Maintenance – Keep tension mechanisms clean and calibrated to prevent tension fluctuations that affect stitch quality
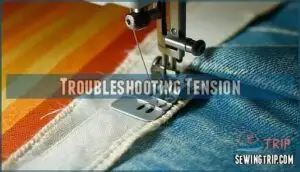
Troubleshooting Tension
Even experienced sewers run into tension headaches when their stitches go wonky. Don’t worry – most tension problems have simple fixes that don’t require a trip to the repair shop.
Common Tension Issues and Solutions
Frustration strikes when your sewing machine tension creates chaos instead of perfect stitches.
Skipped stitches, thread nests, and puckering fabric signal tension problems that need immediate attention. Uneven seams and looping stitches reveal imbalanced sewing machine tension settings.
Most tension issues stem from incorrect threading, lint buildup, or wrong settings for your fabric type.
Before adjusting dials, rethread completely and clean tension discs—this fixes 80% of sewing machine troubleshooting problems instantly, often resolving issues with skipped stitches, thread nests, and puckering fabric, which are commonly caused by imbalanced tension.
Resolving Thread Breakage and Loose Stitches
Thread breakage and loose stitches plague even experienced sewers, but simple fixes restore your machine’s performance. Start with Needle Quality—replace dull needles that cause thread breaks.
Check Thread Quality for fraying or weakness that affects tension problems.
- Clean Tension Discs to remove lint disrupting thread flow
- Inspect Bobbin Issues like improper winding or placement
- Verify proper threading following your sewing machine tension diagram
Regular Machine Maintenance prevents most stitch quality issues before they start.
Maintaining Optimal Tension Through Regular Cleaning
Regular maintenance keeps your sewing machine tension running smoothly.
Lint buildup in tension discs disrupts thread flow, causing tension problems you’ll notice immediately.
Clean these discs weekly using a small brush, removing every speck of debris.
Don’t forget bobbin race cleaning and oiling machine parts monthly.
Replace needles regularly too—dull ones create more tension headaches than you’d expect.
Frequently Asked Questions (FAQs)
Does tension change based on what fabric you use?
Like a chameleon changes colors, your tension dial must adapt to each fabric’s unique personality—lightweight materials need gentler settings while heavyweight fabrics demand stronger tension for perfect stitches.
What tension should I use for stretchy fabrics?
For stretchy fabrics like lycra or jersey, set your tension to 2- This moderate setting maintains the fabric’s flexibility while preventing loose stitches that could weaken seams.
How often should I test tension settings?
Surprisingly, you’ll need to test tension settings every time you switch fabrics, threads, or projects. Even switching from cotton to polyester demands a quick scrap test for ideal results.
Can I use different tensions simultaneously?
You can’t use different tensions simultaneously on a single machine.
Each adjustment affects both threads together. However, you can achieve varied effects by switching tension settings between different project sections.
Creating intentional contrast in your stitching appearance is possible by making these adjustments, allowing for a unique and customized look.
What causes tension to change during sewing?
Several factors cause your machine’s tension to shift mid-project.
Thread type changes, needle wear, lint buildup in tension discs, bobbin running low, fabric thickness variations, and even humidity can throw off your carefully set tension during sewing.
These factors include humidity and other environmental or mechanical issues that affect the sewing process.
Should I adjust tension for seam types?
Different seam types typically don’t require tension adjustments. Your machine’s standard tension setting works for straight seams, French seams, and flat-fell seams.
However, you’ll need looser tension for decorative stitches since they consume more thread and tighter settings for reinforced seams on heavy fabrics.
How do I document successful tension combinations?
I know keeping a notebook seems old-school, but it’s your secret weapon for sewing success.
Record fabric type, thread weight, needle size, and tension dial numbers on index cards.
Test each combination on scraps first, then jot down what works.
Conclusion
Mastering adjusting tension for different fabrics transforms your sewing from frustrating to flawless.
You’ve learned that lightweight fabrics need gentler settings, thick materials require more force, and stretchy knits demand balanced approaches.
Testing on scraps saves time and prevents disappointment.
Remember that proper needle selection and thread quality matter just as much as dial adjustments.
With practice, you’ll instinctively know when tension feels right, creating professional results every time.
- https://sabrinawhartonbrown.wordpress.com/2011/05/23/how-to-get-your-sewing-machine-thread-tension-and-stitch-quality-right/
- https://www.jofamericanscience.org/journals/am-sci/am0904/029_16903am0904_205_210.pdf
- https://www.fortheloveofthread.com/blog/solving-tension-issues-on-your-sewing-machine
- https://www.youtube.com/watch?v=ji786ELirvo
- https://www.magnetichoop.com/blogs/news/thread-weight-guide-master-selection-applications-adjustments

