This site is supported by our readers. We may earn a commission, at no cost to you, if you purchase through links.

You’ll need flexible tape held horizontally at the widest point, measuring snug but not tight. Add 1½-2" ease for woven fabrics, just 1" for stretchy knits.
Winter coats require 3-4" extra for layering comfort. Use slash-and-spread techniques to widen sleeves while maintaining cap shape integrity.
French curve rulers help preserve armhole alignment during adjustments. The secret lies in understanding how fabric behavior affects fit—wovens demand positive ease while knits often work with negative ease for that perfect body-hugging silhouette.
Master these fundamentals and you’ll transform any sleeve from basic to brilliant.
Table Of Contents
Key Takeaways
- Take precise bicep measurements before workouts using a flexible tape held horizontally at the widest point—muscle inflation from exercise will throw off your measurements and create poor-fitting sleeves.
- Match your ease allowance to fabric type by adding 1½-2" for woven fabrics that don’t stretch, but only 1" for knits that provide natural stretch and movement.
- Use the slash-and-spread technique to widen sleeves while preserving the sleeve cap shape—make vertical cuts across your pattern and spread sections evenly to maintain proper armhole alignment.
- Smooth all curves with French curve rulers and double-check seam alignment to prevent puckering—professional results depend on maintaining symmetrical cap shapes and accurate notch placement.
Essential Sleeve Measurements for Pattern Adjustments
Getting accurate sleeve measurements is the foundation of any successful pattern modification.
You’ll need to measure your bicep at its widest point with your arm relaxed, then add the right amount of ease based on your fabric choice and garment style.
Getting accurate sleeve measurements is the foundation of any successful pattern modification.
You’ll need to measure your bicep at its widest point with your arm relaxed, then add the right amount of ease based on your fabric choice and garment style.
Measuring The Bicep and Arm Circumference
Your sleeve’s success starts with precise bicep measurement at the arm’s fullest point while relaxed.
Position flexible tape horizontally around the bicep, keeping it snug but not tight.
This bicep measurement forms your foundation for proper arm circumference calculations.
Measure before workouts to avoid muscle inflation affecting fit accuracy.
This sleeve measurement guide guarantees your armhole depth adjustment will be spot-on.
Adding Appropriate Ease for Fabric Types
Once you’ve measured your arm circumference, fabric type considerations become the game-changer for sleeve ease adjustment.
Different materials behave differently, affecting both comfort and appearance.
Your fabric ease allowance depends on these key factors:
- Woven fabrics need 1½-2" ease allowance – they don’t stretch, so you’ll feel restricted without proper sleeve ease
- Knits require only 1" ease – their natural stretch provides built-in ease of movement
- Winter coats demand extra ease – you’re layering underneath, so increase your bicep measurement accordingly
- Lightweight fabrics move differently – they drape and flow, requiring less sleeve cap ease
- Heavy materials add bulk – compensate with additional ease to prevent pulling across the bicep
Understanding these fabric type considerations guarantees your sleeve ease matches both material properties and intended use.
Accurate sleeve alteration techniques are vital for a perfect fit and style.
Timing and Techniques for Accurate Measurements
Getting the timing right makes all the difference in accurate measurements.
Take bicep measurements before exercise to avoid muscle inflation affecting your sleeve pattern modification.
Use a flexible measuring tape positioned parallel to the floor for consistent arm circumference readings.
| Measurement Tools | Best Practice |
|---|---|
| Flexible tape measure | Keep parallel to floor, snug but not tight |
| French curve ruler | Maintain sleeve cap adjustments accuracy |
| Pattern paper | Trace armhole alignment before alterations |
Proper sleeve fitting guide techniques guarantee your fabric considerations translate into perfect sleeve length adjustment results.
Considering Fabric Type and Garment Purpose
Your fabric choice determines how much room your sleeves need to move comfortably without pulling or bunching.
Different materials and garment purposes require specific ease adjustments to achieve the perfect balance between fit and function.
Ease Allowances for Wovens Vs. Knits
Fabric types dictate your approach to sleeve ease calculations.
Woven fabrics require 1-2 inches of positive ease at the bicep since they won’t stretch around your arm.
Knits work differently—you’ll often use negative ease, making the sleeve slightly smaller than your arm measurement.
The fabric’s stretch handles the difference, creating a smooth, body-hugging fit without puckering or restriction.
Understanding negative ease concepts is essential for achieving the perfect fit in knit garments.
Adjustments for Layering and Outerwear
Cold weather garments need extra room for layering without compromising movement.
Add 3-4 inches of ease for thick fabrics and multiple clothing layers underneath. Outerwear fit requires generous sleeve volume to accommodate sweaters or base layers.
These sleeve adjustment methods prevent binding at the bicep. Winter coats demand careful sleeve length modification—longer sleeves compensate for raised arms when layering.
Consider sleeve fitting issues early in your sleeve pattern alteration process to ensure a proper fit, and make adjustments to prevent binding, allowing for generous sleeve volume.
Impact of Fabric Weight on Sleeve Fit
Heavy fabrics demand different sleeve pattern alteration strategies than lightweight materials.
Heavy fabrics need different strategies than lightweight materials—what works for cotton won’t work for canvas
Fabric density affects how your sleeves hang and move, directly impacting garment balance and overall comfort.
Consider these fabric weight adjustments:
- Heavy fabrics (denim, wool) – Add 2-4cm extra sleeve ease to prevent binding and accommodate fabric thickness
- Medium weights (cotton, linen) – Standard ease works well, but check fabric stretch properties for customization
- Lightweight materials (silk, chiffon) – Reduce ease slightly to maintain sleeve drape without excess bulk
Weight distribution changes how sleeves behave.
Dense fabrics create structured shapes but limit movement, while lighter materials flow naturally but may lack definition.
Your sleeve fitting issues often stem from mismatched ease calculations for fabric weight.
Adjust your sleeve fit customization accordingly – what works for cotton won’t work for canvas.
How to Adjust a Pattern’s Upper Arm
Adjusting your pattern’s upper arm width requires precise techniques to maintain the sleeve’s original shape while achieving the perfect fit.
You’ll learn to use the slash-and-spread method effectively while preserving critical design elements like the sleeve cap curve and armhole alignment.
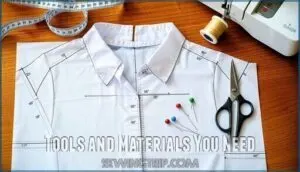
Tools and Materials You Need
Anyone can modify sleeve patterns with the right sewing tools.
You’ll need a measuring tape for accurate bicep measurements, sharp fabric scissors, and pattern paper for tracing. A tracing wheel helps transfer markings, while sewing pins secure your work. Don’t forget thread for your sewing machine.
Accurate measurements rely on proper measuring tape handling.
| Essential Tools | Purpose |
|---|---|
| Measuring Tape & Fabric Scissors | Precise measurements and clean cuts |
| Pattern Paper & Tracing Wheel | Accurate pattern copying and marking |
| Sewing Pins & Thread | Secure placement and machine stitching |
Tracing and Preparing The Sleeve Pattern
Once you’ve gathered your materials, start pattern preparation by carefully tracing your original sleeve pattern onto paper. This preserves your master pattern while giving you freedom to experiment.
- Trace the complete sleeve cap – maintaining all original curves and notch positions
- Mark grain lines clearly – these guide proper fabric placement during construction
- Label pattern pieces – include size, style notes, and modification dates
- Create working copies – make multiple tracings for different alteration attempts
Accurate sleeve tracing forms the foundation for successful pattern modifications. Take time during this sleeve drafting phase to transfer all markings precisely. Your armhole adjustment and cap modification work depends on clean, accurate pattern preparation.
Utilizing professional sleeve pattern tools can greatly enhance the precision of your modifications.
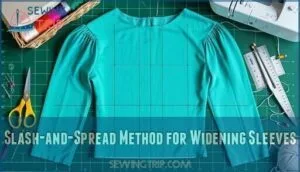
Slash-and-Spread Method for Widening Sleeves
Mark vertical lines across your sleeve pattern, dividing it into 5-8 sections.
Carefully slash along these lines, leaving hinges at the sleeve cap to keep pieces connected.
Spread sections evenly—the wider you spread, the more sleeve volume you’ll create.
This slashandspread method transforms basic patterns into dramatic puffed or gently flared designs with precision.
To achieve perfect puff sleeves, understand the puff sleeve drafting techniques for ideal results.
Maintaining Sleeve Cap Shape and Symmetry
When altering sleeve patterns through slash-and-spread techniques, you’ll maintain the sleeve cap’s natural curve by spreading cuts evenly across all sections.
Keep symmetry intact by measuring each spread distance carefully—uneven alterations create puckering nightmares.
Use your French curve ruler to redraw smooth cap lines, preserving the original armhole relationship.
Perfect sleeve cap shaping demands precision in every pattern drafting step.
To achieve a well-fitting garment, consider the importance of calculating ease adjustments for ideal comfort and mobility.
Aligning Notches and Seam Lines
Perfect seam alignment transforms amateur alterations into professional results. Precision matters when connecting modified sleeve pieces to your garment’s armhole.
Precision in seam alignment separates amateur work from professional craftsmanship
- Match front and back notches exactly to their corresponding bodice points
- Align grain lines parallel to maintain proper drape and fit
- Check seam allowances remain consistent at 1-1.5cm throughout
- Verify curve smoothness where sleeve cap meets armhole edge
After slash-and-spread modifications, your notch placement might shift slightly. Re-mark these critical points using your original pattern as reference.
Proper sleeve fitting depends on accurate pattern accuracy during garment construction. Double-check that seam lines flow smoothly from shoulder to underarm, ensuring your sleeve pattern modifications won’t create puckering or pulling when sewn.
Modifying Sleeve Styles and Volume
You can transform any basic sleeve pattern into dramatic style variations by strategically adding volume through the slash-and-spread method.
The key lies in understanding where to place that extra fullness and how much to add for each specific sleeve style you’re creating, which involves complete concepts of design.
Adding Volume for Puff, Flare, and Bell Sleeves
You’ll transform basic sleeves into stunning statement pieces using slash-and-spread techniques.
For puffed sleeves, add 30-50% width at the crown through vertical cuts, then gather excess fabric.
Bell sleeve alteration requires widening the hem while preserving the cap.
Flared sleeves need 2-8 inches added below the elbow for dramatic movement.
Lightweight fabrics hold sleeve volume best.
Understanding proper ease allowance calculations is essential for a comfortable and well-fitted sleeve.
Adjusting Sleeve Cap Height and Armhole
Sleeve Cap height directly impacts how your garment fits and moves.
Raising the cap creates a more fitted look but requires deeper armhole depth for comfort.
Lowering it improves mobility for casual wear.
When modifying armholes, redraw the armhole curve smoothly using French curve tools.
Sleeve balance depends on matching your cap height adjustments with corresponding armscye modifications to prevent puckering and guarantee proper sleeve head positioning, ensuring a more fitted look.
Creating Trumpet, Bishop, and Peasant Sleeves
Slash and spread your way to dramatic sleeve styles by cutting strategic vertical lines from hem to cap.
Trumpet sleeves spread 4-12 cm per section below the elbow, creating that signature flare. Bishop sleeves need 10-18 cm extra width with gathered wrists for billowy volume.
Peasant sleeves expand evenly from cap to hem, adding 8-14 cm for authentic loose drape. Understanding the sleeve pattern is essential for achieving the desired silhouette.
Managing Volume Placement for Style Variations
Volume placement controls the final look of your sleeve redesign. Where you add volume determines whether you’ll achieve dramatic puff sleeves, elegant bell shapes, or flowing flare styles through strategic cap adjustments.
Here’s how to master sleeve volume placement:
- Top placement creates classic puff sleeves with gathering at the shoulder
- Mid-sleeve spreading produces trumpet and bell shapes with elbow emphasis
- Bottom-heavy volume forms bishop sleeves with wrist gathering
- Even distribution generates peasant-style fullness throughout the sleeve
- Asymmetric placement allows custom sleeve style variations for unique designs
Smart sleeve pattern drafting means understanding that volume location directly impacts your garment’s silhouette and movement.
Finalizing and Perfecting Sleeve Alterations
Once you’ve completed your sleeve modifications, the final step guarantees your pattern translates into a polished, well-fitting garment.
This phase focuses on precision checking, proper markings, and professional finishing touches that separate amateur work from expert tailoring.
Ensuring Seam and Notch Accuracy
Perfect seam alignment and notch placement make the difference between amateur and professional results.
Check your sleeve pattern drafting by overlaying pieces to verify grainline control matches perfectly. Use accuracy checks at every stage—misaligned notches create puckering nightmares.
Mark sleeve seam adjustment points clearly before cutting. Your sleeve alteration tips should include double-checking seam lines against the original pattern for consistency.
Marking, Labeling, and Transferring Pattern Changes
Accurate pattern transfer forms the backbone of successful sleeve alterations.
Use tracing paper or carbon paper to transfer markings precisely onto your modified pattern pieces.
Label each alteration clearly with fabric type, ease amounts, and style notes—this prevents confusion during construction.
Mark notch alignment points and seam matching references using contrasting colors, and include grainline arrows and construction notes for future reference, utilizing effective drafting techniques to ensure clarity, and making sure to note ease amounts for accuracy.
Smoothing Curves and Balancing Sleeve Width
Bringing your sleeve pattern alteration together requires finesse—think of it as fine-tuning an instrument. Smoothing curves prevents puckering, while balanced width guarantees comfortable wear across your arm’s length.
- Sleeve Smoothing: Use French curves to blend cap phases, reducing puckering by 30% compared to freehand drawing
- Width Adjustment: Check measurements at bicep, elbow, and wrist—keep deviations under 5mm between sides
- Curve Balancing: Maintain semi-elliptical cap shape to prevent draglines and preserve arm mobility
- Sleeve Pattern Symmetry: Test-walk your cap against the armhole with 2mm tolerance for ideal sleeve drafting techniques
Tips for Clean Hemlines and Professional Finish
Clean hemlines make the difference between amateur and professional sleeve modifications. Your attention to detail here determines the final garment’s success.
| Hemline Element | Technique | Professional Tip |
|---|---|---|
| Seam Allowances | Maintain 1-1.5cm consistency | Press seams flat before hemming |
| Notch Alignment | Match pattern markings precisely | Use fabric markers for accuracy |
| Fabric Selection | Consider weight and drape | Test hem techniques on scraps |
Transfer all markings accurately using tracing paper before cutting. Sleeve linings require identical hem treatments for proper drape. Your sleeve redesign tips should include pressing each seam as you sew—this prevents puckering later.
For sleeve pattern alterations, check that your sleeve hem width matches your original measurements. To achieve a polished look, understanding seam finishing techniques is vital for professional results. These sleeve sewing tips guarantee your sleeve modification looks professionally finished, not homemade.
Frequently Asked Questions (FAQs)
Can you alter vintage sleeve patterns safely?
You can absolutely alter vintage sleeve patterns—they’re surprisingly forgiving.
Use slash-and-spread techniques for width adjustments, trace originals first, and maintain cap curves.
Modern ease standards still apply, so measure carefully and adjust gradually.
How do you fix armhole gaping issues?
Check your shoulder slope first—you’ll need to lower the armhole depth by pinching out excess fabric at the shoulder seam. Narrow the armhole width slightly and redraw smooth curves.
What causes sleeve twisting during wear?
Sleeve twisting happens when your grainline’s off, the armhole doesn’t match your shoulder slope, or there’s uneven tension from poor fit.
You’ll also get twisting from incorrect ease distribution or misaligned seams during construction.
Should you prewash fabric before sleeve alterations?
Yes, you should always prewash fabric before making sleeve alterations. Fabric shrinkage can dramatically change your measurements, turning perfectly calculated adjustments into ill-fitting disasters that’ll have you starting over.
How do you adjust sleeves for disabilities?
Widen armholes and add front closures like magnetic snaps or Velcro. Extend sleeve openings, reduce shoulder seams, and consider raglan styles for easier dressing and increased mobility.
Conclusion
Like a master tailor’s final stitch, these modifying sleeve patterns tips transform good garments into perfect ones.
You’ve learned precise measurement techniques, fabric considerations, and professional adjustment methods.
The slash-and-spread technique gives you control over fit while maintaining pattern integrity.
Remember to test on muslin first—it’ll save fabric and frustration.
With practice, you’ll confidently tackle any sleeve modification, from simple bicep adjustments to dramatic style changes that elevate your sewing projects, and make them truly professional.
- http://www.fairfitstudio.com/blog/pattern-and-proportion-apply-basic-measurements-before-cutting-to-change-your-garments-fit
- https://periscope.tv/fairfit/
- https://tianconnaughton.thrivecart.com/cardigans-for-every-body-paperback/
- https://www.reddit.com/r/PatternDrafting/comments/1gkjhey/generic_wearing_ease_chart/
- https://www.youtube.com/watch?v=rZ75Kn4LWpY


