This site is supported by our readers. We may earn a commission, at no cost to you, if you purchase through links.
Use fine-tipped micron pens and lightweight tracing paper to capture main outlines. Water-soluble pens let you draw directly on fabric for instant visualization.
Self-adhesive wash-away stabilizers eliminate tedious manual tracing steps. For digital patterns, vector graphics software creates scalable designs that maintain crisp lines at any size.
Mix elements from different sources to create unique hybrid patterns. The secret lies in simplifying complex details and focusing on elements that translate beautifully into thread—turns out there’s a specific technique for choosing which lines to trace and which to ignore, allowing for beautifully into thread creation.
Table Of Contents
- Key Takeaways
- Steps to Create Custom Embroidery Patterns
- Essential Tools and Materials for Pattern Making
- Manual Pattern Drawing and Transfer Methods
- Combining and Customizing Pattern Elements
- Digital Tools for Embroidery Pattern Design
- Creating Scalable Vector Embroidery Patterns
- Converting Images to Embroidery-Ready Files
- Top Free and Advanced Embroidery Design Tools
- Trends and Tips for Modern Pattern Makers
- Frequently Asked Questions (FAQs)
- Conclusion
Key Takeaways
- You can transform any photo, sketch, or doodle into embroidery patterns using simple tracing techniques with fine-tipped pens and lightweight paper, or by drawing directly on fabric with water-soluble markers.
- Digital tools give you professional scalability – vector graphics software like Inkscape (free) or Adobe Illustrator lets you create patterns that resize perfectly without losing quality, plus export machine-ready files.
- Start simple and focus on essential lines – strip away complex details that won’t translate well to thread, keeping only the main outlines and shapes that’ll create clean, stitchable designs.
- Mix elements from different sources to create unique hybrid patterns – combine a flower from one photo with a border from another design, then adjust the style to match your personal vision.
Steps to Create Custom Embroidery Patterns
Creating custom embroidery patterns starts with selecting your design source and transforming it into stitch-ready artwork.
You’ll need to simplify complex images by focusing on essential lines and removing unnecessary details that could confuse your stitching process, which involves working with complete concepts.
Strip away clutter—focus on the essential lines that truly matter for perfect stitches
Choosing a Design Source
Your journey into custom embroidery patterns starts with picking the right design source.
You’ll discover inspiration everywhere once you know where to look. Photo inspiration from nature shots works perfectly for beginners practicing sketch techniques.
- Photo Inspiration: Use personal photos, stock images, or Pinterest finds as your foundation for embroidery pattern creation
- Sketch Techniques: Start with simple pencil drawings or trace existing artwork to develop your embroidery design studio skills
- Doodle Art: Transform random sketches and margin drawings into professional digital embroidery patterns through image editing
Design resources like coloring books and online galleries offer endless possibilities for your embroidery pattern maker toolkit.
Transforming Photos, Sketches, and Doodles
Once you’ve chosen your design source, transforming it into an embroidery-ready pattern requires strategic photo tracing and sketch simplification.
Start by identifying the main outlines in your doodle art or photograph. Use fine-tipped micron pens to trace these primary lines onto trace paper.
This line drawing process converts complex images into clean patterns perfect for embroidery digitization and pattern conversion, resulting in a design that is ready for further use.
Simplifying for Stitch Clarity
Once you’ve captured your design’s essence, focus on line simplification and design refining.
Strip away unnecessary details that complicate embroidery pattern transfer. Keep main outlines and directional guides for thread management.
For example, a bird needs its basic shape and color boundaries—not every feather stroke.
This stitch optimization creates embroidery pattern clarity while maintaining embroidery pattern smoothness for flawless pattern clarity, which is essential for design refining.
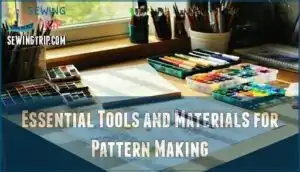
Essential Tools and Materials for Pattern Making
You’ll need the right tools to transform your creative ideas into clean, transferable embroidery patterns.
The basic essentials include fine-tipped pens for tracing, lightweight papers for transfers, and specialized markers that wash away after stitching.
These tools will help you create the patterns you need for your embroidery projects.
Fine-Tipped Pens and Trace Paper
Fine-tipped micron pens deliver the precision you need for clean embroidery pattern tracing.
Perfect precision starts with the right pen—micron tips transform rough sketches into stitch-ready masterpieces
These artist’s tools create sharp lines that won’t smudge or bleed through lightweight trace paper.
- Pen Techniques: Use 0.3mm to 0.5mm tips for main outlines and design elements
- Paper Types: Choose translucent tracing paper that allows clear visibility of underlying sketches
- Line Drawing: Focus on essential contours while skipping excessive detail that complicates stitching
This combination transforms rough sketches into refined embroidery pattern design templates ready for fabric transfer.
The quality of fine tipped pen sets can substantially impact the overall design accuracy.
Water-Soluble Pens and Carbon Paper
When confidence runs high, Water Pens offer direct Canvas Drawing on fabric.
These disappearing ink tools eliminate transfer steps entirely.
Carbon Tracing provides backup precision—place carbon paper between pattern and fabric, then trace with a stylus.
Both Transfer Methods excel for embroidery pattern tracing.
Water-soluble Pen Tips vanish with moisture, while carbon creates permanent guidelines for complex embroidery pattern design projects.
Using the best carbon paper tools guarantees accurate and efficient pattern transfer for embroidery designs.
Self-Adhesive Wash-Away Stabilizers
Self-adhesive wash-away stabilizers streamline embroidery pattern making by eliminating manual tracing steps.
These innovative materials combine stabilizer support with built-in adhesive backing for direct pattern transfer onto fabric.
Here’s how to use wash-away stabilizers effectively:
- Print your vector image directly onto the stabilizer surface
- Peel away backing and position on your embroidery fabric
- Stitch through both layers following your printed pattern lines
- Dissolve remaining stabilizer using warm water rinse
Different stabilizer brands offer varying adhesive strength levels for fabric compatibility. Choose lighter adhesive for delicate materials and stronger versions for heavy fabrics.
Understanding the proper stabilizer usage techniques is essential for achieving professional results.
Manual Pattern Drawing and Transfer Methods
Manual pattern transfer methods give you complete creative control over your embroidery designs. You’ll work directly with your hands to create precise patterns that capture every detail you envision.
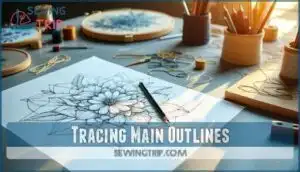
Tracing Main Outlines
Tracing brings your sketches to life through careful line refinement.
Place lightweight trace paper over your original drawing and use fine-tipped micron pens to capture essential outlines.
Focus on main shapes while eliminating unnecessary details that complicate stitching, this Outline Techniques approach creates clean vector image foundations.
Proper Tracing Tools and Line Simplification transform rough sketches into professional embroidery pattern designs ready for Canvas Preparation.
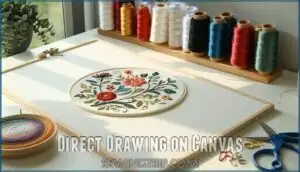
Direct Drawing on Canvas
Canvas Tracing becomes even more streamlined when you draw your embroidery pattern design directly onto fabric.
Water Soluble pens let you sketch without worry since marks disappear after washing. This Direct Stitch method works best for experienced crafters who trust their artistic instincts.
Canvas Prep involves choosing smooth fabric that won’t snag your Fine Tips pen.
Three game-changing benefits of direct canvas drawing:
- Skip transfer steps – your design flows straight from imagination to fabric
- Perfect placement control – adjust spacing and proportions as you work
- Instant visualization – see exactly how your finished piece will look
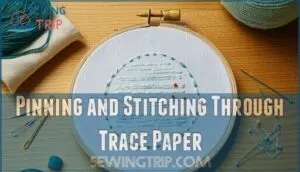
Pinning and Stitching Through Trace Paper
This method works great when you need flexible positioning.
Pin your traced design onto your fabric using small pins around the edges.
Make sure your Fabric Choice can handle pins without damage.
Focus on Stitch Alignment by keeping the trace paper flat against your canvas.
Use quality Paper Selection – lightweight trace paper won’t tear easily during stitching.
Apply Pinning Techniques that secure corners first, then sides.
This embroidery pattern tracing method lets you stitch directly through both layers, creating perfect hand embroidery patterns.
Understanding traditional hand stitching patterns is essential for achieving professional-looking results.
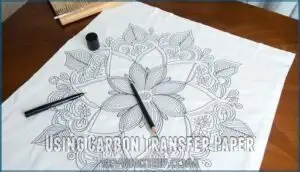
Using Carbon Transfer Paper
Carbon transfer paper offers precise pattern placement without guesswork.
Place transfer paper face-down on fabric with your design on top. Use a stylus or pen cap to trace firmly along design lines.
- Paper Types: Choose graphite or colored transfer paper based on fabric color
- Stylus Tips: Ball-point stylus creates consistent pressure for clean lines
- Transfer Techniques: Work from center outward to prevent paper shifting
- Tracing Methods: Apply steady pressure while following pattern contours exactly
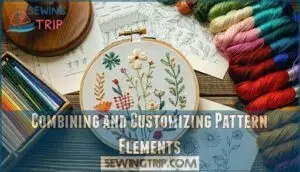
Combining and Customizing Pattern Elements
You can create truly unique patterns by mixing elements from different designs and adjusting them to match your personal style.
Reference books and pattern libraries provide endless inspiration for combining motifs, borders, and decorative elements into something entirely your own, allowing you to create truly unique patterns and adjust them to match your personal style.
Mixing Multiple Designs
You can create stunning embroidery patterns through Design Fusion by combining elements from different sources.
Pattern Blending allows you to merge a flower from one design with a bird from another. This Style Mixing approach produces unique Hybrid Embroidery pieces that reflect your creative vision.
| Source Type | Element to Extract |
|---|---|
| Nature photos | Leaf shapes and textures |
| Children’s drawings | Simple line structures |
| Vintage patterns | Border and frame details |
| Modern graphics | Geometric shapes |
| Cultural motifs | Traditional symbols |
Use embroidery pattern software or vector image tools for Element Combination. Start by importing multiple designs into your embroidery pattern editing program. Select specific components from each pattern and arrange them on a new canvas.
This embroidery pattern combining technique creates personalized designs that stand out from standard templates, allowing for a high degree of creative control and personal expression.
Adjusting for Unique Style
Personal touch transforms basic embroidery patterns into signature artwork.
You’ll add custom details by adjusting line thickness, incorporating unique themes, and experimenting with style variations.
Scale your vector image elements to emphasize focal points.
Mix embroidery techniques like French knots with satin stitches for artistic flair.
These pattern editing choices create distinctive embroidery design that reflects your creative vision perfectly.
Using Reference Books and Libraries
Reference materials reveal new possibilities for embroidery pattern making beyond your personal sketches.
Library research opens doors to centuries of design inspiration waiting to be adapted.
Smart resource hunting yields the best results:
- EGA Study Boxes – Access cultural embroidery techniques and traditional samplers for authentic pattern elements
- Antique Pattern Library – Find historical designs perfect for embroidery pattern vectorization and modern updates
- Adult coloring books – Discover detailed line drawings from artists like Johanna Basford that translate beautifully into embroidery designs
These pattern archives provide design references you can trace directly onto your canvas or scan for vector image conversion.
Digital Tools for Embroidery Pattern Design
When you move beyond hand-drawn sketches, digital tools transform your embroidery pattern creation with precision and endless possibilities.
You’ll discover software options that turn rough ideas into professional patterns you can resize, edit, and share effortlessly, utilizing endless possibilities.
Vector Graphics Software Overview
Vector graphics software transforms your sketches into professional embroidery patterns.
These programs use mathematical paths instead of pixels, creating clean lines that scale perfectly for any project size.
Leading options include Adobe Illustrator for professionals and free alternatives like Inkscape for beginners.
| Software | Best For | Key Features |
|---|---|---|
| Adobe Illustrator | Professional designers | Advanced vector editing, precision tools, industry standard |
| Inkscape | Budget-conscious creators | Open-source, embroidery extensions, multi-format support |
| CorelDRAW | Commercial embroidery | Native machine compatibility, specialized plug-ins |
| Affinity Designer | Small studios | Cross-platform, affordable, robust drawing tools |
| GIMP | Image conversion | Free raster editing, basic vectorization capabilities |
Free and Paid Software Options
Today’s embroidery software landscape offers solutions for every budget and skill level.
You’ll find powerful free options alongside professional-grade paid platforms that can transform your pattern making workflow.
- Free Options: Ink/Stitch provides full digitizing capabilities through Inkscape, while My Editor offers basic design editing and file conversion
- Budget-Friendly Paid: Embrilliance Essentials ($149) delivers cross-platform compatibility with modular upgrades for growing creators
- Professional Software: Wilcom Embroidery Studio ($3,499+) and Hatch Embroidery offer industry-standard digitizing with Adobe Illustrator integration
- Subscription Models: Hatch’s flexible pricing starts at $1.50/day, making premium embroidery design software accessible for small businesses
Choosing the right software often involves exploring free embroidery tools to find the best fit.
Choose based on your needs and budget constraints.
Importing and Layering Images
Most embroidery software handles image editing through drag-and-drop importing.
Start by scanning your photo or sketch at 300 DPI for crisp vector conversion. Create separate layers for different pattern elements like outlines and fill areas.
Adjust opacity between layers to trace underlying images effectively. This layer management approach streamlines design optimization and makes embroidery pattern importing much more manageable for beginners, allowing for crisp vector conversion.
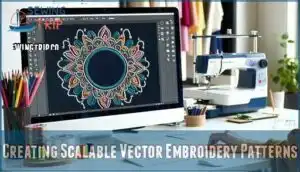
Creating Scalable Vector Embroidery Patterns
When you’re ready to create professional-quality embroidery patterns, vector graphics give you the precision and scalability that pencil sketches can’t match.
You’ll be able to resize your designs without losing clarity and export them in formats that work perfectly for both personal projects and commercial use, utilizing the precision to achieve high-quality results.
Drawing and Manipulating Lines and Nodes
Precision matters when crafting vector embroidery patterns.
Node editing transforms rough sketches into smooth, stitch-ready designs. You’ll adjust anchor points to create clean curves and straight lines that translate perfectly to fabric.
- Select nodes individually to fine-tune specific curve sections and eliminate jagged edges
- Use bezier handles to control curve direction and create natural flowing lines
- Delete unnecessary nodes to simplify paths while maintaining shape integrity
- Convert sharp corners to smooth curves using node type tools
- Snap to grid for precise alignment and consistent spacing between elements
Organizing and Grouping Elements
After mastering line and node control, smart organization transforms chaotic designs into professional patterns.
Group related elements like petals or leaves to move entire sections together.
Use layers to separate background from foreground details.
This prevents accidental edits and speeds up your workflow substantially.
| Organization Task | Before Grouping | After Grouping |
|---|---|---|
| Moving flower petals | Select 12 individual nodes | Click once, move entire flower |
| Changing leaf colors | Edit each leaf separately | Update all leaves simultaneously |
| Resizing pattern sections | Adjust multiple elements | Scale grouped section together |
| Creating symmetrical designs | Mirror each element manually | Duplicate and flip entire groups |
Element Sorting keeps your workspace clean.
Layer Organization separates complex designs into manageable sections.
Object Grouping speeds up embroidery pattern editing skills.
Design Hierarchy helps you understand which elements sit on top.
Node Management becomes easier when similar shapes work together.
This embroidery pattern organization approach creates better embroidery pattern symmetry and cleaner embroidery pattern grouping across all embroidery pattern layers, using layers to separate background from foreground details, and Element Sorting to keep the workspace clean, while Design Hierarchy helps in understanding the pattern, and smart organization makes the design process more efficient.
Exporting in Printable Formats
Once you’ve organized your pattern elements, the final step transforms your digital artwork into a physical template.
Proper file formats and print settings guarantee your patterns translate perfectly from screen to fabric.
- EPS and PDF formats preserve vector scalability without quality loss during enlargement
- JPEG exports require 300 DPI minimum resolution for crisp embroidery pattern printing
- Color management settings maintain thread color accuracy between monitor and printed output
- Print settings should specify actual size measurements to avoid scaling confusion
- Output resolution determines pattern clarity when transferring to stabilizers or fabric
Converting Images to Embroidery-Ready Files
Once you’ve created your design, you’ll need to convert it into a format your embroidery machine can read.
This process transforms your artwork into precise stitch instructions that tell the machine exactly where to place each thread.
Using Auto-Digitizing Features
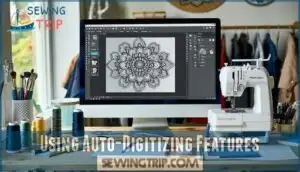
Auto digitizing transforms your images into embroidery-ready files with minimal effort.
This vector conversion technology analyzes your artwork and generates stitch paths automatically.
Most software achieves 85% accuracy with flat vector art but struggles with complex photos.
You’ll need stitch editing after auto trace conversion.
Design optimization requires adjusting density settings and color stops for professional results.
Manual Versus Automatic Tracing
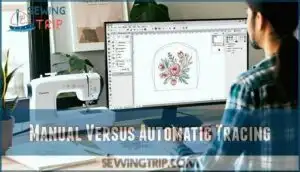
Two tracing methods exist for converting designs into embroidery patterns.
Manual drawing gives you complete control over every line and stitch placement. You’ll trace each element by hand using vector software tools.
Automatic conversion uses software to scan your image and generate vector paths instantly. While auto trace saves time, it often creates messy results that need extensive cleanup.
Manual drawing takes longer but delivers superior design accuracy and stitch precision for professional embroidery tutorials.
File Formats for Embroidery Machines
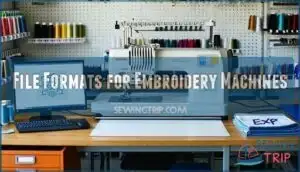
Your machine needs specific file formats to read your designs.
DST files work with most commercial machines while PES format suits Brother models.
EXP conversion handles Melco systems perfectly.
Each embroidery code tells your machine exactly where to stitch.
Digital stitching software exports these embroidery pattern formats automatically.
Convert your vector image to EPS first for clean embroidery pattern scaling and precise embroidery pattern scanning.
Top Free and Advanced Embroidery Design Tools
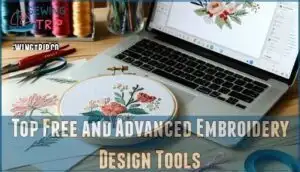
You’ll find dozens of free and paid tools that can transform your sketches into professional embroidery patterns without breaking the bank.
These digital platforms range from simple cross-stitch generators to sophisticated software that handles everything from auto-digitizing to machine file exports, providing a comprehensive solution for embroidery design needs.
Cross-Stitch Pattern Generators
Cross-stitch pattern generators transform your favorite photos into stitchable masterpieces with just a few clicks.
These tools handle the heavy lifting of color conversion and thread matching while you focus on creative choices.
- Stitch Fiddle offers drag-and-drop pattern design with 400+ thread colors
- MyPhotoStitch converts images into ready-to-stitch patterns with automated sizing
- Pixel Stitch provides instant photo-to-pattern conversion with customizable stitch counts
Most generators support image tracing from JPG and PNG files, automatically creating vector images suitable for embroidery pattern making.
The use of a Cross Stitch Generator can greatly simplify the design process for beginners.
Open-Source Digitizing Platforms
Breaking free from proprietary constraints, open-source digitizing platforms offer full control over your embroidery pattern design process.
These InkScape Tools and similar vector conversion software let you craft custom patterns without licensing fees.
| Platform | Key Features | Best For |
|---|---|---|
| Ink/Stitch | SVG to embroidery files | Vector image conversion |
| Embroidermodder | Full digitizing suite | Advanced embroidery coding |
| TurtleStitch | Block-based programming | Learning digitizing techniques |
Open source software democratizes professional embroidery digitizing.
You’ll find extensive embroidery tools that rival expensive commercial options while maintaining complete creative freedom.
This allows for full control over the design process, making it ideal for those who value flexibility and customization in their embroidery work.
Mobile and Cloud-Based Design Apps
If you’re ready to level up from open-source platforms, Mobile Apps and Cloud Stitching put the embroidery pattern design process in your pocket.
With Design Sync and Pattern Share, you can auto digitize sketches and access embroidery pattern resources anywhere.
These embroidery tools make vector image edits easy and support embroidery pattern learning for beginners and pros who want real-time control.
Trends and Tips for Modern Pattern Makers
Today’s pattern makers have access to AI-powered tools that can generate stitch-ready designs in seconds and automatically adjust thread tension for cleaner results.
You’ll also find cloud-based platforms that let you collaborate with other designers and access your patterns from anywhere, making it easier than ever to create professional embroidery patterns whether you’re working solo or with a team.
This allows for greater flexibility and convenience, as you can work on your designs from anywhere.
AI and Automation in Pattern Design
Modern embroidery software uses AI Design and Automation Tools to transform your sketches into stitch-ready patterns in minutes.
These systems analyze your artwork and suggest ideal thread paths, reducing manual digitizing time by 80%. Machine Learning algorithms detect fabric types and adjust Pattern Optimization automatically, while Digital Stitching preview shows exactly how your custom embroidery designs will look before production.
The use of AI embroidery systems enables efficient and precise embroidery production.
- Auto-digitizing converts photos to machine embroidery designs instantly
- Real-time error detection prevents thread breaks and misaligned stitches
- Smart density adjustment reduces thread usage by 35% without quality loss
- AI suggests color palettes based on your vector image input
Collaborative and Cloud-Based Tools
Cloud-based tools transform your embroidery pattern workflow by enabling seamless team collaboration across different locations.
You can share custom embroidery designs instantly and work together in virtual workspaces.
These online platforms store your vector images securely while multiple team members edit patterns simultaneously.
Utilizing pattern making software is essential for efficient embroidery design creation.
Cloud design platforms reduce revision cycles by 40% compared to traditional desktop software.
Your embroidery pattern making becomes more efficient when team members access files from any device.
| Feature | Benefit | Popular Tools |
|---|---|---|
| Real-Time Editing | Multiple designers work together | iDigitize, PulseCloud |
| File Sharing | Instant pattern distribution | Chroma Plus, Happy Embroidery |
| Version Control | Track changes and revisions | Ink/Stitch, Cloud Storage |
File sharing eliminates email attachments and version confusion, making the workflow more efficient and streamlined.
This results in a more productive team and better collaboration across different locations.
Choosing The Right Method for Your Needs
Your pattern selection depends on your project goals and skill level. Hand sketching works for personal projects while vector images suit commercial use.
Consider these factors when making technique evaluation:
- Time investment – Manual methods take longer but offer complete creative control
- Design complexity – Simple patterns work with any method while intricate designs need digital tools
- End use – One-time projects don’t require custom embroidery services or professional software
- Budget constraints – Free options exist for every approach from basic sketching to advanced digitizing
Method comparison reveals that beginners should start with trace paper and fine-tipped pens. Advanced users benefit from tool choices like Inkscape for vector creation.
Match your embroidery pattern making approach to your specific embroidery design services needs.
Frequently Asked Questions (FAQs)
How much does professional embroidery pattern digitizing cost?
Turnaround times of 2 to 6 hours for commercial operations show demand’s hot.
Professional embroidery digitizing costs range from $15 to $30 per design for standard logos.
Complex designs can reach $200+ depending on detail level and stitch count.
What fabric types work best for custom patterns?
You’ll get crisp results with tightly woven cotton, linen, or cotton blends. These fabrics hold their shape while stitching and won’t pucker. Avoid stretchy materials like jersey.
Can I sell patterns I create from photos?
Yes, you can sell patterns created from your own photos.
However, avoid using copyrighted images, trademarked logos, or photos containing recognizable people without permission.
Your original photographs become your intellectual property for pattern creation and commercial use.
How do I fix common pattern transfer mistakes?
You can fix blurred transfers by using a sharp pencil or stylus with firm pressure.
Clean smudged carbon paper between uses.
For misaligned designs, use registration marks and tape your materials securely before tracing.
Whats the difference between hand and machine patterns?
Machine embroidery captures 60-70% of market share compared to hand embroidery.
You’ll find machine patterns use precise digitized files with stitch counts and thread specifications, while hand patterns rely on simple line drawings and color guides for manual stitching flexibility, which allows for manual stitching.
Conclusion
Mastering custom embroidery pattern making opens endless creative possibilities for your stitching projects.
You’ve learned essential techniques from photo transformation to digital vector creation. These methods let you turn any inspiration into beautiful threadwork.
Start with simple designs and gradually tackle complex patterns as your skills develop. Remember that practice perfects your pattern-making abilities.
Whether you choose manual tracing or digital tools, you’ll create unique designs that reflect your personal style and vision. You will develop a unique ability to turn any inspiration into beautiful threadwork.
- https://egausa.org/5-ways-to-design-your-own-embroidery-patterns/
- https://www.needlenthread.com/2017/08/how-to-make-printable-hand-embroidery-patterns.html
- https://www.digitizingusa.com/showblog/FACTS-AND-FIGURES-ABOUT-EMBROIDERY-DIGITIZING
- https://www.precedenceresearch.com/embroidery-machine-market
- https://maggieframestore.com/blogs/maggieframe-news/2025-machine-embroidery-design-mastery-from-digital-libraries-to-commercial-success

