This site is supported by our readers. We may earn a commission, at no cost to you, if you purchase through links.
You’ll know it’s time when threads start shredding or you hear unusual popping sounds from your machine. Heavy fabrics like denim require more frequent changes after each project.
Insert needles with the flat side facing back and dispose of old ones safely in sharps containers.
These machine needle replacement tips guarantee smooth stitching and protect your equipment. Smart sewers also match needle types to their fabric weight for even better results, ensuring a good sewing time.
Table Of Contents
Key Takeaways
- You’ll save time and money by replacing your needle every 8-10 hours of sewing or after each heavy fabric project to prevent thread breaks and skipped stitches.
- You’ll know it’s replacement time when you hear popping sounds, see thread shredding, or notice fabric snags along your stitch line.
- You’ll get professional results by matching needle size to your fabric weight – use 60/8-70/10 for lightweight materials and 100/16-110/18 for heavy fabrics like denim.
- You’ll protect your machine and ensure safety by inserting needles with the flat side facing back, securing them properly, and disposing of old needles in sharps containers.
How Often to Replace Machine Needles
You’ll get the best performance from your sewing machine when you replace needles every 8-10 hours of sewing time.
This simple maintenance step prevents thread breaks and keeps your stitches looking professional on every project.
Recommended Replacement Frequency for Different Projects
You’ll want to establish clear project schedules for needle replacement to maintain superior sewing performance.
Change needles after every 8-10 sewing hours or at each new project’s start. Garment construction benefits from fresh needles every two completed pieces.
Quilting and embroidery projects require replacement after each major design. Heavy-duty work needs more frequent replacement intervals to prevent compromised stitch quality.
Understanding needle replacement guidelines is essential for achieving professional results in various sewing tasks, including those that require superior sewing performance and fresh needles for the best outcome.
Impact of Fabric Type on Needle Lifespan
Different fabrics dramatically affect needle lifespan through fabric density and material thickness.
Fabric density and thread count determine how quickly your needle dulls with each stitch
Your needle size selection directly impacts needle wear based on these factors:
- Lightweight fabrics (cotton, linen) – needles last 6-10 hours with proper thread tension
- Heavy materials (denim, canvas) – require needle replacement after each project due to increased friction
- Stretch fabrics (knits) – create unique mechanical stress, demanding project-based changes for perfect thread and fabric compatibility
Understanding proper needle size selection is essential for extending needle lifespan and achieving perfect stitches.
Benefits of Regular Needle Changes for Stitch Quality
By consistently changing your sewing machine needle, you’ll experience dramatically improved stitch consistency and thread quality.
Fresh needle sharpness prevents fabric damage while maintaining proper thread and fabric compatibility.
Regular needle replacement techniques boost sewing efficiency by eliminating tension issues and uneven stitches that compromise your project’s professional appearance, which relies on proper thread.
Professional Maintenance Schedules for Needle Replacement
Professional shops track needle rotation patterns to maximize sewing efficiency.
Smart schedulers replace needles based on project complexity rather than rigid timelines.
This preventive care approach supports machine calibration and equipment optimization.
- Replace needles every 8-10 hours for consistent performance
- Change before starting heavy fabric projects
- Schedule replacements after completing dense material work
- Document needle replacement techniques for team consistency
Professional maintenance schedules prioritize sewing machine maintenance over convenience.
The right needle size and embroidery needle selection becomes second nature with systematic tracking.
This approach ensures that shops can maintain their equipment effectively, leading to better results and longer machine lifespan.
Signs Your Needle Needs Replacing
Recognizing when your needle needs replacement prevents frustrating sewing problems and protects your machine from damage.
You’ll notice several clear warning signs that indicate it’s time to swap out that old needle for a fresh one, and this is crucial for maintaining your sewing machine’s health and preventing damage.
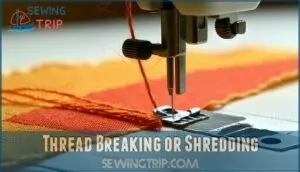
Thread Breaking or Shredding
Thread breaking or shredding signals needle dullness faster than any other warning sign.
When your sewing machine needle becomes dull, it can’t pierce fabric cleanly.
This creates excessive friction that damages thread fibers.
You’ll notice fabric thread splitting or fraying at the needle eye.
Material thickness and sewing speed amplify this problem.
Sharp embroidery needles prevent thread tension issues and fabric fray effectively.
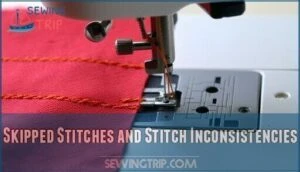
Skipped Stitches and Stitch Inconsistencies
When do you know your sewing machine needle needs attention? Skipped stitches signal a dull or bent needle that can’t penetrate fabric properly.
Watch for these telltale signs:
- Uneven stitch formation – Your fabric shows gaps where stitches should appear
- Inconsistent stitch length – Some stitches appear longer while others bunch together
- Poor thread tension – Fabric puckering occurs despite proper machine settings
- Reduced sewing accuracy – Straight seams become wavy or crooked unexpectedly
A sharp sewing machine needle guarantees consistent stitch quality across all fabric types.
Unusual Noises During Sewing
Listen carefully when your machine starts talking back to you.
Popping sounds and thumping noises signal a damaged needle tip punching through fabric instead of piercing cleanly.
Grinding sounds indicate the needle hitting metal components while clicking sounds suggest loose needle installation.
Squeaking sounds often mean the needle size doesn’t match your fabric thread combination, creating friction in your embroidery machine setup.
Fabric Snags and Visual Needle Inspection
Damaged needles create fabric snags and pulls along your stitch line. Burrs on the needle surface catch fabric threads during stitching. Regular visual inspection prevents costly project damage and maintains smooth embroidery machine setup.
A burr-free needle glides through fabric like butter—inspect yours regularly to maintain that silky-smooth sewing experience
Understanding needle replacement schedules is vital for maintaining peak sewing performance.
- Snag Causes – Burrs, nicks, or bent needle tips grab fabric fibers
- Needle Burrs – Rough spots on needle shaft create thread catches
- Visual Clues – Check for bends, discoloration, or damaged points
- Inspection Tools – Use magnifying glass for detailed needle examination
- Immediate Action – Replace needle when damage appears to prevent further fabric issues
Choosing The Right Needle for Your Project
Selecting the correct needle for your fabric and thread combination guarantees professional results and prevents costly damage to your project.
You’ll need to match needle size to thread weight and fabric density while considering specialty needles for unique materials like leather or stretch fabrics.
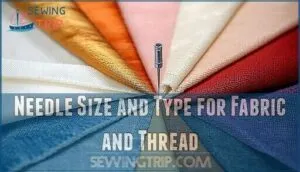
Needle Size and Type for Fabric and Thread
Proper needle size and fabric selection determine your sewing success.
Match your needle size to fabric density and thread weight for ideal results.
Understanding the correct sewing machine needles is essential for achieving professional stitches with the right machine needle types.
| Fabric Type | Needle Size |
|---|---|
| Lightweight silk, chiffon | 60/8 – 70/10 |
| Cotton, polyester blends | 80/12 – 90/14 |
| Denim, canvas | 100/16 – 110/18 |
| Leather, vinyl | 110/18 – 120/19 |
| Knit fabrics | Ballpoint 70/10 – 90/14 |
European needle size appears before the slash, while American needle size follows it.
Needle materials like titanium extend lifespan with synthetic threads.
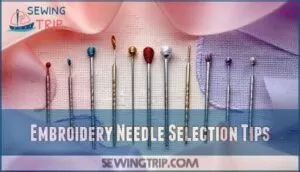
Embroidery Needle Selection Tips
Embroidery machines require specialized needles designed for dense thread patterns and decorative stitching.
Needle Materials like titanium offer durability while chrome-plated Needle Coatings reduce friction. Thread Compatibility depends on matching needle eye size to thread weight for smooth feeding.
- Choose 75/11 or 80/12 European needle size for standard embroidery threads
- Select ballpoint tips for knit fabrics to prevent snags
- Use larger eye openings for metallic or specialty threads
- Match Stitch Density requirements with appropriate needle strength
- Consider Fabric Weave when selecting sharp or ballpoint needle types
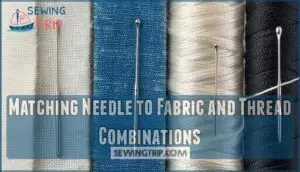
Matching Needle to Fabric and Thread Combinations
Your embroidery machine needs the right needle-to-fabric pairing for ideal results.
Match needle size to thread weight and material thickness.
Use European needle size 75/11 for lightweight fabrics with fine threads, while heavy materials require size 90/14 needles.
Material Compatibility determines stitch quality and prevents fabric damage.
| Fabric Type | Thread Weight | Needle Size (European) | American Needle Size |
|---|---|---|---|
| Cotton/Linen | 40wt | 75/11 | 11 |
| Denim/Canvas | 30wt | 90/14 | 14 |
| Silk/Chiffon | 60wt | 65/9 | 9 |
| Fleece/Terry | 40wt | 80/12 | 12 |
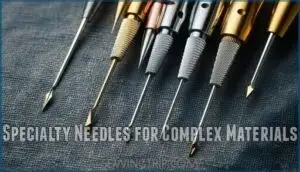
Specialty Needles for Complex Materials
Complex materials demand specialized needles to prevent damage and achieve professional results.
Leather sewing requires triangular-tip needles that slice through material cleanly. Denim needles feature reinforced blades for heavy fabrics. Metallic yarns need larger-eye embroidery needles to prevent shredding.
- Microtex needles – Sharp points for silk threads and tightly woven fabrics in American needle size 90/14-110/18
- Leather needles – Triangular cutting tips for genuine leather and vinyl materials
- Ballpoint needles – Rounded tips prevent snags in stretch knits and jersey fabrics
- Industrial specialty options – Coated needles like DBK5Z1 for embroidery machines handling technical textiles
For heavy duty sewing, using heavy duty needles is essential for thick fabrics.
Safe and Effective Needle Replacement Techniques
Proper needle replacement protects your sewing machine and guarantees consistent stitch quality.
You’ll need to follow specific steps for insertion, securing, and disposal to maintain safe operation and extend your machine’s lifespan, which helps in maintaining consistent stitch quality.
Correct Needle Insertion and Orientation
Why struggle with crooked stitches when perfect needle alignment is simple? Insert your needle with the flat side facing toward the back of your embroidery machines.
This needle orientation guarantees secure fitting with DBK5Z1 and DBK5RG needles. Push the needle completely up into the needle clamp before tightening.
Check that the needle size matches your thread weight for proper threading and superior performance.
Proper needle replacement techniques are vital for achieving perfect stitches and extending the life of your sewing machine.
Proper Tightening and Securing Methods
Once you’ve positioned your needle correctly, you’ll need to secure it properly to prevent loosening during operation.
Use the appropriate tightening tools for your machine – either a small screwdriver for the needle screw or grip the thumbscrew firmly.
Turn clockwise until snug but don’t overtighten, which can damage the needle clamp or strip threads.
The needle should sit firmly without wobbling when you test it gently, and it’s crucial to ensure it’s secure to prevent issues during operation.
Disposal of Old or Damaged Needles
Proper disposal protects everyone from sharp waste injuries.
Don’t toss old needles in regular trash—use plastic medicine bottles or FDA-cleared sharps containers for safe storage.
Label containers clearly and seal tightly when three-quarters full.
Check local guidelines for eco friendly disposal locations like pharmacies or hazardous waste centers.
Never attempt needle recycling through standard programs.
Using proper sharps disposal methods is essential for community safety and helps prevent sharp waste injuries through proper disposal.
Avoiding Reuse of Compromised Needles
After proper disposal, resist the urge to reuse needles that show any signs of compromise.
Once you’ve pulled a needle from heavy materials like denim or leather, consider it done for good. Needle damage isn’t always visible to the naked eye.
Even microscopic burrs can snag delicate fabrics later.
Smart needle storage in labeled containers helps you track which needles are fresh and ready for your next project.
Regular needle inspection before each use protects both your fabric and guarantees consistent sewing safety throughout your work.
Needle Care for Better Sewing Machine Performance
Your needle’s condition directly affects your machine’s performance and stitch quality. Fresh needles maintain proper tension balance and reduce stress on critical components like the bobbin case and hook assembly.
Impact on Machine Tension and Stitch Consistency
Your needle’s sharpness directly controls tension control and stitch regulation across every seam.
Fresh needles maintain proper thread flow through fabric stretch while worn ones create tension inconsistencies that ruin your project’s appearance.
5 Signs Your Needle Affects Tension:
- Loose upper threads – Dull needles can’t grip thread properly during loop formation
- Tight bobbin stitches – Bent needles disrupt timing and create uneven pull
- Puckered seams – Blunt points drag fabric instead of piercing cleanly
- Thread shredding – Rough needle eyes catch and fray delicate fibers
- Skipped stitches – Poor needle-hook clearance prevents proper loop catch
Reducing Wear on Machine Components
Regular needle changes protect your sewing machine’s internal components from unnecessary damage.
Fresh needles reduce stress on the bobbin case and hook assembly through smoother penetration.
| Component | Wear Risk | Protection Method |
|---|---|---|
| Bobbin Case | High with dull needles | Replace every 8-10 hours |
| Hook Assembly | Moderate damage risk | Use proper needle size |
| Feed Dogs | Low but cumulative | Match needle to fabric |
| Tension Discs | Varies by thread type | Avoid bent needles |
Machine longevity depends on component durability.
Wear reduction occurs when you maintain sharp needle points.
Part maintenance includes regular inspection.
Equipment efficiency improves with consistent needle replacement schedules.
Preventing Machine Jams and Timing Issues
Bent needles create mechanical interference that disrupts your machine’s precise timing mechanisms.
When needle alignment shifts even slightly, it throws off the delicate synchronization between the needle bar and bobbin assembly.
This misalignment causes fabric jams and forces timing adjustments that require professional machine calibration.
Fresh needles maintain proper sewing efficiency by preventing these costly disruptions.
Regular needle replacement also helps to prevent sewing machine jams.
Extending Overall Equipment Lifespan Through Needle Care
When you establish needle-machine harmony through consistent replacement schedules, you’re investing in your equipment’s future.
Preventative maintenance protects delicate components from excessive wear while timing preservation keeps your machine running smoothly.
Regular needle changes minimize downtime by preventing costly repairs.
Fresh needles reduce stress on internal mechanisms and extend your machine’s productive years substantially.
Frequently Asked Questions (FAQs)
Can different needle brands affect machine performance?
Yes, different needle brands can substantially affect your machine’s performance. Quality brands provide consistent manufacturing tolerances and materials that improve stitch formation and reduce thread breakage compared to cheaper alternatives.
Should needles be stored in specific conditions?
Store needles in original packaging or magnetic holders at room temperature.
Avoid damp basements or hot attics since humidity causes rust and heat warps metal.
Keep them organized by size and type for easy selection.
How do universal needles compare to specialty?
Universal needles work with most fabrics but lack the precision of specialty options.
You’ll get adequate results for basic projects, but specialty needles deliver superior performance for specific materials like leather, denim, or stretch fabrics.
What causes needle eyes to become enlarged?
Heavy thread, frequent use, and improper installation stretch needle eyes over time.
You’ll notice larger holes when thick threads pass through repeatedly, especially with decorative or metallic threads that create extra friction and wear, particularly because of the friction.
Can machine oil affect needle longevity?
While dirty oil can clog needle mechanisms, proper machine lubrication actually extends needle life. Clean oil reduces friction and heat buildup that dulls needle tips faster than dry operation.
Conclusion
Smart sewers succeed by staying systematic with machine needle replacement tips.
You’ll transform your sewing experience when you follow proper replacement schedules and recognize warning signs early.
Fresh needles prevent costly repairs and deliver professional results every time.
Don’t wait for problems to appear. Replace needles regularly based on fabric weight and project complexity.
Your machine will reward consistent care with years of reliable performance and beautiful stitches.
- https://nancysnotions.com/understanding-sewing-machine-needles/
- https://www.maggieframes.com/blogs/embroidery-blogs/the-ultimate-guide-to-needle-size-for-jeans-sizes-types-and-techniques
- https://medcraveonline.com/JTEFT/a-comprehensive-study-on-the-effect-of-different-seam-parameters-on-woven-fabrics.html
- https://corefabricstore.com/blogs/tips-and-resources/how-to-choose-the-perfect-machine-needle-for-your-next-sewing-project
- https://pmc.ncbi.nlm.nih.gov/articles/PMC8706176/

