This site is supported by our readers. We may earn a commission, at no cost to you, if you purchase through links.
Remember, your clothes should move with you, not fight you every step. Taming sway back fit is all about letting your style breathe. Stick around for secrets to mastering tricky curves and fabrics.
Table Of Contents
Key Takeaways
- Spot horizontal wrinkles and excess fabric pooling at your lower back—they’re the main signs you need a swayback adjustment.
- Pin and measure the extra fabric on a test muslin, then fold and remove it from your pattern while keeping grainlines straight.
- Choose your alteration method based on your pattern’s back seam type—center back seam, no center back seam, or horizontal waist seam.
- Always blend new lines into adjacent pattern pieces and redraw grainlines to keep your garment balanced and comfortable.
What is a Swayback Pattern Issue?
A swayback pattern issue occurs when your
Swayback Definition and Causes
Swayback creates a spinal curvature challenge that throws your back bodice fitting completely off balance. This posture impact stems from pelvic tilt and muscular imbalance, creating excess fabric that bunches and wrinkles where it shouldn’t.
Here’s what causes swayback issues:
- Genetic predisposition – Some folks are naturally built with more pronounced curves
- Poor posture habits – Hours hunched over screens shift your spine’s natural alignment
- Weak core muscles – When your abs slack off, your back compensates awkwardly
- Pregnancy changes – Growing babies alter pelvic positioning permanently for many women
- Age-related shifts – Time naturally changes how our spines carry weight
Your swayback adjustment needs depend on these root causes, making each fitting adjustment unique to your body’s story. A key step involves measuring excess fabric at the center back to determine the necessary reduction.
How Swayback Affects Garment Fit
When your spine curves inward, it creates a domino effect on how clothes hang on your body. Posture Impact shifts your natural alignment, causing excess fabric to bunch up along your lower back. This Curve Accommodation challenge means garments lose their intended Garment Balance.
When your spine curves inward, your clothes lose their balance—creating bunching and wrinkles where fabric should flow smoothly.
| Fit Challenge | What You’ll Notice |
|---|---|
| Fabric Drape disruption | Back panels pull and twist awkwardly |
| Comfort Issues emerge | Constant tugging and readjusting needed |
| Waistline shifts upward | Hemlines become uneven front to back |
| Folds on the back appear | Horizontal wrinkles across shoulder blades |
| Swayback Adjustment needed | Standard patterns don’t follow your curves |
Your fitting adjustment isn’t just about looks—it’s about creating clothes that move with you instead of against you.
Common Signs of Swayback Fit Problems
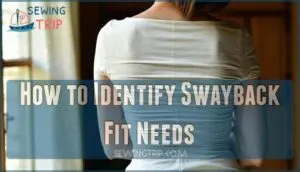
Wrinkles tell the real story about your swayback alteration needs. You’ll spot horizontal folds across your back bodice, especially below the shoulder blades where excess fabric pools.
The back wrinkle types vary—some create deep creases while others show gentle ripples. Poor fabric drape makes your torso length appear uneven, and shoulder slope changes affect how the garment sits.
These telltale signs mean your pattern needs adjustments to accommodate your posture impact.
How to Identify Swayback Fit Needs
You’ll spot swayback issues right away when your fitted garments pucker and wrinkle across the lower back, even when everything else fits perfectly.
The telltale signs show up as horizontal wrinkles that bunch up just above your waist, creating that classic "too much fabric" look that no amount of pressing can fix.
Fitting Muslin and Pinning Techniques
Before cutting into your good fabric, create a test muslin using your pattern. Pin the muslin together and try it on, focusing on the center back area where excess fabric often bunches.
Through this iterative fitting process, you’ll pinch out wrinkles and mark adjustments accurately on the muslin fabric choice. A key step involves measuring excess fabric at the center back to determine the necessary reduction.
This fitting help reveals exactly how much swayback adjustment your dress alteration needs, making your fitting adjustments precise and confident.
Key Wrinkle Patterns to Watch For
When you spot diagonal wrinkles radiating from your lower back, that’s your first red flag for swayback issues. Horizontal creases pooling just below your waist create unsightly folds on the back. These telltale back wrinkle patterns mean your swayback alteration can’t wait.
Excess fabric bunching creates uneven hemlines that scream "I need a swayback adjustment!
Measuring for Accurate Swayback Adjustments
Once you’ve spotted those telltale wrinkles, it’s time to get precise with your measurements. During your muslin fitting, pin out the horizontal excess along the centreback seam at your natural waistline. Measure the vertical depth of this fold—typically 1-2cm for most swayback adjustments.
This adjustment helps address excess fabric issues in the lower back. Record both the amount you’re removing and its exact placement from your waist measurement point on the back bodice piece.
Step-by-Step Swayback Pattern Alteration
Making swayback alterations is easier than you think once you know the right technique for your pattern type. You’ll choose from three main methods depending on whether your pattern has a center back seam, no center back seam, or a horizontal waist seam.
Adjusting Patterns With a Center Back Seam
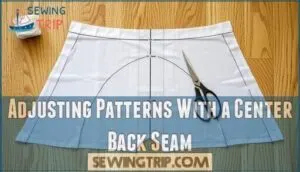
When your pattern has a center back seam, you’re in luck—this makes swayback adjustment straightforward. Draw a horizontal line across your back pattern piece just above the natural waistline where wrinkles appear. Slash along this line, then overlap the pieces at the center back seam, tapering to nothing at the side seams. This creates the perfect curve for your swayback needs while maintaining proper fit.
Many find it helpful to explore options for sewing with this seam.
Altering Patterns Without a Center Back Seam
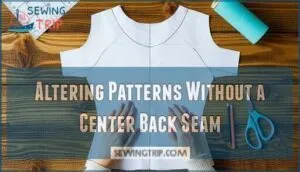
Without a center back seam, you’ll need two pattern pieces for your swayback adjustment. Slash horizontally where excess pools, creating a hinge at the side seam—don’t cut through completely. Overlap pieces by your CB reductions amount, then redraw the fold line and grainline.
This pattern alteration affects bodice width, so blend side seams back to maintain proper fit and avoid grainline impact. This adjustment is essential when the spine curves inward.
Modifying Patterns With Horizontal Waist Seams
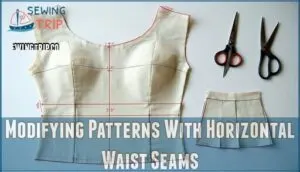
Horizontal waist seams make swayback adjustments surprisingly straightforward. You’ll remove excess fabric from the bodice while maintaining proper proportions throughout your garment.
- Mark the waist seamline on your back bodice pattern piece before making any cuts
- Create a horizontal tuck by folding out excess length, starting at center back and tapering to nothing at sides
- Scoop out fabric from the bottom of the center back bodice using seam scooping technique
- Redistribute the removed amount evenly across the waist seam for smooth seam alignment
- Add equivalent length to the skirt section below to maintain overall garment proportions
This bodice adjustment method prevents grainline distortion while ensuring even distribution of your pattern alteration.
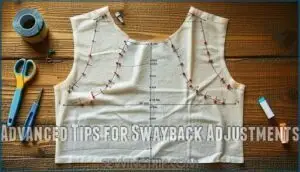
Advanced Tips for Swayback Adjustments
Once you’ve mastered the basic swayback alteration, you’ll need to hone your technique to achieve professional results.
These expert tips will help you maintain pattern integrity while creating a perfectly fitted garment that won’t pull or pucker.
Maintaining Proper Grainline and Seam Alignment
After completing your swayback adjustment pattern alteration, you’ll need to restore proper alignment. Your back pattern piece requires careful attention to maintain professional results.
| Grainline Importance | Action Required |
|---|---|
| Fabric Behavior | Redraw grainline parallel to center back |
| Cutting Accuracy | Mark new seamlines before cutting |
| Pressing Techniques | Press along corrected grainlines only |
When your grainline gets wonky during swayback adjustment, don’t panic—it’s fixable. Seam matching becomes tricky when grainlines shift, so redraw them straight.
Understanding pattern ease allowances is vital for ensuring garments drape and move correctly. This prevents fabric from pulling awkwardly and ensures your garment hangs correctly on the body.
Blending and Redrawing Adjacent Pattern Pieces
After making your swayback adjustment, you’ll need to smooth out any sharp corners or awkward shifts where the pattern piece meets adjacent sections. Think of it like connecting puzzle pieces – each edge must flow naturally into the next.
Redraw curved lines to maintain seam continuity and pattern symmetry. Check that your back pattern piece maintains proper grainline impact throughout the alteration.
Special Considerations for Knit and Woven Fabrics
Your fabric choice dramatically affects swayback adjustment success. Knit fabric drape and stretch factor impact how much pattern adjustment you’ll need, while woven fabric structure demands precise excess fabric removal for proper fit adjustment.
- Knit garment considerations: Use 20-50% less adjustment than wovens since stretch masks minor fitting issues
- Recovery rate effects: High-recovery knits maintain shape after swayback adjustment; poor recovery causes bagging
Woven precision needs: Zero stretch means every measurement counts—test with muslin first
Bias cut swayback: Diagonal grain adds complexity; stabilize altered seams with stay tape
Troubleshooting and Perfecting The Fit
When your swayback adjustment doesn’t achieve the perfect fit, troubleshooting becomes your best friend. Start by checking for Grainline Issues – if your Back Pattern Piece isn’t hanging straight, you’ll need to redraw those lines after making your pattern adjustment. Muslin Refinement often reveals additional problems that weren’t obvious initially.
Complex Curves around the waistline might require blending adjustments into adjacent pattern pieces. Don’t forget how Fabric Choice affects your results – knits behave differently than wovens when dealing with Posture Impact. If wrinkles persist after your Swayback Adjustment, consider whether you need additional modifications like lengthening at the hips or adding waist darts. To address these issues, consider diagnosing common problems by checking finished dimensions.
Remember, achieving the perfect fit adjustment is rarely a one-shot deal. Think of it as fine-tuning a musical instrument – each small adjust pattern tweak brings you closer to harmony. Test, evaluate, and improve until your garment hugs your curves like it was made just for you.
Frequently Asked Questions (FAQs)
Can swayback adjustments affect garment style lines?
Think of style lines as the road map of your garment—adjusting for swayback can shift those lines, especially at the waist or back. You’ll need to redraw seams to keep everything looking smooth and intentional.
How do swayback alterations impact pattern grading?
You’ll need to adjust each size separately, since swayback corrections don’t scale evenly. It’s a bit like herding cats—every size wants its own tweak, so double-check your grainlines and seam allowances for consistency.
Is swayback correction necessary for loose garments?
You won’t always have to bother with swayback correction for loose garments, since extra ease can hide wrinkles.
If you’re after a sleeker look, though, a quick tuck can work wonders for your silhouette.
What tools help mark swayback adjustments accurately?
Grab a flexible ruler, tailor’s chalk, and a clear gridded ruler to mark your adjustments. Precision here saves headaches later!
A muslin test garment helps spot wrinkles early—don’t forget pins for quick tweaks.
Can swayback be combined with other fitting changes?
You can totally combine swayback adjustments with other fitting tweaks, like adding waist darts or lengthening at the hips. Just blend changes carefully, so your pattern stays balanced—no one wants a Franken-garment surprise!
Conclusion
Like a tailor smoothing out a wrinkled sheet, using pattern alteration advice for sway back helps you create garments that fit and move with ease. You’ve spotted the signs, measured the excess, and learned how to adjust your patterns step by step.
Don’t let sway back issues trip you up—keep testing, pinning, and blending those lines. With practice, you’ll master the art of a great fit, turning every project into a custom success.
- https://www.sbccpatterns.com/blogs/news/the-number-one-alteration-you-are-doing-wrong
- https://www.threadsmagazine.com/project-guides/fit-and-sew-pants/fitting-a-high-hip-vs-sway-back
- https://www.lovenotions.com/how-to-do-a-swayback-adjustment
- https://patternscissorscloth.com/2010/12/05/sway-back-alterations-my-analysis/
- https://www.sewalongs.com/clover/clover-swayback-adjustment/

