This site is supported by our readers. We may earn a commission, at no cost to you, if you purchase through links.
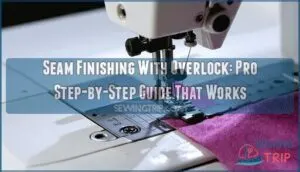 You’ll master seam finishing with overlock by using a serger machine that cuts, sews, and finishes fabric edges in one pass. This technique prevents fraying while creating professional-looking seams that last through countless washes.
Set your overlock machine with proper thread tension, guide fabric through steadily, and let the differential feed prevent puckering. Three-thread overlocks work great for knits, while four-thread versions provide extra durability for wovens.
Your overlocked seams will resist unraveling 40-70% better than regular finishes, making garments last years longer. The secret lies in choosing the right thread count and tension settings for each fabric type.
Table Of Contents
Key Takeaways
- You’ll save time and achieve professional results by using an overlock machine that cuts, sews, and finishes fabric edges in one pass instead of using multiple traditional techniques.
- You’ll get stronger, longer-lasting seams by choosing a three-thread overlock for knits and four- or five-thread versions for woven fabrics and high-stress areas.
- You’ll prevent puckering and skipped stitches by adjusting thread tension properly, using the right needle type for your fabric, and maintaining a consistent feeding speed through the machine.
- You’ll extend garment life significantly since overlocked seams resist fraying 40-70% better than regular finishes and maintain their integrity through 100+ wash cycles.
What is a Seam? Definitions and Examples
When you stitch two pieces of fabric together, you create a seam – the backbone of any garment you’re building. These joining lines show up everywhere, from basic hems to tricky construction spots.
Getting familiar with what each seam needs to do makes all the difference when you’re deciding how to finish it for the right mix of durability and appearance.
Seam Definition in Sewing and Textiles
When you’re sewing, seams are basically how you join two pieces of fabric together with stitches. Getting comfortable with seams is key if you want to build solid garments that last:
- Basic seam structure – stitched line joining fabric edges
- Stitch types – straight, zigzag, or overlock patterns
- Seam strength – determines garment longevity
- Edge finishing – prevents fraying and unraveling
- Construction quality – defines professional appearance
Different seam types work better depending on your fabric’s weight, how much it stretches, and what you’re making.
Seam in Geology and Mining
Beyond textiles, you’ll find seams in geology and mining contexts. A seam in geology represents a thin layer or stratum of material like coal or ore between rock formations.
Coal seam mining targets these underground layers when they’re thick enough for economic seam viability. Geological seam identification helps miners locate valuable mineral seam types through seam formation processes that occurred over millions of years.
Seam Usage in Language and Idioms
You’ll find seam metaphors woven throughout everyday language. When something comes apart at the seams, it’s falling apart completely. If you’re bursting at the seams, you’re overflowing with excitement or space constraints. The seamy side refers to life’s unpleasant aspects.
These idiomatic expressions showcase language evolution, transforming literal sewing terms into powerful linguistic meaning that describes human experiences beyond fabric construction.
Historical Origins and Word History
The word "seam" traces back to Old English "sēam," meaning to join or sew together. This ancient root connects directly to "sīwian," the verb for sewing. You’ll find similar words across Germanic languages, showing how fundamental seaming was to early textile work.
- Old English Roots: The term emerged before the 12th century from "sēam," related to basic sewing practices
- Cross-Language Connections: Similar words appear in Old Norse "saumr" and Old High German "soum"
- Evolution Timeline: The verb form developed in 1582, expanding from textile work to general joining concepts
Understanding Overlock Seam Finishing
You’ll master overlock seam finishing when you understand how this specialized stitching technique locks fabric edges while trimming excess material in one smooth operation.
This method creates durable, professional seams that resist fraying and handle repeated washing better than traditional finishing techniques.
What is Overlock Stitching?
Overlock stitching works with several threads at once, paired with special serger needles that produce sturdy yet flexible seams. What makes it tick is the differential feed system—this controls how fabric moves through the machine so you don’t get annoying puckers.
Getting your thread tension right is key since it affects how tight and even your stitches turn out. Here’s what’s really clever about overlocking: it cuts away excess fabric while wrapping the raw edges in those interlocking threads all in one go.
The result? Clean, professional-looking seams that won’t fray over time.
| Feature | Function |
|---|---|
| Multiple Threads | Creates interlocked stitch formation |
| Differential Feed | Controls fabric stretch during stitching |
| Cutting Blade | Trims excess fabric automatically |
Overlock Vs. Traditional Seam Finishes
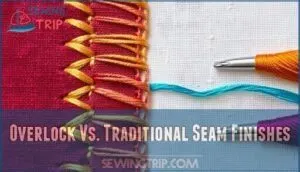
When you compare traditional sewing methods like French seams and zigzag finishes to overlock stitching, the difference is striking. Overlock machines handle three tasks at once—they stitch, trim, and finish seams in a single pass. This streamlined approach can cut your production time by nearly half while creating seams that hold up through hundreds of wash cycles. The numbers work out too: you’ll save about 35 cents per garment on finishing costs.
Overlock machines cut production time in half while delivering seams that withstand hundreds of wash cycles
The real advantage shows up in how the finished garments feel and look. Overlock creates smoother, flatter seams that work especially well in activewear where comfort matters. Whether you’re working with stretchy knits or stable wovens, industrial overlock machines deliver that crisp, professional finish that’s hard to achieve with conventional methods. An overlocker provides a neat and professional finish, improving the overall look of the garment.
Benefits of Using an Overlock Machine
An overlock machine works faster than hand-sewing methods, letting you complete seams quickly while getting professionally made results. Since it cuts, sews, and finishes edges in one step, you save money on time and materials.
This machine handles different fabric weights well, from lightweight knits to heavier materials like canvas. The seams hold up better too, staying strong through repeated washing and wear.
Types of Overlock Seams for Fabrics
You’ll use different overlock seam types depending on your fabric and project needs. Three-thread overlocks work best for lightweight knits, while four-thread and five-thread options provide extra strength for heavy fabrics and high-stress seams.
Three-thread Overlock for Knits
For knit fabrics, three-thread overlock stitches create the perfect balance of seam flexibility and lightweight edge finishing. This technique excels with stretchy materials like jersey and cotton blends.
The stitches move with the fabric during wear, preventing breakage. This cost-effective approach follows best practices for knitting projects, delivering professional results without bulk.
Four-thread and Five-thread Overlock for Durability
When you need ultimate strength, four-thread and five-thread overlock seams deliver serious durability for high-stress areas. These configurations create reinforced stitches that handle repeated stretching and washing cycles without failing.
- Seam stress points: Perfect for crotches, armholes, and shoulder seams where fabric endures constant movement
- Industrial applications: Professional garment manufacturers rely on these dense stitches for safety standards compliance
- Material compatibility: Works exceptionally well with heavy knits, denim, and stretchy fabrics requiring extra backing
Choosing The Right Overlock Seam for Your Project
Success starts with matching your overlock choice to your fabric type and project needs. Knits require three-thread seams for stretch, while woven fabrics benefit from four or five-thread options for strength. Consider seam stress levels, stitch density requirements, and your aesthetic preference when selecting the right technique for your sewing project. Ultimately, the decision depends on balancing production costs, garment quality, and end-user satisfaction.
| Fabric Type | Recommended Seam | Best For |
|---|---|---|
| Lightweight knits | 3-thread overlock | T-shirts, underwear |
| Heavy woven fabrics | 4-thread overlock | Jeans, canvas bags |
| Stretch materials | 3-thread flatlock | Activewear, swimwear |
| Delicate fabrics | 2-thread rolled hem | Scarves, lingerie |
Step-by-Step Guide: Finishing Seams With Overlock
You’ll learn how to properly set up your overlock machine and create clean, professional seam finishes that prevent fraying.
This section covers machine preparation, stitching techniques, and troubleshooting tips to help you achieve consistent results every time.
Preparing Fabric and Setting Up The Machine
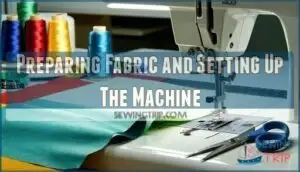
Proper fabric preparation sets the foundation for professional results. Press your cloth flat and trim loose threads before starting.
Select appropriate thread that matches your fabric weight. Choose the correct needle size for your material. Adjust machine tension settings according to manufacturer guidelines.
Clean your overlock machine regularly to help maintain smooth operation throughout your sewing project.
Stitching The Seam With an Overlock
Guide fabric through your overlock machine steadily, maintaining consistent speed for even stitches. Check overlock tension settings before starting—balanced tension prevents puckering or loose seams.
Adjust differential feed based on fabric type to avoid stretching. Select appropriate serger needles and thread for your material.
Keep seam allowances consistent as you sew, trimming excess fabric automatically with the cutting blade.
Tips for Neat, Professional Results
Achieving professional overlock results requires attention to key details. Your thread selection affects seam appearance and durability. Choose quality polyester or cotton threads that match your fabric weight. Needle choice matters too – use ballpoint needles for knits and sharp needles for wovens.
Getting great overlock results comes down to a few key choices. Your thread selection makes a real difference in how seams look and hold up over time. Go with quality polyester or cotton threads that work well with your fabric weight. Needle choice matters just as much—ballpoint needles work best for knits, while sharp needles handle wovens better.
- Adjust tension settings for balanced stitches
- Maintain consistent feeding speed through fabric
- Keep your workspace clean and organized
- Test stitch on fabric scraps first
These steps help your seams look polished and perform well in finished garments.
Troubleshooting Common Issues
When your overlock seam finishing goes wrong, you’ll need to identify what’s happening. Tension Problems show up as loose or tight stitches in sewing. Skipped Stitches appear as gaps in your seam line. Check these issues systematically:
If your overlock seam finishing isn’t working right, start by figuring out what’s going wrong. Tension problems will give you stitches that are either too loose or pulling too tight.
When you see gaps in your seam line, that’s skipped stitches. Work through these problems one by one.
Skipped Stitches
Fabric Puckering and Needle Breaks often stem from wrong settings or dull equipment.
Care and Longevity of Overlocked Seams
You’ll want to know how your overlocked seams hold up after countless washes and daily wear.
Proper care techniques keep these professional finishes looking fresh and prevent the frustrating unraveling that ruins your hard work.
Durability Through Laundering and Wear
Your finished seams will outlast countless wash cycles when you understand the laundering impact on stitch integrity. Four-thread overlock seams maintain fabric stability through 100+ washing cycles with less than 5% seam degradation.
When you get the hang of how washing affects your stitches, your seams will hold up through years of laundry.
Four-thread overlock seams keep fabrics stable—they’ll go through over 100 wash cycles with barely any wear (less than 5% breakdown).
Preventing Seam Failure and Fraying
Strong seam reinforcement starts with proper fabric selection and stitch density. You’ll prevent fraying by adjusting tension correctly on your serger.
Regular serger maintenance keeps stitches consistent. Quality thread and sharp blades reduce stress on fabric fibers.
Check seams after washing – loose threads signal potential failure. Monitor high-wear areas like armholes where seams face extra strain during sewing and textile work.
Maintaining Garments With Overlock Finishes
Your garments deserve proper care to keep those overlock stitches looking sharp. Regular maintenance prevents common issues like stitch loosening and fabric pilling around seam areas.
- Check tension adjustments periodically to maintain consistent stitch quality
- Handle parts of clothes gently during washing to avoid preventing snags
- Store garments properly to protect delicate overlock repair work
- Inspect seams regularly for early signs of wear or damage
Frequently Asked Questions (FAQs)
Can overlock machines handle thick denim fabrics?
While you’d think these hefty fabrics would overwhelm your machine, most industrial and heavy-duty overlock machines can handle thick denim surprisingly well with proper needle adjustments and thread tension.
What needle types work best for overlock?
You’ll want ballpoint needles for stretch fabrics and universal needles for woven materials. Size 14/90 works well for most projects, while heavier fabrics need 16/
Sharp needles cut cleanly through multiple layers without skipping stitches.
How do you adjust overlock tension properly?
Start with your upper looper thread. Adjust it first by turning the tension dial clockwise to tighten or counterclockwise to loosen.
Test on fabric scraps, checking that loops lie flat without puckering or loose threads showing.
Can you overlock stretch lace materials successfully?
Yes, you can overlock stretch lace successfully. Use a ballpoint needle, reduce presser foot pressure, and test stitch tension first.
Work slowly with gentle handling to prevent distortion or damage to delicate fibers.
Which threads prevent overlock seam puckering issues?
Use polyester or cotton-wrapped polyester threads for best results. They offer balanced stretch and stability. Avoid 100% cotton threads—they’re too rigid and create puckers. Adjust thread tension properly too.
Conclusion
Mastering seam finishing with overlock transforms your sewing projects from amateur to professional quality. You’ll create durable seams that resist fraying and last through years of wear.
The serger’s ability to cut, stitch, and finish edges simultaneously saves time while delivering consistent results. Remember to match thread tension and stitch type to your fabric weight.
Practice on scraps first, then watch your finished garments gain that polished, store-bought appearance you’ve been aiming for.
- https://pubs.nmsu.edu/_c/C218/index.html
- https://meissnersewing.com/blogs/inspiration/serger-vs-overlock
- https://www.anysew.com/blog/what-are-the-advantages-of-using-overlock-sewing-machines
- https://www.sussexseamstress.com/sewing-tips-blog/should-i-buy-an-overlocker
- https://mypacklove.com/blog/patches/what-is-an-overlock-machine-serger-basics-pro-finishes-guide/


