This site is supported by our readers. We may earn a commission, at no cost to you, if you purchase through links.

Always practice on scraps before touching your good fabric, because nobody wants to turn expensive material into expensive mistakes. Lock stitch at the beginning and end of seams to prevent that heartbreaking moment when everything unravels.
Keep your scissors sharp and your supplies labeled—trust me, you’ll thank yourself later when you’re not hunting for that perfect thread color. These simple changes will cut your sewing time in half while boosting your confidence with every project.
Table Of Contents
- Key Takeaways
- Essential Sewing Preparation Tips
- Organizing Your Sewing Space Efficiently
- Caring for Sewing Tools and Equipment
- Basic Sewing Techniques Every Beginner Needs
- Avoiding Common Sewing Mistakes at Home
- Improving Fabric Handling and Manipulation
- Mastering Sewing Machine Usage and Maintenance
- Easy Zipper and Button Installation Tips
- Hem Finishing and Seam Techniques
- Saving Time and Reducing Sewing Costs
- Frequently Asked Questions (FAQs)
- Conclusion
Key Takeaways
- You’ll avoid costly mistakes by measuring twice before cutting and practicing new techniques on scrap fabric first—this prevents wasting expensive materials and builds your confidence.
- Set up your workspace efficiently with tools within arm’s reach, pegboards for organization, and labeled containers so you’re not constantly searching for supplies during projects.
- Master essential techniques like lock stitching at seam beginnings and ends, proper machine threading with the presser foot up, and maintaining sharp scissors exclusively for fabric.
- Keep your sewing machine running smoothly through regular cleaning every 8 hours of use, proper tension adjustments, and changing needles every 6-8 hours or per project.
Essential Sewing Preparation Tips
Planning ahead saves you hours of headaches and keeps you from making expensive mistakes that force you to start from scratch.
You’ll thank yourself later for double-checking measurements and grabbing some extra fabric to test your skills before diving into the real deal.
Measuring and Cutting Fabric Accurately
You’ll avoid costly fabric disasters by following one golden rule: measure twice, cut once.
Measure twice, cut once—it’s your insurance policy against expensive fabric mistakes
Start by checking your fabric grain direction, then lay out pattern pieces according to your pattern layout guide. Use sharp cutting tools and reliable marking methods for clean, accurate cuts.
Practice proper measuring techniques on scraps first—your future self will thank you when everything fits perfectly.
Accounting for Seam Allowance
Seam allowance basics can make or break your project. Always add seam allowance to your pattern measurements before cutting fabric. Standard seam allowance is 5/8 inch, but check your pattern instructions first.
Consistent seam width keeps your garment fitting properly. For curved seam allowance, mark with chalk or washable markers.
Trimming seam allowance after sewing prevents bulk and creates cleaner finishes.
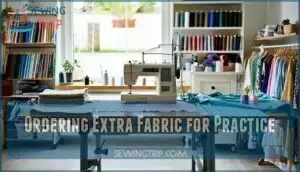
Ordering Extra Fabric for Practice
Here’s your golden rule: always buy extra fabric before starting any project. You’ll thank yourself later when you can practice sewing techniques on scrap fabric without fear.
Keep fabric scraps to build your own swatch library. You can experiment with different fabric types and test dyes without wasting good material.
Plus, you’ll get comfortable handling various fabrics through practice.
Organizing Your Sewing Space Efficiently
You’ll cut your sewing time in half when you create a well-organized workspace that keeps everything within arm’s reach.
Set up pegboards for tools, use clear containers for small items, and label everything so you won’t waste precious minutes hunting for that perfect button or matching thread.
Setting Up a Functional Sewing Area
Start by choosing your Sewing Station location wisely—natural light beats harsh overhead bulbs every time. Your Sewing Desk height should match your elbow when seated, creating an Ergonomic Setup that prevents backaches during long projects. Smart Storage Solutions keep your workspace organized and efficient.
- Position your sewing machine at elbow height to reduce neck and shoulder strain during extended sewing sessions
- Place cutting mats near windows for natural Lighting Options, or invest in adjustable LED desk lamps for evening work
- Keep frequently used tools within arm’s reach to maintain workflow and prevent constant interruptions while sewing
Using Pegboards and Clear Containers
Transform your sewing room into an organized haven with smart pegboard installation and clear container storage solutions. Mount pegboards within arm’s reach to keep essential tools visible and accessible. Clear containers let you spot supplies instantly, eliminating the frustrating hunt for that perfect button.
When everything has its place, you’ll spend more time creating and less time searching through messy drawers.
Labeling Supplies for Easy Access
Clear labels turn chaos into control in your sewing room. Use a label maker or simple masking tape to mark every container, drawer, and shelf.
Create categories like "zippers," "buttons," or "interfacing" for quick inventory management. This cataloging system saves precious minutes during sewing projects, letting you focus on creating instead of hunting through storage solutions.
Caring for Sewing Tools and Equipment
You’ll keep your tools working smoothly and lasting longer when you maintain them properly.
Clean fabric scissors stay sharp when you use them only for fabric, and your sewing machine runs better with regular cleaning and oiling.
Maintaining Sharp Fabric Scissors
Sharp scissors make all the difference in your sewing room. Use fabric scissors only for cutting fabric—never paper or thread. This blade maintenance trick preserves their edge.
When they start dulling, cut through aluminum foil several times to restore sharpness. Store your scissors in a protective case and clean them regularly.
These cutting techniques and edge preservation methods will keep your fabric protection tools working perfectly for years.
Cleaning and Oiling Your Sewing Machine
Keep your sewing machine running smoothly through regular maintenance with proper machine cleaning tools and quality machine oil types. Remove lint using sewing machine brushes after every eight hours of sewing machine usage, then apply a few drops of specialist oil to moving parts.
Check your manual for oil change frequency—most machines need monthly oiling for ideal tension and thread performance.
Proper Storage for Tools and Notions
Your sewing setup works best when everything has its place. Small bins keep buttons and zippers sorted, while nearby shelves store your fabric stash and pattern collection where you can actually reach them.
Clear containers work wonders for thread—no more digging around to find that exact shade you need. A good labeling system ties it all together.
When your scissors, seam ripper, and measuring tape each have their own spot, you’ll spend more time creating and less time hunting for tools.
Basic Sewing Techniques Every Beginner Needs
Master these three core techniques and you’ll see your sewing confidence grow much faster.
Lock stitching at the start and end of seams, trapping threads to prevent tangles, and stay stitching curved edges will save you hours of frustration and guarantee your handmade items last for years.
Lock Stitching for Durable Seams
Lock stitching transforms weak seams into bulletproof connections. Your sewing machine becomes a security guard when you reverse-sew at the beginning and end of each seam. This simple technique prevents unraveling disasters that’ll make you want to throw fabric across the room.
- Sew forward three stitches, then hit reverse for three more stitches
- Continue sewing your seam normally with proper thread tension
- At the seam’s end, reverse-sew three stitches back over your work
- Trim excess thread close to fabric for clean seam reinforcement and sewing durability
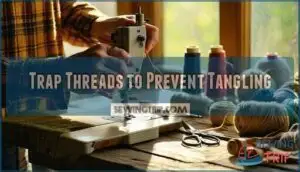
Trap Threads to Prevent Tangling
Before you start stitching, grab your thread’s tail and hold it firmly against the fabric. This simple thread management trick prevents that annoying bird’s nest tangle right from the first stitch.
You’ll save time on tension issues and boost your sewing efficiency. Use thread snips to trim excess, keeping fabric control smooth throughout your project.
Stay Stitching to Maintain Fabric Shape
Stay stitching works like an invisible safety net for your fabric. You’ll sew a single line of stitches along curved edges—like necklines or armholes—before assembling your garment.
This simple sewing technique prevents stretching and distortion, giving you fabric stability and shape retention. Your sewing machine becomes your best friend for fabric control, creating stitch reinforcement that maintains seam security throughout construction.
Avoiding Common Sewing Mistakes at Home
You’ll avoid costly mistakes and wasted fabric when you check measurements twice before cutting and practice on scraps first.
These simple steps prevent tension problems and thread tangles that can ruin your project and cost you extra time.
Double-Checking Measurements Before Cutting
You’ve mastered basic sewing techniques, but one simple step can save you from costly fabric waste and major headaches. Measure twice, cut once—this golden rule prevents sewing mistakes that ruin entire projects.
Use proper measurement tools and double-check against your pattern for accurate cutting. Even experienced sewers verify dimensions before making that first snip, because replacing wasted fabric costs more than taking an extra minute to confirm your numbers.
Practicing on Scrap Fabric First
Before you cut into your good fabric, grab some scraps for testing and practice. This simple strategy saves money and prevents costly mistakes.
Try out your machine settings, adjust thread tension, and practice new techniques on leftover material first. Experienced sewers swear by this approach—running through the motions on scraps before working with your real fabric.
Preventing Tension and Thread Issues
When your sewing machine starts acting like a stubborn mule, thread tension usually holds the key to peace. You’ll save hours of frustration by checking these basics first:
- Thread Tension dial adjustment – Lower numbers loosen, higher numbers tighten
- Bobbin Management – Use matching thread weights in top and bottom
- Needle Selection – Match needle size to fabric weight and thread type
- Fabric Fray prevention – Check for lint blocking tension disks
- Sewing Machine threading – Rethread completely when problems persist
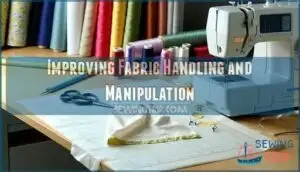
Improving Fabric Handling and Manipulation
You’ll handle fabric much better when you know these simple tricks that save time and prevent mistakes.
These techniques help you keep fabric layers aligned, edges straight, and cuts accurate throughout your entire project.
Folding Fabric for Accurate Edges
Proper fabric folding makes all the difference between crooked cuts and professional-looking seams. Fold fabric to square off edges, creating smooth alignment while avoiding distorted selvedges that throw off your measurements.
| Folding Method | Best For |
|---|---|
| Grain-line fold | Straight cuts, basic patterns |
| Bias fold | Stretchy fabrics, curved edges |
| Cross-grain fold | Wide fabric pieces |
| Selvage alignment | Accurate cutting preparation |
| Corner matching | Seam precision work |
Aligning Layers With Fingernails or Scratch Marks
When fabric layers shift during cutting, you’ve got a problem. Use your fingernails to gently nudge the top layer back into perfect alignment with the bottom one.
For fabric matching and edge squaring, scratch marks work like invisible guides:
- Create light scratch marks on your fabric to mark seam guides for precision stitching
- Align pattern pieces using fingernail pressure to keep layers from sliding
- Match plaid or stripes by using gentle fingernail positioning before pinning
These layer alignment tips save time and prevent wonky cuts.
Keeping Fabric Straight While Sewing
You’ll master fabric alignment by guiding material with gentle, steady pressure as it feeds under the needle. Keep your hands positioned on both sides of the presser foot for edge control and seam guidance.
Don’t pull or push the fabric—let your machine’s feed regulation work naturally. This tension management technique prevents puckering and creates perfectly straight stitches every time.
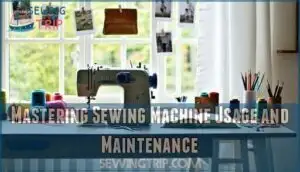
Mastering Sewing Machine Usage and Maintenance
Your sewing machine works best when you understand its basic functions and keep it well-maintained.
Master proper threading, tension adjustments, and presser foot techniques to avoid frustrating thread tangles and uneven stitches that slow down your projects.
Proper Threading Techniques
Threading your sewing machine correctly prevents most stitching problems before they start. Follow your machine’s threading order exactly—usually from spool to tension discs, through the take-up lever, then down to the needle.
Always lift the presser foot first; this opens tension discs so thread slides into proper position. Check needle threading direction and verify your bobbin management stays consistent.
Adjusting Tension for Smooth Stitches
Tension-adjustment nightmares happen when your sewing machine acts like a temperamental toddler. Start with your machine’s default settings, then make small tweaks while testing on fabric scraps.
Upper thread tension that’s too tight creates puckered seams, while loose tension causes loopy stitches underneath. Watch your stitch quality closely—perfect stitches look balanced on both fabric sides.
Lifting The Presser Foot for Threading
Before threading your sewing machine, always lift the presser foot first. This simple step opens the tension disks, allowing thread to settle properly between them.
Here’s your threading checklist:
- Lift the presser foot – Opens tension disks for proper thread placement
- Thread from spool to needle – Follow your machine’s threading path completely
- Lower the foot before sewing – Engages tension control for even stitches
This prevents frustrating thread tension issues.
Easy Zipper and Button Installation Tips
You’ll save time and avoid frustration when you master these simple techniques for installing zippers and buttons.
These methods work with basic tools you already have, and they’ll give you professional-looking results every time.
Inserting Zippers Face Down Over Seam Allowance
Positioning your zipper face down over the seam allowance creates the foundation for professional zipper installation. Place the zipper teeth directly against the fabric’s right side, aligning the tape with your seam allowance markings.
Use zipper feet for precision stitching along the tape edge. This face-down sewing technique ensures invisible stitches and perfect zipper alignment every time.
Using Guides for Even Zipper Placement
Look for an opening in the back of your presser foot holder to attach guide attachments. These seam guides keep your zipper perfectly straight during zipper installation.
You can also use guides from walking foot attachments for wide hems and precise zipper insertion. The guide maintains a consistent distance from your fabric edge, preventing wonky zipper alignment that’ll make you want to start over.
Sewing on Buttons Securely
Nobody wants their favorite shirt losing buttons at the worst possible moment. You’ll master button sewing by following these proven techniques for long-lasting results.
- Create a proper button shank by wrapping thread around the base several times before securing
- Choose heavy-duty thread like polyester or cotton-wrapped polyester for better durability than regular thread
- Use reinforcement stitches by sewing through each hole at least six times with tight, even tension
- Check button placement accuracy by testing the fit before final stitching to prevent costly do-overs
Hem Finishing and Seam Techniques
You’ll transform your sewing projects from amateur to professional when you master proper hem finishing and seam techniques.
These essential skills save time while creating clean, durable results that won’t unravel or look homemade.
Using Walking Foot for Wide Hems
Wide hems require special care, and that’s where a walking foot becomes your best friend. This sewing machine attachment prevents fabric feeding problems by gripping both layers evenly.
As you guide your fabric through, the walking foot ensures stitch consistency and eliminates puckering. Use it with seam guides for even hems every time.
Techniques for Even and Durable Hems
Creating perfectly even hems starts with proper measuring. Mark your hem length with pins spaced two inches apart around the entire garment.
Use a blind stitch hem for invisible finishes on pants and skirts, while a rolled hem foot works beautifully for lightweight fabrics.
When hemming curves, clip seam allowance strategically to prevent puckering and promote smooth transitions. These durable hem finishes transform homemade pieces into professional-looking garments.
Finishing Seams for Professional Results
Tired of seams that scream ‘homemade project’? The difference between amateur and polished work often comes down to how you finish those edges. Good seam finishing keeps your garments looking sharp and lasting longer—no more fraying disasters after a few washes.
- Grade seams by trimming seam allowances to different lengths, preventing bulk
- Use serger options or zigzag stitches to encase raw edges cleanly
- Apply binding techniques with bias tape for curved seams and delicate fabrics
- Try hand finishing with blanket stitches for heirloom-quality hem finishing results
Saving Time and Reducing Sewing Costs
You can cut your sewing costs in half and save hours on each project with the right approach and tools.
Smart fabric choices, efficient machine settings, and proper planning turn expensive hobbies into budget-friendly skills that actually save you money.
Choosing Efficient Sewing Machines and Accessories
High-efficiency machines slash your sewing costs to $0.30-$1.50 per 1,000 stitches versus $5-$50 for outsourcing. Look for automatic thread cutting, programmable stitches, and advanced thread management systems.
Quality accessories like walking feet and guides boost machine efficiency while reducing errors. Smart accessory selection paired with proper sewing machine maintenance transforms your hobby into cost-effective automation.
Planning Projects to Minimize Waste
Start your sewing tips with fabric optimization in mind. Map out all pattern pieces on your material before cutting fabric—this prevents costly mistakes and maximizes yard usage.
Calculate material sourcing needs by adding 10% extra for waste reduction. Smart project estimation helps stretch your budget while preparing for sewing projects efficiently.
Comparing Homemade Vs. Store-Bought Garment Costs
Breaking down the numbers reveals striking differences between homemade and store-bought options. A handmade dress costs $80-90, while jeans reach $148-159, including labor costs.
Here’s what the numbers actually show:
- Fabric savings through sales can reduce material expenses by 40%
- Labor costs represent 73% of homemade garment expenses
- Market trends show store-bought jeans average $35 versus homemade alternatives
Smart DIY sewing focuses on production efficiency and long-term garment alteration benefits. Understanding the true cost analysis is essential for making informed decisions about homemade versus store-bought clothing.
Frequently Asked Questions (FAQs)
How do you fix skipped stitches?
Think skipped stitches mean your needle’s cursed? They’re usually fixable!
First, change your needle—worn ones miss the bobbin thread. Next, re-thread everything with the presser foot up to guarantee proper tension.
These two simple fixes solve most skipped-stitch mysteries surprisingly quickly.
What thread weight works best for beginners?
You’ll want to grab 50-weight thread for most beginner projects. It’s the goldilocks of thread weights—not too thick, not too thin.
Works great with cotton fabrics and feeds smoothly through your machine without drama.
How do you prevent fabric from puckering?
Puckering is absolutely the worst fabric nightmare!
Use proper needle size for your fabric weight, adjust thread tension carefully, and don’t rush—let your machine feed fabric naturally without pulling or pushing it through.
When should you change your needle?
Change your needle every 6-8 hours of sewing time or after each project.
If you notice thread breaks, skipped stitches, or fabric damage, swap it immediately—you’ll save yourself headaches later.
How do you sew stretchy fabrics properly?
About 74% of sewers skip ballpoint needles when working with knits. Use ballpoint needles, reduce tension to 5-3, and sew with zigzag or stretch stitches.
Keep fabric flat while cutting—stretchy materials fight back!
Conclusion
Remember the old saying: practice makes perfect? These helpful sewing tips for home will transform your crafting journey from frustrating fumbles to smooth successes.
You’ll save hours by measuring twice, organizing smartly, and maintaining your tools properly. Start with one or two techniques that resonate most with you, then gradually add others to your routine.
Before you know it, you’ll be sewing with the confidence and efficiency of a seasoned pro.
- https://www.kayeteede.com.au/news/sewing-a-timeless-art
- https://www.archivemarketresearch.com/reports/household-sewing-machines-482672
- https://www.factmr.com/report/2508/household-sewing-machines-market
- https://www.statista.com/statistics/306907/us-expenditure-on-sewing-machines/
- https://maggieframestore.com/blogs/maggieframe-news/embroidery-machine-rates-comprehensive-cost-breakdown-and-buying-guide


