This site is supported by our readers. We may earn a commission, at no cost to you, if you purchase through links.

Today’s designers blend old-school flat pattern drafting with CAD software to streamline their process and see how garments will look in 3D before cutting fabric.
The real game-changers are zero-waste layouts that use every scrap of fabric, plus marker making that cuts down on waste during production.
Then there’s pattern grading—scaling your design across different sizes without losing the fit.
All of this connects your initial sketch to something manufacturers can actually work with, creating patterns that deliver the same great results every time.
Table Of Contents
- Key Takeaways
- Basic Pattern Drafting Fundamentals
- Flat Pattern Making Methods
- Fashion Draping Techniques
- Dart Manipulation for Garment Shaping
- Slashing and Spreading Methods
- Digital CAD Pattern Creation
- Pattern Grading for Multiple Sizes
- Advanced Pattern Techniques
- Marker Making and Fabric Efficiency
- Pattern Making Quality Control
- Frequently Asked Questions (FAQs)
- Conclusion
Key Takeaways
- Master foundational skills like creating accurate slopers from body measurements and manipulating darts—these building blocks determine whether every garment you create fits perfectly or becomes a costly mistake.
- Combine traditional flat pattern methods with digital CAD software for maximum efficiency, using 3D simulation tools that eliminate guesswork and reduce development time by up to 70%.
- Apply slashing and spreading techniques to transform basic patterns into dynamic designs with controlled fullness, creating everything from flowing A-line skirts to dramatic bell sleeves.
- Implement zero-waste pattern layouts and strategic marker making to slash material costs by 15-30% while supporting sustainable fashion practices through intelligent fabric utilization.
Basic Pattern Drafting Fundamentals
Pattern drafting starts with understanding your foundation—accurate body measurements and creating basic pattern blocks called slopers.
You’ll need precise tools like rulers, curves, and quality paper to translate these measurements into the building blocks for every garment design.
Understanding Body Measurements
Think of body measurements as the foundation of your entire garment—get them wrong, and even the most exceptional design will never fit quite right. Mastering measurement techniques and understanding body proportions transforms your pattern design from guesswork into precision. Reading a ruler becomes second nature when measuring the female body accurately.
Here’s what you’ll learn to measure like a pro:
- Anthropometric data analysis – decode the science behind perfect fit
- Size standards interpretation – navigate industry sizing with confidence
- Fit analysis fundamentals – spot fitting issues before they become problems
- Precision measuring techniques – capture every curve and contour accurately
- Body proportion assessment – understand how measurements relate to each other
Creating Slopers From Scratch
Building a sloper is like creating the DNA of your entire garment collection—get this foundation wrong, and every piece that follows will inherit its flaws.
Your bodice sloper starts with precise measurements using tools like French curves and hip curves. Accurate drafting techniques guarantee proper garment fitting—each line you draw directly impacts pattern accuracy.
Master these sloper blocks through methodical drafting, and you’ll transform basic measurements into perfectly fitted foundations.
Using Pattern Blocks Effectively
Pattern blocks are your secret weapon for turning one winning design into an entire collection—master them, and you’ll never start from square one again. These foundation slopers become your personal Block Libraries, storing perfected fits for instant pattern modification. With precision cutting and block construction mastered, you’ll create efficient layouts that transform basic drafting into refined design variations.
- Build Your Foundation Library: Create perfectly fitted basic blocks (bodice, skirt, sleeve) that serve as templates for all future pattern making projects
- Master Block Modification: Learn to manipulate your foundation blocks through dart shifts, seam relocations, and style line additions without losing the original fit
- Refine Your Workflow: Use established blocks to eliminate repetitive measuring and fitting, focusing energy on creative design development instead
Essential Drafting Tools and Materials
Your pattern-making arsenal can make or break your entire design process—without the right tools, even the most ingenious concept will crumble at the drafting table.
Start with a proper drafting table featuring precise measurements and smooth surfaces. Quality pattern papers form your foundation for accurate slopers and bodice blocks.
Essential measuring tools include L-squares, French curves, and flexible measuring tapes for capturing precise body measurements. Don’t forget fabric markers for clean transfer lines during your pattern-making process.
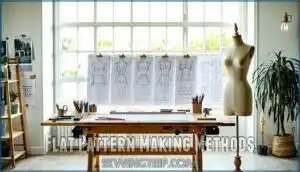
Flat Pattern Making Methods
Flat pattern making transforms your sketched designs into precise, buildable garment blueprints that manufacturers can actually use.
You’ll master the art of converting flat drawings into three-dimensional clothing by manipulating basic pattern pieces, establishing clean seamlines, and calculating exact seam allowances that guarantee professional results.
Translating 2D Designs to 3D Shapes
Ever wonder how designers transform flat sketches into garments that actually fit the human form? This transformation relies on spatial mapping techniques that convert 2D pattern pieces into 3D structures.
Through careful fabric simulation and form creation methods, you’ll translate your design concepts into precise pattern drafting blueprints. Master these 3D modeling fundamentals to bridge the gap between creative vision and wearable reality.
Working With Basic Pattern Pieces
Think of basic pattern pieces as the alphabet of fashion design—master these fundamental shapes, and you’ll speak fluent garment construction. These slopers form your foundation for every garment you’ll create through pattern making and drafting.
- Front and back bodice blocks – Your core pattern pieces for fitted garments
- Basic sleeve slopers – Essential for proper garment fitting across arm movements
- Skirt and pant blocks – Foundation shapes that adapt to countless design variations
- Neckline and armhole curves – Critical basic shapes requiring precise drafting tools for accuracy
Creating Seamlines and Cutting Lines
Drawing seamlines and cutting lines transforms flat patterns into precise construction blueprints that guide every stitch. Your seamline drafting creates the exact stitching path, while cutting lines define fabric boundaries for ideal pattern precision. These technical markings guarantee garment finishing meets professional standards through systematic pattern making approaches.
| Line Type | Purpose |
|---|---|
| Seamline | Defines stitching path for garment assembly |
| Cutting Line | Marks fabric cutting boundary with seam allowance |
| Grainline | Indicates proper fabric grain alignment |
| Notches | Creates matching points between pattern pieces |
Adding Seam Allowances Properly
Your perfectly drafted pattern becomes worthless without proper seam allowances—it’s the difference between a professional garment and a frustrating sewing disaster. Standard seam allowances vary by garment type and fabric selection, but consistency throughout your pattern-making process ensures accurate garment fitting and construction.
You’ll want to nail down these five seam allowance measurements for accurate patterns:
- 5/8 inch – Standard for most garment construction and commercial sewing patterns
- 1/2 inch – Common for curved seams and armholes in garment fitting
- 1/4 inch – Used for facings, collars, and detailed sewing techniques
- 1 inch – Hemlines and areas requiring pattern grading adjustments
- 3/8 inch – Necklines and areas with tight curves during weaving
Calculate seam allowances based on your fabric’s fray tendency and intended sewing techniques, marking them clearly on your patterns for foolproof garment construction.
Fashion Draping Techniques
Fashion draping transforms flat fabric into three-dimensional garments by sculpting muslin directly on dress forms.
You’ll master the art of creating volume, capturing fit, and translating your draped designs into precise paper patterns for production.
Setting Up Dress Forms Correctly
A properly aligned dress form becomes your silent partner in creating impeccable drapes, but one misaligned measurement can throw off your entire garment construction.
Start with dress form calibration by checking your body measurements against the form’s dimensions. Add padding to achieve form-fitting precision where needed.
Quality dress form materials won’t shift during precision draping sessions, guaranteeing your bodice patterns maintain accuracy throughout the garment development process.
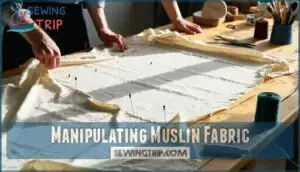
Manipulating Muslin Fabric
Muslin becomes your canvas when draping, but working with this humble fabric takes some know-how to get professional results instead of amateur attempts.
Here’s what you need to nail:
- Pre-treat your muslin – Steam lightly to remove sizing and achieve natural drape
- Work with the grain – Align lengthwise threads parallel to center front for proper hang
- Pin strategically – Use silk pins every 2-3 inches to secure without distorting fabric patterns
Your hands become sculpting tools, gently coaxing muslin into garment prototyping shapes while manipulating darts naturally.
Creating 3D Shapes Through Draping
Think of draping as sculpting with fabric—you’re not just covering a form, you’re breathing life into flat material by coaxing it into three-dimensional poetry.
Draping transforms flat fabric into three-dimensional poetry by sculpting material into life through strategic manipulation and precise form-fitting techniques
You’ll pin strategically along the grain, creating draped silhouettes through careful fabric manipulation. This muslin modeling process reveals natural fold lines and design variations that flat pattern making techniques simply can’t capture.
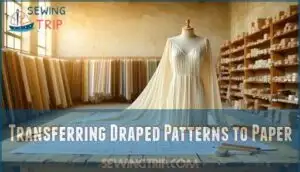
Transferring Draped Patterns to Paper
Once your draped masterpiece hugs the dress form like a second skin, the real magic begins when you translate those flowing curves into flat, precise pattern pieces that any seamstress can follow. This critical step transforms your three-dimensional creation into reproducible templates through careful pattern transfer techniques that preserve every curve and detail.
- Mark all seamlines directly on the muslin using a sharp pencil before removing from the dress form
- Transfer notches and grain lines immediately to maintain accurate fabric rendering alignment
- Use tracing wheels on paper underneath to capture draped silhouettes with precision
- Document fit adjustments during pattern drafting to guarantee consistent pattern grading results
Dart Manipulation for Garment Shaping
Darts are your secret weapon for transforming flat fabric into fitted, three-dimensional garments that follow the body’s natural curves.
You can move, convert, or eliminate darts to create everything from sleek princess seams to flowing silhouettes without sacrificing the perfect fit.
Moving Darts to Different Positions
Darts are like the secret architects of fit, and knowing how to relocate them transforms a basic pattern into countless design possibilities.
Through dart relocation techniques, you can move bust darts to armholes, shoulders, or side seams while maintaining the same shaping power. This pattern manipulation involves slashing and spreading methods that preserve garment fitting while creating fresh silhouettes through strategic fabric manipulation and seam adjustment.
Converting Darts to Seams
When you transform a dart into a seam, you’re fundamentally turning invisible shaping into a visible design element that can become the star of your garment. This dart manipulation technique creates structural interest while maintaining proper garment fitting.
- Seam Conversion Process: Cut along the dart legs and add seam allowance to both edges
- Pattern Shaping Benefits: Converts fitting darts into decorative style lines with functional purpose
- Design Integration: Works perfectly with slashing and spreading methods for complex silhouettes
Creating Princess Lines From Darts
Princess lines aren’t just another seam placement—they’re the secret weapon that transforms a basic bodice into a couture-worthy silhouette. You’ll redirect dart manipulation from the side seam through the bust point, creating elegant vertical seams that sculpt the torso.
This pattern drafting technique eliminates bulk while maintaining precise garment shaping, making princess seams essential for refined fashion drafting and pattern creation.
Eliminating Darts Through Ease
Sometimes the most elegant solution isn’t adding structure—it’s letting the fabric breathe naturally into shape. Eliminating darts through ease calculation transforms rigid construction into fluid garment design.
You’ll redistribute dart intake across seamlines, allowing fabric flow to create natural body contours. This pattern simplification technique requires precise ease distribution—usually adding 1-2 inches strategically.
The result? Softer silhouettes where sewing techniques improve comfort without compromising fit through thoughtful pattern making adjustments.
Slashing and Spreading Methods
Slashing and spreading transforms basic patterns into vibrant designs by strategically cutting and expanding pattern pieces to add controlled fullness.
You’ll master techniques that create everything from flowing A-line skirts to billowing sleeves, giving your garments movement and visual interest through calculated pattern manipulation.
Adding Fullness to Skirts
Skirt fullness transforms flat fabric into flowing, dimensional silhouettes that move with grace and purpose.
You’ll achieve stunning flared hem effects by slashing your basic skirt pattern from hem to waist, then spreading each section to create gathered fabric sections.
This pattern-making technique produces everything from subtle A-line shapes to dramatic full skirt designs with ruffled edge details and tiered layers for varied skirt silhouette variations.
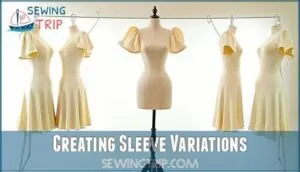
Creating Sleeve Variations
Sleeves can make or break your design—they’re the architectural framework that transforms a flat bodice into something that moves with grace and purpose. Mastering sleeve design variations through slashing and spreading unlocks endless creative possibilities.
Five sleeve techniques that’ll completely transform your designs:
- Bell Sleeve Patterns – Slash from wrist to elbow, spread for dramatic flare
- Puffed Sleeve Styles – Add fullness at shoulder cap through strategic slashing
- Gathered Sleeve Techniques – Create controlled volume with multiple slash points
- Ruffled Sleeve Details – Layer multiple pattern pieces for cascading effects
- Full Sleeve Modifications – Combine sleeve cap design adjustments with body integration
Developing Flare and Gathers
Flare and gathers breathe life into flat fabric, transforming rigid pieces into flowing, dimensional garments that move with graceful rhythm.
You’ll control volume management through strategic curve drafting, creating elegant flare by spreading pattern pieces at hemlines while maintaining fit at hip points.
Gather control requires calculated fabric manipulation—mark your gathering points, then slash vertically to add precise fullness where movement demands it most.
Combining Slash Techniques
Think of slash techniques as your creative toolkit’s Swiss Army knife—each method powerful on its own, but truly radical when you master their combinations.
When you merge slash fold methods with pattern spreading techniques, you’re fundamentally creating fabric layering possibilities that single approaches can’t achieve.
Cut and spread operations work brilliantly alongside manipulating darts—you can eliminate bust darts while simultaneously adding sleeve fullness through strategic slashing and spreading.
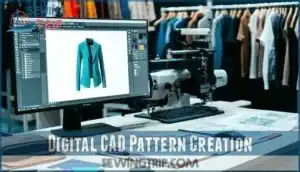
Digital CAD Pattern Creation
Digital CAD software has revolutionized pattern creation by replacing traditional paper methods with precision computer tools that simplify the entire design process.
These sophisticated systems offer 3D simulation capabilities, AI-powered pattern generation, and extensive digital storage solutions that dramatically reduce development time while improving accuracy.
Using Pattern Making Software
Pattern making software has revolutionized fashion design faster than you can say "seam allowance," turning what once took hours of manual drafting into precise digital blueprints created in minutes.
These CAD systems integrate seamlessly with your existing workflow, offering pattern optimization tools that eliminate guesswork from digital pattern creation.
Software integration streamlines everything from basic pattern drafting fundamentals to complex virtual prototyping, letting you manipulate dart placement and adjust seamlines with surgical precision while maintaining your creative vision intact.
3D Pattern Simulation Tools
Gone are the days when you’d need countless muslin mock-ups cluttering your studio—3D pattern simulation software lets you visualize how fabric drapes, moves, and fits before you cut a single thread. These virtual prototyping tools transform your digital design process by showing real-time fabric behavior and fit adjustments.
- Fabric simulation accuracy – Sophisticated physics engines replicate how different textiles behave, from silk’s fluid drape to denim’s structured hold
- Instant fit visualization – See how your pattern translates to the human form without physical sampling or costly alterations
- Real-time pattern adjustments – Modify dart placement, seam lines, and proportions while watching the garment transform instantly
This CAD design revolution streamlines your pattern-making techniques, turning weeks of traditional sampling into hours of precise digital pattern creation.
AI-powered Pattern Generation
What possibilities emerge when machines learn your design vision? AI pattern automation transforms traditional template creation by analyzing 83.33% cost savings compared to manual methods.
These digital design systems generate 400 unique pattern variations per prompt, enabling sustainable fashion through zero-waste algorithms.
Pattern making accelerates through tech innovation, reducing development time by 70% while maintaining weaving precision. The use of AI fashion tools enhances the design process with precision and speed.
Digital Pattern Storage Systems
Your digital pattern library can become a goldmine or a graveyard—and the difference lies in how you organize and store your files from day one. Cloud storage platforms like Google Drive or Dropbox create secure digital archives accessible from anywhere. Virtual libraries with proper naming conventions transform your pattern templates into searchable design assets, securing pattern safety through automated backups and version control.
- Implement consistent file naming – Use date stamps, design codes, and size ranges for instant pattern identification
- Create folder hierarchies – Organize by season, garment type, or client to simplify your digital workflow
- Enable automatic syncing – Set up cloud-based data management to protect your pattern investments from hardware failures
Pattern Grading for Multiple Sizes
Pattern grading transforms your single-size pattern into a complete size range, scaling proportions to fit different body measurements while maintaining the garment’s design integrity.
You’ll master grade rules that control how each pattern piece grows or shrinks, guaranteeing consistent fit across all sizes from petite to plus.
Grade Rule Development
Creating accurate grade rules feels like building a mathematical blueprint that transforms one perfect pattern into an entire size range. You’ll establish precise measurements for each size increment, usually adding or subtracting specific amounts at key points.
Your grading rules become the foundation for consistent sizing across your entire collection, guaranteeing each garment maintains its intended fit and proportions.
| Size | Bust Grade | Waist Grade | Hip Grade |
|---|---|---|---|
| XS-S | +1" | +1" | +1.25" |
| S-M | +1" | +1" | +1.25" |
| M-L | +1" | +1" | +1.25" |
| L-XL | +1.25" | +1.25" | +1.5" |
Proportional Sizing Methods
Mastering proportional sizing isn’t just about making patterns bigger or smaller—it’s about understanding how the human body changes shape as it scales across different sizes.
You’ll need to analyze body proportions carefully, recognizing that waist-to-hip ratios shift differently than shoulder measurements across sizing standards.
Your measurement techniques must account for these natural variations, guaranteeing proper fit analysis through strategic grading patterns that maintain garment integrity while adjusting seam allowance proportionally.
Computer-aided Grading
Imagine having a digital assistant that can grade your entire pattern collection in minutes rather than hours—that’s the power of computer-aided grading software transforming modern fashion production. These automated grading systems use precision sizing algorithms to scale your base patterns across multiple sizes while maintaining perfect proportional relationships. Digital patterns eliminate human error and create consistent technical drawings for virtual prototyping.
Why automated grading works so well:
- Speed Enhancement – Complete size runs in 90% less time than manual pattern making techniques
- Mathematical Precision – Grading software calculates exact measurements using industry-standard grade rules
- Version Control – Digital storage systems track pattern revisions and maintain grading patterns consistency
Quality Control in Grading
Even seasoned designers know that a single grading error can turn your carefully crafted pattern into a production nightmare that costs thousands in remakes and delays. Your quality metrics must catch inconsistencies before they reach production floors.
| Quality Check | Measurement Point | Tolerance Range |
|---|---|---|
| Bust circumference | Center front to side seam | ±0.125" |
| Waist positioning | Natural waist placement | ±0.25" |
| Armhole depth | Shoulder point to underarm | ±0.125" |
| Seam allowance width | All construction seams | ±0.063" |
Precision grading demands systematic error analysis at each size breakpoint. Check that your technical drawings reflect accurate proportional changes, and verify seam allowance consistency across all garment pieces. Size consistency separates amateur pattern making from professional-grade work that manufacturers trust.
Advanced Pattern Techniques
You’ll master the art of transforming basic patterns into show-stopping designs through four game-changing techniques that separate amateur seamsters from industry professionals.
These sophisticated methods release endless creative possibilities while maintaining the quality and technical superiority that defines superior garment construction.
Creating Complex Design Variations
Think of sophisticated pattern manipulation as your design laboratory where basic shapes transform into runway-worthy silhouettes through strategic cuts, curves, and creative problem-solving.
You’ll master complex silhouettes by manipulating darts into asymmetrical designs, adding fullness to patterns through original details, and using textile manipulation for fashion embellishments that enhance bodice design beyond conventional construction methods.
Zero Waste Pattern Layouts
Revolutionizing sustainable fashion through Zero Waste Design, these eco-friendly textile techniques eliminate fabric scraps entirely. Your pattern drafting becomes a puzzle where every piece fits perfectly, supporting circular production and green manufacturing goals.
- Tessellation layouts – Interlock geometric pattern pieces like puzzle tiles
- Rectangular cutting – Design garments using only straight-line cuts
- Modular construction – Create detachable sections for adaptable styling
- Wrap-around silhouettes – Eliminate traditional seams through continuous fabric flow
These sustainable fashion methods reduce textile waste by 15-20% while creating distinctive, loose-fitting designs that challenge conventional pattern-making approaches. By adopting zero waste strategies, designers can markedly minimize environmental impact and promote sustainability in the fashion industry.
Colorblocking Pattern Development
Colorblocking transforms a single garment into a canvas of contrasting hues, but the real magic happens when you learn to manipulate pattern pieces like a puzzle master arranging visual drama. You’ll separate your original pattern into distinct sections, applying Color Theory principles to create striking palette design combinations.
Modern fashion trends embrace bold digital textures alongside traditional block printing techniques, turning each clothing design into wearable art that grabs focus through strategic visual placement.
Technical Flat Drawing Integration
Think of technical flat drawings as the blueprint language that bridges your creative vision with the pattern maker’s precision—without this visual translation, even the most ingenious design idea becomes lost in miscommunication.
Your Tech Pack templates become the foundation for accurate pattern integration, where Digital Drafting tools transform sketches into measurable specifications.
Precision Drawing techniques guarantee every seam, dart, and construction detail translates seamlessly from design concept to functional pattern pieces.
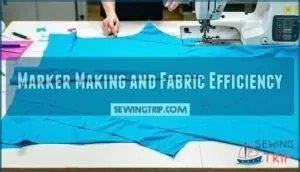
Marker Making and Fabric Efficiency
Marker making transforms your patterns into profitable production by strategically arranging pieces on fabric to minimize waste and boost yield.
Mastering these layout techniques can slash material costs by 15-30% while streamlining your manufacturing process from sketch to finished garment.
Optimizing Fabric Layouts
Smart fabric placement can slash your material costs by up to 30% while turning waste scraps into profit-boosting efficiency.
You’ll optimize textile efficiency through strategic digital layouts that minimize remnants. Position your largest pattern pieces first, then nestle smaller components into remaining spaces.
This sustainable cutting approach transforms garment design from wasteful guesswork into precision clothing production that respects every fabric inch.
Automated Marker Creation
You’ve probably watched cutting machines slice through dozens of fabric layers like butter, but the real magic happens in the software that orchestrates every cut with mathematical precision.
Modern CAD systems deliver Automated Cutting through Digital Nesting algorithms that optimize Fabric Optimization.
Your Tech Pack specifications transform into intelligent Marker Layout solutions that boost Production Efficiency while maintaining pattern accuracy.
These pattern making technologies transform clothing production workflows in contemporary fashion design.
Minimizing Textile Waste
Through strategic pattern layout optimization, you can slash textile waste by up to 30% while maintaining garment quality. Zero-waste pattern making techniques achieve near 100% fabric utilization by eliminating traditional cutting waste at armscyes and necklines.
Sophisticated marker making with CAD systems reduces fabric waste compared to manual methods, supporting sustainable fabrics and eco-friendly clothing production.
These circular design approaches transform textile recycling potential in fashion design.
Production Efficiency Strategies
When your patterns hit the production floor, every second counts—and the difference between a smooth operation and costly delays often comes down to how well you’ve optimized your workflow before the first cut. Smart production planning integrates your pattern grading process with supply chain timing, while lean manufacturing principles eliminate bottlenecks in the clothing manufacturing industry.
Workflow optimization through digital systems reduces cost reduction opportunities, transforming your fashion design process into a competitive advantage.
Pattern Making Quality Control
Quality control transforms rough drafts into production-ready patterns that manufacturers can trust. You’ll master error correction techniques, create bulletproof documentation, and prepare patterns that eliminate costly production mistakes.
Correcting Pattern Errors
Pattern making mistakes snowball fast. One wrong measurement throws off the entire fit, turning what should be a perfect garment into an unwearable disaster.
The key is catching these errors early and knowing how to fix them systematically:
- Measurement mistakes requiring complete pattern revision
- Fit issues demanding systematic pattern grading adjustments
- Draft miscalculations needing precise geometric corrections
- Seam placement errors affecting overall garment design integrity
Documentation and Specifications
Your pattern’s journey from creative vision to factory floor hinges on documentation that speaks the universal language of manufacturing. Tech Pack templates become your blueprint, containing Technical Specs, Pattern Notation, and Measurement Standards that eliminate guesswork.
Include Fabric Requirements, seam allowances, and Production Guidelines within your design process documentation. These Pattern making techniques guarantee smooth communication between designers and manufacturers worldwide.
Production-ready Pattern Preparation
Think of production-ready patterns as the final dress rehearsal before opening night—every measurement, notch, and instruction must be impeccable because there’s no room for improvisation once the cutting begins.
Your tech pack becomes the manufacturing bible, detailing fabric sourcing requirements and quality assurance checkpoints. Sample testing validates your pattern grading process before mass production.
Manufacturing optimization depends on clear pattern making techniques that eliminate costly errors during clothing manufacturing industry workflows.
Frequently Asked Questions (FAQs)
How to calculate fabric requirements accurately?
Measure twice, cut once—this golden rule starts with precise Fabric Estimation before your shears touch silk. Calculate yardage by measuring each pattern piece length, adding seam allowances, then multiplying by fabric width efficiency.
Smart Textile Measurement accounts for pattern layout optimization, preventing costly Material Optimization mistakes during the manufacturing process.
What interfacing types work for different patterns?
Heavy patterns demand woven interfacing materials for structure, while delicate templates need sew-in fabric stabilizers.
Knit interlinings support stretch garment designs, providing pattern reinforcement without eliminating drape.
Match interfacing weight to your fabric’s density for ideal backing.
How to adjust patterns for stretch fabrics?
Stretch Fabric Basics require reducing pattern ease by 25-50% depending on fabric stretch ratios.
Knit Fabric Patterns need narrower seam allowances and strategic dart placement.
Elastic Seam Allowance prevents puckering while maintaining garment shape during textile tension control and fabric shaping.
When should notches be added to patterns?
Like breadcrumbs guiding you through a forest, notches serve as your pattern’s navigation system. Add notches during initial Drafting Tips phases when creating seam alignment points, matching curved edges, or marking construction details.
Strategic Notch Placement ensures Pattern Accuracy while saving designers time during garment assembly, preventing costly fabric mistakes.
How to modify patterns for different body types?
Body Type Analysis transforms standard patterns through targeted Fit Adjustments and strategic Measurement Techniques. Successful Customization Strategies focus on key areas where bodies naturally vary.
Essential modifications include:
- Bust adjustments – Expand or reduce chest area through waist darts manipulation and shoulder yoke repositioning
- Hip modifications – Alter side seams and add ease through pattern making refinements at natural waistline
- Necklines adaptation – Adjust depth and width based on individual body measurements and Proportion Guidance requirements
Conclusion
Pattern making isn’t just about following rules—it’s about turning ideas into something you can actually make. You’ve just worked through ten professional techniques that bridge the gap between what’s in your head and what ends up in production.
These methods cover everything from basic drafting to advanced CAD systems. Each one builds on the others, whether you’re working with darts, planning zero-waste layouts, or scaling patterns across different sizes. Get comfortable with these techniques, and you’ll move confidently from initial design concepts to manufacturing-ready patterns.
- https://techpacker.com/blog/design/apparel-pattern-making/
- https://www.tandfonline.com/doi/full/10.1080/17543266.2023.2260829
- https://her.re.kr/journal/view.php?doi=10.6115%2Fher.2023.005
- https://www.verifiedmarketreports.com/product/apparel-manufacturing-cad-software-market/
- https://sites.google.com/view/insightpursuit/top-reports/north-america-cad-in-apparel-market-by-application

