This site is supported by our readers. We may earn a commission, at no cost to you, if you purchase through links.
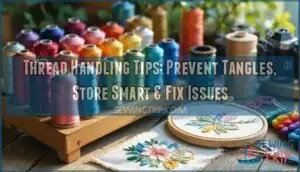
Prep each strand like you’re slicking back hair: condition, separate, and settle any wild static. Keep thread lengths under 18 inches, and use bobbins or cards to avoid a spaghetti heap in your kit.
If a thread throws a tantrum and breaks, check your tension and swap that weary needle. Proper handling keeps your workflow humming, with more helpful tricks waiting just below the surface.
Table Of Contents
Key Takeaways
- Always match your thread type and length to the fabric and project to prevent tangles and breakage. – Proper storage, labeling, and organizing of threads speed up workflow and minimize wastage or loss. – The right tools and ergonomic habits reduce hand fatigue, improve efficiency, and keep your threads in top condition. – Regularly check tension, needle condition, and preparation methods to troubleshoot breakage, fraying, and knotting before they slow you down.
Essential Tips for Preventing Thread Tangles
Thread tangles don’t have to derail your project if you start with the right foundation.
When you pick the right thread, get things set up properly, cut to the right length, and have the right tools handy, your project is much more likely to come together without a hitch.
Choosing The Right Thread Type
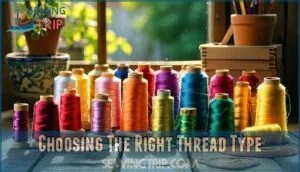
Picking the right thread material prevents tangles before they start. Match thread to your fabric—polyester works across most garments, while cotton floss excels for embroidery on natural fibers. Polyester outperforms cotton in stress tests by 18%, making it the go-to for heavy-duty seams. For outdoor projects, selecting thread with high UV resistance is vital for longevity.
Consider these priorities:
- Fabric compatibility – Match thread fiber to your base material
- Strength requirements – Polyester covers 60% of garment needs; nylon suits canvas
- Color considerations – Test colorfastness; polyester and rayon hold 97%+ retention
- Special finishes – UV-treated or mercerized threads reduce puckering and extend lifespan
Use thread organizing cards to keep floss sorted and ready for your next project.
Preparing Threads Before Use
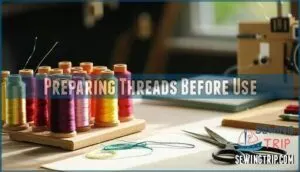
Once you’ve selected the right thread for your project, prepping it correctly can make the difference between smooth stitching and a tangled mess. Thread conditioning smooths fibers and reduces static, taming troublesome threads before they hit your needle.
Inspect for weak spots or inconsistencies. For stranded floss, separate and realign individual strands—this prevents twisting during use.
Thread cards come in handy for keeping your stash sorted, and winding your thread the right way can save you a lot of tangles down the line.
Depending on what your threads are made of, you might need to tweak how you prep them—each type has its own little quirks.
Proper Thread Length and Handling
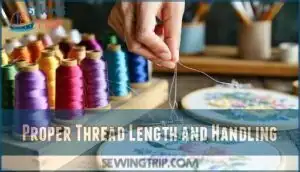
You’d be surprised how much grief comes from cutting your thread too long—18 inches is your sweet spot for most hand sewing and embroidery work. Beyond that, you’re inviting tangles and fraying. Here’s how to handle thread like a pro:
- Best Length matters: Keep cotton floss and weaving thread under 18 inches to maintain proper thread tension and prevent knots.
- Hand Placement counts: Hold the working thread between your thumb and forefinger, about two inches from the fabric.
- Smooth Pulling technique: Draw thread through in one consistent motion—no jerking or twisting motions that create stress points.
- Thread management systems: Pre-cut and organize lengths on bobbins or cards to eliminate mid-project tangles and improve your workflow.
Tools and Techniques for Tangle-Free Sewing
The right tools can turn thread chaos into smooth sailing, but you need to know which ones actually work and how to use them. Needle threaders cut setup time, while thread conditioners reduce friction and tangles. Spool caps keep thread secure during machine work, and thread nets prevent unwinding disasters.
| Tool | Primary Benefit |
|---|---|
| Needle Threaders | Fast, accurate threading |
| Thread Conditioners | Eliminates static, friction |
| Spool Caps | Secures thread on machines |
| Thread Nets | Prevents floss unwinding |
| Winding Techniques | Organized embroidery threads |
Getting your thread wound and organized the right way makes the whole process a lot smoother—and way less frustrating.
Organizing and Storing Embroidery Threads
Storing your threads the right way means you’ll always find what you need and won’t waste any supplies.
You’ll work more efficiently when you can quickly locate the right color and know your materials are protected from damage.
Storage Solutions for Different Thread Types
Organizing embroidery threads effectively starts with matching storage to thread type. Spool size matters when selecting containers, as standard spools, cones, and pull skeins each demand different solutions. Consider these proven approaches:
- Stackable bins hold up to 40 spools per unit, offer 90% better dust protection than open racks, and accommodate various floss types with transparent designs for quick color identification.
- Wall-mounted Industrial Thread Racks expand vertical space for up to 150 spools, speeding color selection by 35% while freeing workspace.
- Climate-Controlled Storage or UV-protected cases reduce brittleness by 60% for specialty threads, while DIY Thread Storage using repurposed containers saves 93% versus commercial options.
Portable Thread Cases suit travel needs, and drawer organizers pair bobbins with spools efficiently. A great way to maintain accessibility is with customizable organization. Weaving proper storage into your workspace preserves thread quality for over five years.
Labeling and Color-Coding Systems
If you don’t have a good labeling system, you’ll waste more time searching for the right thread than actually stitching.
Simple color cues and visual organization can make it so much easier to keep track of your embroidery floss.
Stick with consistent brand markers on your cotton threads, but don’t be afraid to tweak your organizing style if your collection or needs change.
| Method | Best For | Key Benefit |
|---|---|---|
| Number codes | Large collections | Matches manufacturer reference |
| Color swatches | Visual workers | Instant identification |
| Digital apps | Professional setups | Tracks inventory usage |
| Custom labels | Mixed brands | Maintains consistency |
Preventing Thread Wastage and Loss
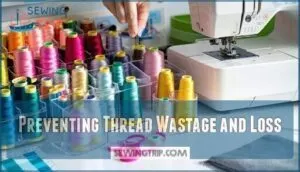
After you’ve labeled and color-coded your collection, the next step is keeping those threads from disappearing into thin air or ending up in the scrap bin. Thread wastage and loss add up fast, cutting into your budget and interrupting your workflow. Here’s how you protect your investment:
- Inventory Management: Track thread quantities to reorder before you run out and avoid duplicate purchases
- Material Optimization: Cut working lengths that match your project needs, often 18 to 24 inches
- Thread Safety: Store spools in closed containers to prevent dust, moisture, and UV damage
- Cost-saving Strategies: Collect short ends for small fill stitches or basting instead of discarding them
- Best Practices for Thread Management: Keep frequently used colors accessible to minimize handling and potential tangles
When your threads are organized and easy to find, you’ll spend less time searching through piles and more time actually making things.
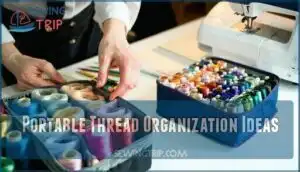
Portable Thread Organization Ideas
When you’re stitching on the go, keeping your threads organized isn’t just convenient—it’s the difference between a smooth project and a tangled nightmare. Travel thread kits and compact thread cases solve this problem by keeping your colors separated and accessible.
Thread organizer bags with labeled compartments prevent wastage and improve user experience. DIY portable solutions, like repurposed pill organizers or small tackle boxes, offer best practices for thread management without breaking the bank.
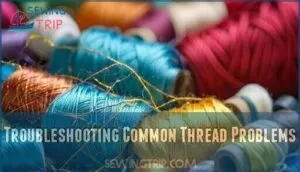
Troubleshooting Common Thread Problems
Even the best threads break, fray, or knot when you’re working with them. You’ll face these issues whether you’re handling cotton floss, metallic threads, or specialty fibers, but the right techniques can solve most problems before they slow you down.
Preventing and Fixing Thread Breakage
Thread breakage doesn’t have to halt your project. Incorrect threading accounts for over 60% of breaks, while improper tension causes more than 40%. Start with these foundational checks:
- Re-thread your machine completely—this resolves breakage in over 70% of cases
- Adjust tension settings for your fabric and thread type to fix 47% of issues
- Replace your needle after 8 hours of use to prevent 33% of snapping incidents
Regular machine maintenance every 8–10 hours cuts breakage by 50%. High-quality threads show 25% greater tensile strength than generic options, and proper needle selection eliminates 28% of failures.
For persistent problems, clean your bobbin area and slow your machine speed on dense patterns. Non-destructive repair strategies preserve thread strength when rework is necessary, maintaining full load-bearing capacity in 95% of applications.
Dealing With Fraying and Knotting
Fraying and knotting can turn even the simplest project into a test of patience, but understanding why these problems happen gives you the upper hand. Preventing fraying starts with matching your needle size to the thread weight, while thread conditioners reduce friction that causes wear. When untangling knots, don’t pull harder—hold the thread taut and work backward from the knot. Proper thread tension and thread management throughout the thread lifecycle help you avoid these threading pitfalls.
| Problem | Cause | Solution |
|---|---|---|
| Fraying ends | Rough needle eye or excessive friction | Use thread conditioner; check needle size |
| Mid-stitch knots | Improper thread tension or twisted threads | Let needle hang to untwist; adjust tension |
| Pull-through tangles | Thread too long or incorrect threading direction | Cut to 18 inches; thread from spool end |
| Split strands | Dull needle or wrong thread type | Replace needle; match thread to fabric |
| Persistent knotting | Poor thread quality or storage issues | Store threads properly; invest in quality |
Once you start spotting these trouble signs, fixing them quickly feels like second nature.
Tips for Managing Pull Skeins and Stranded Floss
Pull skeins look simple enough, but they’ve a knack for turning into a knotted mess the moment you try to find the center strand. Here’s how you master cotton floss without losing your sanity:
- Locate the center pull correctly – Feel for the loose end inside the skein before pulling
- Strip floss gradually – Separate strands slowly to maintain proper thread tension
- Wind small amounts – Use bobbins or cards for color management and easy access
- Keep skeins intact – Don’t unravel the entire skein until you need specific sections
- Practice gentle winding techniques – Avoid stretching fibers during floss separating processes
Handling Specialty and Metallic Threads
Metallic threads and specialty fibers might look stunning in your project, but they’ll test your patience in ways cotton floss never could. These temperamental materials require different handling than standard cotton embroidery floss.
| Thread Type | Key Challenge | Solution |
|---|---|---|
| Metallic Thread Issues | Frequent breakage | Use shorter working lengths (12-18 inches) |
| Silk floss | Tangling during weaving | Apply thread conditioner before use |
| Rayon specialty | Fraying at needle eye | Select larger needle size for smoother passage |
| Lurex blend | Tension problems in hand embroidery | Reduce machine tension by 20-30% |
Preventing Fraying starts with proper Needle Selection – choose a size larger than normal to reduce friction. Lubrication Techniques using thread conditioner or beeswax create smoother passage through fabric. Tension Adjustment becomes critical with these delicate materials, requiring lighter handling than traditional cotton skeins.
Ergonomic and Sustainable Thread Handling
Your hands shouldn’t pay the price for beautiful stitching—smart ergonomic techniques can transform your thread handling from strain to satisfaction.
Sustainable practices also stretch your thread budget further while reducing waste, making every project both kinder to your body and the environment.
Reducing Hand Fatigue With Proper Tools
Your hands weren’t designed to grip tiny needles and manipulate delicate threads for hours on end, which is why the right tools can transform your embroidery sessions from endurance tests into enjoyable crafting time. Ergonomic tooling reduces strain while optimized grips prevent cramping during extended needlework sessions.
- Needle threaders eliminate squinting and reduce finger pressure when working with fine floss
- Ergonomic hoops with padded grips minimize hand fatigue during intricate stitching projects
- Magnetic needle holders keep tools within easy reach, reducing repetitive stretching motions
- Adjustable work stands promote proper posture improvement and reduce neck strain while weaving
- Thread snips with spring action require less force than traditional scissors for continuous cutting
Techniques to Minimize Muscle Strain
Long stitching sessions can turn your hands and wrists into a battlefield of aches and tension, but smart positioning and movement techniques can keep you comfortable for hours.
Take regular breaks every twenty minutes to stretch your fingers and rotate your wrists. Keep your work at elbow height to maintain neutral posture awareness and prevent shoulder strain.
Ergonomic tools like padded thimbles and adjustable hoops reduce pressure points, while proper thread management prevents excessive tugging motions.
Sustainable Practices for Thread Use
Smart choices in materials make your stitching more sustainable. Organic cotton embroidery floss uses 91% less water than conventional options, while recycled threads from PET bottles help divert 30 billion bottles from landfills annually.
Choose skeins made from hemp or bamboo—they need no pesticides and 70% less water.
Ethical sourcing matters too, especially for specialty silks used in weaving projects.
Reducing Thread Waste in Home and Industry
Every spool tells a story—so why let those extra inches wind up in the waste bin? Embrace waste reduction strategies like precise cutting and efficient inventory planning.
Keep your thread stash in check by using digital tracking, choosing materials mindfully, and finding creative ways to recycle what’s left.
Smart resource management benefits not just your wallet, but also application performance, user experience, and overall performance optimization in both home and industrial settings.
Thread Handling Best Practices in Programming
Managing threads in programming takes more than just splitting tasks—it demands careful attention to timing and resource sharing.
By following best practices for thread safety, synchronization, and smart control, you can prevent bugs and get smoother, faster results from your code.
Avoiding Deadlocks and Race Conditions
Run too many threads without a roadmap, and you’ll end up in a deadlock—like two weavers both grabbing the same shuttle and refusing to let go.
Deadlock Prevention means guarding lock acquisition order, while Race Detection highlights those tricky moments when threads trip over each other.
Prioritize Thread Safety and smart Concurrency Control to conquer these classic threading pitfalls.
Synchronization Methods for Shared Data
Ever felt like too many cooks in the kitchen ruin the recipe? Sharing data between threads can get messy fast without the right synchronization methods. Here are your essentials:
- Use Mutex or the Monitor class for precise locking mechanisms.
- Rely on Interlocked methods and Reset events for basic thread synchronization and control.
- Carefully design synchronization techniques to avoid starvation and guarantee smooth shared data synchronization.
Safe Thread Termination and Control
Once you’re comfortable keeping threads in sync, it’s time to make sure you can stop them safely—without risking errors or unfinished business. Avoid ThreadAbort, ThreadSuspend, and ThreadResume; they can ruin Resource Management and Context Preservation.
Instead, use Cooperative Cancellation and proper Exception Handling. Always coordinate thread termination, especially with Daemon threads, to uphold safe Thread synchronization and control.
Improving Application Responsiveness With Multithreading
When you’re comfortable managing the end of a thread’s life, it’s just as important to know how running multiple threads at once can keep your application snappy and responsive.
Leverage thread pools for heavy lifting, use asynchronous tasks for non-blocking operations, and address concurrency issues head-on.
Multithreading and proper parallel processing directly improve GUI application responsiveness and overall performance optimization.
Frequently Asked Questions (FAQs)
How to salvage damaged or tangled thread spools?
Untangling techniques always start with patience. Use slow, gentle tension and a seam ripper or needle when needed.
Wind salvaged thread using proper re-spooling methods.
Preventing future damage comes down to organized storage and reliable resource management.
What’s the best way to join short thread ends?
Splicing threads is the neatest joining technique—overlap ends, weave or split them together, then secure with a tiny knot if needed. For extra knot security, try thread locking or a small dab of clear adhesive.
Blending colors? Plan ahead for resource management and thread safety.
Can old or expired thread still be used safely?
Dry, brittle, or fuzzy—old threads often show their age. Thread degradation can weaken structure.
For peace of mind, perform strength testing before use. Storage impact matters, too.
Prioritize project suitability and thread safety over nostalgia.
How to clean and maintain thread-handling tools?
Tool Cleaning Methods start with removing lint and residue after use.
For Rust Prevention Tips, store in a dry spot.
Lubrication Best Practices matter for smooth movement.
Use Sharpening Techniques precisely, and always monitor storage environment control.
Are there safe thread handling practices for children?
Suppose you’re testing the theory that children can manage threads safely—start with child-safe threads, direct supervision, age-appropriate tools, simple educational resources, and a small first-aid kit.
Focus on practical thread management, shared data, and clear synchronization.
Conclusion
Who doesn’t want a smoother, more efficient stitching experience? Mastering thread handling tips saves you headaches, but also ensures your materials and time are well spent.
Practice choosing the best threads, storing them smartly, and addressing problems on the fly. With the right habits, your embroidery projects stay organized and tangle-free.
Control over your threads means control over your final results—making every piece you create stand out for all the right reasons.
- https://f1000research.com/articles/14-477
- https://www.coats.com/en/info-hub/thread-consumption-guide/
- https://finethreadind.com/sustainable-threads-paving-the-way-for-a-greener-future/
- https://www.verifiedmarketreports.com/product/industrial-threads-market/
- https://www.osha.gov/sites/default/files/OSHA_2023_Work-Related_Injury_and_Illness_Summary.pdf

