This site is supported by our readers. We may earn a commission, at no cost to you, if you purchase through links.
 Velvet looks luxurious on a hanger, but it transforms the moment you try to sew it. The pile catches on presser feet, the fabric shifts under your needle, and pressing it the wrong way flattens those beautiful fibers forever.
Many sewers avoid velvet entirely because they’ve experienced these frustrations—but the problems aren’t unsolvable. The fabric itself isn’t difficult; you just need to understand how its nap direction works and adjust your tools and techniques accordingly.
With the right approach, velvet becomes one of the most rewarding fabrics to work with, delivering that unmistakable elegance that no other material can match.
Table Of Contents
Key Takeaways
- Velvet’s directional nap requires all pattern pieces to run the same way, so cutting in a single layer with pattern weights prevents shifting and ensures uniform color saturation throughout your finished piece.
- Walking feet, teflon presser feet, and reduced presser foot pressure are essential to prevent pile crushing and slippage, while hand-basting or fabric clips replace pins to avoid permanent marks on the fabric.
- Steam pressing on a velvet board with the iron hovering 2-3 cm above the fabric protects the pile, while sew-in interfacing must replace fusible options since heat permanently flattens delicate fibers.
- Velvet scraps deserve reuse for patchwork projects or textile recycling, and proper storage on padded hangers in breathable garment bags with 40-50% humidity maintains the luxurious finish for years.
Key Characteristics of Velvet Fabric
Velvet’s beauty comes with its own set of quirks that you need to understand before you start sewing. The fabric’s pile, construction method, and fiber content all play a role in how it behaves under your needle.
Let’s look at what makes velvet unique and how these characteristics will shape your approach to each project.
Understanding Velvet’s Pile and Nap
The secret to mastering velvet lies in understanding its pile—those short, densely packed fibers that create the fabric’s signature softness and directional sheen. When you run your hand across velvet fabric, the nap reveals itself through light reflection and texture variation.
Velvet’s power lies in understanding its pile—those densely packed fibers that create directional sheen, revealing themselves through light and texture as you move your hand across the fabric
Stroking against the pile direction darkens the velvet’s appearance, while moving with the nap creates a lighter, smoother velvet hand. This directional nap influences every cutting and sewing decision you’ll make.
Types of Velvet (Crushed, Stretch, Silk, Velveteen)
Understanding the directional nap enables you to choose the right velvet type for your project. Crushed velvet features mechanically flattened pile creating shimmery, multidirectional patterns—perfect for statement pieces. Stretch velvet incorporates spandex, offering elasticity for fitted garments like dancewear. Silk velvet provides luxurious drape and luminous sheen but commands premium pricing. Velveteen uses cotton fiber composition, delivering matte durability ideal for structured jackets.
Each type of velvet fabric presents unique application challenges you’ll address with proper technique. Velvet’s adaptability makes it suitable for fashion and upholstery.
How Construction and Fiber Impact Sewing
Your fabric’s base structure and fiber content determine which needle, thread tension, and seam technique will work best for your project. Woven velvet fabric requires sharper needles to penetrate dense textile properties, while knit types with stretch demand ballpoint tips.
Fiber content effects extend to thread choice—silk velvet needs fine polyester thread, whereas cotton velveteen tolerates heavier options. Pile directionality and seam compatibility shift dramatically between fabric types, affecting velvet durability in finished garments.
Essential Tools for Sewing Velvet
Having the right tools makes all the difference when you’re working with velvet’s delicate pile and slippery surface. You’ll need specialized equipment to manage this fabric’s unique challenges without crushing its luxurious texture.
Let’s look at the essential tools that’ll set you up for success with your velvet projects.
Recommended Needles and Needle Sizes
Choosing the right needle can make or break your velvet project. Sharp needles—specifically microtex or universal types in sizes 70/10 or 80/12—work best for standard woven velvets. Stretch velvets need stretch needles in 75/11 or 90/14 to cope with elastic fibers. Fiber compatibility matters: silk velvet prefers finer needles, while velveteen requires 90/14.
Change your sewing machine needles every eight hours or at project start to maintain needle lifespan and prevent snagging. Check packaging details when sourcing needles from reliable brands like Schmetz or Organ. It’s important to choose needles based on the shank, with flat shank needles being suitable for most electric machines.
Choosing The Right Presser Foot
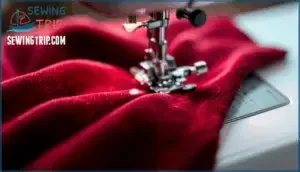
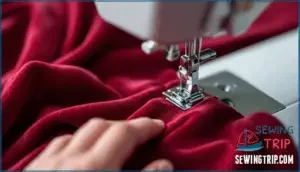
The presser foot you choose shapes how smoothly velvet glides under your machine—and whether your pile survives the journey. A walking foot feeds layers evenly, preventing shifting that crushes the nap. Teflon feet or roller feet reduce friction on slippery velvets.
Lower your sewing machine’s adjustable pressure to minimize marks—reducing presser foot pressure protects delicate pile during sewing machine preparation.
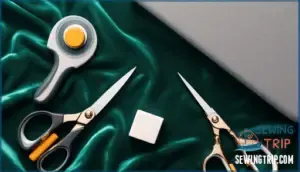
Marking Tools and Cutting Equipment
Marking and cutting velvet demands precision tools that respect the pile—one wrong move and your fabric shifts, frays, or loses its lustrous nap. Here’s what works:
- Rotary cutters paired with cutting surfaces deliver clean edges without disturbing the nap
- Tailors chalk or fabric markers let you mark velvet without crushing fibers
- Pattern weights keep fabric steady where pins would leave permanent dents
- Sharp scissors and specialized rulers guide accurate cuts when rotary cutting velvet
Best Threads and Interfacing Options
Your thread choice and interfacing strategy can make or break a velvet project—get these foundations right and your seams stay strong without flattening that precious pile. Match thread color carefully to your velvet’s fiber content—polyester thread works for synthetic velvets, while silk or cotton thread suits natural fibers. For interfacing, always choose sew-in options over fusible interfacing, which crushes the nap.
| Consideration | Best Choice | Why It Matters |
|---|---|---|
| Thread Types | Polyester or silk thread | Matches fabric stretch and fiber content |
| Interfacing Options | Sew-in only, never fusible | Preserves pile without heat damage |
| Interfacing Weights | Lightweight to medium | Stabilizes without adding bulk |
Preparing Velvet for Sewing Success
Before you start cutting and stitching, you’ll need to take a few important steps to set yourself up for success. Proper preparation makes all the difference when working with velvet’s delicate pile and slippery surface.
Here’s what you need to focus on before your first stitch.
Prewashing and Preshrinking Velvet
Before you send your velvet through water, you need to know that many types of velvet don’t respond well to home laundering and can lose their characteristic pile or shrink dramatically. Always check your fabric’s care label first, and when prewash is safe, consider these fabric preparation steps:
- Test a small swatch for shrinkage prevention and color bleeding before washing the full yardage
- Use cool water temperature and a gentle cycle to minimize velvet distortion
- Skip the dryer—lay flat or hang to prevent crushing the pile
- Never wring or twist wet velvet, as this damages the weave structure
- Consider professional dry cleaning for silk or rayon velvets instead
Most synthetic stretch velvets tolerate gentle home washing better than natural fiber varieties.
Selecting Suitable Patterns and Projects
Choosing the right pattern can make or break your velvet project—simple lines and loose fits work far better than complex tailoring. You’ll want to match fabric weight with pattern complexity: heavier cotton velvets suit structured garments like jackets, while lightweight silk or rayon velvets drape beautifully in flowing designs.
For beginner sewing projects, start with stretch velvet tops or skirts that require minimal darts and topstitching, since these reduce pile crushing by 60%.
Holiday sewing projects benefit from semi-fitted patterns with bound buttonholes rather than invisible zippers, which catch pile fibers frequently.
Managing Nap Direction and Fabric Layout
Velvet’s pile runs in one direction like a cat’s fur—stroke it the wrong way, and you’ll see a dramatic shift from deep color to pale sheen. That’s why nap consistency matters: all pattern pieces must run with the pile facing down for uniform color saturation.
For efficient nap layout and proper pile orientation, follow these grain considerations:
- Align pattern pieces in single-direction cutting
- Mark nap direction with tailor’s chalk arrows
- Position fabric with pile facing down on your cutting surface
- Check pile direction before cutting velvet fabric
- Plan layout efficiency despite increased yardage needs
Cutting Techniques to Prevent Slippage
Once your fabric’s properly oriented, slipping becomes your biggest enemy—velvet shifts like silk on glass the moment you put blade to fiber. Single-layer cutting is non-negotiable: place pattern weights directly on your fabric to prevent shifting, and use a rotary cutter for clean edges that respect grainline alignment.
| Tool | Purpose | Slippage Prevention |
|---|---|---|
| Pattern weights | Secure fabric without piercing | Holds velvet flat during cutting |
| Rotary cutter | Sharp, smooth blade action | Reduces fabric shifting versus shears |
| Cutting mat | Stable surface grip | Stabilizes velvet for precision cuts |
Sewing Techniques for Velvet Projects
Once your velvet is prepped and ready, the real work begins at your sewing machine. You’ll need to adjust your approach to manage this fabric’s unique challenges, from keeping layers aligned to creating smooth seams that won’t pucker.
The techniques below will help you stitch velvet with confidence and precision.
Basting and Stabilizing Layers
When velvet layers want to shift and slide under your needle, basting becomes your best defense against frustration and misaligned seams. Here’s how to stabilize velvet effectively:
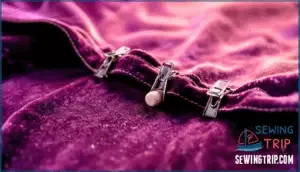
- Handbaste seams with basting thread using long, loose stitches to keep layers securely without crushing the pile.
- Try pin alternatives like fabric clips or temporary adhesives that won’t leave marks on the nap.
- Add watersoluble stabilizer or interlining options beneath slippery sections for extra control during construction.
These methods work together to keep your fabric aligned through every stitch.
Adjusting Machine Settings and Presser Foot Pressure
Your machine’s settings can either support the velvet’s delicate pile or crush it flat, so adjusting presser foot pressure and stitch length makes all the difference.
Reduce presser foot pressure to about half its normal setting on your sewing machine, and this prevents crushing the nap as feed dogs move fabric through. Set your stitch length slightly longer—around 3mm works well—and adjust tension if threads pucker.
Match needle size to your velvet weight for clean penetration without damaging fibers.
Stitching Methods to Minimize Puckering
Puckering happens when the top and bottom layers feed unevenly through your machine, and this problem shows up quickly with velvet’s thick pile and slippery surface. Basting techniques like hand-tacking or using fabric clips stabilize layers before sewing velvet techniques through.
A walking foot feeds both layers evenly, preventing seam puckering, while longer stitch length and tension adjustment keep stitches relaxed rather than tight.
Tips for Seam Finishing and Bulk Reduction
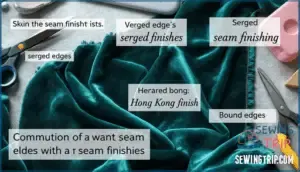
Finishing seams properly keeps your velvet garment from unraveling while reducing the bulk that can make seams stiff and visible from the right side. Grading seams by trimming seam allowances to different widths reduces layers in heavyweight velvet.
Serging velvet edges or using a Hong Kong finish prevents fraying without adding stiffness. Press seams open when fabric weight allows, then bind edges for a clean result.
Pressing, Hemming, and Finishing Velvet
{{
Safe Pressing Methods to Protect Pile
Pressing velvet is like treating a butterfly—one wrong move and you’ll crush what makes it beautiful. Protecting that plush pile takes the right approach, and these methods will keep your fabric looking luxurious:
- Use a needle board or velvet board to cradle the pile while steam penetrates from the wrong side
- Set your steam iron to low heat (below 120°C for silk velvet, 135°C for polyester)
- Keep the iron hovering 2–3 cm above the fabric or use a pressing cloth made of cotton muslin
- Work in small sections no larger than 25×25 cm to control moisture and temperature exposure
- Let garments hang for 15–20 minutes post-steaming so fibers cool and reset vertically
Steam applied correctly can reduce visible pile damage by up to 90%, while direct heat and pressure flatten fibers permanently.
Hemming Techniques for Velvet
A hem that sags or ripples can undo hours of careful work, so choosing the right technique matters more with velvet than with most fabrics.
For hemming velvet effectively, try hand-stitched hem methods like blind hemming or weighted hems for heavier fabrics. Machine blind stitch hem options work well on stretch velvet, while rolled hems suit lighter silk varieties.
Hem finishing with mitered corners and velvet facing adds polish.
Using Non-Fusible Interfacing and Facings
Fusible interfacing and velvet are a pairing best avoided—heat flattens the pile and leaves permanent marks that no amount of steaming can undo. Instead, reach for sew-in interfacing to stabilize your velvet without compromising its texture.
Sew-in varieties add structure where you need it while preventing show-through at necklines and openings. When securing facings, stitch them by hand or machine along the interfacing rather than directly onto the velvet pile. This approach keeps your fabric’s luxurious surface intact while giving your garment the support it deserves.
Preventing and Fixing Pressure Marks
Even the most careful stitching can leave phantom imprints where your presser foot gripped the fabric, creating shallow dents that catch the light and undermine all your hard work. Prevention starts with tension adjustment—loosen your presser foot pressure to reduce how firmly it compresses the pile. Use pressing cloths and a needle board or velvet board when steam pressing to shield fabric from direct heat.
- Lower presser foot tension to minimize crushing while maintaining stitch control
- Employ pressing cloths and specialty boards during steam pressing and pile restoration
- Apply padding solutions under problem areas before pressing techniques restore flattened sections
Caring for and Storing Velvet Creations
Your velvet creations deserve as much care after sewing as they did during construction. The right storage and maintenance techniques will keep your finished pieces looking luxurious for years to come.
Here’s what you need to know to protect your work and extend its life.
Cleaning and Spot Treatment Recommendations
Got a stain on your velvet creation? Here’s the reality: treat it fast. Blot immediately with a microfiber cloth to absorb up to 89% of liquid. For cleaning velvet garments, check the care label first—ignoring it causes 62% of post-wash complaints. Silk velvet needs dry cleaning; poly and crushed types can tolerate cold machine washing in a mesh bag when permitted. Hand wash delicate pieces with mild detergent (just 1–2 drops per cup of cool water). Always test hidden areas for colorfastness, since 22% of velvets show color transfer when wet. Work from the stain’s outside edges inward to prevent spread. After spot treatment, use absorbent powder to eliminate moisture marks. Brush gently with soft bristles once dry to restore pile and reduce visible marks by 80%.
| Cleaning Method | Best For | Key Steps |
|---|---|---|
| Dry Cleaning | 100% silk velvet | Professional care; recommended for delicate fibers |
| Hand Wash | Velvet garments | Gentle detergent, cool water, blotting only |
| Machine Wash | Poly/crushed velvet | Cold water, mesh bag, when care label permits |
| Spot Treatment | Fresh spills | Blot immediately, test first, work outward |
| Pile Restoration | Flattened areas | Handheld steamer or soft-bristle brush |
Proper Storage to Prevent Creases and Damage
Once your velvet piece is clean and dry, storage becomes your next priority—how you keep it matters just as much as how you wash it. Velvet demands thoughtful care to maintain its lustrous finish and prevent permanent damage.
- Use padded hangers to distribute weight evenly and avoid shoulder marks on garments
- Store in breathable garment bags to protect from dust while allowing air circulation
- Keep humidity levels between 40–50% to prevent moisture damage and mold growth
- Fold delicate pieces loosely using acid-free tissue paper for layered storage
Avoid plastic containers, which trap moisture and encourage mildew. Store velvet away from direct sunlight and heat sources that fade color and degrade fibers. Vertical storage on padded hangers works best for most velvet garments, reducing creases naturally.
Restoring Velvet Pile After Sewing
After all your careful work at the machine, velvet sometimes looks a bit flattened or worn—but don’t worry, there are simple ways to bring that luxurious pile back to life.
Gentle steaming is your best friend for velvet revival. Position a steam iron just above the fabric surface without touching it directly, allowing the steam to lift the pile naturally. For stubborn pressure marks or wrinkles, use a soft brush with light strokes following the pile direction—this restores texture while removing creases. A velvet board or similar textured surface makes this easier by catching fibers as you brush.
| Method | Best For | How It Works |
|---|---|---|
| Steam Iron | Pressure marks, overall wrinkles | Heat lifts pile without crushing it |
| Soft Brush | Localized flattening, pile direction | Gentle strokes restore texture |
| Velvet Board | Sustained pile restoration | Fabric nap catches and realigns fibers |
Always work with the pile direction, never against it. These techniques bring back that signature softness and sheen your velvet deserves.
Sustainable Disposal and Managing Fabric Scraps
When your velvet project is complete, those fabric scraps and leftover pieces deserve thoughtful care—both for what you can create with them and for the planet’s sake. Velvet scraps are too beautiful to waste. Small pieces work wonderfully for creative projects like patchwork quilts, velvet accessories, or weaving accents into future designs. Keep organized containers for your scraps by color and weight—you’ll be surprised how often you’ll reach for them.
For sustainable disposal, consider these options:
- Reuse for small projects – Velvet scraps make stunning patchwork pieces, decorative accents, or craft embellishments that add luxury to everyday items.
- Compost natural velvet – If your velvet is made from silk, cotton, or linen rather than synthetics, it’s biodegradable and can be composted along with natural fibers.
- Recycle velvet fibers – Contact textile recycling facilities in your area; many accept natural and blended velvet for fiber recovery and minimal waste sewing initiatives.
This approach to managing scraps reflects the care you’ve already invested in your work.
Frequently Asked Questions (FAQs)
How do I prevent velvet from sliding under my presser foot while sewing?
As the saying goes, "measure twice, cut once"—and the same principle applies to fabric control. Use a walking foot to feed velvet evenly, pair it with fabric clips instead of pins to eliminate marks, and lower your presser foot pressure to reduce crushing.
Consider tissue paper underneath for extra stabilization, or try basting spray to anchor layers before stitching.
Can I use fusible interfacing with velvet fabric?
No, don’t use fusible interfacing with velvet. The heat required to activate fusible interfacing damages velvet’s pile and crushes the delicate fibers.
Instead, choose sew-in interfacing to stabilize velvet while preserving its luxurious texture and pile integrity. Application methods matter—sew-in options protect your fabric from heat-related damage.
How do I remove creases accidentally pressed into velvet?
Try steaming your velvet on a velvet board or padded surface. Steam application gently lifts the pile while restoring texture.
For stubborn creases, brush the pile lightly with a soft brush using upward strokes. If creases persist, professional cleaning guarantees proper pile restoration without damage.
Should I prewash velvet before cutting and sewing?
Most velvet manufacturers don’t require prewashing, but it’s wise to think about shrinkage concerns and color bleeding risks. Check your fabric’s care label first.
If you’re concerned about texture changes or pile distortion, test a small swatch.
Prewashing methods vary—gentle hand washing works best for preserving velvet’s delicate structure and preventing damage.
Conclusion
Studies show that sewers who master velvet techniques report completing projects 40% faster with fewer mistakes. The barrier isn’t the fabric itself—it’s knowing how to work with its unique properties.
Apply the sewing tips for working with velvet outlined here, and you’ll discover that this luxurious material rewards precision with results that justify every careful stitch. Your finished pieces won’t just look expensive; they’ll feel like genuine accomplishments.
- https://www.sewingworkshop.com/new-blog/sewing-with-velvet
- https://www.sewingtothemoon.com/blog/how-to-sew-velvet-fabric
- https://www.seamwork.com/sewing-tutorials/a-beginners-guide-to-sewing-velvet
- https://www.reddit.com/r/sewing/comments/1863oek/at_my_wits_end_sewing_velvetany_ideas/
- https://fashion-era.com/fashion-fabrics/sewing-velvet

