This site is supported by our readers. We may earn a commission, at no cost to you, if you purchase through links.
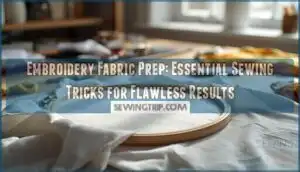 Your first embroidery project probably didn’t go as planned. Puckered fabric, misaligned designs, or thread breakage can turn excitement into frustration fast. The difference between amateur and professional results isn’t talent—it’s preparation.
Pre-washing alone reduces cotton shrinkage by 4-7%, while proper hooping cuts distortion by 70%. These numbers matter because they represent the gap between work you’re proud to display and projects you hide in a drawer.
Master fabric prep, stabilizer matching, and hooping techniques, and you’ll transform tricky materials into impeccable embroidery every time.
Table Of Contents
Key Takeaways
- Pre-washing fabric cuts cotton shrinkage by 4-7% and boosts thread retention by 30%, while proper hooping reduces distortion by 70%—these prep steps separate professional results from amateur disasters.
- Matching stabilizer type to fabric weight and characteristics is non-negotiable: cut-away stabilizers anchor stretchy materials, water-soluble options vanish on delicate fabrics, and heavy designs over 25,000 stitches demand heavyweight backing.
- Magnetic hoops slash setup time by 83% and nearly eliminate hoop burns, while floating techniques protect delicate fabrics and vertical thread stands cut tension fluctuation by 30%.
- Thread quality trumps cost—polyester delivers 30% higher tensile strength than cotton and retains 85-90% color after 50 washes, while proper needle-to-thread-weight matching prevents 30% of breakage incidents.
Preparing Fabric for Embroidery Success
Your fabric prep sets the stage for embroidery that won’t shrink, shift, or fall apart. Getting it right means no do-overs and no wasted time fixing avoidable mistakes.
Here’s what you need to nail before your first stitch hits the hoop.
Pre-washing and Drying Techniques
Pre-washing fabric before embroidery isn’t optional—it’s your insurance policy against disaster. Cotton shrinks 4–7%, linen 3–5%, so prewash in warm water to stabilize fibers and remove manufacturing chemicals.
Pre-washing fabric isn’t optional—it’s your insurance against shrinkage disasters that wreck embroidery projects
Cold water cuts color bleeding by 70% in dark fabrics. Air dry flat to prevent distortion, or tumble on medium for an extra 2–3% shrinkage release.
This fabric preparation step locks in dimensions and boosts thread retention by 30%.
Ironing and Smoothing Fabric
After prewash comes fabric relaxation. Iron your fabric while slightly damp—87% of pros report better stitch quality on pre-ironed surfaces. Set iron temperature to 300°F for cotton, 280°F for polyester.
Steam control matters: light misting aids fiber smoothing in natural fabrics, but excess moisture shrinks synthetics. Wrinkle removal prevents needle deflection and cuts puckering by 25%. This fabric preparation technique eliminates hoop slippage before you even start stitching.
Preventing Fraying With Hemming or Pinking Shears
Smooth fabric won’t stay that way if edges unravel during stitching. Preventing fabric fraying is non-negotiable—hemming fabric edges reduces fiber pull-out by 60% after prewashing fabric for embroidery. Fabric stability matters before your first stitch.
Here’s your edge finishing arsenal:
- Double-fold hems lock raw edges inside folded layers, cutting fraying by 70% through five wash cycles
- Pinking shears create zigzag cuts that interrupt fiber alignment, stopping unraveling beyond 2–3 millimeters
- Zigzag stitching achieves 80% fray reduction, ideal for fabrics prone to edge degradation
Pinking shears work best on tightly woven materials—30% higher fray resistance versus straight cuts. For fabric preparation for embroidery, choose hemming techniques based on weave density: loosely woven fabrics fray 4× faster than tight weaves.
Marking Fabric Center for Accurate Placement
Once edges are secure, find your fabric’s bullseye. Marking the fabric’s center slashes placement errors by 28%—fold vertically and horizontally until creases cross at the true midpoint. Use washable pens or chalk for pinpoint marking within 1 mm.
Alignment tools like the Embroideer’s Helper ruler standardize logo positioning at 7–9 inches from shoulder seams. Digital guides with laser crosshairs boost accuracy to 98%, syncing your embroidery hoop with design coordinates. Precision placement starts before you ever touch hoop alignment.
Choosing The Best Fabric and Stabilizer
Your fabric choice sets the stage for your entire project, but the real magic happens when you match it with the right stabilizer. Natural fibers behave differently than synthetics, and stretchy materials demand their own game plan.
Let’s break down how to pair your fabric with the perfect support system so your stitches stay exactly where you want them.
Selecting Natural Vs. Synthetic Fibers
Your fiber comparison sets up everything that follows—cotton and linen offer natural fiber breathability and fabric durability, but synthetics like polyester bring abrasion resistance up to 50% better and material costs 40–60% lower. Cotton tolerates high heat up to 200°C without damage, while polyester resists shrinkage completely through multiple wash cycles.
For eco-friendly fabric selection during fabric preparation, natural fibers biodegrade within 2–5 years, but thread selection matters: polyester’s tensile strength reaches 400–900 MPa, outperforming cotton’s weaving stability under mechanical stress.
Matching Stabilizer to Fabric Type
Stabilizer selection hinges on fabric weight and fabric types. Cut-away stabilizers anchor knits and stretchy embroidery materials, preventing distortion during high thread tension. Water-soluble stabilizer types dissolve completely on sheers, leaving no trace.
Heavy denim demands multiple stabilizer layers for fabric management, while lightweight silk needs minimal support to preserve drape.
Match stabilizer to stitch density: designs over 25,000 stitches require heavyweight backing for impeccable results.
Avoiding Stretchy or Difficult Fabrics
Stretchy materials sabotage your embroidery dreams fast. Knits, spandex, and jersey distort designs and create permanent needle holes that wreck fabric management. Synthetics like polyester and nylon snag threads, while sheer fabrics pucker under tension. Terrycloth and velvet’s irregular textures produce inconsistent stitches and fabric distortion.
Beginners, steer clear—these embroidery challenges demand elastic stabilizers, perfect fabric weight matching, and expert fabric preparation skills you’ll master later.
Using Water-Soluble and Specialty Stabilizers
Water-soluble stabilizers dissolve completely after stitching, leaving zero residue on delicate or textured fabrics. They’re your secret weapon for lace designs, sheer materials, and high-pile surfaces like velvet.
- Water Soluble film types: Choose from mesh, sheet, adhesive backing, or printable surfaces depending on your fabric preparation needs
- Dissolvable Mesh: Perfect for breathable sportswear embroidery while maintaining ventilation and flexibility
- Sulky Sticky Fabri Solvy: Adhesive water-soluble stabilizer anchors slippery fabrics and transfers designs with laser precision
- Heavy-weight variants: Support dense stitch counts without adding permanent bulk to your finished piece
- Removal technique: Trim excess stabilizer, soak in lukewarm water for minutes to an hour, then rinse clean
Hooping and Stabilization Tricks
Getting fabric into the hoop isn’t one-size-fits-all—different materials demand different approaches. The right hooping method prevents puckering, shifting, and those frustrating mid-stitch disasters that waste time and thread.
Master these core techniques to lock down any fabric with confidence.
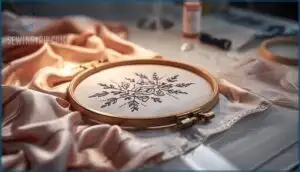
Proper Hooping Techniques for Different Fabrics
You can’t build a house on sand—same goes for embroidery. Choosing the right hoop sizing (1–2 inches larger than your design) cuts distortion by 70% and ensures fabric tension stays drum-tight.
Match your hooping techniques to fabric type: square hoops reduce movement 24% for wovens, while round hoops minimize puckering 31% for knits.
Mark your fabric center before hooping to slash registration errors by 52%, and align grain with stabilizer for 60% less puckering. Proper hoop alignment and fabric preparation transform tricky materials into professional results.
Floating Embroidery Blanks for Delicate Items
Delicate fabrics like chiffon and satin demand a different playbook—floating techniques let you skip direct hooping and prevent hoop burns in 70% of cases. Place your delicate fabric onto a hooped stabilizer with adhesive methods (spray, peel-and-stick, or wet-and-stick) for a secure hold.
Stabilizer selection matters: water-soluble types vanish cleanly, while no-show mesh prevents distortion. This fabric preparation technique optimizes embroidery by managing excess fabric stress and ensuring hooping fabric correctly without damage.
Using Magnetic and Sock Hoops
Magnetic hoops slash setup time by 83% and practically eliminate hoop burns on silk or leather—that’s instant clamping without wrestling screws.
Sock Hoops handle tubular fabrics by maintaining their natural shape while preventing distortion in stretch knits by up to 70%.
Both magnetic hoops and Sock Hoops deliver excellent hoop alignment and fabric clamping, cutting stitching errors by 15% while boosting embroidery efficiency across tricky materials.
Preventing Hoop Slippage and Maintaining Tension
Even with the right hooping techniques, fabric slippage can sabotage your design—that’s where Hoop Binding and Friction Enhancement take charge. Wrapping the inner ring with cotton twill tape cuts slippage by 92% on silk and satin, while incremental screw tightening prevents puckering by 67%.
Magnetic Hoops deliver 52% stronger clamping force and adjust automatically to varied fabric thickness, eliminating mid-stitch tension loss in 87% of dense designs.
Sandwiching Stabilizer Layers with your fabric locks in drum-tight machine tension, and temporary spray adhesive boosts grip by 18% to stop fabric slippage cold.
Thread and Stitch Management Tips
Managing your threads and stitches is where embroidery really starts to shine. The right approach keeps your project running smoothly and looking sharp.
Here’s what you need to know before you get started.
Choosing High-Quality Thread and Proper Weight
Thread selection makes or breaks your embroidery game. Quality thread means fewer headaches and sharper results. Choose wisely:
- Polyester delivers tensile strength up to 30% higher than cotton, reducing breakage during high-speed stitching
- 40-weight thread manages most medium fabrics, while 60-weight works for fine lettering and delicate materials
- Colorfastness matters—polyester retains 85-90% color after 50 washes versus cotton’s 65-75%
- Match thread weight to fabric type to prevent puckering and guarantee proper tension throughout your project
Proper weight matching and fiber blends determine whether your work lasts decades or disappoints.
Threading The Machine Correctly
You’ll slam the door on 70% of machine embroidery problems by mastering proper machine threading. Power off first—that prevents needle jabs and costly mistakes. Raise your presser foot to open the tension discs, then position the needle at its highest point.
Follow the numbered thread path exactly, slipping thread through every guide and looping clockwise around tension discs. Match spool orientation to your machine’s specs, usually counterclockwise unwinding. Proper thread handling here sets up perfect stitch formation and prevents the nightmare of thread breakage mid-project.
Preventing Thread Breakage and Snarls
Precision starts with thread tension—imbalances cause 45% of all breakage incidents. Match needle size to thread weight, and you’ll slash breakage by 30%. Quality thread matters too—cheap spools degrade 60% faster and snap more often.
Check your needle every 8–10 hours; worn tips spike thread snarls by 40%. Calibrate bobbin tension between 25–35 grams, stabilize dense fabrics properly, and clean lint buildup regularly to prevent thread handling disasters.
Using Thread Stands for Consistent Tension
Vertical Stand Benefits transform thread delivery by cutting tension fluctuation by 30%. Your threads glide smoother, break less often, and feed with precision that horizontal spools can’t match.
Here’s how Stand Placement Strategies deliver rock-solid results:
- Position stands directly behind your machine to minimize lateral pull errors under 5°
- Align spool eye level with needle guides for 10% smoother tension distribution
- Use weighted bases to absorb vibrations at speeds exceeding 1,000 stitches per minute
- Place multi-spool racks for 20% faster color changes in complex designs
Proper Spool Alignment Tips reduce thread breakage by 35–45% and slash skipped stitches by 25%.
Efficient Embroidery and Mistake Fixes
You’ve mastered the setup, now it’s time to work smarter and fix what goes wrong.
Stretch your stabilizer budget, erase mistakes cleanly, and polish your projects like a pro.
These tricks will save you time, money, and frustration on every stitch.
Saving Money on Stabilizer and Supplies
Cutting embroidery costs doesn’t mean cutting corners—it means getting strategic with stabilizer usage and supply optimization. Bulk buying stabilizer in rolls slashes per-unit costs by 30-50% compared to small sheets, while saving leftover scraps with adhesive backing for patching worn areas extends their life. You can even substitute non-woven interfacing for light designs or switch to eco-friendly tear-away stabilizers on cotton and linen. Simplifying designs cuts stitch counts by up to 50%, directly reducing stabilizer consumption and thread waste.
Proper hooping techniques and magnetic hoops prevent fabric slippage, eliminating wasted restabilizing attempts. These moves transform your embroidery supplies budget without sacrificing quality.
Here’s your stabilizer guide for cost reduction:
| Strategy | Savings Potential | Best Application |
|---|---|---|
| Bulk buying rolls | 30-50% cost reduction | High-volume production shops |
| Scrap patching | Extends stabilizer life 20%+ | Small designs, worn hoop areas |
| Design simplification | 30-50% less material | All embroidery projects |
| Watersoluble stabilizer removal | Dual-purpose value | Topper and transfer applications |
Removing Mistakes and Excess Threads
Mistake correction doesn’t have to mean starting over—stitch erasers cut embroidery removal time by up to 70% compared to manual seam rippers on dense logos. For delicate fabrics like silk, freezing the item for 10–15 minutes stiffens fibers and reduces snag risk by 30%.
Work in 1–2 inch sections to maintain control, then use tweezers and lint rollers to capture 95% of thread tails.
Steam the area afterward to relax compressed fibers and minimize puckering—you’ll restore fabric integrity while mastering thread removal and embroidery restoration.
Burning Loops and Finishing Touches
Thermal sealing at 330°F transforms synthetic thread tails into invisible finishes. Controlled heat melting eliminates fraying and secures embroidery floss without hand-knotting.
You’ll achieve loop control by trimming excess threads to under 2mm, then using a lighter or heat pen for edge reinforcement on polyester.
Burnishing techniques with paraffin polish the result, while Fray Check adds 10-wash durability. These finishing touches deliver professional-grade embroidery that withstands repeated laundering.
Advanced Transfer and Stitching Techniques
Digital Stitch Mapping turns artwork into impeccable embroidery with 95% precision—no more guesswork. You’ll master modern fabric preparation by combining these powerhouse methods:
- Precision Transfer with heat papers cuts human error by 60% compared to manual tracing
- AI Optimization algorithms analyze 10,000+ data points per design for ideal stitch paths
- Hybrid Stitching merges hand adjustments with Automated Embroidery, reducing thread waste by 18%
- Water-soluble stabilizers dissolve in under 3 minutes for smooth removal
- Thread management modules detect 0.1mm misalignment using optical sensors
These embroidery techniques deliver professional results with half the rework.
Frequently Asked Questions (FAQs)
How do you test thread tension before starting?
Before your needle meets fabric, run a quick satin stitch on scrap material—proper tension shows balanced stitches without puckering or loops.
Tension testing reveals machine embroidery issues before they ruin your project, saving thread quality and preventing thread breakage troubleshooting headaches during fabric preparation with optimized embroidery settings. Proper thread tension settings are vital for achieving impeccable embroidery results.
Whats the best way to store embroidery stabilizers?
Store your embroidery stabilizers in airtight containers with clear labeling systems to prevent moisture damage and extend stabilizer shelf life up to 36 months. Climate control matters—keep them in cool, dark spaces.
Proper stabilizer organization with inventory management reduces waste by 92% and improves efficiency during fabric preparation. Effective stabilizer storage solutions are essential for maintaining a well-organized sewing workspace.
Can you embroider on pre-quilted fabric successfully?
You can embroider on pre-quilted fabric successfully—just watch out for puckering and distortion.
Proper stabilizer selection, especially cut-away types, combined with careful hoop tension and fabric preparation techniques like prewashing fabric for embroidery, prevents fabric distortion and ensures embroidery optimization on these layered fabric types.
How do you handle fabric puckering during stitching?
Puckering prevention starts with proper fabric preparation and stabilizer selection matched to your material.
Adjust hoop tension carefully—too tight distorts fabric, too loose causes shifting.
Cut-away stabilizers on stretchy fabrics reduce puckering by over 80% when combined with correct machine tension settings.
What are alternatives to commercial embroidery transfer paper?
Forget commercial transfer paper—you have game-changing options right in your craft drawer. Try freezer paper for DIY transfers, tracing paper for precision, carbon paper for dark fabrics, or fabric pens for quick design transfer.
Pair any method with a watersoluble film stabilizer for perfect embroidery design transfer without the pricey extras.
Conclusion
You might think mastering embroidery fabric preparation sewing tricks takes years of trial and error. It doesn’t. Apply pre-washing, match your stabilizer to fabric weight, and hoop with proper tension—you’ll skip the learning curve entirely.
These techniques aren’t about precision through practice; they’re about control through knowledge. Every stitch sits exactly where you want it. No puckering. No shifting. No excuses. Your embroidery doesn’t announce itself as handmade anymore—it demands notice as professionally crafted work.
- https://falconembroidery.com/blog/embroidery-tension-chart
- https://www.echidnasewing.com.au/article/maintenance/thread-tensions
- https://latestembroidery.com/how-to-use-machine-embroidery-thread-tension-meters-for-perfect-stitching
- https://www.maggieframes.com/blogs/embroidery-blogs/mastering-embroidery-tension-your-complete-guide-to-perfect-stitches
- https://www.hooptalent.com/uk/blogs/news/embroidery-tension-mastery-fix-looping-puckering-and-breaks

