This site is supported by our readers. We may earn a commission, at no cost to you, if you purchase through links.
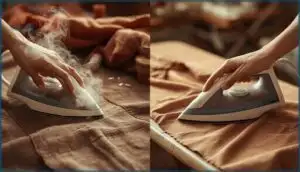
Here’s the thing: pressing isn’t just about removing wrinkles. It sets your stitches, flattens seams, and transforms puckered fabric into crisp, professional lines. The difference between a $20 handmade shirt and a $200 boutique piece often comes down to how well someone wielded their iron. Master a few key sewing project pressing techniques tips, and you’ll improve every item you create from “I made this” to “Where did you buy that?
Table Of Contents
- Key Takeaways
- Why Pressing is Essential in Sewing
- Pressing Vs Ironing: Key Differences
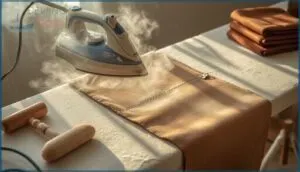
- Must-Have Pressing Tools and Equipment
- Preparing Fabric Before You Start Sewing
- Setting The Right Iron Temperature
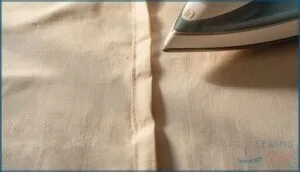
- Pressing Seams for Crisp Results
- Techniques for Pressing Curved Areas
- Pressing Sleeves and Tubular Sections
- Steam, Moisture, and Advanced Pressing Methods
- Pressing Tips for Different Sewing Projects
- Frequently Asked Questions (FAQs)
- Conclusion
Key Takeaways
- Pressing accounts for nearly half the work in professional sewing and transforms homemade-looking projects into boutique-quality pieces by setting stitches, flattening seams, and creating crisp lines that boost garment value by 12-18%.
- The key difference between pressing and ironing is motion—pressing uses a vertical lift-and-lower technique that protects fabric grain and prevents stretching, while sliding an iron back and forth causes distortion, wavy seams, and up to 14% of garment defects.
- Essential pressing tools include an iron with at least 65g/min steam output, a pressing cloth to prevent shine and scorch marks, and specialized tools like tailor’s hams and sleeve rolls that shape curved areas and reduce puckering by up to 84%.
- Temperature control is critical for different fabrics—cotton thrives at 180-220°C with steam, linen needs 200-230°C, wool requires gentle 110-150°C with protective cloths, and synthetics demand low heat to prevent melting and shine marks.
Why Pressing is Essential in Sewing
You might be tempted to skip the pressing step when you’re excited to finish your project, but trust me, it’s one of those game-changing habits that separates a homemade look from a polished, professional one.
Pressing isn’t just about smoothing wrinkles—it actually transforms how your seams sit, how your fabric behaves, and how long your stitches hold up.
Let’s look at three key reasons why pressing deserves a permanent spot in your sewing routine.
Professional Finish Benefits
Pressing transforms your sewing from homemade to store-bought—seriously. Those crisp seams and smooth shapes you’re after? They come from proper pressing techniques, not luck.
Studies show pressed garments score 4.7 out of 5 in appearance versus just 3.1 for unpressed work. That aesthetic polish boosts market value too, with consumers willing to pay 12-18% more for well-finished pieces.
Pressed garments score 4.7 out of 5 in appearance versus 3.1 for unpressed work, and consumers pay 12-18% more for that polished finish
To make certain a professional finish, it’s important to understand pressing and ironing are distinct processes. Professional results start here.
Setting Stitches for Durability
Beyond looks, pressing actually strengthens your work. When you press immediately after stitching, you’re bonding thread fibers into the fabric, boosting seam durability by up to 25%. Steam application plays a crucial role here—it increases stitch integrity and resists slippage by 15%.
Sequential seam pressing as you sew, rather than waiting until the end, delivers 20% better lasting quality through repeated washes. A tailor’s ham is especially useful for pressing curved garment areas. That’s setting stitches techniques in action.
Reducing Wrinkles and Bulk
You’ll also see a smooth look emerge as you reduce wrinkles and bulk. Steam pressing at ideal moisture levels triggers fiber realignment, removing up to 92% of visible wrinkles in cotton.
Seam grading—trimming seam allowances at different widths—cuts thickness by 45%, preventing ridge marks. Tension cooling, holding fabric flat as it cools, locks in flatness.
Light starch usage boosts crease resistance by 12%, keeping your pressing techniques working longer.
Pressing Vs Ironing: Key Differences
You might think pressing and ironing are the same thing, but they’re actually quite different techniques that’ll affect how your fabric looks and behaves. Understanding these differences can save you from stretched seams, puckered fabric, and that “homemade” look we’re all trying to avoid.
Let’s break down what sets these two methods apart and when you’ll want to use each one.
Pressing Motions Explained
Think of pressing as gently placing a stamp—you lift and lower the iron vertically rather than sliding it around. This motion control protects your fabric’s grain and prevents stretching. Press for 3–5 seconds per spot, then lift and reposition. Vertical pressing melts thread into fabric, boosting seam durability by 30% and reducing bulk at intersections by up to 40%.
| Pressing Motion | Result |
|---|---|
| Lift and lower vertically | Prevents fabric distortion |
| Hold 3–5 seconds per area | Sets stitches properly |
| Reposition without sliding | Maintains seam alignment |
Risks of Ironing Movements
When you slide your iron back and forth, you’re inviting trouble. Fabric distortion happens fast—up to 14% of garment defects come from improper ironing movements that stretch seams and warp edges. This isn’t just about wrinkle prevention; it’s about protecting your hard work.
| Ironing Risk | Impact | Prevention |
|---|---|---|
| Fabric distortion and stretching | Wavy seams, misaligned stitches | Use vertical pressing motions |
| Burn hazards and shine | 14% of heat damage cases | Control temperature, don’t linger |
| Seam integrity loss | 19% of construction defects | Lift, don’t slide the iron |
Sliding the iron compromises seam integrity, causes user injuries from accidental burns, and creates quality control nightmares. Choose pressing over ironing movements—your project deserves it.
When to Use Each Technique
During garment construction, use pressing for seam pressing, darts, and curved areas—this keeps fabric stable and prevents stretching. Save ironing for finished items that need wrinkle removal before wearing. Steam usage depends on fabric types: cotton and linen love it, while synthetics need dry heat. Match your pressing techniques to project needs.
| Technique | Best For |
|---|---|
| Pressing seams | Unfinished garments, quilt blocks, bias edges |
| Ironing | Completed projects, pre-cutting prep |
| Steam pressing | Dense fabrics, set-in wrinkles, final touches |
| Dry pressing | Delicate synthetics, lightweight cottons, pieced work |
| Pressing curved areas | Darts, collars, sleeve caps, contoured seams |
Must-Have Pressing Tools and Equipment
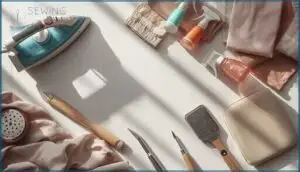
You can’t press like a pro without the right tools in your corner. Having the proper equipment makes the difference between a homemade look and a polished, professional finish.
Let’s walk through the essentials you’ll want to have on hand before you start your next project.
Choosing The Right Iron
Your iron’s steam output can make or break your sewing projects. Look for models with at least 65g/min of continuous steam and precise temperature control—like the Rowenta Steamforce, which delivers up to 210g/min.
Consider soleplate material too; stainless steel glides smoothly and resists scratches. Iron weight matters for even pressure, while energy-efficient designs save money without sacrificing heat.
Importance of Pressing Cloths
A pressing cloth is your fabric’s best friend, preventing scorch marks, shine, and melting on delicate materials. This simple tool provides essential heat distribution and protection, reducing damage incidents by over 90%.
Professional tailors use pressing cloths in 94% of quality garment construction.
- Fabric Protection: Shields silk, wool, and synthetics from direct heat contact
- Shine Prevention: Eliminates unwanted sheen on dark fabrics by up to 70%
- Adhesive Transfer: Stops fusible interfacing from sticking to your steam iron
Using Tailor’s Hams and Sleeve Rolls
Think of curved seams like sculpting—you need the right form underneath. That’s where tailor’s hams and sleeve rolls shine. A ham’s rounded shape bolsters darts, princess seams, and curved areas, reducing puckering by 84%.
Roll dimensions (usually 30 cm x 7 cm) let you press sleeves and narrow tubes without flattening them. These pressing tools transform tricky curves into professional-looking results.
Ironing Boards and Alternatives
Your ironing board is your home base, but you’ve got options. Standard boards with steel frames last 10–15 years, while space-conscious sewers love these alternatives:
- Tabletop boards – weigh just 5–7 pounds, handle 36-inch fabric, save 60% space
- Wool mats – cut pressing time by 40%, resist heat to 480°F
- DIY boards – cost 60% less, customizable
- Space-saving foldables – store in 2-inch gaps
Choose what fits your workspace.
Preparing Fabric Before You Start Sewing
Think of fabric prep as the foundation of your entire project—it’s where good results really begin. Taking a few minutes to prepare your fabric before you sew can save you from headaches later, like puckered seams or fabric that shrinks after you’ve finished.
Let’s look at three simple steps that’ll set you up for success from the very start.
Pre-washing and Pressing Fabrics
Before you cut into your fabric, prewashing is your secret weapon for shrinkage control and dye fixation. It removes up to 98% of chemical residues—those irritants from manufacturing—while stabilizing grain alignment so your seams won’t pucker later.
Cotton can shrink 3–5%, linen up to 10%, so fabric preparation matters. After washing, press at 150–180°C for texture restoration and smooth fabric tips that set you up for success.
| Fabric Type | Shrinkage Rate |
|---|---|
| Cotton | 3–5% |
| Linen | Up to 10% |
| Synthetic Blends | Less than 2% |
| Cotton Knits | 4–5% |
Pressing Out Creases and Folds
Once your fabric’s clean and dry, those stubborn storage folds need attention before you cut. Steam Application at controlled temperatures relaxes fibers, improving crease removal by up to 40% in cotton and wool.
Here’s your action plan:
- Lay fabric wrong-side up on your ironing board
- Use a pressing cloth as one of your Pressing Aids for delicate weaves
- Apply steam in lifting motions—no dragging
- Let fabric cool flat for wrinkle prevention
This Fabric Relaxation step addresses Residual Creases, giving you smooth, ready-to-cut yardage. Preventative Measures now mean accurate cutting and professional fabric smoothing results later.
Benefits of Pre-Pressing
Pre-pressing isn’t just wrinkle prevention—it’s your foundation for success. Pressing before sewing transforms fabric smoothing into a strategic advantage, cutting rework by significant margins.
You’ll see Adhesion Improvement for transfers, with up to 38% better durability. Shape Retention keeps patterns accurate, while Moisture Control prevents bubbling during assembly.
This fabric preparation step offers Error Reduction and Quality Assurance, catching equipment issues early.
Setting The Right Iron Temperature
Getting the temperature right is one of those things that can save your project or send it sideways. Too hot, and you’ll scorch delicate fabric; too cool, and those wrinkles just laugh at you.
Let’s break down the right heat settings for the fabrics you’ll work with most.
Temperature Settings for Cotton
Getting the right temperature for cotton can feel like hitting a moving target, but it’s simpler than you think. Here’s what works best:
- Set your iron between 180°C and 220°C (356°F to 428°F) – most irons call this the “high” or three-dot setting.
- Add steam to boost wrinkle removal by 40% – moisture relaxes those stubborn fibers beautifully.
- Press slightly damp fabric to reduce cotton scorching risks by roughly 30%.
- Use a pressing cloth on polished weaves to prevent shine marks and keep that crisp finish.
- Calibrate your iron every six months to maintain accuracy within 5°C for consistent heat pressing results.
Fabric thickness matters too. Lightweight cotton needs less time and heat, while heavyweight denim thrives at higher ranges. Don’t leave the iron sitting in one spot beyond 10 seconds, or you’ll risk those telltale brown scorch marks from overheating.
Pressing Linen and Wool
Natural fibers like linen and wool each need their own special care when pressing. Here’s your quick guide to fabric temperature settings for these two beauties:
| Fabric | Temperature Range | Key Technique |
|---|---|---|
| Linen | 200°C–230°C (392°F–446°F) | Use full steam, press on wrong side |
| Wool | 110°C–150°C (230°F–302°F) | Limit contact to 10 seconds per section |
| Linen (damp) | 200°C–215°C (392°F–420°F) | Slightly dampen for sharper creases |
| Wool (steam) | 110°C–140°C (230°F–284°F) | Use damp pressing cloth, never direct spray |
| Both | Varies | Always test on fabric scrap first |
Linen thrives on high heat and moisture, which relaxes its tough fibers beautifully. Wool, on the other hand, requires gentler handling, with protective cloths to prevent shine and fiber collapse.
When pressing linen, always work on the wrong side to avoid unwanted sheen. For wool, lift the iron rather than sliding it across the fabric to maintain its soft nap. Specialized tools like tailor’s hams help shape curved wool areas, while wooden clappers set linen creases as the fabric cools. These pressing techniques transform good projects into gorgeous ones.
Handling Delicate and Synthetic Fabrics
When you’re working with synthetics and delicate fabrics, heat sensitivity is your biggest concern. Here’s how to keep your projects safe:
- Test temperature first: Press a scrap to check for melting, shine, or water spots before touching your main piece
- Add protective layers: Use a lightweight cotton pressing cloth to shield acetate, polyester, and rayon from direct heat
- Skip the steam: Steam avoidance prevents water spots on nylon and polyester; try a light mist instead
- Try finger pressing: Gently flatten seams on vinyl or sequined fabric finishes without any iron contact
- Cool completely: Let heat-sensitive fabrics rest 30–60 seconds between pressings for damage prevention
Always press delicate fabric on the wrong side to avoid unwanted shine marks.
Pressing Seams for Crisp Results
Pressing your seams properly is one of those game-changing skills that separates a homemade look from a professional one. You’ll want to know when to press seams open versus to one side, how to work through each step without leaving marks, and what techniques keep your fabric looking crisp and clean.
Let’s walk through the essentials so your seams always turn out sharp.
Pressing Seams Open Vs. To One Side
Deciding between pressing seams open versus to one side can feel like choosing between two trusted friends. Each method has its strengths, and understanding when to use each makes all the difference in your sewing.
| Pressing Method | Best For |
|---|---|
| Seams Open | Garment sewing, reducing bulk at intersections, achieving crisp finish on light fabrics |
| Seams to One Side | Quilting projects, increasing seam strength by up to 15%, faster workflow and nested seams |
| Open Pressing | Complex patterns with multiple layers, preventing shadows on delicate materials |
| Side Pressing | High-stress areas, “stitch in the ditch” quilting, projects needing extra durability |
Seam strength improves when you press to one side, especially in quilts that will see frequent washing. However, pressing seams open reduces bulk management issues at busy intersections, giving you flatter, more professional results in garments.
Quilting implications matter too—side pressing creates that perfect trough for decorative stitching, while open seams offer a smooth surface. Consider your project’s needs, and you’ll choose wisely every time.
Step-by-Step Seam Pressing
Pressing each seam the right way transforms your sewing from homemade to handcrafted. Follow these steps to set initial seam integrity and flatten seam allowances like a pro:
- Press the seam flat as sewn to embed stitches into fabric, boosting flatness by 25%
- Open the seam and press from the wrong side using appropriate heat control
- Make directional adjustments by pressing fuller sections toward less-full areas
- Apply a 2–4 second steam burst, then let cool 10–15 seconds
- Complete finishing phases by pressing lightly from the right side for visual crispness
Avoiding Pressing Marks
Think of pressing marks as sneaky little imprints that can sabotage your hard work—but you can outsmart them. Start by adjusting your fabric orientation: press from the wrong side whenever possible. Use a pressing cloth on delicate fabrics, and slip strips of paper between seam allowances to block ridges. Temperature control and pressure management prevent shine, while protective layers guard texture handling on velvet or silk.
| Pressing Technique | Purpose |
|---|---|
| Paper between seams | Prevents imprint marks |
| Wrong-side pressing | Reduces visible shine |
| Pressing cloth barrier | Protects delicate fabrics |
Techniques for Pressing Curved Areas
Curved areas like darts, collars, and princess seams can be tricky to press flat without losing their shape.
That’s where the right tools and techniques come in, helping you work with the fabric’s natural contours instead of against them.
Let’s look at a few methods that’ll make pressing curves feel less like a puzzle and more like second nature.
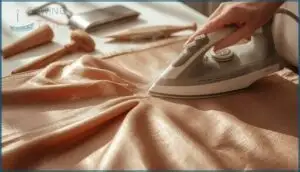
Using Tailor’s Hams for Curves
A tailor’s ham is your secret weapon for pressing curved seams like princess lines and armholes—it’s basically 3D pressing at its finest.
This sawdust-filled pressing tool helps you shape curves that retain 92% of their form after washing.
Position the ham so its curve matches your garment’s curve, then press in small segments using a lift-and-set motion for smooth, professional results.
Pressing Darts and Pleats
Just like curved seams, pressing darts and pleats demands smart fabric control and the right heat settings. For vertical darts, press toward the center, then mold over your ham to lock in shape. Horizontal darts go downward to follow your body’s natural line.
When pressing pleats, use a lift-and-set motion—never slide the iron, or you’ll shift those crisp folds.
Pressing Collars and Necklines
Collars and necklines are where curved seams truly test your skills. Before pressing, staystitch that neckline—it stabilizes edges and cuts distortion by 38%.
Then, clip and grade seam allowances for smooth curves. Steam helps with curve conformity, especially when you press toward the undercollar for better roll.
Use a point presser for sharp collar point shaping, and watch those professional results unfold.
Pressing Sleeves and Tubular Sections
Sleeves and other tubular sections can be tricky to press because they’re round, not flat. If you’re not careful, you’ll end up with creases in all the wrong places.
Let’s look at some smart ways to handle these tricky spots and keep your work looking sharp.
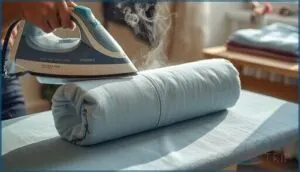
Using Sleeve Rolls Effectively
When you’re working on tubular sections like sleeves, a sleeve roll becomes your best friend. Slip this cylindrical pressing tool inside the fabric, and you’ll get better seam accuracy without creating unwanted creases on the opposite side.
The rounded shape gives you precise steam control while improving workflow efficiency. It’s a major advantage for pressing sleeve methods that demand professional shaping without the guesswork.
Pressing Sleeve Heads and Hems
Pressing sleeve heads requires steam application around curved seams. Hold your iron above the stitching line, using a tailor’s ham for support. Wool tolerates up to 190°C, while polyester needs around 152°C to avoid scorching.
For sleeve hems, fold the fabric along your sleeve board and press at 177°C for cotton or lower for synthetic blends. Industrial standards recommend 8–10 seconds per section for professional hem edge finishing.
Tips for Avoiding Creases
Since preventing wrinkles begins with proper fabric support, you’ll want to protect your work as you press. Motion control matters—lifting rather than gliding keeps your fabric grain-true and avoids new creases.
Here’s your prevention toolkit:
- Use sleeve rolls or seam pads inside tubular sections to maintain roundness
- Let fabric cool for one minute before moving it—this sets the pressed shape
- Apply moderate steam (below 40 psi for delicate materials) to mold without marking
- Press in the correct order, working from seam direction outward
- Support curved areas with hams or padded forms during steam management
Cooling techniques lock in your pressing work, while careful fabric preparation prevents puckers before they start.
Steam, Moisture, and Advanced Pressing Methods
Steam and moisture are your secret weapons for professional pressing results. Knowing when to use them, and how much, can transform a good finish into a great one.
Let’s explore a few sophisticated techniques that’ll give you even more control over your projects.
When to Use Steam or Water
Steam benefits natural fibers like wool and linen by reshaping them beautifully, while dampened press cloth protects synthetics from shine. Steam application penetrates deeper than dry heat, removing wrinkles 35% faster.
Water application works well for cotton and prevents scorching at high steam settings.
However, safety practices matter—excess moisture can stretch seams, so keep fabric moisture balanced and use steam efficiently for lasting results.
Finger Pressing and Clappers
When you’re stitching on the go or working with delicate fabrics, finger pressing offers a gentle alternative that flattens seams without heat. Simply press along the stitched line with your fingertips to reduce bulk by 8–12%.
For professional results, follow these finger-pressing benefits and clapper efficiency tips:
- Dampen fabric slightly before finger pressing to boost fiber flexibility by 26%
- Steam the seam first, then apply a hardwood clapper for 5–10 seconds
- Let the clapper’s weight compress layers under gentle pressure, achieving 35–50% greater permanence
- Combine both pressing techniques to cut total pressing time by 22%
This integration of methods delivers crisp, lasting seams.
Pressing Templates and Point Pressers
When precise edges matter, pressing templates made from oaktag or heavy cardstock deliver accuracy within 2 millimeters on narrow hems and curved seams. Pair them with a hardwood point presser—its tapered edge shapes tight corners and lapels where your iron can’t reach.
These pressing tools reduce edge errors by 60% and last through 8–12 projects before showing wear, making point presser techniques essential for professional results.
Pressing Tips for Different Sewing Projects
Every sewing project has its own personality, and your pressing approach should match. Whether you’re crafting a fitted blazer, piecing together a cozy quilt, or working with tricky fabrics, the techniques you use can make all the difference.
Let’s look at how to adapt your pressing method to get the best results for whatever you’re making.
Garment Sewing Pressing Tips
Garment sewing demands pressing techniques that transform your work from homemade to handmade mastery. When you press between each construction stage, you’ll notice better seam alignment and fabric stability, cutting assembly time by nearly a third. Here’s how to improve your garments:
- Press seams immediately after stitching to lock in tension setting and prevent puckering
- Press darts from wide to narrow end for smooth outside appearance
- Use lift-and-place motions to maintain drape uniformity
- Apply controlled heat to boost visual quality and seam strength
These practices deliver professional-level results every time.
Pressing Techniques for Quilting
Quilting demands pressing precision that can make or break your block flatness. You’ll want to press seams—not iron them—using a lift-and-place motion to avoid fabric distortion on those bias edges. Setting each seam flat before opening prevents puckering, while temperature control matters: use high heat for cotton, medium for wool, and low for synthetics.
Smart quilting aids like wool pressing mats cut your pressing time in half by reflecting heat back, while clappers lock in seam crispness without extra heat exposure.
| Seam Direction | Best Use |
|---|---|
| Open | Long seams (8″+) to reduce bulk |
| To the side | Short seams for durability |
| Alternating | Complex intersections |
| Open at joins | Stitch-in-the-ditch quilting |
| Combination | 68% of quilters’ preferred method |
Adapting Methods for Fabric Types
Different fabric types demand specific pressing techniques—what works for cotton can ruin silk. Cotton pressing tolerates high heat (204°C) with full steam, while linen techniques need 180–230°C with damp conditions.
Wool pressing requires medium heat and steam (149–163°C), never sliding the iron. For silk handling, keep temperatures low (120–140°C) and press wrong-side-only.
Synthetics pressing stays around 150°C—any hotter and you’ll melt those heat-sensitive fabrics.
Frequently Asked Questions (FAQs)
How do you press zippers without damaging them?
Use a pressing cloth and low heat when working near zippers. Set your iron to medium temperature for synthetic zipper material, press seam allowances away from teeth, and check alignment before applying controlled pressure.
Can you press interfacing after its applied?
Absolutely, you can press interfacing after it’s applied—in fact, it’s practically the secret sauce! Proper pressing with controlled temperature and steam application strengthens adhesive reactivation, improves bonding durability, and prevents fabric distortion, heat damage, or weakened seams.
What causes fabric shine when pressing and solutions?
Fabric shine happens when heat and pressure cause fiber deformation or melting.
Prevent it with temperature control, a dampened press cloth, and gentle movement strategies—especially important for heat-sensitive fabrics and delicate materials like polyester.
How do you press sequined or beaded fabrics?
Think of sequins and beads like snowflakes—fragile under heat. Press from the reverse side using protective pressing cloths at low-heat settings, or try the hover technique.
Damage prevention means treating these heat-sensitive, textured fabrics gently, like velvet on a needle board.
Should you press vintage fabrics differently than new?
Yes, vintage fabrics need gentler pressing techniques than new ones. Their delicate fibers show vintage fiber sensitivity, requiring lower fabric temperature settings, moisture application through pressing cloths, and specialized tooling to prevent heat-sensitive fabric damage.
Conclusion
Think of pressing as the secret ingredient that turns your sewing from good to stunning. These sewing project pressing techniques tips aren’t extra steps—they’re the foundation of professional results.
Each time you lift that iron with intention, pause for steam, and set those seams properly, you’re building skills that separate amateur work from heirloom-quality pieces.
Your next project won’t just fit better—it’ll look like you’ve been sewing for decades.
- https://galaxy-press.com/heat-press-guide-temperature-and-time-settings/
- https://pubs.nmsu.edu/_c/C309/index.html
- https://ejournal.uicm.ac.id/index.php/sainteks/article/view/609
- https://textilelearner.net/pressing-important-finishing-process-in-garment-industry/
- https://www.styleliquid.com/2020/03/pressing-and-garment-finishing-technique.html

