This site is supported by our readers. We may earn a commission, at no cost to you, if you purchase through links.
The right balance of comfort and style isn’t guesswork—it’s a practical skill anyone can master. Whether you’re working with crisp cotton or stretchy knits, understanding how to measure, calculate, and adjust ease opens up a world where every project fits the way you want.
Table Of Contents
- Key Takeaways
- What is Ease Allowance in Sewing?
- Types of Ease: Wearing Vs. Design
- Negative Ease and Stretch Fabrics
- Measuring and Calculating Correct Ease
- Fabric Selection and Ease Considerations
- Standard Ease Allowances by Garment Type
- Techniques for Adding Ease to Patterns
- Tips for Achieving The Perfect Fit
- Common Mistakes and Troubleshooting Ease
- Frequently Asked Questions (FAQs)
- Conclusion
Key Takeaways
- Ease allowance is the extra space in a sewing pattern that lets your clothes move comfortably with you, separate from seam allowance.
- Wearing ease provides basic movement room, while design ease shapes the garment’s style and silhouette, and each must be balanced for a good fit.
- The type, weight, and stretch of your chosen fabric directly affect how much ease you need, so always adjust pattern measurements to match material behavior.
- Comparing your body measurements to finished garment dimensions helps you calculate the right ease, preventing tightness or bagginess in your finished piece.
What is Ease Allowance in Sewing?
If you’ve ever pulled on a shirt that felt too tight or sewn a dress that bunched in all the wrong places, you’ve already met ease allowance—you just didn’t know its name. Ease is the breathing room between your body and your clothes, and it’s what separates a garment that moves with you from one that fights you.
Ease allowance is the hidden space that turns clothes from restrictive and uncomfortable into garments that move effortlessly with you
Let’s break down what ease actually means, how it differs from seam allowance, and why getting it right changes everything about fit.
Definition of Ease Allowance
Ease allowance is the extra space built into your pattern beyond your actual body measurements. This breathing room ensures you can move comfortably while achieving your desired garment fit. Understanding ease calculation transforms pattern drafting from guesswork into precision.
Here’s what ease includes:
- Wearing ease – minimum room for daily movement
- Design ease – additional space for style and silhouette
- Fabric considerations – adjustments based on stretch and drape
- Pattern ease allowances – industry standards for different garment types
Sewing ease separates uncomfortable clothes from wearable favorites. To achieve the perfect fit, consider the sewing pattern ease guidelines for your specific garment type.
Difference Between Ease and Seam Allowance
Many sewers mix up ease and seam allowance, but they serve completely different purposes in pattern drafting. Ease is the extra room between your body and the finished garment for movement and style. Seam allowance is the fabric strip beyond the stitching line used to join pattern pieces together during garment construction. Understanding the role of seam allowance guidelines is vital for achieving a perfect fit.
Here’s how they differ:
| Aspect | Ease | Seam Allowance |
|---|---|---|
| Purpose | Creates fit and comfort | Joins fabric pieces |
| When Added | During pattern drafting | After ease calculation |
| Typical Amount | 2–5 inches for blouses | 5/8 inch standard |
Understanding this distinction improves sewing accuracy and prevents common fitting mistakes.
Importance for Garment Fit
Ease directly shapes how your finished piece looks and feels on your body. When you follow pattern ease allowances correctly, you’ll notice better garment mobility and fewer comfort issues.
In fact, 88% of sewers find satisfaction in garments with thoughtful ease. Getting this right means balancing your fit preferences with proper sewing techniques, ensuring every garment construction detail backs both movement and style.
Types of Ease: Wearing Vs. Design
When you’re working with sewing patterns, ease isn’t just one thing—it actually comes in two distinct flavors. Understanding the difference between wearing ease and design ease will help you make smarter choices about fit and style.
Let’s break down what each type does and how they work together to create garments that both fit well and look exactly how you want them to.
Wearing Ease Explained
Think of wearing ease as your garment’s breathing room. It’s the minimal extra space beyond your body measurements that lets you sit, bend, and reach without restriction. For woven fabrics, you’ll usually need about 2.5 inches at the bust, 1 inch at the waist, and 2–3 inches at the hip to maintain garment fit and comfort throughout your day.
| Body Area | Minimum Wearing Ease | Purpose |
|---|---|---|
| Bust | 2–3 inches | Freedom for breathing and arm movement |
| Waist | 1–2 inches | Bending and sitting comfort |
| Hip | 2 inches | Walking and sitting without strain |
Without proper wearing ease in your pattern drafting, you’ll encounter issues like seam strain, gaping closures, and restricted movement. Your fabric choices play a significant role as well—woven materials typically require more wearing ease than knits. When comparing your body measurements to finished garment measurements, the difference reveals your pattern ease allowances. Master this calculation, and you’ll avoid the tight, uncomfortable fits that often challenge home sewers.
Design Ease and Garment Style
Beyond comfort, design ease shapes your garment’s personality. You’re adding extra fullness to create a specific silhouette—from a crisp, fitted blouse with minimal design ease to a flowing tunic with 10+ inches. This aesthetic choice transforms pattern drafting techniques completely. Your fit preferences drive style variations: oversized coats might include 12 inches of chest ease, while slim-fit garments barely add any beyond wearing ease.
| Garment Style | Typical Design Ease | Aesthetic Outcomes |
|---|---|---|
| Fitted/Structured | 0–2 inches | Body-skimming, structured silhouette |
| Relaxed/Oversized | 6–12+ inches | Flowing drape, comfort-driven look |
| Standard Fit | 3–5 inches | Balanced shape with moderate ease |
Silhouette trends shift constantly—recent years favored roomier garment balance, while earlier decades preferred closer fits. Understanding these style variations helps you achieve garment fit that matches your vision.
Practical Examples of Each Type
Picture a standard blouse: you’ll apply 2.5 inches of wearing ease at the bust for reaching and bending. An oversized coat, however, might need 4+ inches of design ease for layering. Legging patterns use negative ease—1–2 inches less than your hip measurement—so stretch knit hugs your body. Pattern drafting techniques vary dramatically by garment type and fabric considerations.
| Ease Type | Garment Example | Typical Allowance |
|---|---|---|
| Wearing Ease | Standard Blouse | 2.5 inches at bust |
| Design Ease | Oversized Coat | 4+ inches chest/hip |
| Negative Ease | Stretch Leggings | 1–2 inches less than hip |
| Combined Ease | Bomber Jacket | 2 in. wearing + 2 in. design |
| Specialty Ease | Dance Leotard | 5–15% negative ease |
Negative Ease and Stretch Fabrics
Negative ease flips the script on traditional fitting. Instead of adding room, you’re actually making the pattern smaller than your body measurements.
This works beautifully with stretch fabrics that hug your curves and move with you.
When to Use Negative Ease
You’ll use negative ease when your stretch fabric needs to hug the body without excess slack. Athletic wear construction and compression garment design rely on this technique—think leggings, swimwear, and sports bras that mold to your shape.
Fitted garment techniques demand fabrics with at least 25% stretch, where you can reduce patterns by 5% to 20% compared to body measurements, ensuring secure coverage during movement.
Calculating Negative Ease for Knit Patterns
Start by testing a fabric swatch to measure its stretch ratio—divide the stretched length by the original length. If your knit fabrics stretch from 10 cm to 15 cm, you’ve got a 1.5 ratio. Then use the negative ease formula: subtract 1, divide by the stretch ratio, and multiply by 100 to find your percentage.
- Fabric swatch testing reveals how much your material can safely stretch before losing comfort
- Stretch ratio calculation transforms guesswork into precise pattern grading techniques
- The negative ease formula unlocks knit patterns that move with you, not against you
- Calculating ease becomes second nature once you understand your knit fabric stretch factor
Achieving a Fitted Look With Stretch Fabric
Think of stretch fabric selection like choosing the right dance partner—you need the perfect balance between give and hold. For that fitted silhouette, aim for 8–12% negative ease horizontally while keeping vertical ease minimal.
Your fabric stretch ratio guides pattern drafting techniques, ensuring knit fabrics hug your curves without restricting movement.
The stretch factor determines whether your garment drape flows or clings, transforming stretchy fabric into a second skin.
Measuring and Calculating Correct Ease
Getting the right fit starts with knowing your numbers and understanding how they translate to your finished garment. You’ll need to measure your body carefully, compare those measurements to your pattern, and adjust the ease based on what you’re making.
Let’s walk through how to measure, compare, and calculate ease so your garments fit exactly how you want them to.
Taking Accurate Body Measurements
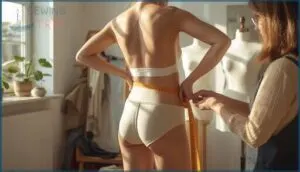
Accurate body measurements form the foundation of every successful garment. You’ll need a soft, non-stretch measuring tape and someone to help you—this approach reduces errors by up to 30% compared to measuring yourself.
Here are three essential measuring techniques for accurate sizing:
- Keep the tape level and parallel to the floor
- Allow one finger under the tape for comfort
- Mark reference points like waist and hip with elastic bands
Comparing Body and Garment Measurements
Once you have your body measurements, lay your chosen sewing pattern flat and measure its finished dimensions—this reveals the built-in ease. Subtract your body measurements from the garment specifications to find the gap. For example, if your bust measures 36 inches and the pattern’s finished bust is 40 inches, you’ve got 4 inches of ease for comfortable movement and fit analysis.
| Measurement Point | Your Body | Pattern Garment | Ease Amount |
|---|---|---|---|
| Bust | 36″ | 40″ | 4″ |
| Waist | 28″ | 30″ | 2″ |
| Hip | 38″ | 42″ | 4″ |
| Shoulder Width | 15″ | 16″ | 1″ |
| Sleeve Length | 23″ | 23.5″ | 0.5″ |
Ease Calculation Tips for Different Garments
Now that you’ve got the basics down, apply different ease calculations to match what you’re making. Blouses need 5–8 cm of bust ease for regular fit, while jackets require 10–12 cm to layer comfortably. Skirts and trousers use hip measurements with 2–4 cm for movement.
Your fabric selection drives these numbers—wovens demand more room than knits, making ease calculation essential for proper fit adjustment across all garment types.
Fabric Selection and Ease Considerations
Choosing the right fabric isn’t just about color or pattern—it directly shapes how much ease your garment needs. Woven cottons behave completely differently than stretchy knits, and a heavy wool requires different considerations than a floaty silk.
Let’s break down how fabric type, weight, and cut influence the ease you should build into your patterns.
Woven Vs. Knit Fabric Requirements
Your fabric choice fundamentally shapes how you approach sewing ease and pattern drafting. Woven fabrics require positive ease—usually 2.5 to 10 cm—because their interlaced structure offers minimal fabric stretch and depends on garment stability for movement. Meanwhile, knit fabrics can handle negative ease, often 2.5 to 7.5 cm less than body measurements, thanks to their looped construction and natural elasticity.
- Wovens need extra room for comfort and flexibility
- Knits stretch to fit your body’s contours
- Textile properties directly influence your sewing techniques and pattern making decisions
How Fabric Weight and Drape Affect Ease
Your fabric’s weight and drape directly influence ease calculations and garment movement. Lightweight fabrics under 150 GSM cling to your body, so you’ll need 2 to 4 cm more ease than heavyweight fabrics above 250 GSM.
High-drape materials require extra room—often 3 to 6% beyond body measurements—to prevent tightness, while stiff fabrics hold their shape and need ease mainly for mobility.
Adjusting Ease for Bias-Cut and Heavy Fabrics
When you’re working with bias grainlines or heavy fabric, pattern resting techniques become essential—bias-cut pieces can stretch up to 10% after hanging, while heavyweight materials need 25% more ease than standard sewing ease amounts.
- Increase seam allowance adjustments to 1.5 inches for bias seams in heavy fabrics to manage fabric drape and prevent distortion
- Let bias-cut sections rest 24 hours before assembly to capture dimensional changes and guarantee closure stability
- Add straight-grain interfacing behind buttonholes to prevent stretching in bias-cut garments
Standard Ease Allowances by Garment Type
Different garments need different amounts of ease to fit and function properly. A blouse won’t have the same ease requirements as a winter coat, and pants follow their own set of rules.
Let’s look at the standard ease allowances you’ll use for each major garment category.
Blouses, Shirts, and Dresses
When you’re building a dress or blouse, sewing ease at the bust makes all the difference. Close-fitting styles use 0 to 3 inches for drama, while fitted bustlines need 3 to 4 inches of bust ease, plus 1 inch waist ease and 2 to 3 inches hip ease for movement comfort.
Semifitted garments require 4 to 5 inches, and loose-fitting styles incorporate 5 to 8 inches for woven dresses that let you breathe.
Jackets, Coats, and Layered Garments
For layering ease, jackets and coats need extra room. Fitted jackets require 3.75 to 4.25 inches of sewing ease for comfortable movement over shirts. Semifitted styles use 4.375 to 5.375 inches, while loose-fit jackets need 5.875 to 10 inches for seasonal wear.
Coats demand even more—over 10 inches of garment ease allowances for heavy layering, plus additional space calculated from insulation thickness.
Skirts, Pants, and Trousers
For fitted skirts and trousers, you’ll want 1 to 1.5 inches of waist ease and 2 to 3 inches at the hip—enough for daily comfort without restriction. Semi-fitted styles bump that up to 3 to 4 inches, while loose trouser styles use 4 to 6 inches.
Don’t forget crotch depth: 0.5 to 0.75 inches keeps your sewing patterns comfortable across different skirt silhouettes.
Techniques for Adding Ease to Patterns
Adding ease to your patterns doesn’t have to feel like guesswork. Whether you’re tweaking a store-bought pattern or starting from scratch, you’ll need reliable techniques that work with your fabric and style goals.
Here’s how to approach pattern alterations, custom drafting, and grading adjustments to get the fit you’re after.
Altering Commercial Patterns for Ease
Most commercial sewing patterns include 5–8 cm of ease at the bust, which means 80–90% of sewists need pattern alterations for proper fit. Start by comparing your body measurements against finished garment measurements on pattern pieces.
Pattern size selection matters—choosing the right figure type adjustment reduces your alteration work by 30%. Multi-size patterns let you redraw seam lines, and using a fitting shell helps you visualize ease changes before cutting fabric.
Drafting Patterns With Custom Ease
When you draft patterns with custom ease, you control block dimensions from the start—adding 1–3 cm beyond wearing ease for your desired silhouette. Design ease shapes the garment style through armhole adjustments and dart manipulation, while easing stitches help fit extra fabric smoothly into seams.
Fabric influence matters here: woven fabrics need more room than knits for truly custom-fitted garments through smart patternmaking.
Pattern Grading and Ease Adjustments
Pattern grading scales your drafted design across sizes—and that’s where ease adjustments become mathematical. You’ll adjust ease incrementally as sizes change: larger sizes need 10–15% more ease.
Digital grading advances now cut pattern distortion rates by over 32%, while predictive analytics boost first-fit accuracy by 21%. Computer-aided design speeds up fitting adjustments and pattern alterations, letting you fine-tune sewing pattern adjustments with precision.
Tips for Achieving The Perfect Fit
Getting the fit just right takes a bit of know-how and a careful eye. You’ll want to think about both comfort and style as you adjust your patterns.
Here are a few practical tips to help you find that perfect balance.
Adjusting Ease for Personal Comfort
When you’re aiming for a truly fitting garment, comfort measurement methods matter as much as style. Most sewists adjust ease allowance—often at the bust and hips—based on personal comfort, not just pattern defaults.
For instance, increasing ease for workwear or layering boosts your satisfaction score and movement. Consider posture ease tailoring, and don’t hesitate to test fabric comfort adjustments.
Designing the correct amount of ease can transform the importance of ease in clothing into everyday comfort.
Balancing Style and Movement
Comfort is just one side of the coin—Mobility vs. Style is the real balancing act. You want a fitting garment that lets you move, but also flatters your silhouette.
Consider these Patternmaking Strategies for better results:
- Use Ease Ratios: Aim for at least 50% movement ease in daily-wear.
- Test Functional Garments: Wear-test for Poor Ease Balance.
- Adjust for activity: Prioritize movement in areas like hips and shoulders, keeping the importance of ease in clothing front and center.
Common Mistakes and Troubleshooting Ease
Getting ease right isn’t always straightforward, and it’s easy to make mistakes along the way. If your garments end up too tight or too loose, you’re not alone.
Here’s what you should watch out for and how to fix common issues.
Over- or Underestimating Ease Needs
Ever wondered why a sewing project ends up either too snug or oddly loose? Over- or underestimating ease throws off fit, often from Measurement Inaccuracies, Fabric Stretch Factor, or Pattern Chart Errors. Comparing Garment Size before cutting helps. Here’s a quick breakdown:
| Fit Problem Causes | Impact on Garment |
|---|---|
| Measurement Inaccuracies | Restricted or loose fit |
| Fabric Stretch Factor | Misjudged comfort/movement |
| Pattern Chart Errors | Unexpected garment sizing |
| Garment Size Comparison | Prevents ease miscalculations |
Resolving Tight or Baggy Garments
When a garment feels too tight or baggy, ease reassessment is your first step. Seam adjustments—like letting out or taking in key areas—solve most fitting issues.
Muslin fitting spots problems early, while digital tailoring pinpoints trouble zones fast. Follow alteration sequencing: start at the shoulders, then work down.
These sewing pattern adjustments sharpen garment fitting and keep your sewing patterns on track.
Adapting Patterns for Changing Fabrics
When you switch fabrics, understanding fabric properties is key. For example, fabric stretch impact and heavyweight fabric ease can throw off your fit if you aren’t careful. Use this four-step approach:
- Test with a muslin fitting guide.
- Check adaptive pattern ease.
- Apply ease adjustment techniques.
- Consider fabric selection and fabric and ease considerations every time.
Frequently Asked Questions (FAQs)
How does ease affect sleeve mobility?
Picture reaching overhead and your sleeve pulls tight—ease is the secret ingredient. Sleeve cap ease, armhole interaction, and fabric stretch all shape mobility. Too little ease restricts movement; too much causes bunching.
Pattern adjustments solve fit issues.
Can ease be added after sewing a garment?
Yes, you can add ease after sewing by letting out seams if enough seam allowance is available, inserting gussets, or adding fabric panels.
Watch for topstitching issues and lining considerations, as these complicate alterations and garment fit.
What tools help measure ease accurately?
To measure ease accurately, use tape measures for body measurements, curved rulers for shaping, seam gauges for hems, and digital scanners for precision.
Fitting tools and systematic measurement techniques help you compare sewing measurements with measurement charts for best results.
How does ease impact pattern matching?
It’s almost magic how a little extra ease can throw off perfect pattern flow. If you don’t manage ease distribution and fabric draping carefully, pattern matching suffers—especially with volume management—making smooth connections at seams tricky in garment sewing.
Is ease allowance different for childrens clothing?
Ease allowance for children’s clothing is different due to rapid growth rates and high activity. Children’s fit needs extra room for movement and kid safety.
Youth sizing and fabric choice also influence pattern ease, ensuring comfort as kids grow.
Conclusion
Much like tailoring a story to its audience, adjusting ease is about understanding both the fabric and the person wearing it. When you apply sewing pattern ease allowance tips, you’re not just following numbers—you’re shaping comfort and confidence.
Each choice, from measuring to fabric selection, builds a foundation for garments that move with you. Let your next project reflect your skill: precise, thoughtful, and uniquely yours. The perfect fit isn’t luck—it’s the art of mindful adjustment.
- https://patternlab.london/home/what-is-ease-in-pattern-making-basic-pattern-making/
- https://www.reddit.com/r/AdvancedKnitting/comments/15v29sh/proportional_ease_on_negative_ease_garments/
- https://sewingforaliving.com/sewing-ease-how-to-add-it-to-patterns/
- https://www.atdplab.com/post/a-quantification-of-the-preferred-ease-allowance-for-men-s-formal-jacket-patterns
- https://www.seamwork.com/sewing-tutorials/understanding-ease


