This site is supported by our readers. We may earn a commission, at no cost to you, if you purchase through links.
Even experienced quilters can find themselves stuck with a pattern that looked perfect on paper but doesn’t translate to fabric, or worse, a project that loses momentum halfway through because the design foundation wasn’t solid.
Strong quilt pattern design advice starts with understanding the fundamentals: how blocks relate to each other, how fabrics interact, and how to translate your creative vision into a workable plan that you’ll actually want to finish.
Table Of Contents
- Key Takeaways
- Essential Quilt Design Fundamentals
- Choosing Fabrics for Quilt Patterns
- Mastering Color Theory in Quilting
- Planning and Drawing Quilt Patterns
- Building Blocks: Piecing and Construction
- Strategic Quilting Techniques and Details
- Tips for Beginner Quilt Pattern Designers
- Frequently Asked Questions (FAQs)
- Conclusion
Key Takeaways
- Strong quilt designs hinge on pre-cutting decisions like block proportions, fabric interplay, and negative space—not just sewing skill—because poor planning derails projects before piecing even starts.
- Achieving visual harmony requires deliberate color theory application, including value contrast for depth, limited palettes for cohesion, and strategic mixing of prints, solids, and textures to balance scale and visual weight.
- Precision in cutting and seam allowances directly determines whether blocks align properly, with errors as small as 1/8 inch multiplying across a quilt to create warping, buried points, and sizing inconsistencies of 5/8 inch or more.
- Successful beginner projects prioritize simple geometry, large blocks, and straight seams while avoiding common pitfalls like inconsistent seam allowances (43% of piecing failures) and skipping complete pattern reviews (31% of construction issues).
Essential Quilt Design Fundamentals
Before you start piecing your first block, you need to nail down the basics that make or break a quilt design. Getting the dimensions right, transferring your vision onto paper or screen, and figuring out how your blocks will come together aren’t glamorous steps, but they’re the foundation everything else builds on.
Let’s walk through the three fundamentals that’ll set you up for success from the start.
Understanding Quilt Sizes and Proportions
A solid grasp of Quilt Design Fundamentals starts with knowing your Dimensions—think Bedding Dimensions, Drape Length, and the effect of Fabric Shrinkage.
Calculating Quilt Blocks or scaling patterns means balancing proportion, often using the Golden Ratio for harmony. Modern quilters can creatively explore composition and design principles by designing with triangles.
The right fit in quilting comes from blending math and vision, so each quilt drapes beautifully and turns heads.
Translating Ideas to Paper or Software
Once you know the right proportions for your quilt, the next step is translating your vision. Some use graph paper and pencils—old-school, hands-on, and rewarding. Others prefer digital design software, which offers sophisticated features, instant pattern integration, and impressive accuracy.
Weigh the cost and convenience—digital vs paper—then choose the method that fits your creative flow best. Digital patterns offer instant availability after purchase. Sketching ideas creates a personal connection with your quilt.
Software lets you experiment with color and layout instantly. Pattern integration saves time and reduces cutting errors. Digital tools simplify design updates and sharing. Graph paper ensures you learn by seeing every line.
Calculating Quilt Block Layouts
Once your pattern sketch feels right, it’s time to tackle calculating quilt blocks. Block Count Formulas turn rough measurements into a snug fit, while Resizing Blocks keeps proportions just so. On-Point Layouts require Triangle Calculations to avoid odd edges, and Sashing Impact shapes the final footprint.
| Concept | Why It Matters |
|---|---|
| Block Count Formulas | Controls the overall size |
| Resizing Blocks | Adjusts dimensions for different patterns |
| On-Point Layouts | Needs triangles at sides and corners |
| Sashing Impact | Alters quilt’s finished measurements |
| Triangle Calculations | Maintains clean edges in angular arrangements |
Choosing Fabrics for Quilt Patterns
Picking the right fabrics is where your quilt truly starts to take shape. The colors, textures, and prints you choose will set the tone for your whole project.
Here’s what to keep in mind as you sort through your options.
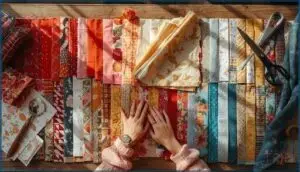
Selecting Fabrics for Color Harmony
Think of your quilt as a canvas—color harmony matters as much as technique. Value contrast draws out your design, while balancing warm and cool tones sparks movement across the quilt.
Neutral fabrics lend structure, making your chosen palette shine. If you limit your palette and lean on color theory, your quilt’s voice is clear, bold, and cohesive.
Matching Prints, Solids, and Textures
In designing quilts, bring balance by blending fabric scale, pattern mixing, and texture contrast. Aim for color harmony by letting solids frame prints and textured fabrics add dimension.
Follow these strategies to achieve visual balance:
- Combine large, medium, and small prints for lively pattern mixing.
- Use textured fabrics for subtle interest.
- Let solids anchor bold or busy prints.
Preparing and Organizing Fabrics
Before cutting and organizing fabric, focus on Prewashing Fabrics—remove excess dyes and cut shrinkage headaches. Sort your fabric by color or size, and label carefully to simplify Fabric Selection. Store yardage in bins out of direct light. This habit preserves fabric quality, speeds up piecing, and lays a foundation for smart Yardage Calculation in every quilt.
| Fabric Prep Step | Pro Tip | Studio Essential |
|---|---|---|
| Prewashing Fabrics | Wash reds separately | Mesh garment bags |
| Fabric Sorting | Sort scraps by size/color | Clear acrylic trays |
| Inventory Labeling | Label and date by project | Sticky back fabric tags |
Mastering Color Theory in Quilting
Color theory is where your quilt really starts to show its personality. By understanding how colors interact, you can shape the mood and movement of your design.
Here’s how you can make smart choices with color for your next quilt.
Using Complementary and Analogous Schemes
Did you know choosing the right colour schemes is as important as the stitch itself? Complementary colours from the color wheel basics boost contrast and vibrancy, while analogous colours offer gentle harmony. To apply colour theory in quilts:
- Map colour wheel pairs for excitement or calm.
- Use fabric selection tips to avoid harsh contrasts.
- Pair prints thoughtfully.
- Consider scheme emotional impact.
Balancing Value, Hue, and Saturation
A successful quilt hinges on skillful color balance—mixing value contrast with mindful hue placement and precise saturation levels. That’s your core for visual harmony.
When you choose fabrics, think beyond the shade: subtle value differences, pure hues, and layered saturation can make a quilt sparkle. Intentional color theory in fabric selection transforms ordinary piecing into striking, harmonious quilts every time.
Creating Depth With Contrast
Ever notice how a quilt pops when light and dark fabrics meet? Value contrast is your shortcut to depth, letting you weave space into your design. Consider this:
- Layer bold lights against deep darks.
- Pair complementary hues for color illusion.
- Mix smooth cottons with nubby wools—texture contrast matters.
- Juxtapose geometric shapes with curves.
- Shift block layouts to showcase striking contrasts.
Planning and Drawing Quilt Patterns
When planning your quilt pattern, a clear roadmap can save you time and frustration. You’ll want a system that matches your style and gets your ideas out of your head and onto the page.
Here are a few approaches that can help shape your vision from the very start.
Designing on Graph Paper
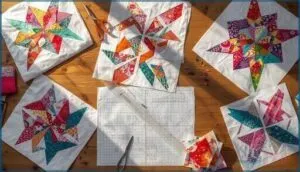
Designing quilt patterns on graph paper lets you map out block sizes with precision and visualize symmetry planning before you even touch your fabric. Many quilters find graph paper essential for error reduction as it turns messy ideas into concrete quilt design plans you can trust.
You can experiment with color coding, test layouts, and track revisions efficiently.
Utilizing Digital Quilt Design Tools
If you’ve ever sketched out patterns by hand, you’ll appreciate how quilting software streamlines every step. Digital quilt planning software brings Software Adoption front and center, offering Digital Accuracy and Creative Customization.
Many quilters now lean on these programs for efficient quilt design, speedy layout adjustments, and Online Collaboration. Plus, most find the Learning Curve pleasantly short thanks to easy-to-grasp features.
Customizing Quilt Layouts
Once you’ve sketched your pattern digitally, customizing quilt layouts gives you room to play with Block Arrangement and Negative Space. You can rotate blocks for visual punch, adjust sashing widths, or substitute background fabric where needed.
Mathematical Methods help you scale patterns up or down, while Trend Demographics show that most quilters spend over an hour designing quilts per project, tweaking layouts until everything clicks.
Building Blocks: Piecing and Construction
Once you’ve planned your quilt design, it’s time to bring it to life through careful piecing and construction. The way you cut, sew, and assemble your blocks determines whether your finished quilt lies flat and looks polished.
Let’s break down the essential techniques that turn fabric pieces into cohesive, beautiful blocks.
Accurate Cutting and Seam Allowances
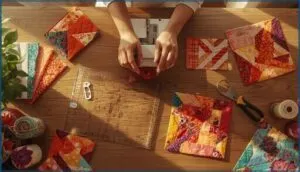
When your quilt blocks don’t line up, the culprit is often hidden in the basics: cutting accuracy and seam allowances. Small errors multiply fast—just 1/8 inch off can throw your 12-inch block off by 5/8 inch, burying star points and creating waves.
Small errors in cutting accuracy and seam allowances multiply fast—just 1/8 inch off can throw your 12-inch block off by 5/8 inch, burying star points and creating waves
To improve precision, follow these essential steps:
- Use rotary cutters with sharp blades on quality cutting mats for precision through multiple fabric layers
- Mark and test your seam guide calibration every 10-20 sewing hours to maintain that important 1/4 inch standard
- Pre-wash and iron fabrics flat before cutting to reduce shrinkage and distortion by roughly 12%
- Align fabric grain properly to prevent warping and keep consistent block sizing within 2%
- Employ clear acrylic quilting rulers with grid markings to improve accuracy in fabric cutting
Simple Block Construction Methods
Once your cutting and seam allowances are dialed in, you’re ready to build blocks efficiently.
Strip piecing cuts construction time by roughly 30% for four-patch and nine-patch blocks, letting you sew fabric strips together first, then slice them into units.
HST methods transform simple shapes into interesting block designs—the draw-and-sew approach yields four units at once, streamlining your quilting workflow, while machine piecing boosts speed sixfold over hand methods.
Adding Borders, Sashing, and Cornerstones
After piecing your blocks, sashing and cornerstones create breathing room between pattern elements. Calculate sashing fabric choice at 1/4 to 1/3 your block width—12-inch blocks pair well with 3-inch strips.
Border width ratios follow similar logic, generally matching block dimensions divided by four.
When designing quilts with cornerstone grid layout, you’ll need 20 squares for a 12-block arrangement, maintaining proportion golden ratio throughout your composition.
Strategic Quilting Techniques and Details
Once you’ve pieced your quilt top, the choices you make in thread, batting, and actual quilting technique can either improve your design or flatten it. These decisions aren’t just technical—they shape how your quilt looks, feels, and moves.
Let’s walk through the strategic details that bring your pattern to life.
Thread Selection for Visual Impact
Thread selection strategy shapes your quilt’s final appearance more than you might expect. Thread color determines whether stitching blends quietly or pops boldly, with contrast increasing visibility by over 60%. Weight effects come into play when choosing between prominent 30wt threads for decorative motifs or fine 80wt for subtle detail work.
Material finish matters too, from matte cotton to lustrous silk, while variegated threads add dimension across surfaces. Specialty threads like metallics amplify visual highlights, though they demand patience.
Your thread choices directly influence stitch density and texture perception, so consider how each decision bolsters your design vision.
Batting Color and Texture Choices
When texture definition meets batting color, your quilting design transforms completely. White batting keeps light fabrics bright, while black intensifies dark tones by over 60%, though it’ll mute lighter shades.
Loft impact dictates drape qualities—high polyester puffs dramatically, cotton lies flat.
Color matching batting to your quilt top prevents distortion, and longevity factors like scrim backing maintain structure through repeated washes. Always create test samples before committing.
Free-Motion and Walking Foot Quilting
Your foot choice dictates efficiency metrics and design versatility. Free-motion quilting unlocks organic motifs and tighter curves, dominating 70% of art quilts, though skill acquisition demands practice—30 days yields 50% improvement. Walking foot quilting maintains stitch consistency across 98% of straight-line projects, completing modern patterns 30% faster.
Consider these structural guidelines:
- Keep quilting lines within 3 inches for durability
- Match stitch density to your design purpose
- Combine both techniques for maximum impact
Tips for Beginner Quilt Pattern Designers
Starting your journey as a quilt pattern designer can feel overwhelming, but you don’t have to master everything at once. The key is choosing projects that match your skill level and learning to spot common pitfalls before they derail your progress.
Let’s look at how to set yourself up for success from your very first design.
Choosing Beginner-Friendly Patterns
Your first project deserves a design that builds confidence rather than frustration. Look for patterns featuring simple geometry, large blocks, and minimal piecing—the nine-patch appears in over 60% of beginner guides for good reason. Strip techniques and improvisational layouts give you room to grow while delivering satisfying results.
| Pattern Feature | Why It Works for Beginners |
|---|---|
| Straight seams only | Eliminates complex matching and curves |
| 8-12 inch blocks | Reduces cutting time by up to 50% |
| Pre-cut friendly | Simplifies fabric selection and preparation |
Avoiding Common Design Mistakes
When you skip the fundamentals, problems multiply fast. Inconsistent seam allowance accounts for 43% of piecing issues, while rushed fabric selection creates muddled patterns in nearly a quarter of projects.
Read pattern instructions completely—31% of construction setbacks trace back to this step.
Check your block layout before sewing, test color theory with value placement, and always measure twice.
Frequently Asked Questions (FAQs)
How do I incorporate curved seams successfully?
As the saying goes, practice makes perfect. Master curved seams through template usage, pinning techniques every inch, and cutting accuracy with starch.
The appliqué method also works beautifully, mitigating distortion while maintaining your seam allowance throughout these intricate quilting techniques.
What are modern quilt design trends?
Modern quilting design leans into geometric designs, earthy palettes, and textured fabrics. Sustainable textiles reflect eco-conscious choices, while digital influence expands creative possibilities, reshaping how you approach aesthetic choices and quilting patterns today.
How do I design scrappy quilts effectively?
Designing scrappy quilts effectively requires fabric cohesion through consistent backgrounds or sashing, color balance using light-medium-dark values, and organizing scrap sizes strategically.
Visual unity emerges when you limit your palette and place fabric scraps thoughtfully rather than randomly.
Can I mix different block sizes harmoniously?
You can absolutely mix different block sizes harmoniously by using borders or sashing to unify them, applying the golden ratio for pleasing proportions, and balancing visual weight through thoughtful placement and modular calculations.
How do I create original quilt patterns?
Start with inspiration from nature, architecture, or fabric itself. Sketch block variations on graph paper, then perfect proportions digitally.
Experiment with unique elements, color placement, and theme development to craft distinctive quilt design methods that reflect your creative vision.
Conclusion
When a quilt doesn’t quite come together, it’s rarely about skill—it’s about the groundwork. Strong quilt pattern design advice reminds you that blocks, fabrics, and color choices need intention behind them.
You’ve now got the framework to sketch confidently, cut accurately, and see your vision through from start to finish. The next quilt you create won’t just be another project. It’ll be the one people remember.

