This site is supported by our readers. We may earn a commission, at no cost to you, if you purchase through links.
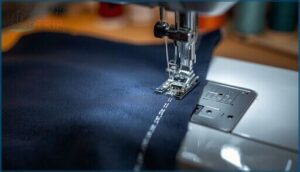
Twin needle stitching doesn’t whisper refinement; it declares it with two perfect rows in a single pass. Those crisp, parallel lines at the hem aren’t a trick—they’re the handiwork of a twin needle, letting you achieve store-bought polish from a home machine.
The magic lies in the balance: each needle creates its own line on top, while a zigzag underneath delivers the stretch that jerseys and knits demand.
When you understand how to pick the right needle, set up your machine, and sidestep common pitfalls, those double lines turn from frustration to favorite finishing touch.
Table Of Contents
- Key Takeaways
- What is Twin Needle Stitching?
- Choosing The Right Twin Needle
- Setting Up Your Sewing Machine
- Adjusting Stitch Settings for Twin Needles
- Hemming and Topstitching Techniques
- Troubleshooting Common Twin Needle Issues
- Essential Tools for Twin Needle Stitching
- Tips for Professional Twin Needle Results
- Frequently Asked Questions (FAQs)
- Conclusion
Key Takeaways
- Twin needle stitching creates two parallel top lines with a zigzag underside that allows seams to stretch, making it essential for hemming knits and achieving professional-looking finishes on stretch fabrics.
- Choosing the right needle size and type for your fabric—ballpoint for knits, reinforced for denim, universal for everyday blends—prevents skipped stitches and ensures clean, durable seams.
- Proper machine setup requires threading two spools separately, setting stitch width limits to avoid needle plate contact, and adjusting tension to prevent tunneling or puckering on the fabric.
- Using stabilizers like washable tape and accessories like walking feet eliminates common problems such as fabric distortion and uneven feeding, transforming home-sewn hems into store-quality results.
What is Twin Needle Stitching?
Twin needle stitching adds a new layer of polish to your sewing projects by creating crisp, parallel lines with a single pass. If you’re curious how this adaptable technique works and what sets it apart, you’re in the right place.
Let’s take a closer look at what makes twin needle stitching unique and where you’ll see it in action.
How Twin Needles Work
At the heart of twin needle sewing is stitch formation—two needles, one pass. You thread each needle from a separate spool, allowing both to pierce the fabric together. Underneath, the bobbin weaves a zigzag connecting both lines.
This clever needle mechanic lets the seam stretch with fabric movement, making twin-needle stitching ideal for everything from tees to topstitch detail work. This makes it suitable for sewing with jersey, due to its inherent stretchiness.
Differences From Single Needle Stitching
Unlike a single needle, a twin needle creates two parallel stitches on top, held together by a zigzag on the underside. This double needle setup changes both the look and performance—expect a decorative, stretchy finish that beats single needle seams for knits but trades a bit of long-term durability for speed and flexibility. Think of it as function with flair.
Double-needle machines are also known as double-needle cars.
Common Applications in Sewing
If you’ve worked with stretch fabrics, you know twin-needle stitching is your go-to for garment hemming, delivering that polished, pro look found on most t-shirts. It doesn’t stop there—use it for bold decorative topstitching, simulating industrial coverstitching, or crafting pintucking effects and raised textures. Upholstery shops rely on twin needles, too, for durable seams.
- Hemming activewear and knits
- Decorative detail on denim and sportswear
- Raised pintucks, texture, and upholstery seams
Choosing The Right Twin Needle
Picking the right twin needle makes all the difference in how your project turns out. There are a few things to know about sizes, fabric choices, and specialty types.
Here’s what you’ll need to help you choose with confidence.
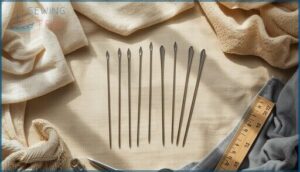
Needle Sizes and Widths Explained
Think of needle sizes as a tailoring toolkit: you’ll see markings like 4.0/80, which means a 4 mm gap and size 80 needles. Metric vs. American sizing can trip you up, so check both.
For thicker fabrics, larger sizes up to 100 are best. Pay attention to presser foot fit and specialty needle widths to avoid mishaps.
Selecting Needles for Fabric Types
Choosing twin needles isn’t one-size-fits-all; let your fabric guide you. Stretch knits need ballpoint or stretch twins—think Knit Needle Selection for smooth hems. Delicate, lightweight fabrics shine with micro-sharp or fine needles. For everyday blends, Universal Needle Uses offer the right balance—needle size selection matters for all fabric types.
Denim? Follow the Denim Needle Guide: opt for reinforced sizes like 90/14.
Stretch, Jeans, and Topstitch Variants
Every twinneedle variant brings its own edge to sewing with stretch fabrics and sturdy wovens. You’ll notice needle coatings and dimension differences right on the retail packaging—there’s a reason for that. Whether your priority is seam durability or the sheen of topstitching, adoption trends show more sewists are reaching for stretch, jeans, or topstitch needles for ideal twin needle sewing.
- Stretch needles: Prevent skipped stitches and improve seam elasticity
- Jeans needles: Reinforced for denim and heavy seams
- Topstitch needles: Built for thicker threads and decorative parallel stitching
- Packaging displays clear codes for easy selection and fewer mistakes
Setting Up Your Sewing Machine
Getting your machine ready for twin needle stitching is simpler than you might think. With just a few adjustments, you’ll be set up for strong, professional results.
Here’s what you need to know before you start.
Installing a Twin Needle Properly
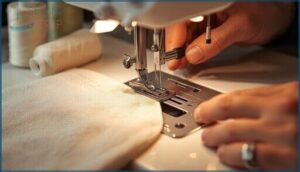
You wouldn’t build a house on a weak foundation—so don’t rush when installing a twin needle. Always orient the needle shank’s flat side to the back as you insert the twin needle, then check those needle plate slots for proper space.
Manual alignment checks make certain both needles clear the plate, while tightening the screw firmly keeps everything secure and ready for action.
Threading Two Spools Correctly
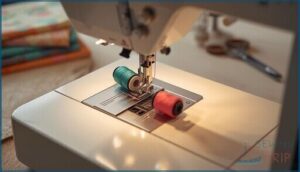
Ever notice how a twin needle relies on smooth teamwork above the fabric? For perfect results, follow these steps:
- Place matching threads on each spool pin—use an auxiliary if there’s no second pin.
- Guide threads separately through the tension disc channels.
- Thread each needle manually.
- Check thread quality to reduce tangling.
Master these, and threading the sewing machine feels simple.
Machine Settings for Twin Needles
Not all sewing machines handle a twin needle the same way. You’ll need to choose a straight stitch and set stitch width limits to prevent the needles from hitting the stitch plate. Some models offer dedicated settings that automatically adjust needle tension and restrict stitch width.
Slow your speed and begin with standard thread tension, fine-tuning as needed for balanced results.
Adjusting Stitch Settings for Twin Needles
Getting your stitch settings right can make all the difference with twin needle sewing. These next options will help you customize your results for strong, smooth seams every time. Here’s what you’ll want to adjust.
Recommended Stitch Lengths
Choosing the right stitch length with a twin needle is about matching fabric type, needle size, and your seam’s intended elasticity. Industry guidelines recommend 2.5–3 mm for most medium-weight knits and wovens, ensuring strong, flexible seams.
Adjust your stitch settings and test on scraps—small changes in stitch length can dramatically affect seam durability and ease when finishing hems.
Adjusting Thread Tension
Once you’ve set your stitch length, adjusting thread tension directly shapes your twin needle results. Begin with the upper tension at a standard range, then carefully test and tweak.
Notice how fabric weight and thread quality sway your balance—a lighter knit might need lower upper tension. Only shift bobbin adjustment if systematic process on top tension fails to resolve quirky seams.
Preventing Tunnelling and Ridges
Now that you’ve dialed in your tension, let’s tackle tunnelling and ridges. These flaws often point to a mismatch between needle width and fabric or skipped steps in setup. To keep everything flat, focus on:
- Using Stabilizer Usage like wash-away tape for structure
- Dropping needle tension for gentler layering
- Switching to a walking Presser Foot when knits resist
Hemming and Topstitching Techniques
Getting a clean hem or crisp topstitch with a twin needle isn’t hard once you know what to watch for.
There are a few key techniques that really make a difference in your results. Let’s walk through some tried-and-true options you can use.
Hemming Stretch Knit Fabrics
For stretch knits with at least 10% Elasticity Percentage, a ballpoint twin needle forms hems that move with the fabric—not against it. Use stabilizing agents beneath the hem and stick to a 1.2–1.7 cm Hemming Width. Wooly Nylon in the bobbin increases stretch and durability in your twin needle hem, especially when sewing stretch knit fabrics.
| Feature | Twin Needle Hemming |
|---|---|
| Needle Type | Ballpoint, Stretch, 75–80 |
| Hemming Width | 1.2–1.7 cm (recommended) |
| Stabilizing Agent | Wash-away tape/interfacing |
| Thread Option | Wooly Nylon in bobbin |
Creating Decorative Parallel Stitches
Twin needle decorative sewing techniques shine when you mix thread color effects or try a bold zigzag stitch. Needle spacing effects create either subtle or dramatic parallel lines, so consider your stitch pattern choice before you begin.
When sewing with a twin needle, specialty thread usage adds visual interest, but always monitor fabric distortion control as you experiment with these decorative twin needle applications.
Using Washable Tape and Stabilizers
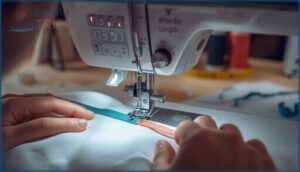
With washable tape, getting a flat, ripple-free hem feels almost easy; this basting alternative sticks down fabric edges, slashing prep time and letting the twin needle glide true.
Add stabilizers—like wash-away or tear-away sheets—to beat tunneling and boost seam strength.
Together, these tools deliver considerable stability gains, reliable user outcomes, and visibly neater sewing—whether you’re hemming a knit tee or topstitching decorative lines.
Troubleshooting Common Twin Needle Issues
Every sewist runs into a few hiccups when using a twin needle for the first time. These common issues can trip you up, but most have simple solutions.
Let’s look at some quick fixes to keep your stitching on track.
Fixing Skipped Stitches
If your twin needle is skipping stitches, needle replacement should be your first step—especially after every project.
Using the correct needle type for your fabric and double-checking that the needle height is set properly can resolve most troubleshooting twinneedle problems.
For stubborn cases, a fabric stabilizer under the seam or balancing needle and bobbin tension helps with consistent sewing.
Avoiding Thread Tangling
Even experienced sewists can end up with tangled threads if the details aren’t right—thread quality is important, but so is tension balance. Check that both spools sit securely and feed through all machine guides to reduce snags.
Needle compatibility and even tension, especially bobbin tension, bring smooth results and help you avoid the troubleshooting twinneedle problems that undermine neat stitchwork.
Solving Tunnelling and Uneven Feeding
Puckering and fabric swallowing might make you want to give up, but there are simple fixes. Reduce tunnelling by easing presser pressure and adjusting tension—including bobbin tension.
Stabilizer usage, like a strip of washable tape, flattens hems and helps with even feeding.
If tunnelling or uneven feeding continues, a walking foot or hand-wound bobbin can help you avoid trouble.
Essential Tools for Twin Needle Stitching
Getting great results with twin needle stitching isn’t just about the needle and thread. The right tools make setup, stitching, and finishing much easier.
Here are some essentials to keep close at hand.
1. Prym 6 mm Wonder Tape
Curious how to keep seams perfectly in place when sewing with a twin needle? Prym 6 mm Wonder Tape is your go-to for tape application—ideal for hems, zippers, or wherever you’d rather skip the pins.
This washable tape sticks firmly, yet dissolves without residue after washing, making residue removal simple. It works on most fabrics, but some may challenge its grip.
Consider cost analysis, as some find it pricey for 9 meters. Still, for twin needle projects, its precision offers a clear alternative option.
Best For: Sewists, quilters, and DIY crafters who want a quick, clean, no-pin solution for holding fabric temporarily during sewing.
- Easy to use, holds fabric securely, and dissolves completely with washing.
- Makes precise sewing and hemming much faster, especially for tricky projects like zippers and twin needle work.
- Saves fabric from pinholes or damage, and leaves no sticky residue behind.
- May not adhere as well to certain fabrics or textured materials.
- Can be a bit narrow for larger projects or broader hems.
- Some find it expensive for the length provided in a single roll.
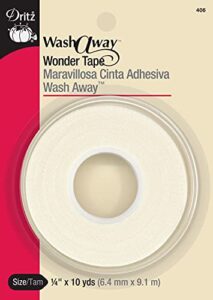
2. Dritz Wash Away Wonder Tape
If you’re after crisp, professional hems while sewing with a twin needle, Dritz Wash Away Wonder Tape brings precise temporary stabilization to the table. Its clever tape composition is transparent, double-sided, and designed for application methods that work with most sewing machines—just press, peel, and sew.
This washable tape keeps those tricky knits tamed, then dissolves after laundering, leaving no residue.
For makers comparing market alternatives, it offers peace of mind for stretch hems and zippers—without a single pin in sight.
Best For: Sewists who want quick, accurate placement for seams and hems—especially on stretchy fabrics—without needing pins.
- Speeds up sewing by holding fabric layers in place until stitched.
- Washes away completely with water, leaving no sticky residue.
- Can be sewn through without gumming up your machine needle.
- Temporary only—using it as a permanent fix may lead to yellowing or stains.
- Separating the paper backing from the tape can be fiddly.
- Not ideal for every fabric type or project; adhesive may lose stick over time.
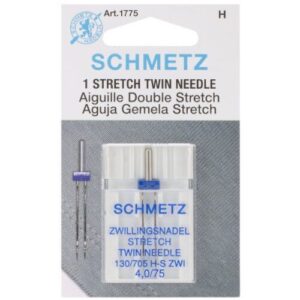
3. Schmetz Twin Stretch Sewing Machine Needle
For a reliable finish on stretch knits, the Schmetz Twin Stretch Sewing Machine Needle is worth keeping on hand. Built on the 130/705 system, its ballpoint glides through Lycra, spandex, or layered performance fabrics, practically erasing skipped stitches.
Stretch twin needles like this excel in real-world metrics—expect fewer thread breaks and flatter seams, especially when sewing double needle hems. Retail pricing lands around $6–$8 a pack, making this ballpoint tool a strong investment for any home sewist’s toolkit.
Best For: Home sewists and pros who need neat, stretchy hems on elastic fabrics like knits, swimwear, and activewear.
- Creates smooth, parallel rows for a polished, stretchy hem without a coverstitch machine.
- Significantly reduces skipped stitches and thread breaks on spandex or layered knits.
- Fits most domestic sewing machines and is affordable for routine use.
- Some users report breakage or quality issues, especially on first use.
- The underside finish may not look fully professional compared to factory hems.
- Only works with domestic sewing machines, not industrial models.
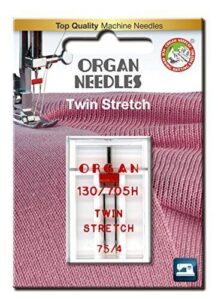
4. Twin Stretch Sewing Machine Needle
When your hem demands stretch and strength, the Twin Stretch Sewing Machine Needle (size 75/4.0) stands out. Designed for smooth stitching on jersey or viscose, its ballpoint shape prevents snags.
Strewn throughout the market by top brands, this twin needle excels at balancing seam flexibility and stitch quality, even after hours of sewing. You’ll notice less tunneling and a cleaner finish—hallmarks prized in both stretch twinneedles and double needle work.
Want consistent results? Change the needle every few projects for best durability.
Best For: Home sewers and garment makers wanting strong, flexible hems on stretch fabrics like jersey, viscose, and athletic knits.
- Consistently creates neat, parallel seams without leaving holes in stretchy materials.
- Reduces skipped stitches and seam tunneling on elastic or knit fabrics.
- Works with most home sewing machines using the common 130/705 H-S system.
- Only one needle per package, so spares aren’t included.
- Not ideal for thick or heavy-duty fabrics and projects.
- The specific 75/4.0 size may not fit all machines or unconventional thread setups.
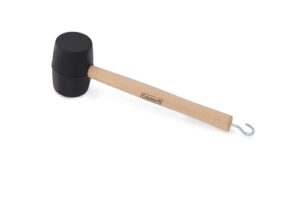
5. Coleman Rubber Mallet Tent Peg Remover
Balancing precise stitches with a clean finish means sometimes you need help beyond the sewing machine. The Coleman Rubber Mallet Tent Peg Remover, though a camping staple, shines in the sewing room for tough jobs.
Its lightweight build and wood handle offer versatility applications—from tapping stubborn needle plates to flattening seams without scarring fabric.
User feedback analysis reveals mixed experiences with material durability—Mallet Head Detachment and Hook Bending Issues surface if pushed too far. Still, handled with care, it works quietly in your toolkit.
Best For: Campers or anyone needing a lightweight, versatile tool for hammering tent stakes or quick peg removal on outdoor trips.
- Compact and lightweight for easy carrying in any gear bag
- Dual-purpose design with mallet head and built-in hook simplifies setup and takedown
- Suitable for both steel and plastic stakes across hard or soft ground
- Some users report the mallet head may detach with heavy or repeated use
- The end hook can bend or break if used with excessive force
- Durability varies; quality may depend on specific manufacturing batch
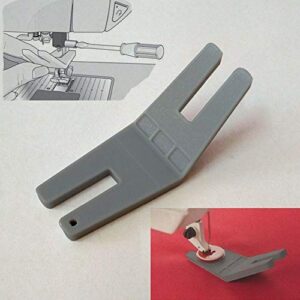
6. Button Clearance Plate Hump Jumper Tool
If you’ve ever struggled with seam “speed bumps” when twinneedle stitching, the Button Clearance Plate Hump Jumper Tool is your go-to Seam Hump Solution. By elevating the presser foot behind thick layers, it acts as a quick height compensation tool, preventing skipped stitches and feeding issues.
Its rugged design fits most machines—think broad Machine Compatibility—but what matters is consistent Stitch Reliability. Add this to your toolkit, especially when troubleshooting twin needle sewing or perfecting Fabric Layer Management for even, flat results.
Best For: Anyone who regularly sews over thick or layered fabrics, like quilters or garment makers, and wants smoother, hassle-free stitching.
- Makes sewing over bulky seams and thick layers easy and prevents skipped stitches.
- Works with most sewing machine brands for versatile use.
- Compact tool that helps improve stitch quality and finish, especially with twin needle or button sewing.
- Small size means it can get lost or misplaced easily.
- Needs careful handling to avoid damage or breakage.
- Not suitable for every sewing machine or all fabric types, so double-check compatibility.
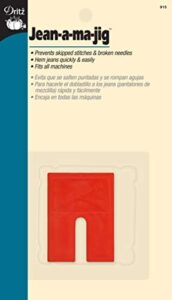
7. Dritz Jean-A-Ma-Jig Sewing Tool
Amidst thick seams and layered hems, the Dritz Jean-A-Ma-Jig stands out as your practical Seam Thickness Aid. Designed for Sewing Machine Compatibility, this compact tool slips beneath the presser foot to provide steady elevation over bulky areas.
It shines during denim hemming or anytime you work a twinneedle stitch across tough seam transitions. Needle Breakage Prevention becomes second nature, letting you focus on clean lines, not surprises.
Consider it both a height compensation tool and an ally in troubleshooting twin needle sewing.
Best For: Anyone who needs an easy, reliable way to sew smoothly over thick seams or layered hems, especially with jeans or heavy fabrics.
- Prevents skipped stitches and needle breakage on thick denim or multiple fabric layers.
- Simple to use with any sewing machine, with a compact design for easy storage.
- Highly rated for reliability and efficiency, saving time on hemming jeans and similar projects.
- Instructions can be unclear or not in English, which may cause confusion for new users.
- Some find it expensive for a small plastic tool, especially if only used occasionally.
- Not necessary for high-end sewing machines and only works with machine sewing, not by hand.
Tips for Professional Twin Needle Results
Getting the best finish with a twin needle comes down to a few key habits. Pay attention to the way you feed your fabric and how you finish your seams.
Here’s what to focus on if you want your stitching to look and last like a pro’s.
Using a Walking Foot for Even Feeding
Using a walking foot isn’t just a clever upgrade—it’s a game changer for anyone hungry for clean, professional seams. Tired of fabric slippage or velvet wrinkles wrecking your stitch alignment? The walking foot’s dual-feed design keeps both layers moving in sync, dramatically reducing seam puckering and boosting layer integrity on stretch knits and tricky materials. With this presser foot, essential sewing techniques become simpler and results more reliable.
A walking foot transforms your sewing by keeping every fabric layer in sync for smooth, professional seams—even on tricky materials
- Keeps plaid lines and stripes perfectly matched
- Handles multi-layer seams with steady feeding
- Delivers even stitches on sticky or slippery fabrics
Finishing Seams for Durability
If you want seams that go the distance, finishing makes all the difference. Even when sewing with twin needles, seam breakage rates can creep up—rising faster with rough wear or neglected hems.
That’s why routine hems inspection should be part of your process. Factors like stitch overlap and mechanical pre-stretching will directly impact overall durability.
If you work with high elastane content fabric, twin needle hems consistently hold strong. Prioritize thorough finishing and reinforcement, especially on stretch fabric, to keep your creations looking sharp and lasting longer.
Frequently Asked Questions (FAQs)
Can twin needles be used for quilting projects?
Like a painter blending hues, twin needle quilting brings Decorative Effects to fabric, forming parallel stitches ideal for Quilting Applications.
Pairing the right Stitch Settings with Fabric Stabilizing turns problem solving into art—transforming ordinary quilts into polished masterpieces.
How do I maintain and store twin needles safely?
Clean twin needles with a lint-free cloth every 8–10 hours to extend needle lifespan and prevent skipped stitches.
Store using safe storage methods—like compartmentalized, labeled containers—to prevent corrosion.
Dispose of dull or bent needles in a secure container.
Are specialty threads compatible with twin needle stitching?
Yes, specialty threads work with twin needles when you match them correctly. Metallic thread needs metallic twin needles, while heavy-duty threads require sturdy needles.
Always test thread and needle compatibility on scrap fabric first.
What are the best fabrics to avoid with twin needles?
Certain fabric types don’t play well with double needles. Sheer fabrics, slippery synthetics, heavyweight fabrics, loosely woven textiles, and coated fabrics frequently cause skipped stitches, tunneling, or needle breakage—challenges you’ll want to sidestep.
Conclusion
Twin needle stitching is the bridge between handmade and haute couture—it transforms amateur seams into professional finishes without expensive equipment. You’ve learned how to choose needles, balance tension, and prevent tunnelling. Each parallel line you stitch now carries the weight of intention, not chance.
The techniques you apply today—stabilizers, walking feet, proper threading—become second nature with practice. Your hems won’t just hold; they’ll announce that you’ve mastered the details that separate competent sewers from confident ones.
- https://www.wiseguyreports.com/reports/twin-stretch-machine-needle-market
- https://www.longsew.com/news/jumbo-bag-twin-needle-machine.html
- https://weaverdee.com/blogs/news/needle-twinspec
- https://globaljournals.org/GJRE_Volume18/2-Critical-Analyses-of-Sewing.pdf
- https://www.linkedin.com/pulse/forecasting-future-twin-stretch-machine-tz8ne

