This site is supported by our readers. We may earn a commission, at no cost to you, if you purchase through links.
Your first quilt might sit in a drawer for months because you’re unsure which stitch to use, or worse, you stitch it all together only to watch the seams unravel. The truth is, most quilters stick with one or two familiar stitches because learning the alternatives feels overwhelming.
But here’s what changes everything: the right stitch doesn’t just hold your quilt together—it transforms how your work looks and feels. Hand quilting offers precision and texture, while machine techniques deliver speed and consistency.
Each quilting stitch variation fulfills a specific purpose, from functional stitches that reinforce seams to decorative ones that showcase your creativity. Understanding when and how to use each technique turns quilting from a guessing game into something you control with confidence.
Table Of Contents
Key Takeaways
- The right quilting stitch transforms both how your quilt holds together and how it looks, so matching your technique to your project’s purpose—whether functional durability or decorative impact—determines your success.
- Master foundational hand stitches like running stitch, back stitch, and chain stitch alongside machine techniques like straight stitch and free motion quilting to build flexibility across any project type.
- Proper preparation through layering, basting, thread selection, and design marking prevents 80% of common quilting problems like puckering, bunching, and batting shift before you even start stitching.
- Modern decorative approaches like big stitch quilting and sashiko-inspired techniques let you finish projects faster while adding personality, proving that quilting success comes from understanding when to prioritize precision versus embracing intentional imperfection.
Essential Quilting Stitch Types
Before you can build a quilt with interesting patterns and textures, you need to understand the foundational stitches that hold everything together.
These basic techniques form the backbone of hand quilting, and once you master them, you’ll have the skills to tackle almost any project.
Let’s look at four essential stitches every quilter should know.
Running Stitch
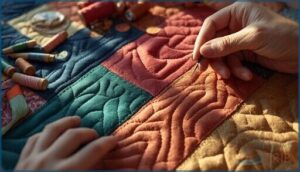
With roots stretching back to 12th-century Egypt, the running stitch remains the most popular hand quilting technique today. You’ll generally aim for 8 to 12 stitches per inch, though modern adaptations like big-stitch quilting use larger, bolder lengths.
This simple yet adaptable method secures your quilt layers while offering exceptional design versatility—perfect for quilting beginners mastering essential techniques. Many quilters also use the running stitch as a popular hand stitch for its ease of use.
Back Stitch
While running stitch moves forward continuously, back stitch takes a different approach—you stitch backward to build stronger seams. This quilting technique, documented in 16th-century English embroidery and earlier in 10th-century Portuguese whitework, creates hand quilting with machine-like seam strength. The stitch is fundamental in various embroidery styles.
Key Elements for Mastering Back Stitches:
- Stitch length: Use 1/8 to 1/4 inch spacing for standard quilting techniques
- Seam strength: Creates reinforced lines that secure patchwork designs effectively
- Hand vs. machine: Both methods work well for embroidery stitches and modern applications
- Historical context: Appears in Indian Chikan work and Middle Eastern textiles
- Modern applications: Perfect for binding edges and high-stress quilt areas
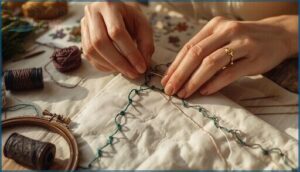
Chain Stitch
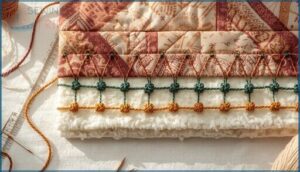
Chain stitch loops back through itself to create a signature chain-like line—a technique with chain stitch history stretching over 3,300 years, from Egyptian tombs to modern quilting tutorials.
This stitch variations guide shows you’ll find chain stitches perfect for decorative applications: outlining motifs, creating borders, and embellishing seams. Technical considerations matter—work on your quilt’s surface without piercing all layers.
Modern adaptations include cable and braided variations, expanding quilting techniques beyond traditional embroidery stitches.
Tie Stitch
Unlike stitched lines, tie stitch secures your quilt sandwich through individual knots—yarn or floss passed through all layers and tied on top. This quilting technique has deep historical context in working-class households, where speed trumped ornate quilting stitches.
Key durability considerations for tie stitch in modern applications:
- Place knots every 5–10 inches for proper batting loft support
- Choose thick yarn or embroidery floss for strength
- Use secure double-knots at each position
- Match knot spacing to your batting manufacturer’s guidelines
Perfect for quilting for beginners tackling utility quilts.
Machine Quilting Stitch Variations
Machine quilting gives you speed and consistency that hand stitching can’t match. Whether you’re working on a simple baby quilt or tackling a king-sized project, your sewing machine opens up a whole new world of stitch possibilities.
Let’s look at four essential machine quilting techniques you’ll use again and again.
Straight Stitch
Straight stitch is your go-to quilting technique for clean, efficient lines that hold layers together beautifully. You’ll want a walking foot to prevent shifting, with stitch length around 3mm and tension settings near 4 for balanced results.
Match your needle size and thread weight to your fabric—usually 80/12 needles with 40-50wt thread work perfectly. This beginner-friendly method delivers professional durability every time.
Free Motion Quilting
Free motion quilting gives you creative freedom to stitch any design motif you imagine—from swirls to feathers—by dropping your feed dogs and guiding the fabric yourself.
Machine setup requires a darning foot and proper stitch regulation practice to maintain that 2.5–3.5mm sweet spot.
Dedicate 10–20 minutes daily to practice drills, building muscle memory whether you’re working on a domestic machine or eyeing longarm options down the road.
Stippling Stitch
Among all the quilting stitches available, stippling stands out as a puzzle-like free motion technique where your curvy paths never touch or cross—perfect for creating receding backgrounds on wholecloth quilts.
You’ll control stippling density through machine settings, adjusting from tight ⅛-inch spacing for durability to looser patterns for loft.
This quilting technique adapts beautifully across fabric types, explaining why stipple quilting tutorials remain trending favorites among modern quilters.
Stitch in The Ditch
When you’re ready to master stitch in the ditch, you’ll be stitching directly in the seam where fabric pieces meet—basically creating invisible quilting stitches that secure layers without competing for attention.
This quilting technique demands precision: pressing direction affects seam integrity, and stabilizer sprays reduce shifting by 25%. Walking feet improve equipment precision considerably, helping you navigate this beginner-friendly method that’s featured in over 60% of introductory quilting tutorials.
Preparing for Quilting Stitches
Before you start stitching, you need to set yourself up for success. Think of this stage as laying the groundwork—it’s where you prepare your quilt sandwich, gather the right materials, and map out your design.
These three preparation steps will make your actual quilting smoother and help you avoid common frustrations down the road.
Layering and Basting The Quilt
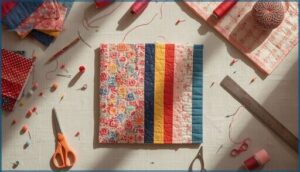
Before you can work on your quilting techniques, you’ll need to build a proper quilt sandwich—the three-layer stack of backing, batting, and quilt top. This foundation step determines whether your stitches will lie flat or create frustrating puckers.
Here’s how to secure layer security using proven basting methods:
- Pin basting: Place pins every 3-4 inches across your quilt for maximum stability
- Spray basting: Apply temporary adhesive for speed—ideal for quilting for beginners
- Thread basting: Hand-stitch layers together for heirloom projects
Common issues like batting migration happen when basting density is too loose. Modern trends show that 58% of quilters prefer pins, while spray adhesives have gained popularity for their convenience. Take time with this prep work—it prevents the headaches that come from shifting layers during quilting tutorials.
Choosing Threads and Needles
Your thread and needle choices can make or break your quilting stitches. Cotton thread works beautifully for 64% of traditional quilts, while polyester withstands frequent washing with 38% more durability.
For thread weight, 50-weight suits most piecing work, though 40-weight creates bolder decorative lines.
Match quilting needles to your fabric—size 11/80 machine needles cover 65% of cotton projects, while hand quilters prefer size 9-10 for general work.
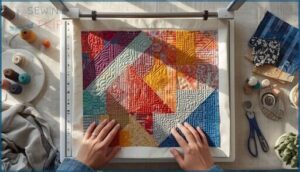
Marking and Planning Stitch Designs
Before you start stitching, take time to mark your quilting designs and patterns—over 84% of quilters do. Water-soluble markers lead the pack at 62% preference, while chalk works for 41%.
Marking tools boost design accuracy by 23% compared to freehand work. If you mark before basting integration, you’ll avoid 21% more pin-related errors and achieve cleaner residue removal after washing.
Decorative and Modern Stitch Techniques
Quilting has come a long way from simple straight lines, and today’s stitchers are bringing bold personality into their work. These modern techniques combine function with visual interest, making your quilt as unique as you are.
Let’s explore three decorative approaches that are shaking up the quilting world in 2025.
Big Stitch Quilting
Big stitch quilting techniques use visibly larger quilting stitches—about 6 to 8 per inch—creating bold, decorative lines by hand quilting with thicker thread weight like 12 to 40 perle cotton.
This quilting method emphasizes design aesthetic over flawlessness, allowing you to finish projects faster than traditional hand quilting while adding texture.
Adjust your needle size to 8–12 and embrace the imperfect charm that defines this modern quilting tutorial approach.
Sashiko-Inspired Stitches
Sashiko quilting techniques bring Japanese tradition into your stitch library—born from necessity in the Edo Period for fabric reinforcement, now celebrated for stitch geometry that balances function and artistry. Modern adaptations move beyond traditional white-on-indigo into vibrant thread specifications and creative quilting stitches:
- Hitomezashi grid patterns with crossing lines
- Moyozashi curved motifs without overlaps
- Five to ten stitches per inch
- Layered fabrics for added durability
- Variegated threads for contemporary flair
Template and Pattern Quilting
Metal and plastic templates have revolutionized quilting designs, with digital patterns now accounting for 38% of North American sales. These tools cut planning time by 2-4 hours per project while giving you precise geometric shapes and intricate motifs.
Here’s how template materials stack up:
| Template Type | Best For |
|---|---|
| Metal templates | Long-term repeated use |
| Plastic templates | Visibility on dark fabrics |
| Digital patterns | Customization options |
| Pre-cut kits | Efficiency gains |
| AI-assisted tools | Pattern complexity |
Choosing The Best Stitch for Your Quilt
Picking the right stitch for your quilt isn’t about following rigid rules—it’s about understanding what your project needs and what you want it to become. The stitch you choose affects both how your quilt holds together and how it looks when you’re done.
The right stitch is not a rigid rule but a choice shaped by what your project needs and what you want it to become
Let’s break down how to match your stitching approach to your specific quilt, whether you’re aiming for function, beauty, or both.
Matching Stitches to Quilt Types
Your quilt’s purpose shapes which stitches will serve it best. Traditional bed quilt stitches like running and straight stitches handle everyday use well, appearing in over 70% of home projects.
Modern quilt stitches favor geometric patterns that accent clean lines. Art quilt stitches embrace stippling and echo techniques for visual impact. Heirloom quilt stitches feature intricate feather patterns. Utility quilt stitches prioritize density and durability:
- Running stitch for classic bed quilts
- Stippling for art and pictorial designs
- Straight lines for modern aesthetics
- Echo quilting for appliqué emphasis
- Dense matchstick patterns for heavy-use items
Functional Vs. Decorative Stitches
Every stitch you make has two purposes: holding your quilt together or making it beautiful. Functional stitches prioritize durability, using standard thread weight and tight density to prevent batting shift and fabric bunching. Decorative stitches emphasize visual impact with heavier threads and specialty fibers, placed strategically in low-stress areas.
Understanding this distinction shapes your quilting techniques—dense, closely spaced stitches reinforce structural integrity, while design integration through decorative work adds personality without compromising the quilt’s performance.
Tips for Beginners and Advanced Quilters
Starting with straight-line quilting on larger blocks cuts your visible stitching errors by more than half. Here’s what sets you apart as you grow:
- Master seam accuracy using a quarter-inch presser foot, which reduces block size errors by nearly half
- Invest in pressing techniques—consistent pressing improves block flatness by 27%
- Adopt quality tools and digital design software for precise stitch planning and time efficiency
These foundations build confidence and durability into every project you create.
Frequently Asked Questions (FAQs)
How do I fix puckering or bunching in my quilted fabric?
Puckering usually stems from tension imbalance or incompatible materials. Adjust your machine tension between 4–6, use shorter stitches (0–5 mm), and test on scraps first.
Prewash fabrics, match thread weight to fabric, and use spray basting instead of pins for better layer stability.
Can I combine hand and machine quilting on one project?
Yes, you can absolutely combine hand and machine quilting on one project. Proper basting is essential—use safety pins every 4–6 inches to prevent shifting.
Start machine quilting from the center outward, then add hand stitches for decorative contrast and visual emphasis.
How do I transition smoothly between different quilting techniques?
Plan your technique changes in advance using water-soluble pens to mark transition lines.
Stabilize through proper basting, overlap patterns by at least 5 cm, and adjust needles and threads accordingly.
Test samples first to verify quilting stitch joins.
What common mistakes should I avoid when quilting?
Most quilters struggle with inconsistent seam allowance, skipped fabric preparation, and poor layering. These mistakes compound quickly—a tiny 1/16 inch deviation becomes 5 inches across your quilt.
Focus on precision first, then perfect your quilting techniques through practice and patience.
Conclusion
Your quilting journey doesn’t end when you finish your first project—it deepens with each stitch you master. Like a master musician learning new instruments, exploring quilting stitch variations transforms how you approach every future quilt.
You’ve learned the foundation, discovered which stitches serve function and which showcase your artistry. Now comes the part that truly matters: practicing with intention. Each project teaches you something new. Your confidence builds one stitch at a time until what once felt overwhelming becomes second nature.
- https://craftindustryalliance.org/the-size-of-the-quilting-market-quilting-trends-survey-results-2024/
- https://theaiquilter.com/hand-quilting-vs-machine-quilting-which-ones-right-for-you
- https://slightlybiasedquilts.com/2024/11/quilt-trends-to-watch-for-in-2025.html
- https://www.quiltingboard.com/main-f1/how-far-apart-quilt-warm-natural-t247878.html
- https://www.facebook.com/groups/QuiltersCreativeTouch/posts/3857984784305928/

