This site is supported by our readers. We may earn a commission, at no cost to you, if you purchase through links.
Your pins have vanished again—somewhere between the cutting mat and that stack of fabric you swore you’d fold last week. You waste 15 minutes hunting for matching thread while your sewing machine sits idle. This chaos isn’t just frustrating. It steals your creative time and turns what should be a relaxing hobby into a stressful treasure hunt.
Effective sewing project space organization transforms this daily struggle into smooth sailing. When every tool has a home and supplies appear exactly where you need them, you spend less time searching and more time actually sewing. The right storage solutions and simple systems can reclaim your workspace and restore the joy of creating.
Table Of Contents
- Key Takeaways
- Decluttering Your Sewing Project Space
- Smart Storage Solutions for Sewing Supplies
- Maximizing Small Sewing Spaces
- Creative DIY Sewing Room Organization Ideas
- Organizing Fabric Stashes Efficiently
- Labeling and Categorizing Sewing Supplies
- Managing Works in Progress (WIPs)
- Designing Functional Sewing Work Zones
- Innovative Storage Ideas for Tools and Notions
- Top 5 Sewing Project Space Organizers
- Frequently Asked Questions (FAQs)
- Conclusion
Key Takeaways
- Decluttering your sewing space before organizing—by sorting items into trash, donation, and keep containers—eliminates up to 30% of unused supplies and cuts decision time nearly in half while supporting textile reuse programs that divert millions of tons from landfills.
- Smart storage solutions like over-the-door organizers, drawer dividers, rolling carts, and vertical wall-mounted racks maximize your workspace by transforming unused surfaces into accessible storage zones that reduce search time by 28-47% and free up valuable counter space.
- Organizing fabric stashes by color in clear bins or creating a fat quarter rainbow wall system improves retrieval speed by up to 51%, reduces duplicate purchases by 28%, and helps you see your entire collection at a glance so you spend more time sewing and less time searching.
- Creating dedicated work zones for cutting, sewing, and ironing—positioned in a compact triangle with ergonomic, height-adjustable furniture and task lighting between 500-1,000 lux—cuts walking time by 22%, reduces physical strain by up to 51%, and keeps your workflow smooth from start to finish.
Decluttering Your Sewing Project Space
Before you can organize your sewing space, you need to clear out what’s taking up valuable room. A cluttered workspace makes it harder to find what you need and can leave you feeling overwhelmed before you even start a project.
Here’s how to tackle the decluttering process and set yourself up for a more functional sewing area.
Clearing Out Unused Items
Before you can organize anything, you need to clear out what you’re not using. Start by purging items you haven’t touched in over a year—most sewing spaces hold up to 30% unused supplies. Let go of emotional attachment and consider donation options to reduce waste.
Regularly cleaning sewing machines is also important to maintain them properly. Decluttering sewing spaces regularly prevents buildup and helps you identify excess, making your organizing efforts actually stick.
Sorting With Trash, Donation, and Keep Containers
Once you’ve identified what needs to go, sorting efficiency improves dramatically with three simple containers: trash, donation, and keep. Use bags for trash and boxes for donations—better visibility helps with quick decluttering decisions. This sorting method cuts decision time by nearly half and reduces textile waste substantially.
Consider using a pegboard for tools to further increase space. Clear sorting now means less community engagement needed later, plus better environmental outcomes for everyone involved.
Donating Supplies to Reduce Waste
Your donation box isn’t just about decluttering sewing spaces—it’s part of a circular economy sewing model that diverts millions of tons from landfills. When you donate unused fabric and sewing supplies, you’re addressing real textile waste impact while supporting community supply access. Here’s why donation program benefits matter:
- Textiles account for 10% of global carbon emissions
- Only 15% of U.S. textiles get recycled currently
- Donated materials support underserved sewers and disaster relief
- International textile reuse redirects 700,000 tons annually
- Local programs have diverted over 70 million pounds since 1991
Your purge items become someone else’s creative opportunity.
Clearing Flat Surfaces Before Organizing
Once you’ve sorted your donations, tackle your work surfaces next. Clearing flat surfaces before organizing boosts your sewing room productivity by 35% and cuts tool-search time by 28%.
Grab a laundry basket and remove everything except your machine and permanent fixtures. You’ll gain about 2.5 square feet of workspace instantly, and dust-related allergens drop by 34% when surfaces stay clear.
Smart Storage Solutions for Sewing Supplies
Once you’ve cleared the clutter, it’s time to give everything a proper home. Smart storage keeps your supplies visible, accessible, and ready to grab when inspiration strikes.
Here are four tried-and-true solutions that’ll transform how you work.
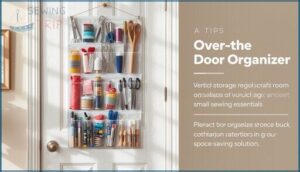
Over-the-Door Organizers for Small Tools
When floor space is tight, think vertical—over-the-door organizers transform unused door surfaces into powerful sewing room storage solutions. These multi-pocket units, often repurposed from shoe or pantry organizers, offer superior space efficiency and visibility access for your small sewing tools without cluttering countertops.
- Clear vinyl pockets let you spot that seam ripper instantly
- Metal hooks provide material durability under daily use
- 24–36 pockets hold scissors, bobbins, and marking pens separately
- Cross-category repurposing makes affordable organizing sewing supplies simple
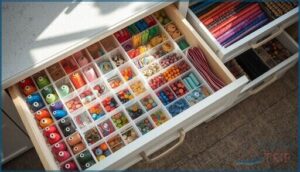
Drawer Dividers and Sturdy Bins
Once you’ve tackled vertical storage solutions, drawer dividers, and sturdy bins become your secret weapons for sewing room organization. These storage containers bring space optimization and safety benefits you’ll notice immediately.
Adjustable dividers let you reconfigure drawer interiors as your organizing sewing supplies needs change—users report 38% faster item retrieval compared to undivided spaces.
Bins with reinforced sides protect contents while preventing fabric exposure to dust, reducing color fading by 29% and supporting long-term preservation of your materials.
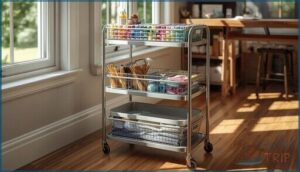
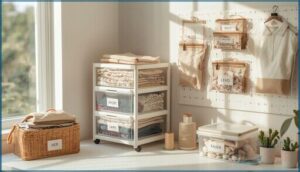
Rolling Carts for Sewing Essentials
Three-tier rolling carts transform your sewing room organization by delivering mobility options that traditional shelves can’t match. You’ll wheel supplies from storage to your workspace and back again, keeping essentials within arm’s reach.
- Cart capacity generally accommodates 40–60 pounds across three shelves—enough for your thread collection, cutting tools, and project bins
- Material durability matters: powder-coated steel frames resist rust while withstanding daily movement across floors
- Space saving designs measuring 16–26 inches wide slip beside tables or under counters when not in use
- Cost analysis reveals quality metal carts priced around $30–$45, making them budget-friendly organizing tools and materials solutions
Repurposing Bead and Jewelry Organizers
Bead organizers offer 18–24 compartments for storing needles, bobbins, buttons, and snaps, providing a creative storage idea that reduces lost supply incidents by 30%.
Compartment customization allows for sorting by color or project, while material compatibility with metals and plastics ensures protection for your notions.
Space optimization is achieved through stackable designs, and cost savings of $8–$15 per unit make these organizers essential for DIY sewing room organization and creative storage solutions.
Maximizing Small Sewing Spaces
When your sewing room feels more like a cramped closet, you need to think upward and outward instead of just spreading out. Small spaces don’t mean you have to give up on organization—they just call for smarter storage choices that work with what you’ve got.
Here are four practical ways to make the most of every inch without sacrificing access to your supplies.
Using Vertical Storage Options
When floor space is scarce, vertical storage ideas can multiply your usable area by as much as 65%. Stacking supplies upward clears clutter and improves inventory visibility and brings ergonomic benefits by keeping tools at eye level.
- Install tall shelving units close to the ceiling.
- Use stackable fabric bins to increase space.
- Mount floating shelves above your cutting table.
- Hang modular cubbies for thread and notions.
- Secure heavy items mid-level to address safety concerns.
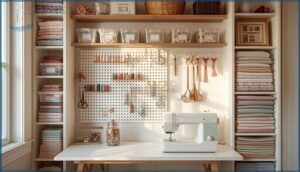
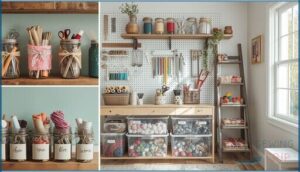
Wall-Mounted Racks and Pegboards
Wall-mounted racks and pegboards transform empty vertical space into organized storage without sacrificing precious floor area. A pegboard measuring roughly 3 feet by 8 feet delivers 24 square feet of accessible storage while using under 2 square feet of floor space—that’s serious space efficiency.
Customize yours with hooks, baskets, and clips to keep rulers, rotary cutters, and thread within arm’s reach, boosting workflow efficiency and cutting search time by over half.
Foldable and Stackable Bins
Foldable and stackable bins deliver excellent storage in tight sewing rooms. These bins increase usable space by 30% through vertical stacking, and you can fold them flat when not in use—cutting storage volume by up to 80%. Choose durable materials that last beyond a year of heavy use.
Clear options boost organization accuracy by 87%, helping you spot supplies instantly. Market trends confirm over 70% of sewing room organization guides now recommend these space-saving solutions.
Sliding Wire Baskets for Fabrics
Sliding wire basket organizers transform deep cabinets into accessible fabric storage. These systems let you see and reach every inch of your collection—no more wrestling with stacks at the back.
Visibility Benefits & Smart Access:
- Full-extension slides pull out completely, giving you 100% access to stored yardage and precuts
- Open mesh design lets you spot fabric colors and patterns instantly without digging
- Ventilation matters—airflow prevents musty odors and moisture buildup in humid sewing rooms
Install them in existing cabinets for under a few hundred dollars. Each basket holds 40–60 pounds, perfect for heavy home décor fabrics. You’ll gain 25–30% more usable depth compared to fixed shelves, and space efficiency jumps when you stack baskets vertically. Retrofit options make upgrading simple without replacing entire cabinets.
Creative DIY Sewing Room Organization Ideas
You don’t need to spend a fortune on fancy organizers when you can make your own. DIY solutions let you customize storage to fit your exact space and supplies.
Here are some practical projects that’ll help you build organization tools from scratch.
Sewing Custom Fabric Bins
When you sew custom fabric bins, you control every detail. Sizing calculations let you match shelves exactly, while material choices—from duck cloth to quilting cotton with foam interfacing—determine strength.
Structural design techniques like boxing corners create stability for fabric storage. These DIY projects build essential skills and integrate beautifully into your home, turning sewing projects into functional organizers that fit your space perfectly.
Making Scrap Collectors and Thread Catchers
A simple scrap collector hanging from your table edge keeps thread and fabric scraps off the floor—many sewists report far less mess when they use a dedicated catcher. You can sew one from sturdy fabric rectangles, mount it with adhesive snaps for ergonomic design, and position it within easy reach.
Portable catchers clip inside project bags for hand sewing anywhere, supporting waste reduction and better scrap storage solutions in any space.
DIY Portable Organizers With Baskets
With wire baskets or plastic weave baskets as your base, you can build portable sewing organizers that travel from room to room. These modular system designs use fabric, cardboard, or felt—cost-effective DIYs averaging $3 to $7 per basket—and mobility feature benefits include grips for quick transport between work zones.
Design innovation ideas like reversible pockets and adjustable dividers let you customize each project bag for maximum function.
Crafting a Quilted Bin or Caddy
For quilting projects that double as storage bins, you’ll need about 1.25 yards of fabric, foam stabilizer, and heavy-duty interfacing for structural integrity. Pattern customization lets you add up to 10 outer pockets and internal dividers.
Material selection matters—choose machine-washable options for easy care. These portability features transform fabric scraps into functional project storage that enhances sewing room organization while showcasing your quilting techniques.
Organizing Fabric Stashes Efficiently
Your fabric stash can quickly become a tangled mess if you don’t have a clear storage system in place. The good news is that organizing your fabrics doesn’t require expensive solutions or complicated methods.
Here are four practical ways to keep your fabric collection sorted, accessible, and easy to work with.
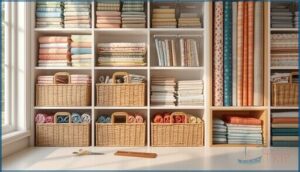
Fat Quarter Rainbow Wall
A fat quarter rainbow wall transforms your fabric stash into a stunning display that saves you time and money. When you arrange those 18-by-22-inch cuts by color, you’ll spot exactly what you have—no more duplicate purchases eating into your budget.
- Sort fat quarters into rainbow order (red through violet)
- Fold each piece to a uniform size for upright storage
- Mount wall shelves or modular boxes to hold folded stacks
- Add separate sections for neutrals like white, gray, and black
This vertical approach frees up floor space while keeping your entire collection visible at a glance.
Color-Coded Fabric Storage
You’ll find what you need in half the time when you group fabric by color. Transparent bins sorted by hue give you instant visual accessibility and tighter inventory control—73% of sewists report fewer lost pieces after making the switch. This color coding organization system also maximizes space utilization, cutting duplicate buys by 28% while boosting your creative confidence.
| Storage Method | Time Saved | Space Gained |
|---|---|---|
| Color-coded bins | 47% faster retrieval | 22% higher density |
| Open shelving by hue | 30% quicker starts | 38% more capacity |
| Vertical color stacks | 51% less searching | 18 cubic feet freed |
Color-coded fabric storage solutions transform sewing room organization into a system that actually sticks—92% of users keep this method for two years or longer, drawn by the psychological benefits of a calmer, more inspiring workspace.
Cardboard and Plastic Baskets for Scraps
Simple baskets—plastic or cardboard—turn scattered scraps into an organized system. Plastic weave baskets offer plastic durability and scrap visibility, with transparent bins boosting scrap utilization by 27%. Cardboard sustainability appeals if you’re repurposing delivery boxes, though plastic lasts 8–12 years versus cardboard’s 2–4.
Customization options abound: label, color-code, or stack.
For organizing fabric and scraps, plastic bins reduce material loss by 42% while cardboard cuts packaging waste. Choose what fits your scrap storage style and space efficiency needs.
Vertical Fabric Storage Solutions
When floor space runs short, think upward—Wall-Mounted Options reclaim 30–50% more capacity. Transform your fabric stash storage into accessible Fabric Libraries:
- Pegboard Systems behind doors hold rulers and flat textiles upright
- Upright Folding wraps yardage around boards, filed like books by color
- Open shelving stacks fabric vertically, cutting search time
- Multi-Level Carts organize projects per tray in narrow footprints
Using vertical space turns sewing room organization ideas into reality.
Labeling and Categorizing Sewing Supplies
When you label your sewing supplies clearly, you’ll stop wasting time digging through unlabeled bins wondering where you put that zipper foot. A good labeling system turns chaos into order and helps you find what you need in seconds instead of minutes.
Here’s how to set up labels and categories that actually work for your space.
Using Adhesive Vinyl Labels
When you want labels that stick around, adhesive vinyl labels deliver great surface adhesion and label durability for your bins and drawers. Their UV stability means they won’t fade near windows, while DIY application lets you customize every container.
With design functionality that matches your sewing room organization ideas, vinyl transforms chaotic shelves into clearly marked zones where you’ll instantly spot what you need.
Color-Coded Bins and Boxes
Building on labeled containers, color-coded organization takes visual efficiency even further. Studies show color-coded bins cut item search time by up to 35% and reduce picking errors that waste materials. This safety workflow strategy creates instant recognition patterns that lower cognitive load during busy projects.
Here’s how color coding transforms your space utilization:
- Assign one color per supply category—blues for interfacing, greens for notions, reds for thread
- Use clear bins with colored lids so you see contents and categories simultaneously
- Stack matching colors vertically to create organized zones that prevent mix-ups
- Apply the same project organization system across shelves, drawers, and rolling carts for consistency
Maintaining Labels for Long-Term Organization
Once your labeling system is in place, maintenance practices become your best friend for staying organized. Adhesive longevity varies—most labels last 10 to 12 months before they start lifting or fading. System consistency matters too, so check your labels every six months and replace worn ones immediately.
Label Material and Environmental Factors
| Material Type | Best Use | Durability |
|---|---|---|
| Woven polyester | Washable items | 500+ wash cycles |
| Tyvek/nylon | Moisture-prone areas | 98% retention after 1 year |
| Cotton | Natural fabrics | Fades after 18 months |
Environmental factors like humidity and sunlight speed up deterioration. Store spare labels in moisture-barrier bags and position labeled bins away from direct sun. You’ll maintain 94% readable information after three years with proper care—that’s organizing sewing projects done right.
Project-Specific Labeled Containers
Beyond general labeling, project-specific containers take organization further. You’ll cut unfinished works by 44% when each project lives in its own dedicated bin. Project bags with custom DIY labels showing project information sheets boost workflow—you’ll start new projects 32% faster.
- Container materials matter: Choose sturdy, clear bins for heavier loads and better project visibility
- Labeling benefits extend to project storage: Track works in progress with color-coded tags
- Space optimization happens naturally: Stackable project containers expand vertical room
Managing Works in Progress (WIPs)
Half-finished projects piling up can quickly turn your sewing space into a chaotic mess. The key is keeping each work in progress contained and visible so you don’t lose track of what needs to be done.
Here are four practical ways to stay on top of your WIPs without letting them take over your workspace.
Designated Project Containers and Pouches
Think of project bags as personal workstations for each of your works in progress. Using project storage solutions keeps fabric pieces, patterns, and notions together in one place. About 73% of hobbyist sewists rely on designated project containers to prevent mixing supplies.
Transparent pouches with clear windows offer excellent space efficiency, while labeled project storage helps you identify each WIP instantly and reduces search time greatly.
Using Clipboards or Bulletin Boards
With clipboards and bulletin boards mounted on your walls, you’ll transform project planning into a visual system that keeps every WIP visible. Studies show bulletin boards boost perceived productivity by 27%, while clipboards cut material search time by 22%.
- Pin pattern instructions and fabric swatches where you can see them
- Track project stages with color-coded notes
- Free up 3.4 square feet of counter space with vertical mounting
This approach to Task Management and Material Organization creates natural Accountability Tracking. About 78% of sewists using bulletin boards complete more works in progress thanks to those constant visual reminders.
Tracking Projects With Planners or Sheets
With planners or sheets, you’ll nail down every project detail in one spot. A 2020 survey found 64% of sewists use written tools for project planning, and these formats reduce material search time considerably.
Track pattern names, fabric swatches, and notions on each sheet. Visual planning pages let you sketch designs alongside measurements.
Choose printable PDFs or digital formats—both keep works in progress moving forward with clear project information at your fingertips.
Setting Deadlines and Reminders
Setting firm project timelines transforms your completion rate—quilters with explicit deadlines finish 30% more work. Managing sewing projects with motivation boosters like weekly mini-deadlines cuts procrastination by 36%, so you’ll actually finish what you start.
Combine digital reminders on your phone with physical checklists in your workspace for best results. This dual approach to project management keeps long-term storage plans on track while short-term storage stays organized.
Designing Functional Sewing Work Zones
A well-designed sewing space isn’t just about storage—it’s about creating zones that work together to keep you moving smoothly through each project. When you set up dedicated areas for cutting, sewing, and finishing, you’ll spend less time hunting for tools and more time actually creating.
Here’s how to design work zones that reduce strain and boost your efficiency.
Creating Cutting, Sewing, and Ironing Zones
Break your workspace into three zones—cutting, sewing, and ironing—to simplify your projects. Position your cutting table near fabric storage to cut setup time by about 30%.
Keep your sewing table within arm’s reach of the cutting area, and place your ironing station close by.
This zone lighting approach creates a functional workspace that facilitates a natural flow from start to finish, reducing backtracking by roughly 22%.
Ergonomic Layouts for Efficiency
Your sewing table height matters more than you might think. Match your work surface to your seated elbow height—usually 28 to 30 inches—to ease shoulder strain by up to 44%.
Position your cutting table slightly higher and keep frequently used tools within arm’s reach to avoid repeated twisting.
Add task lighting around 500 to 1000 lux above your needle area to cut eye strain nearly in half.
Optimizing Placement for Workflow
Once your table and lighting feel right, arrange your workspace using a simple work triangle. Position your sewing machine, cutting surface, and ironing station close together to slash walking time by 22%. Store everyday tools—pins, rotary cutters, thread—within arm’s reach of your primary bench. Zoning tasks by frequency of use and shaping your bench into an L or U boosts sewing room organization dramatically, creating a functional workspace that keeps you moving smoothly through every step.
- Place your machine, cutting mat, and iron in a tight triangle to reduce steps.
- Keep high-frequency tools like scissors and bobbins beside your machine.
- Arrange medium-frequency items on nearby shelves or side tables.
- Use visual aids like color-coded bins to reinforce each zone.
Adjustable Chairs and Tables
Your triangle won’t deliver its full productivity impact if you’re hunched over a cramped sewing table. Height-adjustable chairs paired with ergonomic tables cut reported strain by 51% and boost productivity by 44.5%. Choose a sewing space with chairs that offer lumbar support and a workspace that adjusts between 762–787 mm. This setup tackles anthropometrics mismatch and bolsters your back, neck, and shoulders through every seam.
| Adjustable Features | Ergonomic Benefits |
|---|---|
| Height-adjustable chair | Reduces neck, shoulder, and back pain |
| Lumbar support | Decreases musculoskeletal strain by 51% |
| Adjustable sewing table (762–787 mm) | Minimizes reaching and twisting |
| Footrest compatibility | Supports lower limbs during pedal use |
| Inclined cutting table (10° angle) | Lowers upper limb strain |
Innovative Storage Ideas for Tools and Notions
Finding the right home for your small sewing tools can make or break your workspace. When everything has a clear spot, you won’t waste time hunting for that one special button or the seam ripper you just had in your hand.
Here are some simple storage solutions that keep your notions organized and within reach.
Mesh Zipper Bags for Notions
For keeping your sewing notions tidy and visible, mesh zipper bags offer exceptional versatility. You can store fabric scraps, threads, and small tools all in one breathable pouch. They’re perfect for mobile spaces since they’re lightweight and stackable.
Their storage efficiency cuts down search time, and the clear mesh lets you see everything at a glance. Plus, many bags now feature sustainable material features like recycled polyester.
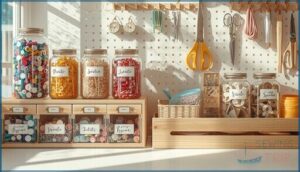
Mason Jars for Buttons and Small Items
Glass containers bring both charm and function to your workspace. Mason jars excel at corralling buttons and tiny notions—you’ll save up to 31 seconds per search compared to opaque bins. Try color coding by hue or custom lids with dividers for maximum density. Thrifted jars cost under $2, making this one of the smartest sewing supplies storage solutions around.
Display options that transform your space:
- Stack three jars high for vertical efficiency
- Sort by project type for instant retrieval
- Label with adhesive vinyl for clarity
- Showcase vintage buttons in clear glass
- Mix jar sizes for modular flexibility
Cotton Reel Holders and Thread Racks
Thread racks transform your sewing room by showcasing up to 120 spools at once—visibility access cuts search time dramatically. Wall-mounted cotton reel holder designs free up worktop space while capacity optimization lets you store everything vertically.
Choose enclosed boxes for environmental protection against dust and UV damage, or install pegboards near your machine for instant color selection.
DIY wooden racks under $15 offer portability with custom spacing for organizing threads and yarns.
Drawer Organizers for Accessories
Your sewing room organizing ideas start with smart drawer organizers that adapt to your needs. Customizable dividers and modular systems let you create sewing room storage solutions that grow with your collection.
Transform accessory chaos with these essentials:
- Clear materials for instant visibility of organizing sewing supplies
- Sustainable options in bamboo or recycled composites
- Adjustable compartments that prevent tangling and damage
Digital integration with smart labels takes organizing to the next level.
Top 5 Sewing Project Space Organizers
Not every organizer works for every sewing space, and that’s okay. What matters is finding a few solid options that fit your workflow and keep your supplies where you can reach them.
Here are five organizers that consistently help sewers stay on track without breaking the bank.
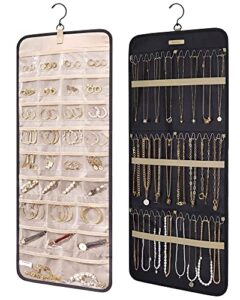
1. Jewelry Organizer Storage Roll Holder
You’ll love how a jewelry organizer roll holder brings roll versatility and portable storage right into your sewing space. This clever craft repurposing solution offers multiple clear pockets perfect for small notions like needles, pins, and elastic.
The material durability means it stands up to daily use while maintaining space efficiency—it hangs on doors or rolls up for travel. These storage solutions for sewing double your organizing power, and they’re among the smartest creative storage ideas you’ll find.
Plus, following these organizing tips and sewing room organization tips helps you locate supplies instantly.
Best For: Sewers and crafters who need compact, portable storage for small notions like needles, thread, and pins, especially if you’re tight on space or travel with your supplies.
- Clear pockets let you see everything at a glance, so you’re not digging around for that one needle or button you need
- Hangs on doors or closet rods to save precious table space, or rolls up tight for classes and sewing retreats
- Durable polyester and metal hooks hold up to daily use without falling apart, even when stuffed with heavier items like scissors or rotary cutters
- Exposed backside when folded makes it awkward to pack in a bag without snagging on other items
- No snap or Velcro closures on compartments means small items can slip out if you’re not careful
- Elastic straps don’t always keep smaller notions separated, so things can shift around and get mixed up
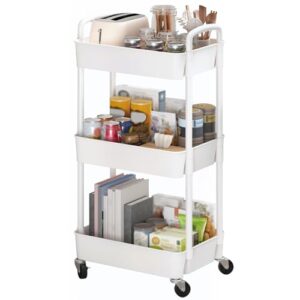
2. Portable White Storage Utility Cart
A white rolling cart on wheels transforms your sewing room organizing ideas into reality. This three-tier wonder offers excellent Weight Capacity—each shelf holds up to 20 pounds of fabric, notions, and tools.
The Material Durability comes from powder-coated steel that lasts through years of use, while Mobility Features like 360-degree wheels (two lockable) let you glide supplies wherever you need them.
Cart Assembly takes under 20 minutes, making it perfect for small space sewing room setups. The clean Aesthetic Appeal matches any décor, bringing creative storage ideas and solid sewing room organization together beautifully.
Best For: Sewers and crafters who need mobile storage that keeps supplies organized and accessible in small spaces or multipurpose rooms.
- Each of the three shelves holds up to 20 pounds, giving you plenty of capacity for fabric, thread, and tools without taking up much floor space.
- Four 360-degree wheels (two locking) make it easy to roll the cart between your cutting table and sewing machine, then lock it in place when you’re working.
- Takes less than 20 minutes to put together, and the white powder-coated steel frame looks clean in any room while lasting through years of use.
- Lightweight construction means it can tip if you load one side too heavily or pull a full drawer out too quickly.
- Shelves may bow over time if you consistently max out the weight limit, especially with dense items like fabric bolts.
- Wheels can wobble or struggle on thick carpet, making it better suited for hard floors or low-pile rugs.
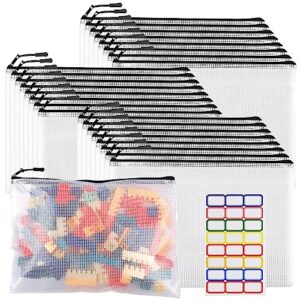
3. Reusable Mesh Zipper Storage Bags
You know how fabric scraps and notions can scatter everywhere? Mesh zipper bags solve that problem fast. These transparent storage heroes let you spot what’s inside without rummaging, and their Mesh Durability withstands regular use for over three years.
Zipper Quality matters—look for sturdy closures that last through 200-plus openings. Size Variety means you’ll find options for buttons, patterns, or full fabric pieces.
The Environmental Impact is impressive too, with Cost Savings adding up as you reuse them 120 times on average while organizing fabric and scraps.
Best For: Sewers and crafters who need to organize notions, fabric scraps, and project supplies while keeping everything visible and easy to find.
- Clear mesh design lets you see contents instantly, cutting search time by about a third during projects
- Durable construction handles 200 openings and closings, lasting over three years with regular use
- Reusable design saves money and reduces waste—you’ll use each bag around 120 times before replacing
- Zippers aren’t leak-proof, so they won’t work for storing liquids or wet items
- Some bags have quality issues with zippers that come off easily and can’t be reattached
- Not ideal for very heavy or bulky items that might stress the mesh material
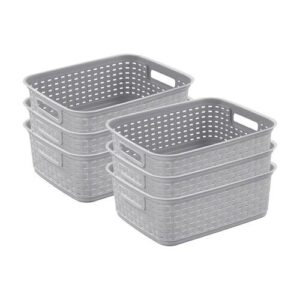
4. Gray Plastic Storage Baskets Set
These gray plastic baskets check every box for smart home organization. Their neutral basket aesthetics blend into any sewing room, while plastic durability benefits mean they’ll last through years of daily use.
With adaptable storage solutions like six rectangular bins at 15″W × 12.25″D × 5.24″H, you’ll organize fabric scraps, patterns, and notions with ease. Market demand analysis shows storage bins remain the top choice for craft spaces.
Consider basket size considerations carefully—the 5-inch height works perfectly for flatter organizing items but won’t fit bulkier storage container options like large fabric bolts.
Best For: People who want a versatile storage system for organizing sewing supplies, craft materials, and small household items across multiple rooms without breaking the bank.
- Six durable plastic baskets with a woven look give you plenty of sorting options for thread, fabric scraps, patterns, and notions while fitting neatly on shelves or countertops.
- The neutral gray color works with any décor style, and the ventilated weave design keeps fabrics fresh while letting you see what’s inside at a glance.
- Made in the USA with sturdy construction that’s easy to wipe clean, so they hold up well to frequent use in busy craft spaces.
- The 5-inch height limits what you can store—bulky items like large fabric bolts or tall spools won’t fit comfortably.
- Some buyers report receiving the wrong color, which suggests occasional quality control hiccups during shipping.
- Stock runs low at times, so you might need to wait if you’re trying to buy multiple sets at once.
5. Clear Glass Cookie Storage Jar
Glass jars bring visibility benefits and airtight freshness to your sewing room storage solutions. This 1-gallon container lets you spot buttons or pins at a glance—no more digging through mystery bins.
The material durability of thick glass means organizing sewing supplies stays protected from dust and moisture. However, Glass Jar Safety matters: dropped jars shatter into sharp pieces on hard floors. Keep repurposing ideas like vintage glass jars on stable shelves, never near cutting tables. Perfect storage container ideas for small notions when you handle them carefully.
Best For: Sewers and crafters who want to see their buttons, pins, and small notions at a glance while keeping them fresh and organized on sturdy, stable shelving.
- Clear glass lets you spot exactly what you need without opening multiple containers or digging through bins.
- Airtight seal protects metal pins and needles from humidity that causes rust during long-term storage.
- Non-porous surface won’t absorb dyes or oils from fabric scraps, thread, or chalk, and cleans completely between uses.
- Heavy glass construction makes it harder to move around your workspace and increases the risk of drops on hard floors.
- Shatters into sharp, dangerous pieces if knocked over near your sewing machine or cutting table.
- Weight adds up quickly when you’re organizing multiple jars, requiring reinforced shelving in compact craft rooms.
Frequently Asked Questions (FAQs)
How often should I reorganize my sewing space?
Regular resets really matter. Plan project-based decluttering triggers plus quick weekly sessions.
Community insights show this sewing room organization method dramatically boosts sewing space productivity while keeping workflow effects positive and preventing major reorganization marathons.
Whats the best lighting for detailed sewing work?
Your sewing room needs task lighting between 1,000–2,000 lux for detailed work. LED fixtures with a Color Rendering Index above 90 help prevent eye strain, while positioning lights 18–24 inches away optimizes lighting fixture placement.
How do I store large fabric bolts effectively?
Store bolts vertically on shallow shelving adaptations to prevent sagging. Consider bolt re-wrapping onto mini boards for compact storage.
Use space planning to position tall racks against walls, and add dust covers for protection considerations.
Should I organize supplies by project or type?
A 2024 survey found that 61% of home sewists use a hybrid approach: organizing core supplies by type for quick access time and creative flexibility, while keeping active WIPs in project bags with clear labeling for efficient project storage and project tracking.
Whats the ideal sewing table height for comfort?
Your table should sit at elbow height when seated—around 27 to 29 inches. Adjustable tables and ergonomic posture matter most.
Cutting table organization needs different height guidelines than sewing, so customization options let you adapt your functional workspace perfectly.
Conclusion
A cluttered sewing space is like trying to cook in a kitchen where every pot is buried—you waste energy before you even start. But with the right sewing project space organization, your tools answer when you call them.
You’ve learned the systems, storage tricks, and DIY solutions that work. Now it’s time to implement them. Clear those surfaces, label those bins, and watch your creative time multiply.
Your organized workspace isn’t just tidy—it’s freedom to actually sew.
- https://sewyours.com/blogs/bag-making-tips-tools-techniques/creating-a-seamless-sewing-experience-organizing-your-workspace-for-efficiency
- https://www.thelittlemushroomcap.com/revamping-sewing-space-the-ultimate-guide-to-organizing-your-sewing-room/
- https://gjeta.com/sites/default/files/GJETA-2023-0195.pdf
- https://ohmycrafty.com/2024/06/20/sewing-room-organization-tips-for-maximum-efficiency/
- https://www.longancraft.com/blogs/sewing-tips/how-to-store-sewing-patterns


