This site is supported by our readers. We may earn a commission, at no cost to you, if you purchase through links.

Interfacing adds structure, prevents fabrics from stretching out, and gives your project that crisp, professional look. Think of it as the hidden hero—your fabric’s supportive best friend.
Whether you choose fusible (iron-on) or sew-in interfacing depends on your fabric and project. Lightweight fabrics might not always need it, but heavier or stretchy ones often do.
If you’re skipping it, make sure your fabric holds up on its own. Curious about when to choose which type? Stay tuned!
Table Of Contents
Key Takeaways
- You don’t always need interfacing, but it’s essential for adding structure to collars, cuffs, and bags.
- Match interfacing type and weight to your fabric to avoid issues like stiffness or floppiness.
- Fusible interfacing bonds with heat, while sew-in is better for delicate or heat-sensitive fabrics.
- Without interfacing, fabric can stretch, sag, or lose its shape, making projects look unfinished.
Interfacing Basics
You’ll find that interfacing is the unsung hero of sewing projects, providing essential structure and support to fabrics that would otherwise droop or stretch out of shape.
It comes in various types including fusible (which bonds with heat) and sew-in options, allowing you to choose the perfect match for your specific fabric and project needs.
Types of Interfacing
When sewing, you’ll encounter two main types of interfacing: fusible and sew-in.
Fusible interfacing bonds to fabric with heat, while sew-in is stitched in place.
You’ll also need to choose between non-woven (paper-like, cuts in any direction), woven (has grain lines like fabric), or knit interfacing (stretchy for knit fabrics).
Each type serves different purposes depending on your project’s needs and fabric properties.
For best results, match fabric weights to the interfacing.
Interfacing Materials
Now that you know about the different types, let’s look at what interfacing is actually made from.
Interfacing comes in various materials to suit your project needs.
- Cotton-based interfacings offer breathability and work well with natural fabrics
- Polyester blends provide durability and resist shrinking
- Rayon mixtures create soft drape while maintaining structure
- Synthetic non-woven options are economical and versatile
The material affects how your interfacing performs, with woven properties offering natural movement while non-woven uses include quick applications without grain considerations.
Many sewers find cotton interfacing options particularly useful, especially for projects that require breathability and a soft drape.
Interfacing Weights
Now that you’re familiar with materials, let’s talk about weights. Interfacing comes in three main options – lightweight, medium, and heavyweight.
You’ll want to match the interfacing weight to your fabric weight for best results. Lightweight interfacing works with delicate fabrics like silk, medium weight pairs with cottons and linens, while heavyweight interfacing supports sturdy materials like denim.
You can find a variety of thin stabilizer options for delicate projects. The right weight maintains your fabric’s natural drape without adding unwanted bulk.
Do I Need Interfacing
Frequently, you’ll wonder if you really need interfacing for your sewing project. The answer depends on what you’re making.
Interfacing is essential when your fabric needs extra structure or stability, like in collars, cuffs, buttonholes, and waistbands. Without this fabric stabilizer, these areas might stretch out or collapse over time.
Consider your project requirements carefully – lightweight summer dresses might need minimal interfacing, while custom-made jackets demand more.
The design impact can be dramatic; interfacing transforms floppy fabric into crisp, professional-looking garments. However, you could also consider a fabric interfacing alternative for a similar effect.
Your skill level and time investment matter too. While beginners might be tempted to skip this step, adding interfacing actually makes construction easier and results more satisfying.
Don’t let cost considerations deter you – interfacing is relatively inexpensive insurance against a droopy collar or stretched-out buttonhole that could ruin your entire project.
Choosing Interfacing
You’ll need to match your interfacing to both your fabric type and project needs for the best results.
Choosing the right weight and variety of interfacing can make the difference between a professional-looking garment and one that’s either too floppy or uncomfortably stiff.
Fabric Weight Consideration
When selecting interfacing, your fabric’s weight is your North Star.
Lightweight fabrics like silk or chiffon need lightweight interfacing to avoid bulkiness.
Medium-weight fabrics such as cotton or linen pair well with medium interfacing.
Heavyweight fabrics like denim or canvas require heavyweight interfacing for proper support.
Always aim for weight matching that preserves the fabric’s natural drape—interfacing should support, not overpower your material, and maintain its original weight.
Fabric Type Selection
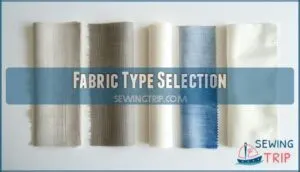
When dealing with loose weave fabrics or tailoring materials like wool coating, you’ll need appropriate interfacing to provide structure.
For knit fabrics, stick with lightweight knit or mesh interfacing to maintain stretch.
Delicate fabrics pair beautifully with silk organza as a sew-in option – it adds stability while remaining breathable.
Heavy fabrics work well with cotton muslin, poplin, or canvas, helping to reinforce without compromising drape. You might also consider fabric as an alternative for a more sustainable approach.
Interfacing Weight Options
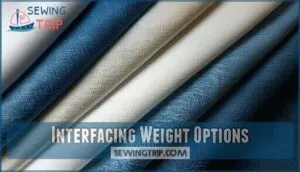
When picking interfacing, weight matching to your fabric is everything.
Lightweight interfacing works for delicate fabrics like silk.
Medium weight interfacing handles common fabrics like cotton.
Heavyweight interfacing? Perfect for denim or canvas.
Be sure to:
- Match interfacing weight to fabric.
- Consider drape for better flow.
- Test on scraps first.
- Avoid bulk with lighter fabrics.
- Maintain balance for natural movement.
Applying Interfacing
Applying interfacing might seem tricky at first, but it’s all about the right technique.
Whether you’re ironing on fusible interfacing or stitching in sew-in types, a bit of practice will make the process smooth and easy.
Fusible Interfacing Application
Getting fusible interfacing right starts with ironing setup.
Use a pressing cloth to protect fabric from adhesive residue, and set your iron temperature to the interfacing’s recommendation.
Place the adhesive side on the fabric’s wrong side, press gently (don’t slide!), and allow cooling time.
For more information, explore ironing interfacing techniques.
Testing the bond guarantees durability.
This step guarantees smooth, professional sewing results!
Sew-in Interfacing Techniques
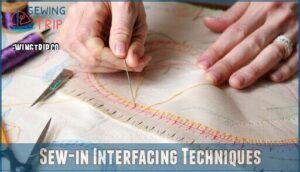
Sew-in interfacing works wonders for delicate fabrics or custom-made garments.
Start by cutting it slightly smaller than your fabric piece. Use basting techniques to secure it, keeping seams tidy.
For curved applications, pin carefully to avoid puckering. Sew within the seam allowance to maintain fabric stabilization.
This method is perfect for edge finishing and tailoring uses where heat might damage fabrics.
Tips for Smooth Application
Using a pressing cloth is key to avoiding bubbles when applying fusible interfacing.
Verify proper interfacing alignment before setting your iron’s temperature.
Press instead of sliding the iron, and let the fabric cool completely to lock the bond.
For sewing interfacing, baste securely.
Understanding interfacing uses and types gives you smoother results and confidence in your sewing projects.
Interfacing Tips Tricks
When working with interfacing, a few simple tricks can make your sewing projects turn out smoother. Knowing what to avoid and how to troubleshoot common issues saves time and frustration.
Common Mistakes to Avoid
Skipping a pressing cloth? That’s how melting interfacing and bubbling issues happen.
Uneven bonding is another headache if you glide the iron instead of pressing. Choosing the wrong weight can leave fabric too stiff or floppy.
For sew-in interfacing, secure it properly or risk shifting during sewing. Avoid peeling problems by double-checking fusible interfacing alignment before ironing.
Interfacing Alternatives
If you’re out of interfacing, don’t worry—creative solutions exist!
Try these alternatives for fabric support and structure:
- Fabric Stabilizers: Muslin or linen can substitute for light interfacing.
- Canvas Alternatives: Canvas or denim adds strength to heavy fabrics.
- Buckram Usage: This stiff material works wonders for hats or home decor.
These options guarantee your fabric stays reinforced!
Troubleshooting Interfacing Issues
Facing bubbling issues with fusible interfacing? Iron slowly, don’t glide! Adhesive failure often means low heat—double-check settings.
Shifting problems? Pin or baste sew-in interfacing securely. Uneven bonding? Use a pressing cloth for even pressure.
Got adhesive residue? A warm iron and scrap fabric work wonders. These sewing techniques help fix common sewing mistakes for smoother results.
Interfacing Importance
Interfacing plays a key role in giving your projects the structure and stability they need.
Without it, fabric can stretch, sag, or lose its shape over time, leaving your hard work looking less polished, because interfacing is crucial for maintaining the integrity of the fabric.
Role in Garment Construction
A sturdy foundation makes all the difference in garment construction.
Interfacing works behind the scenes, adding structure, shaping collars, and keeping seams steady.
It reinforces fabric for better drape enhancement and guarantees a professional finish.
Think of it as a secret weapon for fabric stabilization and shape retention, giving your project the polish and durability it needs.
Benefits of Using Interfacing
When working on garment construction, interfacing is your secret weapon for adding structure and reinforcing fabric.
It helps garments hold their shape, prevents stretching in tricky areas, and boosts durability.
Plus, it gives your projects a professional finish that elevates them from “homemade” to “handcrafted.”
Trust me, when your fabric behaves, sewing feels so much more satisfying!
Impact on Fabric Stability
When you want your garment to keep its shape, prevent stretching, or hang neatly, interfacing is your go-to.
Interfacing transforms fabric with stability and shape, turning droopy materials into polished, professional-looking garments.
It reinforces fabric, adds structure, and improves drape, ensuring your project looks polished.
Think of it like a backbone—enhancing durability while supporting garment structure.
Skipping it can leave your fabric floppy and unstable, especially for lighter materials.
You can also explore a suitable fabric alternative for similar support.
Frequently Asked Questions (FAQs)
Should you use interfacing in a sewing project?
Interfacing is a game-changer when you need extra structure or stability for collars, cuffs, or bags.
While not always required, it gives your projects a polished, professional look.
Think of it as fabric’s secret weapon!
What is interfacing in sewing?
Think of interfacing as the unsung hero of sewing.
It’s a fabric stabilizer that gives your project structure, support, or stiffness, helping collars stand tall, seams stay sharp, and fabrics hold their shape beautifully.
Can you use interfacing with fabric?
You absolutely can use interfacing with fabric!
It strengthens, shapes, or stabilizes your material, depending on your project.
Just match the interfacing type and weight to your fabric for the best results.
Can you use woven interfacing on a sewing machine?
You can absolutely use woven interfacing on a sewing machine—it’s sewn into place instead of ironed on.
Just pin it securely to prevent shifting, then stitch it along the edges or seam allowance.
Why is interfacing important in garment sewing?
It’s like giving fabric a backbone—interfacing adds structure, support, and shape to garments.
It helps collars stay sharp, buttons look neat, and fabrics behave.
Without it, your sewing might look limp or unfinished.
Can you use fusible interfacing on a sewing machine?
You can’t attach fusible interfacing directly with a sewing machine, but you can stitch it after ironing.
Its adhesive activates with heat, so grab an iron first, then sew for extra security if needed.
Is interfacing necessary when sewing?
Imagine your fabric holding its shape perfectly—interfacing makes that happen.
While it’s not always required, it’s a game-changer for collars, cuffs, or structured projects.
Skip it, and your work might feel limp or unfinished.
Can you sew without interfacing?
You can sew without interfacing, especially for casual or simple projects, but it adds structure and support.
Skipping it might result in floppy collars or seams.
For best results, match interfacing to your fabric’s needs.
When not to use fusible interfacing?
Avoid fusible interfacing when working with delicate, textured, or heat-sensitive fabrics.
The heat and adhesive can damage these materials or result in uneven bonding.
Instead, opt for sew-in interfacing to protect your fabric’s integrity.
How do you stiffen fabric without interfacing?
You can stiffen fabric using options like starch spray, homemade gelatin solutions, or glue-water mixtures.
Another trick is to use layers of thicker fabric or muslin.
Just test on scraps first to avoid surprises, and consider complete concepts like these when working with fabric stiffening methods.
Conclusion
Think of interfacing like a solid foundation for a house—it supports your fabric and keeps everything in place.
While you don’t always have to use interfacing when sewing, it’s a game-changer for creating polished, durable projects.
From stabilizing lightweight fabrics to adding structure to heavy materials, interfacing guarantees your creations appear professional and last longer.
Whether you choose fusible or sew-in, it’s all about matching the right type to your fabric and project needs, which is the key to a successful project with proper use of interfacing.

