This site is supported by our readers. We may earn a commission, at no cost to you, if you purchase through links.
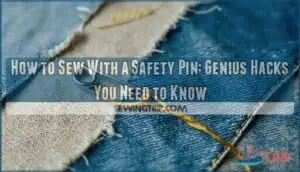
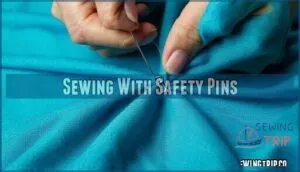
First, thread your string through the closed end of the pin.
Next, close the pin and use the pointed end to push through fabric.
Pull the entire pin through, then repeat the process for each stitch.
It’s like having a rescue boat when you’re stranded without proper sewing tools!
This technique works best with medium to large safety pins and sturdy fabrics.
For delicate materials, use smaller pins and gentle pressure to avoid tears.
You’ll soon discover clever ways to handle even the trickiest fabric challenges.
Table Of Contents
Key Takeaways
- You can use a safety pin as a makeshift needle by threading string through the closed end and using the pointed end to push through fabric.
- You’ll find safety pins are versatile for more than emergency fixes—they excel at turning fabric tubes, marking alterations, and fitting garments temporarily.
- When sewing with safety pins, choose the right size for your fabric—larger pins work better for thick materials, while smaller ones prevent damage to delicate fabrics.
- You should hold fabric firmly with one hand while guiding the pin with the other, maintaining a relaxed grip to prevent puckering as you push through layers.
Sewing With Safety Pins
You’d be surprised how handy a safety pin can be when sewing, especially in a pinch.
With a little patience and a steady hand, you can tackle simple fixes or fabric adjustments in no time.
Safety Pin History
The safety pin’s journey began in 1849, thanks to Walter Hunt, who created this clever fabric fastener.
Originally a practical invention, it swiftly gained fame for its simplicity and versatility, earning early patents and cultural significance worldwide.
Over time, safety pins evolved in design but never lost their sewing history roots, remaining a go-to tool for quick fixes and ingenuity.
Types of Safety Pins
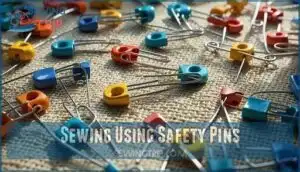
Not all pins are created equal! They come in various sizes and materials like stainless steel or nickel, each suited for different tasks.
Locking mechanisms add an extra layer of security, especially for sewing-heavy tasks.
Decorative and vintage pins? Perfect for adding flair or fixing delicate fabrics.
This safety pin hack transforms a simple fabric fastener into a sewing powerhouse. Many crafters find uses for different safety pin styles, and it’s a great way to explore different tasks with various sizes.
Common Uses of Safety Pins
Fixing stuff on the fly? Safety pins are your go-to for emergency repairs, quick clothing fixes, or even crafting jewelry.
From securing loose hems to holding seams pre-sewing, they’re lifesavers. Use them as temporary clothing fasteners, or try a safety pin hack to mark alterations.
They’re handy for household hacks, craft projects, and even nosew fixes! For more precise fabric work, consider horizontal pinning techniques before using safety pins.
Sewing Using Safety Pins
When sewing with safety pins, think of them as tiny multi-tools. They’re perfect for a no-sew fix or quick clothing repair.
But here’s the deal: pin size matters. Large safety pins can handle thicker fabrics, while smaller ones work best for lightweight material. Be mindful, though—fabric hole concerns are real, especially with delicate fabrics.
For emergency sewing, safety pin durability is a lifesaver. They hold strong and won’t slip out. Use ergonomic pinning to safely secure fabric without poking yourself—just pinch, slide, and close. Remember to prioritize sewing machine safety to avoid accidents.
Looking for innovative pin uses? They’re not just for hems. Safety pins excel at holding trims, creating pleats, or even joining elastic ends temporarily. Keep a few handy—you’ll never know when they’ll save the day!
Safety Pin Sewing Techniques
You might think safety pins are just for quick fixes, but they can handle some serious sewing tasks too.
From turning fabric tubes to fitting garments, these simple pins are surprisingly versatile when you know how to use them, making them a valuable tool for various sewing needs, including serious sewing tasks.
Turning Fabric Tubes
Turning fabric tubes is a snap with a safety pin. It’s simple, quick, and avoids extra tools.
- Tube Turning Tools: Push a safety pin through the tube’s open end.
- Fabric Choice Matters: Use softer, flexible fabrics for easy turning. To find the right material, consider various sewing fabrics for your project.
- Securing the Pin: Always pin securely to avoid slipping.
- Avoiding Snags: Start gently to avoid bunching.
- Speed and Efficiency: Scrunch and pull rhythmically for fast results.
Marking Alterations
When it’s time to tweak a garment, safety pins are your go-to for temporary alterations.
Use them for hemline marking, dart placement, or waistline changes.
Pin at an angle for seam adjustments or length adjustments to keep fabric secure.
Safety pins work great for marking dress adjustments during garment fitting—just be gentle to avoid leaving holes.
Fitting Garments
When tackling garment fitting, safety pins are lifesavers.
They hold layers for temporary alterations without damage.
Use them for dress adjustments, securing muslin mockups, or testing design ease during fittings.
For pattern grading or refining body measurements, safety pins offer flexibility.
Just remember, they’re temporary helpers—perfect for quick fitting adjustments, but not meant for permanent fixes, which is why they are such temporary helpers!
Pinning Fabric Together
Ever wonder how safety pins save the day when fabrics won’t cooperate? They’re perfect for quick pin-and-sew fixes.
Here’s how:
- Use safety pins for fabric alignment before sewing.
- Mark hems or alterations with a pin for accuracy.
- Secure pieces temporarily for makeshift sewing.
- Costume shops rely on safety pins as essentials for fast adjustments.
They’re small but mighty sewing heroes!
Safety Pin Alternatives
When you can’t find a safety pin, don’t worry—there are plenty of clever alternatives you can use.
From household items to quick DIY solutions, you’ve got options to keep your sewing projects moving.
DIY Needle Alternatives
Sometimes, improvising saves the day.
If you’re out of needles, try these:
| Alternative Needles | Pros | Cons |
|---|---|---|
| Bobby pins | Easy to find | May damage fabric |
| Thorn Needles | Eco-friendly from nature | Limited durability |
| Wire Needles | Flexible for natural fibers | Requires smooth edges |
Makeshift sewing with natural options keeps you creative.
You can also find DIY needle products online.
Homemade Sewing Needles
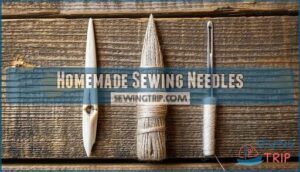
Beyond DIY needle alternatives, you can create your own homemade sewing needles when you’re in a pinch. With materials from nature or your home, you’ll never be without a sewing solution.
Here are three ingenious options for homemade needles:
- Bone needles from deer bones, carefully shaped and polished
- Agave plant spike needles with attached natural fibers
- Twisted paper clip needles with a makeshift eye for threading
Each option offers unique durability concerns but works perfectly for safety pin sewing alternatives.
Using Other Objects as Needles
While homemade needles offer creative solutions, everyday items can also save your sewing projects in a pinch.
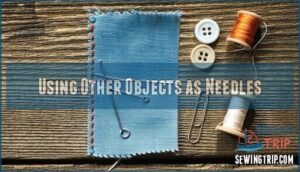
Paper clips, bobby pins, and even sturdy plant thorns can serve as needle substitutes when you’re in a tight spot.
Straighten a paper clip for delicate fabrics or use a bobby pin’s pointed end for emergency sewing.
For temporary fixes, consider seam basting tape.
Remember, alternative sewing methods won’t match a proper needle’s precision, but they’ll get you through when traditional tools aren’t available.
Mastering Safety Pin Sewing
You’ll transform your emergency sewing toolkit when you master these safety pin techniques that professional costume designers use daily.
With just a simple safety pin from your drawer, you can now confidently tackle fabric tubes, mark alterations, and make quick garment repairs when a traditional needle isn’t within reach.
Step-by-Step Instructions
While alternative tools can work in a pinch, knowing the proper steps for safety pin sewing will save your projects.
Here’s how to master basic techniques: For tube turning, secure a safety pin to one end of your fabric tube.
Push it through while scrunching fabric behind it. When marking alterations, use pins to create temporary hems or indicate where adjustments are needed.
For on-the-go repairs, pin fabrics together first, then use the pin head as your needle point.
Troubleshooting Common Issues
Faced with pesky safety pin problems, you’ll need quick fixes to avoid a wardrobe emergency.
When troubleshooting common issues:
- Combat pin snagging by filing rough edges with an emery board
- Prevent excessive fabric damage by placing pins along seam allowances
- Fix pin bending by reinforcing with clear tape at stress points
- Avoid painful skin pricks by pointing pins away from your body
Tips for Efficient Sewing
When you’re using safety pins for on-the-go repairs, keeping them organized in a small tin can save precious minutes during a wardrobe emergency.
Arrange your workspace with all tools within arm’s reach for ergonomic sewing and workflow optimization.
Time-saving techniques include pre-closing several safety pins before starting and using larger pins for thicker fabrics.
Project planning prevents those frantic instant repairs that often lead to clothing malfunctions, and using time-saving techniques can make a significant difference.
Safety Precautions When Sewing
While efficiency matters, your safety matters more!
Always keep safety pins in a designated pin cushion, not your mouth.
Protect your eyes with safety glasses to shield against needle breakage.
When handling sharp objects, pass them with handles first.
Maintain a tidy workspace to prevent tripping hazards, and keep a small first aid kit nearby for those inevitable finger pricks.
To prevent electrical hazards, remember to unplug appliances first before making adjustments.
Remember, good sewing skills include smart safety practices!
Frequently Asked Questions (FAQs)
Can I use safety pins instead of sewing pins?
Like a trusty sidekick, safety pins can pinch-hit for sewing pins in a pinch.
You’ll find they’re more secure but create larger holes, so they’re better for temporary fixes than delicate work.
Can you use a safety pin instead of a stitch marker?
Yes, you can definitely use a safety pin as a stitch marker! They’re great for holding your place in knitting or crochet projects when you don’t have proper markers handy.
What type of safety pins should I use for my project?
Choose medium-sized safety pins (1-5 inches) for most sewing projects. You’ll want nickel-plated pins for durability and smooth pins for delicate fabrics. Specialty kilt pins work well for heavier materials.
Are there any other methods for turning fabric right side out?
Try this terrific technique: pull threads from needle and bobbin longer than your strap, fold and sew the edge.
Then use these threads to turn it right side out.
You’ll love this tool-free method.
What are the benefits of sewing with a safety pin?
Safety pins offer multiple benefits for sewing: they’re ideal for turning fabric tubes inside out, securing fittings without poking the wearer, marking alterations, and can even substitute as a needle in emergencies.
What is the best way to hold the fabric when pushing the pin through?
Hold fabric firmly but gently, pinching with one hand while guiding the pin with the other.
You’ll need steady fingers and a relaxed grip to prevent puckering as you push through the layers.
Are there any specific tips for sewing a button without a needle?
You can use a safety pin as your needle substitute.
Thread through the pin’s coiled end, then push the pointed end through the button and fabric.
Secure with knots when finished.
How to store safety pins properly?
A stitch in time saves nine!
Store your safety pins in small compartments like pill organizers, magnetic holders, or pincushions.
You’ll find them quickly and avoid painful surprises when reaching into your sewing kit.
Can safety pins damage delicate fabrics?
Yes, they can! Delicate fabrics like silk or chiffon may show permanent holes from safety pins. You’ll want to use smaller pins or fabric-friendly alternatives when working with lightweight materials.
Best safety pin size for basting?
Like a knight choosing the right sword, you’ll want medium-sized safety pins (1-5 inches) for basting.
They’re strong enough to hold layers together but won’t leave large holes in your fabric.
Conclusion
Who would’ve thought something designed to prevent mishaps could become your crafty best friend?
Now that you know how to sew with a safety pin, you’ll never be caught unprepared. Whether you’re fixing a torn hem, creating fabric tubes, or marking alterations, this humble tool has your back.
Keep various sizes handy in your emergency kit, and you’ll tackle any unexpected sewing challenge with confidence. Sometimes the simplest solutions are truly the most brilliant!

