This site is supported by our readers. We may earn a commission, at no cost to you, if you purchase through links.
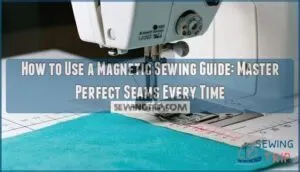
Position the guide at your desired seam allowance distance from the needle – typically 1/4" or 5/8".
The magnetic base holds it securely in place.
Feed your fabric edge against the guide as you sew, keeping consistent contact for perfectly straight seams.
The guide acts like guardrails for your fabric, eliminating guesswork and wobbly stitching lines.
It’s especially handy for quilting, garment construction, and any project requiring precise seam allowances.
Beyond basic straight seams, these versatile tools reveal advanced techniques that transform your sewing accuracy.
Table Of Contents
Key Takeaways
- Position the guide correctly – Place your magnetic sewing guide on the throat plate parallel to the needle at your desired seam allowance distance (typically 1/4" or 5/8") for accurate alignment.
- Keep fabric against the guide – Feed your fabric edge against the guide throughout sewing, maintaining consistent contact to eliminate guesswork and create perfectly straight seams.
- Test before starting projects – Always practice on fabric scraps first to verify that your guide placement and settings work correctly for your specific fabric type and project requirements.
- Maintain steady technique – Do not press fabric too hard against the guide or watch the needle position; instead, focus on smooth fabric feeding and consistent pressure for professional results.
Magnetic Sewing Guide Basics
You’ll master magnetic sewing guides quickly once you understand what they’re and how they work.
These simple tools attach to your sewing machine’s throat plate with magnets, creating a physical barrier that keeps your fabric aligned for perfectly straight seams.
What is a Magnetic Sewing Guide
A magnetic sewing guide is a small, magnetized ruler that attaches to your sewing machine’s metal throat plate.
Your magnetic guide creates an instant fence for perfectly straight seams every time.
This essential sewing accessory acts as a fence, keeping fabric aligned at precise distances from your needle.
The magnet strength guarantees it stays firmly positioned while you sew.
These beginner-friendly sewing tools come in various guide materials like metal or plastic with magnetic backing, offering an affordable alternative to built-in machine guides for consistently straight seams.
Many users find it convenient to buy a sewing guide online, which can be a beginner-friendly and essential tool.
Benefits of Using a Magnetic Sewing Guide
Your magnetic sewing guide transforms ordinary stitching into precision work.
Your magnetic sewing guide transforms ordinary stitching into precision work.
Increased Accuracy becomes second nature as the guide keeps fabric aligned perfectly.
You’ll notice Time Savings immediately – no more measuring and remarking seam allowances.
This Beginner Friendly tool builds confidence quickly while handling Versatile Projects from quilting to garment construction.
Professional Results emerge naturally when your sewing straight seams becomes effortless with this essential accurate sewing guide among sewing accessories that enhance sewing precision.
Types of Magnetic Sewing Guides Available
You’ll find several types of magnetic seam guides to match your sewing needs.
Standard block-style guides offer compact, adjustable positioning for basic seaming. Extended-length roller guides provide superior accuracy on long seams, functioning like a table saw fence.
Specialty shapes handle curves and corners with precision. Multi-guide sets include various configurations for different projects. Hinged guides adjust angles easily.
These sewing accessories transform your machine into a precision tool, making consistent seam allowances effortless across all your sewing projects. The Suisei sewing guide guarantees uniform seam widths.
Using Magnetic Sewing Guides
You’ll master magnetic sewing guides quickly once you understand their simple setup and operation.
These handy tools attach to your machine’s throat plate and guide your fabric for consistently straight seams and accurate seam allowances.
Step-by-Step Guide to Using a Magnetic Sewing Guide
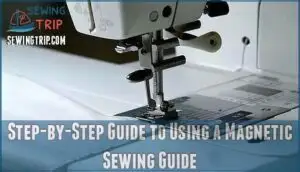
Positioning your magnetic seam guide correctly transforms your sewing precision. Start by identifying your machine’s throat plate, then follow these essential steps:
- Guide Placement: Position the magnetic guide parallel to your needle at your desired seam allowance distance
- Fabric Handling: Feed fabric smoothly against the guide while maintaining consistent pressure
- Stitch Settings: Adjust your machine’s speed and tension for superior results with this sewing tool
Many sewers find a magnetic sewing tool improves accuracy. Regular Guide Maintenance helps your magnetic seam guide stay effective for all sewing projects and techniques.
Tips for Effective Use of a Magnetic Sewing Guide
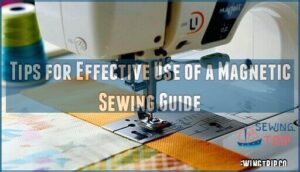
Achieving sewing accuracy requires attention to Guide Placement and consistent techniques.
Test your magnetic alignment on scrap Fabric Type before starting projects. Keep steady Consistent Pressure while guiding fabric along the front edge, not watching the Needle Position.
Seam guides guarantee straight stitching. Regular Guide Maintenance prevents lint buildup that affects precision.
These sewing tips enhance your sewing techniques with reliable sewing guide tools, focusing on consistent techniques.
Common Mistakes to Avoid When Using a Magnetic Sewing Guide
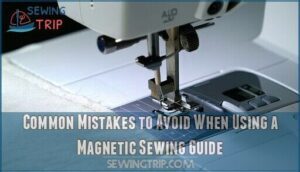
While proper setup helps, avoiding these pitfalls guarantees magnetic sewing guide tools deliver consistent sewing accuracy.
Even experienced sewers can stumble with magnetic alignment basics.
- Guide Misalignment: Position your magnetic guide parallel to the needle, not angled, to prevent fabric veering off course
- Fabric Thickness: Remove thick magnetic guides when sewing heavy materials to avoid needle collisions and machine strain
- Guide Slippage: Check that your guide stays put during sewing – vibration can shift loose magnets mid-seam
- Machine Compatibility: Verify your computerized machine won’t be affected by strong magnetic fields before attachment
- Inconsistent Pressure: Don’t press fabric against the guide too hard, as this distorts seam allowances and sewing techniques
Setting Up Magnetic Sewing Guides
Setting up your magnetic sewing guide correctly is the foundation for achieving consistent, professional-looking seams.
You’ll learn how to position the guide on your machine’s throat plate and adjust it for perfect fabric alignment every time.
Locating The Throat Plate on Your Sewing Machine
Your throat plate sits right beneath your needle – that flat metal piece with the rectangular opening.
Before placing your magnetic tools, you’ll need to identify what type you have and check for any plate screw access points. The feed dog function is vital for moving fabric smoothly.
| Component | Location | Purpose | Check For |
|---|---|---|---|
| Throat Plate | Below needle | Fabric support | Needle plate markings |
| Feed Dogs | Under plate | Fabric movement | Burr removal needs |
| Plate Screws | Plate edges | Secure attachment | Access clearance |
| Size Markings | Plate surface | Measuring plate size | Seam guidelines |
Most sewing machines have standard throat plate types, but measuring plate size guarantees your magnetic sewing guide fits properly for accurate sewing.
Placing The Magnetic Guide and Fabric for Accurate Sewing
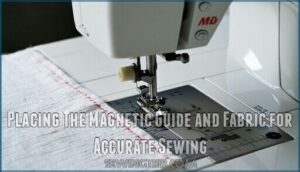
With the throat plate located, place your magnetic guide perpendicular to the needle, measuring your desired seam allowance distance.
Position fabric against the guide’s edge for consistent fabric alignment. The magnetic sewing accessories create a reliable fence for stitching accuracy.
Keep fabric flat against the guide throughout sewing to prevent slippage and guarantee accurate seams with consistent edges every time, ensuring a reliable outcome with magnetic sewing accessories.
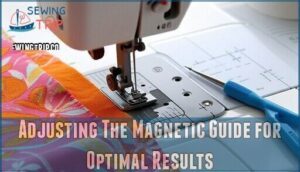
Adjusting The Magnetic Guide for Optimal Results
Fine-tuning your magnetic guide makes the difference between good and great results. Small adjustments transform sewing accuracy tools into precision aids for professional-quality work.
Here’s how to optimize your Guide Repositioning:
- Test Magnet Strength – Verify the guide stays put during fabric movement without restricting material flow
- Account for Fabric Thickness – Thicker materials require slightly wider positioning to maintain consistent seam allowances
- Check Needle Offset – Make certain your needle aligns perfectly with your intended seam line measurement
- Perform Fine Tuning – Make micro-adjustments by moving the guide in small increments until alignment is perfect
- Validate with Test Stitches – Run practice seams on fabric scraps to confirm your sewing alignment tools deliver accurate results
These magnetic sewing accessories work best when positioned precisely for your specific project needs. Consider using a sewing guide adjustment for enhanced precision.
Advanced Magnetic Sewing Guide Techniques
Once you’ve mastered the basics, you can explore advanced techniques that’ll make your magnetic sewing guide even more powerful.
These methods work with computerized machines and help you achieve professional-level precision in your projects.
Using a Magnetic Sewing Guide With Computerized Machines
Using magnetic sewing guides with computerized machines is perfectly safe when you place them on the metal throat plate only.
Modern sewing machine electronics won’t be affected by standard magnetic alignment tools since the magnets aren’t strong enough to interfere with sensor compatibility or stitch regulation systems.
Your computerized machine’s automated adjustments and error detection features continue working normally, and firmware updates remain unaffected by these handy sewing aids, which utilize magnetic alignment tools.
Achieving Perfect Seam Allowance With a Magnetic Guide
Precise seam accuracy starts with strategic guide placement on your sewing machine’s throat plate.
Position your magnetic alignment tools at the exact distance you need, then test fabric control with scraps first.
This approach guarantees consistent width across all seams, making problem solving easier when your sewing guide sewing doesn’t match expectations initially, which is why precise seam accuracy is crucial.
Exploring Alternative Seam Guides for Specific Projects
While magnetic guides work great, you’ll sometimes need alternatives for specific sewing projects.
Presser feet with built-in guides excel for quilting’s precise quarter-inch seams.
Laser guides project lines onto fabric without touching your sewing machine guide surface.
Tape methods offer flexibility—diagonal seam tape helps with angles, while masking tape creates custom fabric guide sewing widths.
For fabric marking, washable pens let you draw seam lines directly.
These guides often feature strong magnets for stability.
When your sewing accessories won’t cooperate, freehand sewing builds valuable skills for any sewing project, utilizing alternative methods and custom fabric guides to achieve precise seams with strong magnets.
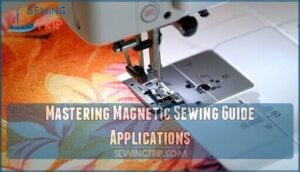
Mastering Magnetic Sewing Guide Applications
Once you’ve grasped the basics, you’ll want to apply your magnetic sewing guide skills to real-world projects.
These practical applications will help you create professional-looking seams and solve common stitching challenges you encounter in your daily sewing work, which will also help you to improve your overall sewing skills.
Sewing Straight Lines With a Magnetic Guide
Perfect seams aren’t just about the sewing machine guide – they’re about consistency in your approach.
Your magnetic alignment guide becomes your trusted partner for sewing straight lines when properly positioned on the throat plate.
Here’s how to master straight-line sewing:
- Position your needle correctly – align it with your chosen seam allowance marking
- Check fabric types compatibility – heavier materials may require stronger magnets
- Maintain steady presser foot pressure – consistent contact prevents fabric wandering
- Follow guide maintenance routines – clean magnetic surfaces regularly for maximum grip
- Practice consistent seams – feed fabric at steady speeds for professional results
Creating Customized Sewing Tools With Magnetic Guides
Beyond straight lines, you can craft specialized quilting accessories and sewing gadgets suited to your projects.
Multiple magnetic guides create custom Multi-Guide Setups for complex patterns, while DIY Guide Materials let you build Personalized Guide Shapes using different Magnetic Strength Options.
| Custom Tool Type | Application |
|---|---|
| 3D Printed Guides | Complex curved seams and specialty shapes |
| Multi-Magnet Arrays | Parallel quilting lines and grid patterns |
| Adjustable Spacing Systems | Variable seam allowances and stepped edges |
These sewing tools transform basic magnetic guides into extensive sewing accessories guide systems for any quilting guide application.
Troubleshooting Common Issues With Magnetic Sewing Guides
When your sewing guide starts acting up, you’ll face predictable problems with simple fixes.
Guide Slippage happens when weak Magnetic Strength can’t grip your throat plate—clean the surface and check Machine Compatibility.
Fabric Snagging occurs when guides sit too high or catch material edges.
Seam Unevenness results from improper positioning or inconsistent fabric feeding.
These sewing accessories work best when you match sewing gadgets to your machine type, ensuring your sewing precision aids deliver consistent sewing efficiency.
To prevent issues, remember pre-washing helps immensely.
Frequently Asked Questions (FAQs)
Are magnetic seam guides worth it?
Like a trusty compass guiding sailors through stormy seas, magnetic seam guides become invaluable tools for sewers seeking consistent, professional results.
They’re absolutely worth it—these guides eliminate guesswork, guarantee straight seams, and boost your sewing confidence dramatically.
What does a magnetic wand do in sewing?
A magnetic wand helps you pick up pins, needles, and metal scraps that’ve fallen while sewing. You’ll wave it over your workspace to collect dropped items quickly and safely.
Can magnetic guides damage computerized sewing machines?
Yes, magnetic guides can potentially damage computerized sewing machines.
Strong magnets may interfere with electronic components, sensors, or memory systems.
You’ll want to keep magnetic accessories away from computerized models to avoid costly repairs.
Do magnetic guides work on vintage machines?
Old iron horses mightn’t have the magnetic personality for modern guides, but they’ll work if your machine’s bed contains enough steel to create attraction.
How to clean magnetic guides properly?
Remove your magnetic guide from the sewing machine carefully.
Wipe it down with a soft, damp cloth to eliminate fabric fibers and dust.
Dry thoroughly before reattaching to prevent rust formation.
Which fabrics work best with magnetic guides?
Like sorting coins by metal type, magnetic guides grip firmly to cotton and linen but slide around on slippery synthetics.
You’ll get best results with medium-weight natural fabrics that won’t overpower the magnet’s hold.
Can multiple magnetic guides be used simultaneously?
Multiple magnetic guides can absolutely be used together for complex sewing projects.
Position them at different distances from your needle to create parallel seam lines or use them for corner guides and curved seams simultaneously.
Conclusion
Practice makes perfect when learning how to use a magnetic sewing guide effectively.
Mastering this simple tool transforms your sewing accuracy from amateur to professional quality. You’ll discover that consistent seam allowances aren’t just about precision—they’re about building confidence in every project you tackle.
Whether you’re quilting intricate patterns or constructing garments, your magnetic sewing guide becomes an indispensable partner.
With practice, you’ll rely less on measuring and more on muscle memory, creating beautifully finished pieces every time.
- https://madamsew.com/products/universal-magnetic-seam-guide-press-feet-for-sewing-machines-diy-crafts-parts
- https://sewcutepatterns.com/blog/best-magnetic-seam-guides-for-your-sewing-machine
- https://www.youtube.com/watch?v=_XxfL8nWD0s
- https://www.nytimes.com/wirecutter/reviews/magnetic-seam-guide/
- https://www.reddit.com/r/sewing/comments/16zzcwz/how_can_i_get_better_at_keeping_my_seams_straight/

