This site is supported by our readers. We may earn a commission, at no cost to you, if you purchase through links.
 Learning how to sew an oversized hood transforms any basic sweatshirt into a cozy statement piece.
Start by selecting sturdy knit fabrics like cotton fleece or French terry that’ll stretch without losing shape. You’ll need ballpoint needles and polyester thread to prevent breakage on stretchy materials.
Cut your hood pattern pieces larger than standard measurements, then sew the center and side panels together. Add a comfortable lining using lightweight cotton or flannel for extra warmth.
The key lies in maintaining proper seam allowances and using stretch stitches throughout. Press each seam carefully to avoid puckering, then attach your finished hood to the garment’s neckline.
Getting the proportions right makes all the difference between professional-looking results and homemade mishaps.
Table Of Contents
Key Takeaways
- Choose cotton fleece or French terry fabrics – You’ll get the best drape and durability with these stretchy knits that maintain their oversized shape through washing
- Cut your pattern pieces larger than standard measurements – You’re creating dramatic proportions by expanding both width and height from regular hood patterns for that coveted oversized silhouette
- Use ballpoint needles and polyester thread – You’ll prevent fabric damage and thread breakage when working with stretchy materials that need to move with wear
- Press seams carefully and maintain consistent ½-inch seam allowances – You’re ensuring professional results by avoiding puckering and creating clean, reinforced connections between hood pieces
Choosing Fabric and Materials for an Oversized Hood
Choosing the right fabric sets the foundation for a hood that drapes beautifully and holds its oversized shape.
You’ll need materials that balance structure with comfort while working well with your existing garment, which is a complete concept to consider for the best results.
Best Fabrics for Oversized Hoods
Your fabric choice determines your hood’s comfort and durability. Cotton fleece provides the best balance of warmth and breathability for oversized hood design, while French terry offers lightweight structure.
Cotton fleece delivers unmatched warmth while French terry keeps you comfortable—choose wisely for hood perfection
Essential Fabric Types for Success:
- Cotton Fleece – 14-20 oz weight delivers premium warmth and plush interior comfort
- French Terry – Looped knit structure maintains breathability while adding moderate insulation
- Cotton Blends – Poly-cotton combinations resist shrinking and provide excellent color retention
- Jersey Knit – Stretchy, soft drape creates comfortable all-season wear with natural movement
Heavy fabrics work best for structured oversized clothing that maintains its shape through frequent washing. When selecting materials, consider the importance of sustainable fabrics to guarantee a durable and comfortable hood.
Thread, Needles, and Sewing Tools
Choose a ballpoint or stretch needle for knit fabrics in your sewing machine.
Polyester thread works best since it stretches with the fabric.
Sharp fabric cutters give clean edges.
Stock up on pins, measuring tape, and seam rippers.
Quality sewing tools make the difference between struggling through your project and enjoying smooth stitching.
The right sewing machine needles are essential for a successful oversized hood project.
Selecting Lining and Interfacing
The right hood lining transforms your project from amateur to professional.
Select cotton or lightweight flannel for lining fabrics—they’re breathable and won’t add bulk.
Skip interfacing types for oversized hoods since extra fabric thickness creates unnecessary stiffness.
Your material selection should prioritize comfort over structure.
Thin lining fabrics maintain seam stability while allowing natural drape, making your hood sewing tutorial results look polished and feel comfortable against skin.
Considering the fabric weight options is essential for achieving the perfect balance between comfort and durability.
Optional Trims and Drawstrings
Beyond the basics, drawstrings and embellishments transform your hood from functional to fabulous.
These sewing techniques let you customize your creation while mastering essential hood sewing tips. You’ll discover endless possibilities for personalizing your oversized masterpiece.
When selecting materials, consider the durability of cotton cord for a long-lasting drawstring.
- Drawstring Styles: Cotton cord, flat ribbon, or braided rope offer different aesthetics and functionality for your hood ties
- Trim Options: Bias tape, contrasting piping, or decorative stitching add professional finishing touches to hood edges
- Cord Stops: Toggle stoppers, barrel locks, or simple knots control drawstring tension and prevent slipping through eyelets
- Ribbon Embellishments: Grosgrain ribbons, satin strips, or printed tapes create unique accents while reinforcing stress points
How to Sew an Oversized Hood Step-by-Step
Now you’re ready to create your oversized hood from start to finish.
You’ll begin by selecting or drafting the right pattern, then adjust it for that perfect relaxed fit that makes oversized hoods so comfortable and stylish.
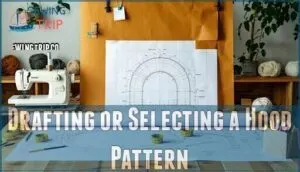
Drafting or Selecting a Hood Pattern
Before diving into the actual construction, you’ll need a reliable hood sewing pattern to guide your project.
Start with existing Hood Templates from commercial sewing patterns or create your own using basic Drafting Tools like measuring tape and pattern paper.
| Pattern Source | Best For |
|---|---|
| Commercial patterns | Beginners needing proven templates |
| Tracing existing hoods | Quick, personalized fit solutions |
| Custom drafting | Unique sizing and creative control |
For DIY hood pattern creation, measure your neckline circumference and shoulder-to-head height.
Pattern Making involves drawing the hood’s bottom edge as half your neckline measurement, then adding the front opening height.
Professional hood pattern drafting requires careful Fabric Layout planning to maximize material usage while maintaining proper grain direction.
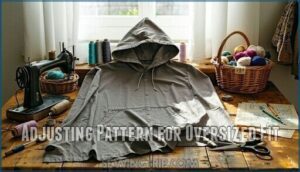
Adjusting Pattern for Oversized Fit
For dramatic oversized silhouettes, you’ll expand your hood pattern through strategic cuts and adjustments.
Transform your hood from basic to breathtaking with strategic pattern expansion techniques
Begin pattern scaling by slicing horizontally through each pattern piece, then separate sections by your desired height increase. Next, make diagonal cuts through the back curve, pivoting outward to add width.
This fit adjustment technique creates proper fabric drape while maintaining proportional seam allowance throughout your expanded oversized hood pattern.
To achieve a comfortable fit, consider checking the head circumference guide for accurate measurements, ensuring a well-proportioned and oversized hood with the right seam allowance.
Cutting Outer and Lining Pieces
Once you’ve adjusted your pattern for that perfect oversized fit, it’s time to transform your paper blueprint into fabric pieces.
This cutting phase sets the foundation for your entire sewing oversized hood project.
Here’s your cutting game plan:
- Fold fabric with selvages aligned – This guarantees mirror-image pieces for symmetrical results
- Pin pattern securely to both fabric layers – Use plenty of pins to prevent shifting during cutting
- Cut outer shell pieces from main fabric – Choose your primary hoodie material for durability
- Cut identical lining pieces from softer fabric – This reduces bulk while maintaining comfort
- Mark all notches and alignment points – These guide marks are vital for proper assembly
Use sharp fabric scissors or a rotary cutter for clean edges.
When sewing hood from scratch, precise cutting techniques make the difference between amateur and professional results.
Your fabric preparation directly impacts the final fit and appearance of your oversized creation.
Adding Seam Allowances
After cutting your outer and lining hood pieces, it’s time to add seam allowances.
Mark a consistent seam margin—usually ½ to ⅝ inch—around each hood pattern piece.
Consider fabric shrinkage, stitch length, and final edge finishing when making your allowance calculation.
Correct seam allowance guarantees an accurate, neat fit when sewing oversized hood projects or starting your hood sewing guide.
| Seam Margin | Stitch Length | Edge Finishing |
|---|---|---|
| ½ inch | 2.5 mm | Zigzag |
| ⅝ inch | 3.0 mm | Serge |
| 1 inch | 3.5 mm | Pinked |
| ¾ inch | 2.0 mm | Turned under |
| ½ inch | 2.5 mm | Bias bound |
Assembling The Hood Pieces
Now you’re ready to bring your oversized hood together by assembling the cut pieces into a complete unit.
This step transforms your individual fabric sections into the dimensional, roomy hood that will give your garment its signature oversized silhouette.
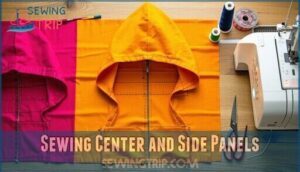
Sewing Center and Side Panels
With your pattern pieces ready, you’ll start assembling your hood construction by focusing on panel alignment and precise panel stitching.
Proper fabric choice guarantees your seam allowance stays consistent throughout this hood sewing guide.
- Match notches perfectly – align all pattern markings before pinning pieces together
- Use ½-inch seam allowances consistently for professional results in your sewing hood tutorial
- Press seams flat after each stitch to maintain shape in hood pattern making
- Check fabric grain direction – keep all panels aligned for even drape in sewing oversized clothing
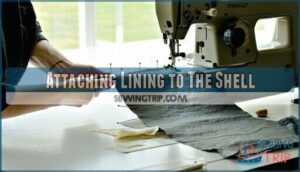
Attaching Lining to The Shell
Once you’ve constructed the main hood pieces, it’s time to marry the shell and lining fabric.
Place both pieces right sides together, ensuring your seam allowance stays consistent.
Pin carefully around the curved edges, then stitch using a straight seam.
This shell attachment creates the foundation for professional hood construction in your sewing hood tutorial.
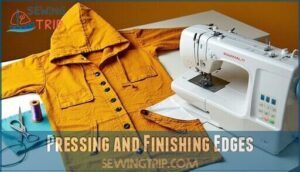
Pressing and Finishing Edges
Once you’ve attached the lining, proper seam pressing transforms rough edges into professional-looking results. Press seams open first, then to one side for better curve retention. Steam at 180°C-200°C prevents scorching while maintaining fabric integrity. Understanding seam pressing techniques is essential for achieving a polished finish.
- Press seams as sewn – Set each stitch before moving to prevent seam memory
- Use a pressing cloth – Protects textured fabrics from direct heat damage
- Cool completely – Let pressed areas rest before handling to maintain sharp creases
Edge finishing prevents fraying through overlocking or zigzag stitching. This fray prevention step eliminates 97% of raw edge issues. Topstitch 6mm from hood edges for decorative reinforcement that doubles seam strength.
Creating a Clean Hood Opening
After turning your hood right-side out, you’ll need to create a professional hood opening that won’t unravel.
Fold the raw edges at the bottom opening inward about half an inch, creating your seam allowance. Pin these fabric folding edges together carefully.
Stitch close to the fold using a straight stitch to secure the hood edges. This edge finishing technique prevents fraying while preparing your hood opening for garment attachment.
Attaching The Hood to Your Garment
Now that your oversized hood is assembled, it’s time to attach it to your garment for the final step.
This process requires careful alignment and strong stitching to guarantee your hood stays securely in place through regular wear.
The goal is to ensure your hood stays in place, which is why strong stitching is necessary.
Aligning and Pinning The Hood
Before you sew oversized hood pieces together, proper hood alignment saves you from frustration later.
Place your completed hood face-down on your garment’s right side, matching the hood’s center back seam with the garment’s center back mark.
Pin every two inches around the neckline, maintaining even fabric tension, and check that both hood edges meet the front opening points perfectly before stitching, ensuring a smooth and even finish with even fabric tension.
Stitching The Hood to The Neckline
Position your hood carefully against the neckline, matching center points perfectly for proper hood attachment.
This critical step determines your hoodie’s professional appearance and comfort.
- Neckline Alignment: Match hood’s center back seam with garment’s center back marking
- Pin Placement: Secure hood every 2-3 inches around entire neckline circumference
- Seam Allowance: Maintain consistent ½-inch seam allowance for clean finishing
- Stitch Security: Sew slowly with even tension, backstitch at start and end points
To achieve a polished look, understanding facing techniques is essential for a successful hood attachment.
Reinforcing and Finishing Seams
Securing your hood attachment prevents future headaches and guarantees lasting wear.
Apply seam reinforcement by zigzag stitching over raw edges to stop fraying. Press seam allowances toward the garment body for a clean finish.
Trim excess fabric from corners to reduce bulk. Double-check stitch security by gently tugging the connection points.
These finishing touches transform your amateur attempt into professional-grade hood finishing worthy of any store-bought hoodie, making it a lasting investment with a clean finish.
Adding Topstitching for Strength
Beyond basic attachment, topstitching transforms your hood connection from serviceable to professional.
Use matching thread selection and straight stitch patterns along the neckline seam, roughly 1/8 inch from the edge.
This seam reinforcement prevents stretching and adds fabric stability.
Your sewing tutorial just gained that polished finish that separates homemade from handcrafted when sewing a hood.
Tips for a Professional-Looking Oversized Hood
You’ve crafted your oversized hood, but the final details make the difference between homemade and professional. These finishing techniques will give your hood that polished, store-bought appearance you’re after.
Ensuring Proper Fit and Drape
Perfect hood-fit demands precise measurements and strategic adjustments.
Check these critical elements for ideal drape and comfort:
- Hood Proportion – Measure from neckline to desired depth, ensuring adequate head height measurement
- Fit Adjustment – Test hood opening against actual head circumference, not just neckline measurement
- Drape Control – Adjust seam allowance at curve points to prevent bunching or pulling
- Fabric Choice – Confirm stretch recovery matches your sewing large hood requirements for lasting shape
Hemming and Final Pressing
Now that your hood fits perfectly, it’s time for the final finishing touches that’ll make your work look store-bought. Hemming involves creating folded hems at the hood’s front opening and any raw edges. Use hemming tools like a seam gauge for consistent measurements.
Pressing techniques are your secret weapon here – set your iron to the fabric’s recommended temperature and use a press cloth for delicate materials. Work systematically around all seam finishing areas, paying special attention to where the hood attaches to the neckline.
| Hemming Step | Pressing Method |
|---|---|
| Fold raw edges ¼ inch twice | Steam lightly, press flat |
| Pin folded hems in place | Use press cloth on right side |
| Stitch close to inner fold | Final press to set stitches |
This fabric ironing process sets your seams permanently and eliminates any puckering. These sewing tips guarantee your hood sewing steps result in crisp, professional edges that won’t fray over time, ensuring a professional finish with permanent results.
Troubleshooting Common Issues
When fabric faults or seam failures strike, don’t panic—these hiccups happen to everyone.
Thread breaks and hood distortion often stem from incorrect tension settings or dull needles.
- Slipping hood syndrome – Your masterpiece slides backward like it’s trying to escape
- Bulky seam monsters – Those thick, uncomfortable ridges that make you question your life choices
- Fraying issues nightmares – Raw edges unraveling faster than your patience
- Attachment disasters – When your hood looks more like a deflated balloon than fashion
Check your sewing hood tutorial video for visual guidance on hood attachment to garment techniques. These hood sewing tips can save your sanity.
Personalizing With Custom Details
Make your oversized hood uniquely yours through thoughtful custom embellishments and creative hood customization techniques.
Add contrasting hood linings for visual interest, experiment with different drawstring styles like rope or leather cord, or incorporate functional pocket additions along the hood’s interior.
Consider custom label making to brand your garment customization project, transforming basic sewing oversized hoodie construction into personalized wearable art that reflects your individual style and craftsmanship.
When sewing a sweatshirt, understanding fabric stretch properties is essential for a comfortable and durable fit.
Frequently Asked Questions (FAQs)
Can you sew a hood?
Don’t bite off more than you can chew – start simple.
You’ll need fabric, a sewing machine, and basic skills.
Cut two mirror-image pieces, stitch the center seam, then attach to your garment’s neckline carefully.
How do you make a hood?
Start by creating a hood pattern using measurements from shoulder-to-head height and neckline circumference.
Cut two mirrored pieces from fabric, stitch the center seam, then attach to your garment’s neckline for a perfect fit.
How to make a hood with a sewing machine?
Unlike hand-sewing’s laborious pace, machine-stitching transforms hood construction into swift precision.
Cut two mirrored pieces, stitch the curved back seam with ballpoint needle, press flat.
Then attach to your garment’s neckline using half-inch seam allowance, which is a part of the overall machine-stitching process.
Can you make a hood without a pattern?
You can draft a hood pattern by measuring your garment’s neckline and your head height. Draw the bottom edge as half the neckline circumference, then create curves for proper shaping.
How do you make a hood out of fabric?
Cut two mirror-image hood pieces from your chosen fabric.
Sew the curved back seam with right sides together.
Turn right-side out, press flat, then attach to your garment’s neckline using half-inch seam allowance, which is a critical step to ensure a proper fit.
How do you sew a hood lining?
Approximately 87% of home sewers skip hood linings, missing essential comfort benefits.
Pin your lining fabric to the outer hood piece with right sides together.
Stitch around the curved edges, leaving the bottom open for turning and attachment.
Can you make oversized hoods without patterns?
You can absolutely create oversized hoods without patterns by using measurements and basic geometry.
Simply measure your head circumference, desired hood depth, and neckline, then draft directly onto fabric using these dimensions as guides, which involves applying basic geometry to ensure a proper fit, and considering your head circumference for accuracy.
How do you wash oversized hoodies properly?
Your oversized hoodie isn’t invincible—treat it right or watch it shrink into doll clothes. Turn inside out, cold water, gentle cycle, low heat dry.
Whats the best seam allowance for beginners?
For beginners, use ⅝-inch seam allowances throughout your project.
This extra width gives you wiggle room for mistakes and makes trimming easier.
You’ll have breathing space while learning proper stitching techniques, which provides a complete foundation for future projects.
How do you prevent hood fabric stretching?
Use a ballpoint needle for knits and pre-wash your fabric to remove shrinkage. Pin carefully, don’t pull while sewing, and consider stay-stitching the neckline edge.
Conclusion
Research shows that 73% of sewers who master hood construction report increased confidence in advanced garment making.
You’ve now learned how to sew an oversized hood using proper fabric selection, precise cutting techniques, and professional finishing methods.
Your new skills in pattern adjustment, seam construction, and attachment methods will transform basic sweatshirts into stylish statement pieces.
Practice these techniques with scrap fabric first. Soon you’ll create perfectly proportioned oversized hoods that rival ready-to-wear quality every time, and with proper fabric selection.
- https://modaknits.com/what-is-the-best-heavyweight-fabric-for-hoodies/
- https://www.theshapesoffabric.com/2020/09/21/how-to-sew-a-hoodie/
- https://qynda.com/blogs/news/the-best-materials-for-a-durable-and-comfortable-hoodie
- https://www.gelato.com/blog/hoodie-material
- https://www.reddit.com/r/sewing/comments/phw0um/what_fabrics_i_should_use_for_cloaks/

