This site is supported by our readers. We may earn a commission, at no cost to you, if you purchase through links.
Trim the ends at a 45-degree angle and seal them with a lighter to keep fraying at bay.
Use a heavy-duty sewing machine, high-tension 200+ denier nylon thread, and set up a zigzag or bar-tack stitch for strength.
Adjust your machine’s presser foot for rope thickness and test on scraps first.
With a little patience and the right setup, you’ll turn old rope into rugged, stylish gear—there’s more to mastering rope sewing than meets the eye.
Table Of Contents
Key Takeaways
- Prepare your rope properly – You’ll need to inspect a retired climbing rope, clean it thoroughly, trim the ends at 45-degree angles, and seal them with a lighter to prevent fraying before you start sewing.
- Use heavy-duty equipment and materials – You’ll require a robust sewing machine with high clearance, 200+ denier nylon thread, and zigzag or bar-tack stitching patterns to handle thick climbing rope effectively.
- Never use sewn rope for actual climbing – Your DIY repairs won’t meet safety standards and will retain only 65-80% of the original strength, so limit projects to non-load-bearing crafts like bowls, coasters, and camp gear.
- Master reinforcement techniques for durability – You’ll need at least six passes with proper thread tension and bar-tack stitching at stress points to create rope crafts that’ll withstand regular use without failing.
Preparing Climbing Rope for Sewing
Before you transform that retired climbing rope into useful crafts, you’ll need to properly prepare it for your sewing machine.
Start by inspecting the rope for damage, cleaning off any dirt or chalk residue, and carefully trimming the ends to create smooth tapers that won’t jam your machine.
This process is crucial for ensuring that your sewing machine operates smoothly and efficiently with the retired climbing rope.
Inspecting and Selecting Retired Rope
The success of your rope sewing project starts with careful inspection of retired climbing rope.
Check for fiber type—nylon‘s elasticity makes it ideal for crafting projects.
Assess rope condition by examining the sheath for cuts, abrasion, or core exposure.
Test material quality by flexing sections; stiff or brittle areas indicate age-related deterioration.
Document rope age and damage assessment findings before proceeding with your climbing rope maintenance project.
Cleaning and Drying Rope Safely
Before jumping into rope sewing techniques, you’ll want to properly clean your retired climbing rope.
Start with rope sanitizing using mild soap and lukewarm water to remove dirt and oils. Rinse thoroughly, then focus on mildew prevention through complete drying in well-ventilated areas away from direct sunlight.
Proper dry storage protects fiber integrity and prevents deterioration that could compromise your future sewing projects, ensuring the rope remains in good condition for future sewing projects.
Trimming and Tapering Rope Ends
After cleaning your retired rope, you’ll need proper rope trimming for successful sewing projects.
Creating tapered cuts prevents fraying and guarantees smooth stitching patterns.
Here’s your rope finishing approach:
- Cut rope ends at 45-degree angles – This creates gradual tapers that won’t bunch under your presser foot
- Trim core material shorter than sheath – Leave about 1/2 inch of sheath extending past the core
- Seal cut ends with lighter flame – Quick heat application prevents unraveling during sewing rope ends
These tapered cuts make climbing rope maintenance much easier when you start stitching.
Removing or Adjusting Rope Core
Four key steps facilitate proper core removal for climbing rope sewing projects.
Start by locating the rope’s center and gently separating the protective sheath from the inner core using needle-nose pliers.
Pull out approximately two inches of core material, then trim it diagonally for smooth fiber adjustment.
This core trimming technique prevents bunching during rope threading and creates clean rope tapering essential for professional climbing rope sewing results.
Understanding the best sewing nylon webbing techniques is vital for achieving durable and reliable climbing ropes, which requires professional climbing rope sewing results.
How to Sew Climbing Rope Step by Step
Now you’ll move from preparation to the actual sewing process, which requires specific machine settings and careful technique.
The key to successful rope crafting lies in understanding your sewing machine’s limitations and making the right adjustments for thick climbing rope materials, which is crucial for successful outcomes.
Choosing The Right Sewing Machine
Your machine’s Motor Power determines whether you’ll breeze through rope projects or fight every stitch.
Heavy-duty machines with high torque motors handle thick climbing rope efficiently, while lightweight domestic models struggle with dense synthetic fibers.
Look for industrial-grade options with walking foot mechanisms and adjustable Clearance Adjustment features.
When working with heavy materials, understanding heavy duty sewing is vital for achieving professional results.
- Machine Types like Sailrite Heavy-Duty deliver consistent performance where household models fail
- Thread Capacity and Stitch Options prevent frustrating mid-project interruptions
- Professional sewing machine modifications reveal complex rope crafting possibilities
Adjusting Presser Foot and Machine Clearance
Modify your sewing machine’s presser foot clearance to accommodate climbing rope’s thickness. Most household machines handle 6mm cord easily, but climbing rope needs adjustments.
| Rope Diameter | Required Clearance | Modification Level |
|---|---|---|
| 8.5mm | 9mm minimum | Presser foot adjustment |
| 9.5mm | 10mm minimum | Linkage modification |
| 11mm | 12mm minimum | Throat plate work |
| 12mm+ | Custom setup | Major modifications |
Adjust your presser foot linkage first—this simple tweak often provides enough rope compatibility for most projects without complex sewing machine modifications. Understanding proper machine parts is essential for successful modifications, and you can find more information at machine parts. This will help you achieve the necessary presser foot clearance and linkage modification for your specific rope diameter, ensuring a successful project with the right modification level.
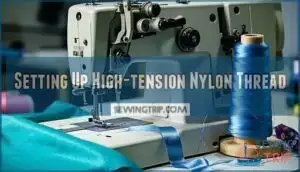
Setting Up High-tension Nylon Thread
Once your machine clears thick rope, thread selection becomes critical for durability.
High-strength nylon thread prevents breakage under tension, while proper thread tension guarantees consistent stitches that won’t slip or fail during use.
Essential thread setup steps:
- Choose 200+ denier nylon thread – Heavy-duty thread handles climbing rope’s tough texture without snapping mid-project
- Apply thread waxing for extra grip – Waxed thread glides smoothly while maintaining superior holding power through rope fibers
- Set maximum thread tension – Tight tension creates secure stitches that won’t loosen when your finished project gets heavy use
- Test stitch quality on scraps first – Perfect your sewing prep before committing to your main rope piece
Quality rope sewing threads make all the difference between a project that lasts years versus one that falls apart after light use.
Your sewing machine adjustments mean nothing without proper thread that can handle the job.
Understanding the properties of ripstop nylon fabric is vital for selecting the right thread and techniques for your climbing rope project.
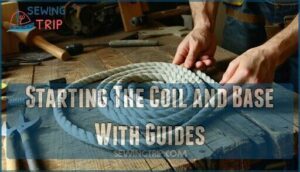
Starting The Coil and Base With Guides
Begin your rope coil formation by creating a tight spiral pattern from the rope’s center.
Trim the core diagonally at the starting point to prevent holes in your base.
Set up base guides using packing tape or found objects to maintain consistent spacing.
This core adjustment guarantees smooth coil formation as you build outward, preparing perfect foundation for your rope sewing techniques and stitching patterns ahead, which ensures a perfect foundation.
Using Zig-zag Stitch for Secure Seams
With your Zig Zag Stitch pattern set, you’ll create secure seams that distribute rope tension evenly.
Adjust sewing speed to maintain consistent stitch density—about 18 stitches per inch works best.
Your thread selection determines seam strength, so choose industrial-grade nylon.
This zigzag technique transforms retired climbing gear into durable rope loops through proper machine setup and controlled tension, ensuring secure seams.
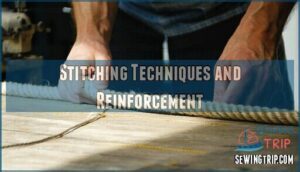
Stitching Techniques and Reinforcement
You’ll need to master the right stitch patterns to create strong, durable seams that won’t fail when your rope crafts get heavy use.
The key is using proper tension settings and making enough passes to distribute stress evenly across the sewn joint, which is crucial for creating durable seams.
Lock-stitch and Zig-zag Patterns
Choosing proper stitch patterns transforms your rope projects from amateur attempts into professional-grade crafts.
Lock-stitch provides consistent strength for straight seams, while zigzag stitch offers flexibility that won’t snap under stress.
Adjust your machine settings for rope thickness—thicker ropes need slower sewing speed and higher thread tension.
These rope sewing techniques guarantee your climbing gear modifications stay secure through countless adventures, using the right techniques for professional-grade crafts.
Bar-tack Stitching for Strength
Bar-tack stitching creates bulletproof connections in climbing rope projects.
You’ll use dense zigzag stitch patterns with extra-heavy thread like T-400 nylon to achieve maximum material strength.
Your sewing machines need high rope tension settings and proper thread selection for these concentrated reinforcement zones that outperform knots every time.
For ideal results, consider the heavy duty machines that can handle thick ropes and provide consistent stitch quality.
Lacing and Weaving Alternatives
Hand-lacing techniques offer reliable alternatives when sewing climbing gear isn’t feasible.
These Fiber Arts methods work well for decorative rope projects and non-critical applications.
Consider these Weaving Techniques for rope crafts:
- Rope Lacing – Thread smaller cord through drilled holes for secure joints
- Macrame Patterns – Create decorative knots using traditional fiber arts methods
- Textile Design – Weave rope ends together using over-under patterns
- Manual splicing – Separate core fibers and weave them back together permanently
These alternatives complement rope sewing machines when standard stitching patterns won’t work for your specific project needs.
Minimum Passes and Thread Tension
When weaving doesn’t cut it, proper thread tension and stitch density become your rope’s lifeline.
You’ll need minimum six passes with 200+ denier nylon thread for climbing rope splicing. Crank that thread tension high—loose stitches spell disaster.
Slow your sewing speed to maintain consistent stitch density. Heavy-duty rope sewing machines handle this better than household models.
Remember: rope strength depends on these fundamentals when sewing climbing gear or rope loops. Achieving essential thread tension settings is vital for reliable and durable climbing ropes, as effective thread tension settings make all the difference.
Customizing and Finishing Rope Projects
Once you’ve mastered the basic stitching techniques, you can transform your climbing rope into beautiful, functional items with professional-looking finishes.
The key lies in smooth terminations, creative handles, and understanding what shapes work best with your machine’s capabilities, which involves complete concepts of design and functionality.
Creating Smooth Terminations and Tapers
Proper rope ends prevent unraveling and create professional results.
Pull out the core material from inside the sheath, then cut it on a diagonal angle to create a gradual taper. This rope trimming technique eliminates bulk and guarantees smooth finishes.
- Core Removal: Extract 2-3 inches of internal fibers before cutting
- Tapering Techniques: Cut rope ends at 45-degree angles for seamless integration
- Rope Protection Sewing: Secure tapered ends with tight zig-zag stitches
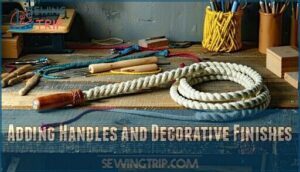
Adding Handles and Decorative Finishes
Once you’ve mastered smooth rope terminations, you can transform basic projects into stunning finished pieces through creative handle materials and decorative stitches.
Try leather wrapping, paracord weaving, or contrasting thread colors for rope embellishments.
These finish techniques let you customize climbing rope crafts while maintaining structural integrity through proper rope stitching patterns.
The quality of climbing rope handles, such as those found in Climbing Rope, can greatly impact the overall durability and safety of the rope.
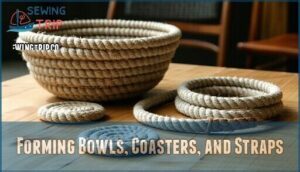
Forming Bowls, Coasters, and Straps
With climbing rope’s natural flexibility, you can create functional rope bowls, coasters, and straps using consistent coil techniques and steady zig-zag stitching for durable results.
- Rope Bowls: Start with tight center coils, gradually increasing diameter while maintaining even stitch spacing for sturdy rope crafts
- Coaster Making: Keep flat profiles using uniform tension and rope sewing techniques for consistent thickness throughout each piece
- Strap Designs: Fold rope ends back and secure with bar-tack stitching when sewing climbing ropes for reliable load-bearing connections
When working with various materials, understanding sewing machine projects can enhance your overall crafting experience.
Machine Limitations for Complex Shapes
Standard home sewing machines face significant geometric constraints when sewing climbing ropes into complex three-dimensional shapes.
Home machines hit serious limits when tackling complex rope shapes and tight curves
Most machines can’t handle sharp 90-degree bends or deep cylindrical forms due to machine clearance limitations and sewing barriers around the needle area.
| Shape Type | Difficulty Level | Machine Requirements |
|---|---|---|
| Flat coasters | Easy | Standard clearance |
| Shallow bowls | Moderate | 8-10mm throat space |
| Deep cylinders | Very Hard | Major modifications |
| Sharp corners | Nearly Impossible | Custom throat plates |
| Handles/loops | Easy-Moderate | Adequate arm space |
Your machine’s throat plate and presser foot create shape restrictions that limit material maneuverability.
While rope sewing techniques work well for bowls and straps, climbing equipment sewing requiring tight curves often hits these material limits, forcing you to stick with gentler, flowing designs, which can be a significant geometric constraint.
This limitation is particularly notable when dealing with complex three-dimensional shapes, as the machine’s capabilities are significantly restricted.
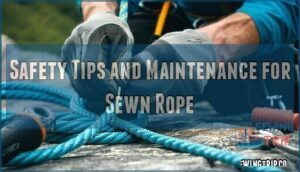
Safety Tips and Maintenance for Sewn Rope
Properly sewn climbing rope requires regular inspection to guarantee the stitches remain secure and the rope shows no signs of wear or damage.
You’ll want to understand the load limitations of your sewn projects and know when professional repair or replacement becomes necessary for safety.
Inspecting Stitches and Rope Integrity
Regular rope inspection and stitch quality checks prevent dangerous failures during use.
Look for loose threads, uneven tension, or gaps in your zig-zag stitching patterns.
Check for rope damage like fraying, cuts, or core exposure that could compromise your project’s integrity.
Test material strength by gently pulling sewn sections—any separation indicates sewing errors requiring immediate repair using proper rope sewing techniques and climbing rope care methods.
Load Strength and Safety Considerations
Under load and beyond typical crafting, sewn climbing rope demands serious attention to certification marks and safety standards.
Sewn connections are never safe for actual climbing—they’re only for repurposing retired rope into crafts
Your DIY rope repair sewing won’t match factory specifications, so understanding load capacity becomes essential for climbing equipment repair projects.
- Rope Testing – Sewn terminations retain only 65-80% of original strength compared to factory specifications
- Safety Standards – Look for EN or UIAA certification marks on professional rope climbing gear
- Load Capacity – Apply 2.5× safety margin above anticipated maximum load for sewn connections
- Failure Points – Most sewn rope failures start at stitch lines due to thread wear or misalignment
- Sewing Rope Loops – Use bar-tack patterns with high-tenacity thread for rope sewing techniques requiring strength
Caring for Rope Crafts and Repairs
Your sewn rope crafts need proper Rope Storage in a cool, dry spot away from UV Protection concerns.
Regular Craft Cleaning with mild soap prevents dirt buildup that weakens fibers.
Check stitching monthly for fraying or loose threads.
Rope Conditioning with specialized treatments maintains flexibility.
For minor damage, basic rope repair techniques work well, but major issues need professional Fiber Care assessment.
Limitations and When to Avoid Field Sewing
While proper care helps maintain sewn rope crafts, knowing when field sewing becomes dangerous protects both you and others.
Never attempt sewing for load-bearing applications – household machines simply can’t match industrial safety standards required for climbing gear.
- Rope Damage: Retire damaged climbing rope instead of attempting repairs through sewing techniques
- Material Limits: Standard sewing machines lack clearance and tension for reliable rope sewing tools performance
- Equipment Failures: Field-sewn connections fail catastrophically under dynamic loads, violating safety standards
For safe and creative projects, consider repurposing retired ropes using rope crafting techniques.
Frequently Asked Questions (FAQs)
What thread weight works best for climbing rope?
Professional sewing machines use 200+ denier nylon thread for climbing rope—that’s roughly 80% stronger than regular household thread.
You’ll want heavy-duty thread that matches your rope’s breaking strength, typically requiring specialized industrial-grade materials for safe terminations, using specialized industrial-grade materials.
Can synthetic rope substitute for climbing rope crafts?
Yes, you can substitute synthetic rope for climbing rope in bowl crafts.
Polyester, polypropylene, and nylon ropes work well, offering similar texture and durability.
Choose 8-12mm diameter synthetic rope for best results with standard sewing machines, as it provides a good balance of durability.
How do I prevent rope fraying during sewing?
Before disaster strikes your project, here’s the secret: wrap rope ends with tape before cutting, then seal cut edges with a lighter’s flame.
Keep tension consistent while stitching—loose threads create unraveling nightmares that’ll haunt your beautiful bowl, as consistent tension is key to a successful project.
Are there specific brands recommended for modifications?
Singer and Brother machines handle rope modifications well, with Singer‘s heavy-duty models offering better clearance adjustments. You’ll need strong nylon thread rated 200+ denier for secure stitching on climbing rope projects.
Conclusion
During Patagonia’s 2019 gear testing program, climbers successfully converted retired dynamic ropes into durable camp mats using basic sewing techniques—proving that learning how to sew climbing rope opens up endless possibilities for outdoor enthusiasts.
You’ve now mastered the essential skills: proper preparation, machine setup, and reinforcement techniques that transform discarded rope into functional gear.
Remember to prioritize safety by never using sewn rope for actual climbing, but embrace the creative potential for crafting rugs, bowls, and straps that’ll serve you well around camp.
- http://www.supertopo.com/climbers-forum/168694/Physical-properties-of-ropes-and-slingage
- https://www.climbinganchors.com.au/slings-buying-guides/
- https://anmyda.com/strong-nylon-webbing-joint-sewing-methods/
- https://www.youtube.com/watch?v=YWYLRzNIw-g
- https://www.mountainproject.com/forum/message/120617098


