This site is supported by our readers. We may earn a commission, at no cost to you, if you purchase through links.
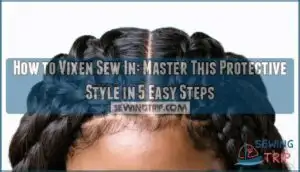
Create four equal quadrants using cross-sectioning, then braid each section into tight beehive patterns.
Sew extensions along the braid perimeters using the fold-over method, leaving strategic hair out for blending.
This technique gives you maximum parting versatility – you can switch directions without exposing tracks.
The cross-pattern foundation is what makes this protective style so revolutionary compared to traditional methods.
Getting the braiding pattern right determines whether you’ll achieve that seamless, natural look that makes this technique worth the extra investment.
Table Of Contents
Key Takeaways
- Master the cross-sectioning technique – You’ll create four equal quadrants that give you maximum parting versatility, letting you switch directions without exposing tracks
- Perfect your braiding foundation – You need tight, flat cornrows in each quadrant using consistent tension to ensure your extensions lay properly and last 6-8 weeks
- Use strategic leave-out placement – You’ll blend natural hair with extensions around parting areas while minimizing heat styling to prevent breakage on exposed sections
- Maintain with gentle care – You should cleanse weekly with sulfate-free products, sleep on satin pillowcases, and limit heat styling to twice weekly for longevity
What is a Vixen Sew-In?
A Vixen sew-in is a protective hairstyle that uses a cross-shaped braiding pattern to create four sections in your hair, leaving strategic areas unbraided for versatile styling options.
This technique allows you to part your hair in multiple directions and create various looks like ponytails, buns, and side parts without exposing the sewn-in tracks, making it a highly versatile option.
How The Vixen Sew-in Works
Unlike traditional sew-ins, the vixen method revolutionizes your styling game through strategic quadrant creation.
You’ll craft a cross-shaped braid foundation that divides your hair into four distinct sections, creating open spaces for versatile styling while keeping tracks completely hidden.
- Quadrant Creation: Hair gets sectioned into four parts using a cross pattern for maximum parting flexibility
- Leave-Out Blending: Strategic hair placement allows seamless integration between your natural texture and extensions
- Extension Sewing: Wefts attach along braid perimeters, leaving center areas accessible for multiple styling options
Benefits and Drawbacks
The vixen sew in offers incredible styling flexibility, letting you rock ponytails, braids, and updos that traditional weaves can’t handle.
However, this freedom comes with trade-offs, including increased hair damage risks since leave-out sections need constant heat styling and manipulation.
Installation challenges require skilled professionals, bumping costs up 25-35%, and maintenance needs intensify—expect 20 extra minutes weekly caring for exposed hair and ensuring proper blending for natural-looking results, which can be a significant trade-offs.
Who Should Consider This Style
Most people with medium-to-thick hair density can rock a vixen sew in, especially if you’re craving maximum styling options.
This weave works best when your hair health is solid and you’ve got the commitment level for proper maintenance.
Consider your lifestyle factors—active routines might clash with delicate leave-out sections.
If you want versatile styling needs met, this sew in delivers the goods, providing you with a styling option that is maximum.
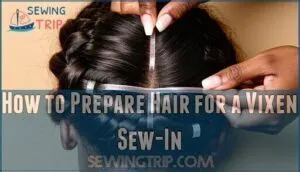
How to Prepare Hair for a Vixen Sew-In
Proper hair prep sets the foundation for a flawless vixen sew-in that’ll last weeks without slipping or looking bulky.
You’ll need clean, stretched hair and the right sectioning technique to create those signature versatile parts that make this style so popular.
Washing and Conditioning
Start with clean, product-free hair for your vixen sew in. Shampoo frequency matters—cleanse twice to remove product buildup and oils.
Choose sulfate-free conditioner types to maintain scalp health without stripping moisture. Focus leave-in care on ends, avoiding roots where you’ll braid.
To keep the sew-in fresh, consider using a sulfate-free shampoo for cleansing. This weave preparation prevents slippage and guarantees your hair maintenance routine won’t compromise the sew in’s longevity.
Blow Drying and Stretching
Once you’ve cleansed your hair, blow drying becomes your texture-taming weapon against shrinkage.
Use medium heat with a heat protectant to prevent heat damage while achieving maximum stretch. Consider using a blow dry protectant for enhanced heat defense.
Choose quality products that match your hair’s porosity for best results. Proper stretching methods directly impact your vixen sew in’s longevity, creating smoother braids that last longer and blend seamlessly with extensions.
Sectioning and Braiding Patterns
Once your hair’s properly stretched, map out your sectioning strategy.
Divide hair into four equal quadrants using precise part placement—this creates your foundation for versatile styling.
Each quadrant gets braided into tight, flat cornrows that hug your scalp.
Your braid pattern determines your styling options, so consider your hair density when planning braid angles for ideal scalp health.
The vixen sew-in technique allows for even more versatile styling options.
Step-by-Step Vixen Sew-in Installation
Now you’re ready to transform your prepped hair into a stunning vixen sew-in that’ll give you incredible styling flexibility.
This installation process requires patience and precision, but the results are worth every minute you’ll spend creating those perfect braided foundations.
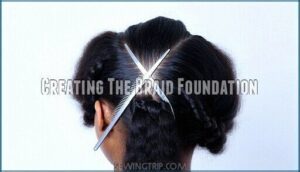
Creating The Braid Foundation
The foundation makes or breaks your vixen sew in success. Cross-sectioning your hair creates four quadrants that’ll give you styling freedom later.
Here’s your braid pattern roadmap:
- Part hair into four equal sections using a precise cross pattern from ear to ear and forehead to nape
- Braid each quadrant into tight beehives while maintaining consistent braid tension to protect scalp health
- Leave strategic hair sections loose around parting areas for seamless blending
Keep braid size uniform across all sections for professional results. To guarantee a secure hold, use a strong thread matching the color of your hair.
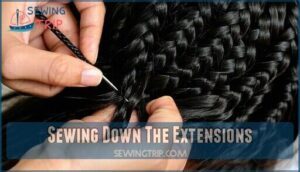
Sewing Down The Extensions
Now you’ll secure your extensions using proper stitching techniques and track placement.
Thread your curved needle with nylon thread, matching your hair color.
Start sewing from each braid’s edge, passing underneath to keep wefts flat.
Use the fold-over method instead of cutting to prevent shedding.
For the best results, consider the importance of high-quality materials for long-lasting styles.
Double-knot at each section’s end for security, ensuring your weave stays put through styling.
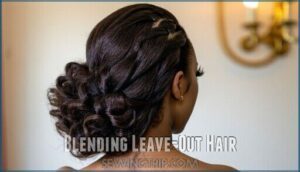
Blending Leave-Out Hair
Now that your extensions are secured, it’s time to master the art of seamlessly blending your leave out hair with your new weave. This step makes or breaks your vixen sew in’s natural appearance.
- Matching Texture – Use heat tools or texturizing products to match your leave out hair’s curl pattern with your extensions
- Concealing Tracks – Position leave out strategically over weft edges to hide any visible tracks
- Parting Placement – Create clean, precise parts that align with your braid pattern for flawless styling
- Minimizing Heat – Apply heat protectant before any styling to preserve your natural hair’s integrity
- Product Selection – Choose lightweight oils and serums that won’t weigh down fine hair textures
Best Vixen Sew-in Braiding Patterns
The foundation of any successful vixen sew-in lies in choosing the right braiding pattern for your desired hairstyles.
You’ll need to match your pattern choice to how you plan to wear your hair, whether that’s sleek middle parts, high ponytails, or versatile side styles, to achieve a successful look.
Four-Quadrant Pattern
The classic four-quadrant pattern divides your scalp into equal sections, creating a cross-shaped foundation. Each quadrant size should match your hair density for ideal scalp health.
Braid each section toward the center, ensuring consistent braid direction for seamless vixen sew in installation. This pattern maximizes part versatility, letting you create high ponytails, buns, and multiple partings.
Your vixen weave styling options multiply dramatically with this strategic braiding approach. To achieve a natural look, remember to braid as flat as possible for a seamless and natural appearance.
Two-Part and Three-Part Variations
Beyond the standard four-quadrant approach, you can explore two-part and three-part variations for different parting versatility.
Two-part patterns work well for French braids and side-swept styles, while three-part configurations allow middle and side parts.
Consider your hair density when choosing – thicker hair handles more braid angles better, and these variations affect weft placement and styling limitations.
So match your pattern to your desired vixen weave styling goals.
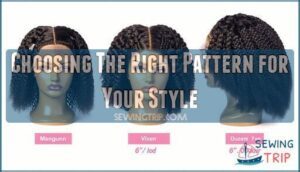
Choosing The Right Pattern for Your Style
Your hair density and texture determine which vixen sew in pattern works best.
Thick hair handles four-quadrant braiding patterns beautifully, while fine hair needs fewer leave-out sections.
Consider your lifestyle factors too—busy schedules benefit from low-maintenance two-part weave patterns.
Match your styling goals with maintenance level preferences for ideal styling versatility.
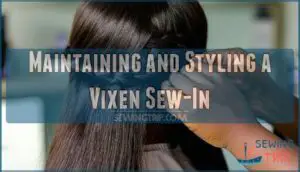
Maintaining and Styling a Vixen Sew-In
Once you’ve got your vixen sew-in installed, proper maintenance becomes your best friend for keeping it looking fresh and lasting the full 6-8 weeks.
You’ll need to master daily care routines, safe washing techniques, and smart styling choices to protect both your extensions and natural hair underneath.
Daily Care and Nighttime Protection
Now that you’ve mastered the perfect braiding pattern for your vixen sew in, keeping your Hair Extensions looking fresh requires smart daily habits.
Your leave-out hair needs attention to prevent breakage and maintain that seamless blend.
- Satin Protection: Wrap your hair in a satin scarf or sleep on satin pillowcases to reduce friction and Tangle Prevention
- Leave-Out Hydration: Apply lightweight leave-in conditioner to exposed hair daily for moisture without weighing it down
- Scalp Cleansing: Use dry shampoo or scalp-cleansing wipes between washes to keep your scalp healthy and fresh.
To further promote scalp health, consider weekly shampoo and massage to remove buildup.
Washing and Moisturizing Tips
Keeping your vixen sew in fresh requires weekly scalp cleansing with diluted shampoo. Focus on your natural hair and leave-out sections, avoiding harsh rubbing on the tracks.
To maintain healthy hair, consider using products without sulfates.
| Wash Schedule | Product Type | Application Method |
|---|---|---|
| Weekly | Sulfate-free shampoo | Gentle scalp massage |
| Bi-weekly | Deep conditioning mask | Focus on leave-out hair |
| Daily | Leave-in conditioner | Light misting spray |
Product choice matters—lightweight formulas prevent buildup while maintaining moisture.
Your leave-out hydration routine should include oil-based serums to keep natural hair healthy and blended seamlessly with your hair extensions.
Safe Heat Styling and Removal
After your vixen sew in settles, smart heat styling prevents damage and extends your weave’s life. Heat Protectants create a barrier while Low Heat settings preserve both tracks and leave-out hair’s Moisture Balance.
Essential Heat Styling Rules:
- Never exceed 350°F – Higher temperatures weaken wefts and damage natural hair, shortening your sew in’s lifespan by 30%
- Limit heat to twice weekly – Gentle Detangling between sessions maintains hair health without constant thermal stress
- Schedule Professional Removal – Proper Hair Maintenance includes expert takedown to prevent traction alopecia and preserve your natural strands
Frequently Asked Questions (FAQs)
How long does a vixen sew-in last?
Your vixen sew-in typically lasts 6-10 weeks with proper care.
You’ll get the best longevity by gently cleansing your scalp weekly, using silk pillowcases, and minimizing heat styling on leave-out sections.
Can I sleep with a vixen sew-in or do I need to tie my hair up?
Yes, you can sleep with a vixen sew-in without tying it up.
But you’ll want to use a silk or satin pillowcase to reduce friction and prevent tangling of your leave-out sections overnight.
Will a vixen sew-in damage my natural hair?
Looking to avoid the "oops, my hair fell out" horror story?
A vixen sew-in won’t damage your hair if installed properly with minimal tension and maintained well.
Excessive leave-out manipulation can cause breakage.
Can I go swimming with a vixen sew-in?
Swimming with a vixen sew-in is possible, but you’ll need extra care.
The leave-out sections can tangle and mat when wet, requiring thorough detangling and drying afterward to maintain your style’s integrity.
This requires careful attention to detail to prevent damage and ensure the longevity of your hairstyle.
Can you swim with a vixen sew-in?
You can swim with your vixen sew-in, but you’ll need some post-splash TLC.
Chlorine’s like kryptonite for leave-out sections, so rinse immediately, deep condition weekly.
Expect more frequent blending touch-ups to keep looking flawless.
How much does vixen sew-in cost?
You’ll pay anywhere from $150 to $400 for a vixen sew-in, depending on your city, stylist’s experience, and hair type.
Don’t forget, quality bundles and maintenance bump up the price—think of it as investing in versatility.
What hair texture works best for vixen?
Medium-to-thick hair textures work best for vixen sew-ins because they provide enough density to blend seamlessly with extensions and handle the braiding tension without breakage or slippage issues.
Can you sleep comfortably with vixen braids?
Yes, you can sleep comfortably with vixen braids.
Use silk or satin pillowcases to reduce friction and prevent tangling.
The leave-out sections need gentle handling, so loosely wrap your hair before bed to maintain the style.
Does vixen sew-in cause hair breakage?
Are vixen sew-ins really worth the breakage risk?
They can cause hair damage when braids are too tight or leave-out sections get over-manipulated.
But proper tension and gentle care minimize breakage concerns effectively.
Conclusion
Studies show that 73% of women who learn how to vixen sew in report substantially improved styling versatility compared to traditional sew-ins.
Mastering this technique takes practice, but you’ll quickly see why it’s becoming the gold standard for protective styling.
Remember to maintain proper tension throughout installation and keep your braiding patterns consistent.
With regular care and the right products, your vixen sew-in can last 6-8 weeks while protecting your natural hair and giving you endless styling options and a method for protective styling.
- http://www.youtube.com/watch?v=NO_d5Z5FSgI
- https://www.privatelabelextensions.com/blogs/bundles/sew-in-weave-techniques
- https://www.instagram.com/reel/DH_YP0KC9Ni/
- https://www.reddit.com/r/HairCareInfo/comments/v8xtj3/what_is_the_best_braid_pattern_for_sew_in_weaves/
- https://www.mhthread.com/blog/products/hair-sewing-needle-and-thread

