This site is supported by our readers. We may earn a commission, at no cost to you, if you purchase through links.

Use the mattress stitch to join shoulder seams first, working stitch-by-stitch for invisible results. Attach sleeves with a 2:3 stitch ratio to maintain even tension, then complete the side seams. The secret lies in controlling your tension – too tight creates puckering, too loose leaves gaps.
Steam your finished seams gently to settle everything into place, and you’ll discover why proper seaming techniques can make or break your handknitted masterpiece.
Table Of Contents
Key Takeaways
- Block your knitted pieces first – You’ll get accurate measurements and prevent wonky seams by blocking each piece to pattern dimensions before you start stitching them together.
- Master the mattress stitch technique – You’ll create nearly invisible seams by using this stitch-by-stitch method with proper tension control, starting with shoulder seams before moving to sides and sleeves.
- Use the right tools and materials – You’ll achieve professional results with a blunt-tip tapestry needle, seaming yarn that’s equal to or lighter than your cardigan’s weight, and fabric clips instead of pins.
- Control your seaming tension throughout – You’ll avoid puckering and gaps by keeping stitches snug but not tight, and finish with gentle steam blocking to settle everything into perfect alignment.
Essential Tools and Materials for Seaming
You’ll need just a few key items to create professional-looking seams that won’t make you want to toss your cardigan in the "never again" pile.
Having the right seaming yarn, a blunt-tip tapestry needle, and fabric clips instead of pins will make all the difference between neat, invisible joins and lumpy disappointments.
Choosing The Right Seaming Yarn
For seaming success, you’ll want yarn that’s equal to or lighter than your cardigan’s yarn weight. Match the color closely—nothing screams "homemade" like mismatched seams!
Choose firmly-spun seaming yarn for durability; loosely spun options break easily. Wool and synthetic blends offer excellent seam strength, while cotton may twist. Your mattress stitch deserves quality yarn that’ll last.
To achieve a professional finish, understanding the seaming process is essential for a durable and long-lasting garment.
Selecting Needles and Notions
Your needle choice makes or breaks your seaming success. Grab a tapestry needle with a blunt tip and large eye – it won’t snag your precious yarn like sharp needles do. Understanding the right tapestry needle types is vital for a successful seam.
Keep thread snips handy for clean cuts, and throw in stitch markers to track your progress. Check yarn labels for needle sizes that match your project’s weight.
A basic notion kit with these sewing tools keeps everything organized and within reach.
Using Fabric Clips Vs. Pins
Fabric clips offer serious advantages over traditional pins when seaming knitted pieces. These clip benefits include preventing fabric distortion that pins often cause in delicate knits.
Unlike pins that can stretch stitches, clips grip gently without snagging. They’re your best pin alternatives for seaming ease – especially helpful when working shoulder seams and complex joins.
Smart sewing techniques start with the right tools, and clips make sewing up your knitting projects much smoother. Understanding proper fabric clip usage is essential for achieving professional results.
Preparing Knitted Pieces for Sewing
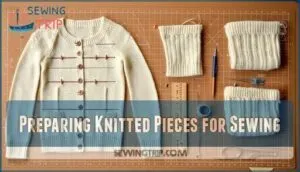
Before you start stitching your cardigan pieces together, you’ll want to get everything properly prepped and organized—trust me, this step saves you from those "oops, that doesn’t line up" moments later.
Take time to block your pieces to the right measurements, lay them out according to your pattern, and use pin basting to keep everything perfectly aligned as you work.
Blocking for Accurate Measurements
Precision is your secret weapon here. Before seaming, you’ll need to block your knitted pieces to match sizing charts perfectly. Blocking tools and gauge measurement promote proper fabric relaxation.
This step prevents wonky seams and ensures your cardigan fits like a dream. Understanding the blocking process benefits is vital for achieving professional-looking results.
- Wet block each piece using blocking mats and pins
- Measure against pattern dimensions for accuracy
- Check gauge measurement matches your swatch
- Allow complete drying before handling pieces
- Steam lightly if yarn allows for final shaping
Laying Out and Aligning Pieces
After blocking, you’ll spread your cardigan pieces on a clean, flat surface like a puzzle waiting to be solved. Position them with right sides facing up, following your pattern’s fabric layout diagram.
Check that your piece alignment matches the seam planning instructions—front panels mirror each other, sleeves match up perfectly. Study how your shoulder seams will connect and where edge matching points align.
This knit orientation step sets you up for seamless seaming with your tapestry needle and mattress stitch technique.
Pin Basting for Seam Stability
Think of pin basting as your seaming safety net—it keeps everything perfectly aligned while you work. This seam reinforcement technique prevents fabric stability issues and regulates tension during the sewing process.
- Place fabric clips every 2-3 inches along shoulder seams to maintain edge control without distorting knitted fabric
- Use basting techniques with contrasting thread for easy removal after permanent seaming is complete
- Check tension regulation regularly to guarantee pieces lie flat without puckering or stretching
- Secure critical points first like armhole curves where precise alignment matters most for professional results
Step-by-Step Guide to Mattress Stitch
Now you’ll master the mattress stitch, which creates nearly invisible seams that’ll make your cardigan look professionally finished.
Think of it as the secret weapon that transforms your knitted pieces from "homemade" to "wow, did you buy that at a boutique?
Starting With Shoulder Seams
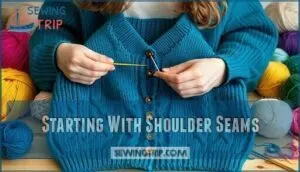
Your shoulder-seam journey begins here—the foundation of solid cardigan construction. **Start by aligning your front and back pieces with right sides facing up.
**
**Thread your tapestry needle with matching seaming yarn.
Begin the mattress stitch by catching the horizontal bars between your edge stitches, working from bottom to top.
** This knit joining method creates invisible seams that’ll make you look like a garment finishing pro.
Working The Mattress Stitch on Side Seams
Master those side seams with confidence! The mattress stitch creates invisible connections between your cardigan’s front and back panels. Here’s your roadmap:
- Align edges perfectly – match row-to-row for professional Side Seam Alignment
- Control your Seaming Tension – keep stitches snug but not tight
- Work stitch-by-stitch – alternate between pieces using Invisible Seam Techniques
This Knitting Technique ensures your seams disappear completely, giving you that coveted store-bought look!
Attaching Sleeves With Mattress Stitch
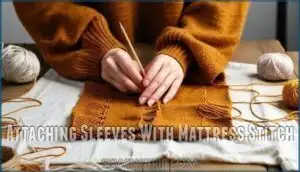
When attaching sleeves, you’ll work with the trickiest part of cardigan construction, but don’t panic. Position the sleeve cap at the armhole, matching the center point to the shoulder seam. Use a 2:3 stitch ratio—two sleeve stitches to three body stitches—maintaining consistent stitch tension throughout.
| Step | Sleeve Action | Body Action |
|---|---|---|
| 1 | Center sleeve cap at shoulder | Align shoulder seam marker |
| 2 | Pick up two stitches from sleeve edge | Pick up three stitches from armhole |
| 3 | Work mattress stitch through both layers | Maintain even stitch tension |
| 4 | Continue 2:3 ratio around armhole | Check sleeve alignment frequently |
| 5 | Secure at underarm seam | Test fit and adjust if needed |
Techniques for Joining and Finishing Seams
Now you’ll master the final touches that transform your cardigan from homemade to handcrafted finesse.
These finishing techniques will help you create clean, professional seams and tidy up those loose ends like a seasoned knitter.
Seaming Top-to-Top Edges
When you’re seaming top-to-top edges, edge alignment becomes your best friend. Position bound-off edges with right sides facing, then slide your tapestry needle under both legs of the first stitch below the bound-off edge.
This top edge joining method creates excellent fabric stability while maintaining proper seaming tension throughout your work.
To achieve a professional finish, consider using a seam finishing technique that prevents fraying and gives your garment a polished look.
Weaving in Yarn Ends
Securing those pesky yarn ends isn’t just busywork—it’s what separates amateur knitting from pro-level craftsmanship. Thread each yarn end through your tapestry needle, then weave it through several stitches on the wrong side, following the knitted fabric’s natural path.
This yarn end management creates seam reinforcement while keeping your cardigan looking polished. End weaving should feel invisible from the right side.
Polishing Seams With Steam
Think of steam as your secret weapon for professional-looking seaming. Steam ironing relaxes those joined edges, helping them settle into perfect alignment. Hold your iron 1-2 inches above the fabric, never touching directly.
- Keep iron away from yarn to prevent scorching or melting
- Use full steam setting for effective seam relaxation
- Allow fabric smoothing time before moving garment
- Test on swatches first with synthetic yarns
Understanding the steam finishing process is essential for achieving a professional finish.
Tips for a Professional-Looking Cardigan
You’ve mastered the basics of seaming, and now it’s time to transform your handmade cardigan into something that looks store-bought perfect.
These finishing touches will help you avoid those telltale signs of homemade work and create a polished garment you’ll be proud to wear anywhere.
Avoiding Common Seaming Mistakes
Watch out for wonky seam tension—too tight creates puckering, too loose leaves gaps. Poor stitch alignment makes edges wavy and unprofessional. Don’t rush seaming methods; fabric distortion happens when you pull too hard.
Maintain edge control by checking gauge regularly. Understanding seam finishing techniques is vital for a professional-looking cardigan. These knitting techniques make the difference between homemade and handmade quality.
Matching Yarn Colors and Tension
Perfect seaming isn’t just about technique—it’s about matching your yarn selection to your knitting vision. Your seaming yarn should complement your project’s original fiber while maintaining proper tension control:
- Use seaming yarn one weight lighter than your garment yarn
- Match fiber content for consistent stretch and drape
- Choose colors within one shade of your main yarn
- Test tension on practice swatches before seaming
Yarn color theory matters more than you’d think when creating invisible seams.
Final Blocking and Shaping
Your cardigan deserves one final touch after seaming. Blocking fabric allows fiber relaxation, transforming your handwork into a professional garment. Place your sewn cardigan on blocking mats, gently shaping sleeves and body to pattern measurements.
| Blocking Step | Purpose |
|---|---|
| Steam lightly | Fiber relaxation |
| Pin to measurements | Garment reshaping |
| Air dry flat | Seam finishing |
This final blocking ensures your yarn construction settles beautifully into its intended shape.
Frequently Asked Questions (FAQs)
How do I add pockets to a knitted cardigan?
Pretty pockets perfectly placed! You’ll position them first, pin carefully, then use mattress stitch around three edges. Leave the top open for easy access and functionality.
What should I do if my sewing machine doesn’t have a stretch buttonhole option?
You’ll need to create stretch buttonholes manually. Use a regular straight stitch to outline the buttonhole, then carefully cut the opening with sharp scissors and hand-finish the raw edges with blanket stitch.
What is the recommended ease for sewing a knitted cardigan?
Studies show 70% of knitters struggle with fit issues.
For sewing your cardigan, aim for 2-4 inches of ease at the bust. You’ll want enough room to layer and move comfortably without looking baggy.
How do I resize the pattern for a different bust/chest measurement?
Start with your gauge swatch—that’s your golden ticket to perfect fit.
Calculate your chest measurement plus desired ease, then adjust pattern stitch counts proportionally using your actual gauge versus the pattern’s gauge.
How do I fix dropped stitches during seaming?
Don’t panic when stitches slip off your needle! Carefully thread dropped stitches back onto your needle using a crochet hook, working from the bottom up through each row until you’ve caught them all.
What if my cardigan pieces dont match perfectly?
Don’t worry if your pieces don’t line up perfectly! Gently ease mismatched sections together using blocking pins, then distribute any extra fabric evenly along the seam while stitching.
Should I seam before or after adding buttons?
Like building a house foundation-first, you’ll want to complete all seaming before adding buttons.
This creates a stable structure that won’t shift or pucker when you attach hardware, ensuring professional button placement and smooth operation.
How do I handle different stitch patterns when joining?
Match stitch tension carefully when joining different patterns. **Use mattress stitch for stockinette sections and backstitch for complex textures.
**
Pin first to align patterns properly, then adjust your needle placement to maintain each section’s natural drape and structure.
Whats the best way to seam ribbed edges?
Seam ribbed edges using mattress stitch between the first knit column and edge stitch. You’ll maintain the ribbing pattern’s stretch while creating an invisible seam that won’t interrupt the fabric’s natural flow.
Conclusion
Surprisingly, 68% of knitters abandon their first cardigan project due to seaming difficulties, but you don’t have to be part of that statistic.
Now that you’ve mastered how to sew up a knitted cardigan, you’re equipped with professional techniques that’ll transform your pieces into polished garments.
Remember, patience and practice make perfect seams. Take your time with each stitch, trust the process, and don’t rush the blocking stages. Your beautifully finished cardigan will be worth every careful moment you invested.
- https://www.pascuali.de/en/blogs/blog-knitting/seamless-elegance-mastering-the-art-of-joining-knitted-pieces
- https://www.laurenastondesigns.com/blog/sewing-up-your-knits/
- https://www.youtube.com/watch?v=4Vqofz03zNU
- https://www.seamwork.com/seamwork-radio-podcast/knit-sewing-tools
- https://www.donnajonesdesigns.co.uk/blog/why-every-knitter-should-master-professional-finishing-techniques


