This site is supported by our readers. We may earn a commission, at no cost to you, if you purchase through links.

The good news is that fraying isn’t a flaw you’re stuck with. Whether you want to stop it dead in its tracks or actually lean into it for design effect, you’ve got plenty of options. The techniques range from simple tape-and-seal methods to more involved sewing strategies, all designed to give you control over how your linen behaves from cut to finished piece.
Table Of Contents
Key Takeaways
- Linen frays quickly because its loose weave leaves individual threads vulnerable to unraveling, but this isn’t a flaw you’re stuck with—you can prevent it or lean into it for design effect.
- Sharp cutting tools, sergers, zigzag stitching, and liquid fray sealants like Fray Check are your most reliable methods for stopping fraying before and after cutting.
- For quick fixes without fancy equipment, masking tape, hand stitching, pinking shears, and liquid fray preventatives all deliver effective edge control without needing a serger.
- You can deliberately fray linen for aesthetic appeal by stitching a boundary line 5–10mm from the edge, then gently teasing out threads or washing multiple cycles to create controlled, intentional fringing.
Does Linen Fray and Why?
Yes, linen frays—and it happens fast. The loose weave that makes linen breathable also makes it vulnerable at the edges.
Let’s look at why this fabric unravels so easily and what you’re up against.
Causes of Fraying in Linen Fabric
Linen frays because it’s woven with a loose structure—those natural fibers just don’t hold hands as tightly as synthetic fabrics do. Here’s what causes those fraying mechanisms to kick in:
- The fabric weave itself is open and airy, leaving edges vulnerable
- Handkerchief linen has even less edge stability than standard weaves
- Cutting pieces in batches means they sit around unraveling before you sew
- Every time you touch the fabric, those loose threads work themselves free
- Without Fray Stop or finishing, linen fraying accelerates fast
Material properties matter—linen’s natural texture is both its charm and its challenge.
Fabrics Most Prone to Fraying
You’re dealing with more than just linen fraying here—over 29% of garments show fabric breakdown from fraying or thinning. Plain-weave cotton and linen lead the pack because of their interlaced thread structure.
Loose-weave fabrics unravel faster than tight weaves, and cutting on the bias makes it worse. Rayon, silk, and polyester-cotton blends all share high fray potential.
Serging and edge finishing techniques prevent this textile science nightmare before construction even starts. Understanding fabric pilling issues can also help in addressing similar problems.
How Project Type Affects Fraying
Your project’s final use—whether it’s a napkin you’ll wash weekly or embroidery you’ll frame once—determines how aggressively you need to fight fraying. Usage factors and project size matter most:
- High-use items like napkins need serged edges or Fray Check before washing
- Large cross-stitch projects demand edge finishing to survive repeated use during fabric preparation
- Small, quick pieces can skip seam finishing if you’re working fast
Fabric thickness and material choice shape your strategy—thin handkerchief linen unravels faster than heavyweight varieties.
Essential Tools to Prevent Linen Fraying
You don’t need fancy equipment to keep linen from fraying, but having the right tools makes the job faster and cleaner.
Some tools prevent fraying through mechanical means, while others use chemical solutions or strategic cutting.
Here’s what works best for keeping those loose threads under control.
Sewing Machines and Sergers
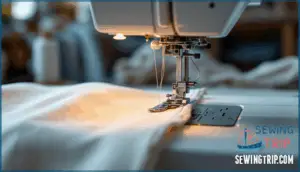
A serger is your secret weapon here—it trims, stitches, and finishes edges in one pass, turning frayed chaos into clean seams faster than you can thread a bobbin.
If you don’t have one, your regular sewing machine works fine for overlocking or zigzag stitches. Use an overlock foot and adjust your tension for cleaner seam finishing—it’s all about controlling that weave before it unravels.
Rotary Cutters and Sharp Scissors
Sharp blades are the difference between a clean cut that holds together and a jagged mess that starts unraveling before you even get to the machine. Here’s how cutting tools prevent fraying from the start:
- Rotary cutters slice through linen’s weave without disturbing adjacent threads—precision cutting that keeps edges stable
- Sharp scissors produce clean lines instead of crushed fibers that invite unraveling
- Blade maintenance matters—dull tools pull and tear, creating instant fraying problems
- Fabric management during cuts affects edge finishing quality before you apply any sewing techniques
- Straight cuts mean fewer loose threads to manage, making fabric stabilization easier later
Replace blades regularly. Your edges will thank you.
Fray Sealant Products (Fray Check, Fray Stop)
Liquid sealants like Fray Check and Fray Stop work like invisible armor—you paint them on raw edges and they lock loose threads in place before unraveling even starts.
These fray prevention products deliver instant edge protection with simple sealant application—just brush Fray Block along cut lines for fabric stabilization that dries clear.
Perfect for fabric finishing when you need fray resistance fast without stitching.
Lightweight Interfacing and Tapes
When seam edges need more muscle than a quick dab of liquid, lightweight interfacing strips or stay tape give you structural backup that won’t add bulk or stiffness to your finished linen. Press fusible options along cut edges for instant edge stabilization—it’s like giving loose-weave fabric a backbone.
Choose interfacing types based on project suitability: sheer tricot works beautifully where you need invisible support, while masking tape offers temporary hold during construction.
Proven Sewing Techniques to Stop Fraying
Once you’ve got the right tools, the real work begins with how you actually manage those edges. The techniques below will show you the most reliable ways to lock down linen’s loose weave before it becomes a problem.
Each method has its place depending on your project and equipment.
Serging and Overlocking Linen Edges
You’ll stop fraying before it starts if you use a serger or overlocker on your linen edges. Sergers vs overlockers both encase raw fabric in thread loops—overlocking is actually the stitch, while serging refers to the machine. Set your thread tension settings between 4.0 and 5.5 for medium-weight linen, and you’re golden.
This linen edge finishing method beats other fray prevention methods because it trims and seals in one pass. For professional results, understanding sewing machine settings is essential.
Using Zigzag Stitch or Overlock Stitch
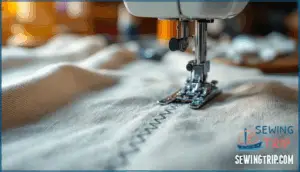
If you don’t own a serger, your regular sewing machine’s zigzag stitch works like a charm to lock down those linen edges. Set your stitch length to 2.0–2.5mm and width to 3.0–4.0mm for solid edge finishing.
Run the zigzag right along the raw edge at medium sewing speed—you’ll catch those loose threads before they become a problem. For extra insurance, add a tiny drop of Fray Stop after stitching.
Applying Basting or Whip Stitches by Hand
Sometimes slowing down with a needle and thread beats wrestling with your machine—hand stitches give you total control when precision matters most. A quick hand basting stitch around raw edges keeps linen from unraveling during construction.
The whip stitch works beautifully for edge finishing and fabric stabilizing, creating a neat seam reinforcing barrier. Pair it with Fray Stop for bulletproof linen sewing.
Finishing Edges Before Construction
Treat fraying like a problem you solve before it starts—finish those edges right after cutting, and you’ll breeze through assembly without picking threads out of your seams. Edge finishing and seam stabilizing during fabric preparation means your linen behaves through construction planning.
Overlock stitch, whip stitch, or fray block work perfectly for cut edge treatment.
Quick DIY Methods for Managing Frayed Edges
Not every linen project needs a serger or fancy machine work. Sometimes you need a fast fix that works with what you’ve got in your sewing drawer right now.
Here are four simple methods that’ll keep those edges under control without breaking a sweat.
Using Masking Tape or Low-Tack Tape
Tape might sound like a band-aid solution, but for quick projects or embroidery work, it’s surprisingly effective at keeping those linen edges under control. Just press masking tape or painter’s tape along your cut fabric edges for instant fray prevention.
The adhesive methods work because they stabilize the weaving without permanent changes to your textile. When you’re done sewing, peel the tape away gently—no residue, no fuss. It’s perfect for edge sealing on small pieces you’ll finish quickly.
Applying Liquid Fray Preventatives
When tape isn’t practical—or you want something permanent—liquid fray preventatives like Fray Check or Fray Stop deliver invisible, long-lasting edge protection with just a thin bead along your cut linen.
These chemical edge treatment solutions dry clear and flexible, creating a sealed barrier that stops threads from unraveling.
Apply Fray Stop application directly to raw edges for instant textile preservation—perfect for fabric care and maintenance on projects like frayed linen napkins where durability matters.
Cutting With Pinking Shears or Rotary Cutter
Your cutting tool matters just as much as your sealant—pinking shears create zigzag edges that naturally resist unraveling, while a rotary cutter with a sharp blade slices cleanly through linen’s loose weave without pulling threads loose.
Sharp blades are your best friend in fabric preparation—dull scissors tug at linen fabric instead of cutting, which starts fray problems before you even stitch.
For serious fray reduction, pair your cutting techniques with proper tool maintenance and you’ll manage edge finishing like a pro.
Hand-Stitching Simple Hem Finishes
A needle, thread, and ten minutes of patience can rescue even the frayed-est linen edges—hand-stitching gives you total control when machines feel like overkill or your project demands a delicate touch.
Try a hand whip stitch for quick edge finishing, or use basic hem stitching for seam reinforcement on delicate handkerchief linen—pair it with fray block for stubborn spots, and you’ve mastered fabric stabilizing without plugging anything in.
How to Fray Linen Deliberately for Projects
Sometimes you want linen to fray on purpose. It adds that casual, lived-in charm to table linens and home décor.
Here’s how to control the fray so it looks intentional, not messy.
Creating Frayed Linen Napkins
Frayed linen napkins look like they cost a fortune at boutique shops, but you can whip up a set in an afternoon with fabric and a ruler.
Cut your linen to size, then pull threads along each edge to create that soft, frayed look. You’ll want to stop about half an inch in, then run a simple straight stitch to lock the weave—no fray block needed.
It’s the easiest DIY home decor trick for impressive table setting ideas.
Fraying Fabric by Tearing or Washing
If you want a wilder, more organic fray, tearing linen along the grain gives you instant texture that washing will only heighten. The tear creates natural fabric weakness that unravels beautifully in hot water, softening edge stability without fray prevention methods.
It’s perfect for frayed linen napkins with that lived-in feel—just mind your weaving direction and expect some drama in the dryer.
Botanical Table Settings With Frayed Edges
Pairing frayed linen edges with fresh greenery and simple ceramics turns your table into something that feels gathered, not bought—like you raided a French countryside market instead of a big-box store. Layer torn napkins with herb sprigs, let the fabric fray control happen naturally through washing, and anchor everything with neutral plates.
The roughed-up edges soften the formality, making your table setting feel intentional rather than precious. It’s textile design that whispers instead of shouts.
Frayed edges soften formality, transforming your table from purchased to personally gathered—textile design that whispers rather than shouts
Tips for Even, Controlled Fraying
Controlled fraying isn’t luck—it’s technique. Stitch a straight line 5–10 mm from your desired edge to create a stable boundary, then use a seam ripper to gently tease out threads in measured increments.
Here’s your roadmap:
- Stitch a boundary line using straight or zigzag stitch 5–10 mm from the edge to anchor threads and prevent chaotic unraveling
- Make vertical cuts every 3–5 cm along the hem to distribute thread removal evenly and achieve predictable fringe density
- Comb out threads with a wire brush or fork post-stitching for uniform fringing at speeds up to 10 cm/minute, depending on linen weight
- Wash 3–4 cycles to encourage progressive fringe softening and create intentional gradient transitions in your edge finishing
The result? Deliberate, gorgeous fraying that looks seamless but isn’t.
Frequently Asked Questions (FAQs)
Can linen be frayed without using any tools?
Absolutely. Linen frays naturally without tools—just pull or tear the fabric edges and the loose weave separates easily. For deliberate fabric distressing, this manual fraying method works well for textile projects.
Hand fraying gives you edge control over how much linen unravels, making it perfect for napkins or decorative pieces. It’s the simplest fray prevention alternative: do nothing and let gravity manage it.
How can I prevent linen from fraying after it has been cut?
Serge the edges with a serger or use zigzag stitching on your sewing machine for reliable edge finishing.
For quick fabric sealing, apply Fray Stop liquid or tape edges with low-tack masking tape.
Lightweight interfacing also stabilizes seam edges effectively.
Are there any specific types of linen that are more prone to fraying?
Handkerchief linen frays most readily due to its loose weave and lower thread count. Tightly woven linens with higher fabric density resist fraying better. Linen-blend fabrics offer more stability than pure linen.
Cross-stitch linens like Aida are particularly vulnerable as you work, requiring careful edge management throughout your project.
Can I wash linen to create fraying instead of cutting?
You can wash linen to create deliberate fraying, though it takes patience. Gentle agitation in cool water softens fibers and loosens edge threads over multiple cycles. Warmer temperatures and rougher washing speed the process.
This fabric management technique works best for projects where controlled fraying adds aesthetic appeal, like botanical napkins or decorative textiles.
How does linen fraying compare to other natural fabrics?
Linen frays readily due to its loose weave, much like cotton does. Cotton fraying mirrors linen’s behavior, requiring similar prevention techniques.
Silk holds together better, resisting fraying more gracefully.
Wool shrinks when wet, creating different management challenges.
Understanding these natural fiber differences helps you choose the right fabric care approach for your textile arts projects.
Will pre-washing linen reduce fraying before sewing?
Pre-washing linen actually helps reduce fraying. When you wash linen, it softens the fibers and tightens the weave slightly, making edges less prone to unraveling during sewing.
This fabric preparation step improves sewing readiness and makes fraying management easier throughout construction.
Conclusion
Picture yourself finishing a linen tote bag—edges sealed, stitches secure—only to watch it hold strong through months of use. That’s what mastery looks like. Whether you’re stopping fraying with sergers and fray check or deliberately unraveling threads for design impact, you now have the control to shape how linen behaves.
The techniques for preventing and managing does linen fray aren’t complicated; they’re just about choosing your approach. Pick the method that fits your project, commit to it, and let your fabric do exactly what you want it to do.
- https://www.pantone.com/color-of-the-year-2017
- https://www.fabric.com/
- https://www.instagram.com/explore/tags/diydreamingwithlia/?hl=en
- https://www.sciencedirect.com/science/article/pii/S0959652622010186
- https://www.premierevision.com/en/articles/d8b6d468-7247-f011-8f7d-000d3a2049b1/small-fibres-big-impact-navigating-fibre-fragmentation-in-textiles


