This site is supported by our readers. We may earn a commission, at no cost to you, if you purchase through links.
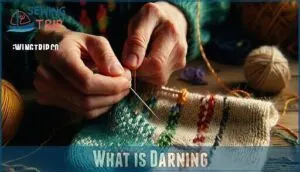
 Darning in sewing is a repair technique that weaves new threads through holes or worn fabric areas to restore strength and extend garment life.
You’ll use a needle and thread to create a woven patch that integrates seamlessly with the original fabric structure.
Unlike patching, which adds layers, darning works by weaving threads in a grid pattern—first vertically, then horizontally—mimicking the fabric’s natural weave.
It’s perfect for fixing moth holes in sweaters, worn sock heels, or thin spots in vintage linens.
This sustainable method saves money while preserving sentimental pieces that would otherwise end up in the trash.
The beauty lies in creating repairs that are nearly invisible when done correctly, making your favorite clothes last years longer with a technique that is both nearly invisible and helps in preserving sentimental pieces.
Darning is a valuable skill for extending the life of clothing and textiles, and its application can be seen in various forms of textile repair.
Table Of Contents
Key Takeaways
- You’ll weave new threads directly through holes to rebuild fabric structure instead of covering damage with patches, creating repairs that integrate seamlessly with the original textile.
- You can save hundreds of dollars annually by darning worn garments, like sock heels and sweater holes, rather than replacing them, making this technique both budget-friendly and sustainable.
- You’ll need basic tools, including a darning needle, darning egg, and matching thread, to create professional-quality repairs that can be nearly invisible when done correctly.
- You can transform necessary repairs into decorative art through visible mending techniques that use contrasting colors and creative stitching patterns to celebrate the repair process.
Darning Basics
You’ll find darning is your secret weapon for bringing worn-out clothes back to life by weaving new threads directly into holes and damaged areas.
Darning transforms trash into treasure—one thread at a time, your clothes get a second chance at greatness.
This time-tested technique transforms what looks like trash into treasure, saving you money while keeping your favorite garments out of the landfill, and it’s a method that utilizes darning to achieve this.
Definition and Purpose
Darning brings fabric restoration to life by weaving new threads directly into damaged areas.
This time-tested sewing technique creates strong, nearly invisible repairs that extend garment life far beyond what simple patches could achieve. Think of it as giving your clothes a second chance at greatness.
Here’s why darning beats mending vs. replacing every time:
- Preserves original fabric structure through careful thread weaving
- Saves money by repairing damage instead of buying new clothes
- Supports sustainable practices that reduce textile waste.
Your favorite sweater deserves this repair superhero treatment!
History and Origins
Throughout history, textile-preservation wisdom transformed necessity into art. You’ll discover darning’s Old English Roots trace back to "dearn," meaning mend.
This ingenious traditional method emerged independently across cultures, with ancient Egyptian examples from 600-799 AD showing wool repairs on children’s tunics.
| Era | Region | Innovation |
|---|---|---|
| 600-799 AD | Egypt | Earliest darning evidence |
| 13th Century | Middle East | Geometric silk patterns |
| 1700s | Europe | Royal Darning samplers |
| Edo Period | Japan | Boro and sashiko techniques |
Global Variations flourished as communities developed unique approaches. Indian rafoogari artisans mastered mending clothes on precious pashminas, while Japanese boro embraced visible repairs.
Early Tools like tiger cowry shells served as ready-made darning eggs. This needlework tradition proves that Textile Longevity has always mattered to resourceful communities worldwide.
Darning samplers from the 1700s often included holes for technique practice.
Benefits of Darning
Mastering darning transforms your relationship with clothing forever.
This sustainable fashion technique extends garments by years while reducing waste dramatically.
Mending clothes through fabric repair saves hundreds annually compared to replacements.
Clothing maintenance prevents unraveling in beloved items, enabling heirloom preservation.
Plus, visible mending offers creative expression—turning repairs into personalized art that tells your story.
What is Darning
Repairing worn fabric doesn’t have to mean throwing away your favorite clothes. Darning definition centers on fiber restoration through strategic thread weaving that rebuilds damaged areas from the ground up.
This repair technique works like fabric surgery, where you’re the skilled surgeon bringing torn fibers back to life:
- Weaving patches across holes using interlaced threads
- Fabric strengthening by recreating the original weave structure
- Hole repair that blends invisibly with existing material
- Mending that prevents further unraveling and damage
Think of darning as giving your clothes a second chance at life. You’re not just covering up problems—you’re actually rebuilding the fabric’s DNA, thread by thread. Unlike regular sewing that joins separate pieces, this repair technique reconstructs lost fibers using careful weaving motions.
A darning plate, also known as a feed dog cover, is often used to facilitate this process. The magic happens when your needle becomes a tiny loom, creating new fabric where none existed.
Whether you’re fixing a beloved sock or rescuing a vintage sweater, darning transforms potential trash into lasting treasure through patient, precise fiber restoration work.
Darning Techniques
You’ll master four core darning techniques that transform holes into strong, often invisible repairs.
Each method serves different fabrics and skill levels, from basic hand darning that anyone can learn to advanced invisible repairs that make damage completely disappear.
Hand Darning
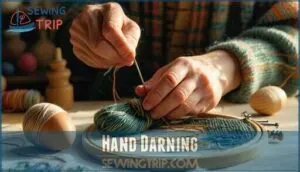
The magic happens when you thread your needle and start weaving techniques across that pesky hole.
Hand darning lets you control every stitch, choosing yarn selection that perfectly matches your fabric.
You’ll weave vertical threads first, then horizontal ones in a basketweave pattern—it’s like creating tiny fabric from scratch.
Tension control keeps everything smooth, while stitch variations and pattern improvisation turn basic hole repair into artistry.
Your darning techniques transform fabric repair into a meditative practice.
Machine Darning
While hand darning requires patience, machine darning transforms your sewing machine into a speedy repair tool.
You’ll drop the feed dogs, attach a darning foot, and guide fabric manually for precise control. For quick and durable solutions, machine darning is often preferred.
Here’s how machine settings make repairs effortless:
- Attachment types – Use free-motion or darning feet for smooth fabric movement
- Fabric feed – Lower feed dogs so you control the stitching direction completely
- Automation levels – Set zero-length stitches while moving fabric creates perfect weaving patterns
Fine Darning
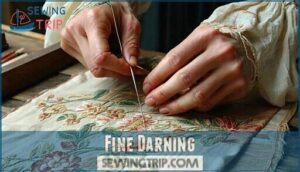
Fine darning transforms invisible mending into precision craftsmanship.
You’ll match fibers exactly, using silk thread on silk fabric for seamless fabric repair. This professional darning technique saves heirlooms with tiny, methodical stitches that replicate the original weave.
Proper needle selection is key, so be sure to consider fabric type.
Historical examples show fine darning restoring heirlooms to museum quality—your grandmother’s sweater deserves the same care.
Invisible Repair
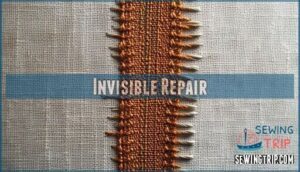
Precision makes invisible repair the gold standard of fabric restoration.
This advanced technique creates nearly invisible mends that seamlessly blend into your original garment.
Your invisible mending arsenal needs:
- Thread matching – harvest original threads from hems
- Weave replication – mirror the fabric’s structure exactly
- Tension control – maintain consistent stitch pressure
- Seamless blending – align grain direction perfectly
- Fiber restoration – rebuild warp and weft threads.
Perfect invisible darning takes patience, but you’ll fool even sharp-eyed inspectors.
Darning Tools
You’ll need the right tools to make darning repairs that actually last and look professional.
The essential darning kit includes a darning egg for support, a darning mushroom for curved areas, a specialized darning needle with a large eye, and a thimble to protect your finger during the repetitive stitching process.
This kit is crucial for making darning repairs that are durable and visually appealing.
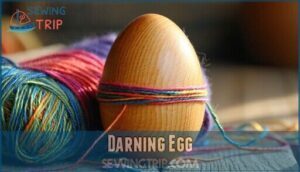
Darning Egg
Your darning egg becomes the foundation that makes fabric repair possible.
This egg-shaped tool slips inside socks, creating the perfect surface tension for smooth weaving. Different egg materials like wood, ceramic, and plastic offer varying support levels.
Historical eggs included tiger cowry shells, proving crafters have always been resourceful. Tension control improves dramatically with the right egg shapes – smaller ones work best for socks, while larger versions handle sweaters.
You can even purchase a darning egg online for convenience. Without this essential tool, your darning techniques would struggle against loose, wobbly fabric.
Darning Mushroom
Your darning mushroom works like a steady helper, holding fabric taut while you repair holes. This curved wooden tool features a rounded top and handle, making darning more comfortable than using a flat darning egg.
Many options are available if you want to buy one.
- Size Matters: Choose mushrooms sized for your project – small for socks, large for sweaters
- Ergonomic Design: The handle prevents hand cramping during long repair sessions
- Mushroom Alternatives: Light bulbs or tennis balls work in a pinch
- Historical Mushrooms: Craftspeople once carved these from single wood pieces
- DIY Mushroom: Make yours from carved soap or wrapped jar lids
Darning Needle
Beyond the darning mushroom, you’ll need the right darning needle to work your repair magic. This specialized tool isn’t your average sewing needle—it’s built for heavy-duty mending work.
A quality darning needle features specific design elements that make fabric repair techniques much easier:
- Needle Length ranges from 2-4 inches for better maneuverability through thick layers
- Eye Size accommodates multiple thread strands or thick darning yarns
- Needle Material uses strong steel construction that won’t bend under pressure
- Rounded Tip prevents snagging delicate fibers during hand sewing repairs
The Needle Size typically runs 14-18, with larger numbers handling heavier fabrics perfectly. For peak performance, consider that steel needles offer durability during heavy use.
Thimble
Your fingers will thank you for using a thimble during darning sessions. These protective guards prevent painful needle pricks while giving you better control over your sewing.
Choose your thimble based on comfort and project needs.
Thimble sizes range from tiny to extra-large, so find one that fits snugly without cutting off circulation. Thimble history dates back centuries, proving their lasting value.
For specialized projects, consider exploring options for a brass sewing thimble. If traditional thimbles feel awkward, try rubber fingertips or adhesive finger guards as thimble alternatives for your darning and repair work.
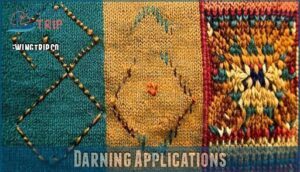
Darning Applications
You’ll discover darning isn’t just about fixing holes—it’s your gateway to extending garment life, saving money, and making sustainable fashion choices.
From preserving your favorite wool sweater to turning repairs into stunning decorative features, these applications will transform how you view mending forever.
Fabric Preservation
Whether you’re dealing with a beloved sweater or trusty work pants, fabric preservation through darning transforms potential casualties into lasting treasures.
This technique extends garment lifespan by reinforcing vulnerable areas before complete failure occurs.
Here’s how darning preserves your textiles:
- Fiber Reinforcement – Creates new structural support where original threads have weakened
- Preventing Wear – Stops small holes from expanding into irreparable damage
- Extending Use – Adds years to garments through strategic textile repair
- Textile Durability – Strengthens high-stress areas like elbows and knees
- Clothing Restoration – Revives vintage pieces that can’t be easily replaced
Cost-Effective
Your wallet will thank you for choosing repair vs. replace.
Darning transforms expensive clothing casualties into budget-friendly mending victories, slashing your clothing costs by up to 90%.
This cost-effective fabric repair technique extends garment life for years, delivering sustainable savings that compound over time.
Sustainable fashion starts with smart economics.
Eco-Friendly
When you choose darning over tossing clothes, you’re joining the circular economy revolution.
This simple fabric repair technique transforms you into an eco-warrior, extending garment lifespan while championing sustainable fashion.
Here’s how darning helps reduce waste:
- Keeps tons of textiles out of landfills annually
- Cuts your clothing consumption footprint in half
- Turns textile recycling into a creative, hands-on adventure
Your needle becomes a powerful tool for ecofriendly living.
Aesthetics
Beyond simple repairs, visible mending transforms darning into textile art.
Your color choices and decorative stitches create stunning artistic expression that celebrates imperfection rather than hiding it.
Think of decorative patching as wearable storytelling—each repair becomes a unique design element.
Texture play through contrasting threads adds visual interest while preserving function.
You can even incorporate hand sewn flower embellishments to further enhance the design.
Modern aesthetics embrace these intentional repairs, turning holes into conversation starters that showcase your creative spirit and sustainable values.
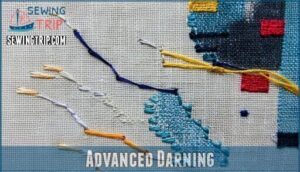
Advanced Darning
Once you’ve mastered basic darning, you’re ready to explore advanced techniques that transform simple repairs into artistic statements.
These sophisticated methods let you create stunning visual patterns while strengthening your fabric, turning necessary mends into decorative features that actually enhance your garments.
Twill Weave
Most darning techniques use straight lines, but twill weave darning creates diagonal strength that’s perfect for heavy-duty repairs.
This advanced technique mimics denim’s natural structure, making your mends nearly invisible while boosting fabric strength.
Here’s why twill angles work magic:
- Diagonal weaving distributes stress better than straight repairs
- Visual appeal blends seamlessly with twill fabrics like jeans
- Advanced patterns offer superior durability for high-wear areas
- Fabric strength increases through the staggered over-two, under-two method
Perfect for denim repair!
Chevron Weave
Chevron weave darning creates zigzag patterns that strengthen repairs beyond basic techniques.
You’ll alternate twill directions every few rows, forming distinctive diagonal lines that enhance chevron aesthetics while boosting weave strength.
This advanced darning technique transforms holes into repair design features.
| Pattern Element | Technique | Benefit |
|---|---|---|
| Direction Change | Reverse every 3-4 rows | Creates arrow patterns |
| Diagonal lines | Maintain consistent angle | Visual appeal |
| Pattern variations | Adjust spacing | Custom effects |
Perfect for chevron weave enthusiasts, this weaving method requires precision but delivers professional results on any fabric.
Decorative Stitches
Anyone can transform ordinary repairs into stunning decorative stitches that celebrate visible mending. When you embrace embroidery integration, your darning becomes artful storytelling through thread.
Try these creative approaches:
- Pattern Creation – Design geometric grids and star motifs
- Color Palette – Mix contrasting threads for bold statements
- Stitch Samplers – Combine running, blanket, and chain stitch variations
- Embroidery techniques – Add French knots and lazy daisies
- Historical patterns – Recreate traditional sewing motifs
Transform damage into design with decorative stitches that make your mending unmistakably yours.
Darning on Delicate Fabrics
Working with silk darning and lace repair requires a gentle touch that your heavy-handed denim fixes won’t appreciate. Think of delicate fabrics like handling butterfly wings – too much pressure destroys the magic.
Your tension control becomes everything here. Loose stitches prevent puckering, while tight ones tear fragile fibers. Use thin embroidery needles for sheer fabrics, and test your approach on scraps first.
Knitwear darning on cashmere demands patience, but invisible repair techniques make tears disappear completely. Support delicate areas with darning eggs to prevent stretching during hand darning work.
Frequently Asked Questions (FAQs)
What is the Difference Between Darning and Mending?
Like night and day, darning weaves new threads into holes while mending covers any repair method.
You’re basically rebuilding fabric structure with darning, but mending includes patches, gluing, or stitching tears together.
What Are the Different Types of Darning Stitches?
You’ll find several darning stitch types: weaving stitches recreate fabric structure, straight darning mends tears, diagonal darning adds flexibility, and Swiss darning repairs knits invisibly using duplicate stitches.
What Are the Best Tools and Materials for Darning?
You’ll need a darning needle (longer, thicker than regular needles), matching thread or embroidery floss, and a darning egg or mushroom for fabric support. These essentials create professional, durable repairs.
How Do I Darn a Hole in a Sock?
You’ll need a darning egg, needle, and matching thread to tackle this repair mission.
Slip the egg inside your sock, then weave horizontal threads across the hole, followed by vertical threads, creating a sturdy patch.
How Do I Darn a Hole in a Sweater?
You’ll use Swiss darning or duplicate stitch for knit sweaters.
Thread a darning needle with matching yarn, then follow the existing stitch pattern, weaving over and under to recreate the fabric structure perfectly.
How do you darn on a sewing machine?
Machine darning saves 70% more time than hand repair.
Set your machine to zigzag or darning stitch mode, remove the presser foot, and lower feed dogs.
Stretch fabric in an embroidery hoop, then guide it manually while stitching back-and-forth to weave over holes using a darning stitch.
What is the difference between sew and darn?
Sewing joins separate fabric pieces together, while you darn by weaving threads across holes to recreate the original fabric structure and repair damage.
What is a darning stitch?
Like mending a broken heart with careful stitches, you’ll weave new threads through holes using running stitches in a basketweave pattern.
This creates a strong, flexible patch that mimics your fabric’s original structure perfectly.
What is darning in sewing?
Darning is a repair technique where you weave threads across holes to recreate the fabric’s original structure.
You’re basically rebuilding damaged areas by interlacing new threads, strengthening worn spots while maintaining the garment’s integrity and comfort.
What is a darning needle?
You’ll find this specialized tool becomes your fabric’s best friend when holes appear.
A darning needle features a longer shaft, thicker body, and larger eye than regular sewing needles, designed specifically for weaving repair threads through damaged areas with ease, and is a key component in making your fabric’s repair process more efficient with its darning needle.
Conclusion
Like the legendary seamstress Penelope weaving her tapestry, mastering what’s darning in sewing transforms you into a guardian of cherished textiles.
You’ll save money, reduce waste, and preserve memories with each careful stitch.
From basic grid patterns to decorative techniques, darning empowers you to resurrect beloved garments that seemed destined for disposal.
This time-honored skill bridges sustainability and sentimentality, proving that what’s darning in sewing isn’t just repair—it’s textile resurrection at your fingertips.
- https://trc-leiden.nl/trc-needles/techniques/embroidery/general-embroidery/darning
- https://pieceworkmagazine.com/to-darn-or-not-to-darn/
- https://wrenbirdarts.com/blogs/embroidery-by-erin-eggenburg/darn-confused-4-ways-to-darn-a-hole
- https://www.gathered.how/knitting-and-crochet/knitting/darning
- https://www.reddit.com/r/sewhelp/comments/18jrhcb/first_time_sewing_need_help_on_mending/

