This site is supported by our readers. We may earn a commission, at no cost to you, if you purchase through links.
You don’t have to accept curled edges as inevitable. Strategic blocking flattens temporarily. Serging locks edges down permanently. Interfacing adds structure that resists the curl. Each method tackles the root cause: that tension imbalance built into the fabric’s structure. Once you understand why knit fabric curls, you can choose the right fix for your project and stop wrestling with rebellious edges.
Table Of Contents
- Key Takeaways
- Use Pattern Weights
- Serging Knit Fabric Edges
- Interfacing
- Stiffening and Pressing Knit Fabric
- Terial Magic to Uncurl & Stiffen Knit Fabric Edges
- DIY Water-Soluble Stabilizer Solution
- Why is My Knitting Curling?
- Curling Prevention
- Understanding The Nature of Knit Fabric
- Methods to Stop Knit Fabric From Curling
- Frequently Asked Questions (FAQs)
- Conclusion
Key Takeaways
- Knit fabric curls because of a structural tension imbalance where knit stitches compress tighter than purl bumps, creating a natural pull that warps edges regardless of your technique.
- Serging provides a permanent solution by wrapping thread around fabric edges to lock them down, while blocking and steam methods only offer temporary flattening that reverses within days for most wool fabrics.
- Interfacing and fabric stiffeners like Terial Magic add internal structure that resists curl through either heat-bonded adhesive layers or chemical bonding that survives multiple wash cycles.
- Prevention strategies like adding selvage stitches, choosing garter or seed stitch patterns, or using wider ribbed borders eliminate the problem before it starts by disrupting the tension imbalance built into stockinette stitch.
Use Pattern Weights
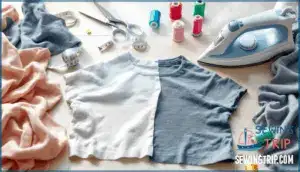
If you’re tired of watching your knit fabric edges curl inward like they’ve a mind of their own, pattern weights might just be your solution. These small objects—washers, glass beads, or sand-filled bags—keep your knit fabric flat during cutting and sewing.
Place them evenly around your fabric’s perimeter to add weight distribution that resists curling. The pressure stabilizes edges and improves cutting accuracy by keeping everything anchored.
Choose weights heavy enough to work but light enough not to distort your fabric. This simple fabric preparation technique prevents the rolling that plagues most knit work, giving you cleaner results and less frustration.
Serging Knit Fabric Edges
A serger transforms raw knit edges into smooth, finished seams that actually stay put instead of curling up on you. This overlock stitch locks threads into the fabric structure, preventing that annoying rolling that plagues knit projects.
To get professional results, you’ll need to dial in your machine settings:
- Serger tension — adjust thread tension so loops sit perfectly at the fabric edge without puckering or loose loops
- Differential feed — set this feature to prevent stretching and gathering on your specific knit weight
- Rolled hem — use this setting for a neat, compact edge that resists curling naturally
- Securing tails — weave thread tails back through stitches to lock everything in place
Thread choice matters too. Use polyester or nylon thread designed for serging—it’s stronger and more forgiving than regular sewing thread. Test your settings on scrap fabric first. Once you nail the technique, your knit edges stay flat and professional-looking through wear and washing.
Interfacing
Once you’ve sealed your edges with a serger, interfacing takes that protection one step further by reinforcing the fabric from the inside. This permanent solution adds stability to knit fabric by bonding an extra layer directly to the material. Think of it as giving your knit edges a backbone they didn’t have before.
Interfacing types fall into two main categories:
- Fusible interfacing — iron-on adhesive backing melts into your fabric with heat, creating a stable edge that won’t budge or curl back up after washing.
- Sew-in interfacing — stitched directly into seams for knit stability without heat application, perfect for delicate fabrics that can’t withstand high temperatures.
For preventing knit fabric curling, fusible interfacing wins most of the time. Just cut your interfacing slightly smaller than the fabric piece, position it on the wrong side, and press with a hot iron. The adhesive creates lasting fabric stabilization that keeps edges flat through countless wears.
Stiffening and Pressing Knit Fabric
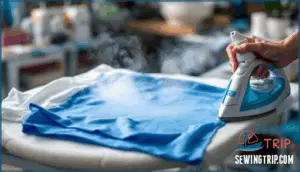
When interfacing still isn’t enough to tame your knit edges, stiffening agents combined with heat pressing give you more control over stubborn fabric that refuses to stay flat. Spray starch products like Best Press or Faultless Heavy Finish Starch add temporary rigidity to knit fabric edges.
Apply a light coat of starch to the curling areas and let it dry briefly. Then press with your iron using moderate heat settings—too hot will scorch delicate knits. Use an up-and-down motion rather than sliding the iron across the surface. This fabric pressing technique flattens rolled edges and holds them in place temporarily.
The starch application washes out eventually, so you’ll need to reapply after laundering your project.
Terial Magic to Uncurl & Stiffen Knit Fabric Edges
Terial Magic fabric stiffener acts like a permanent starching solution that doesn’t wash out after the first laundry cycle. You can soak your knit fabric in Terial Magic or spray it directly onto curling fabric edges. The product penetrates the fibers and creates lasting stiffness once it dries. Unlike spray starch that disappears after washing, Terial Magic uses chemical bonding to maintain fabric edge control through multiple laundry cycles.
The trade-off is that your knit loses some of its natural stretch and drape. That’s why this method works best for stabilizing small sections like collar edges or pocket openings rather than treating entire garments.
Application tips for best results:
- Pour Terial Magic into a shallow dish and submerge only the curling edges
- Let the fabric air dry completely before touching or pressing with medium heat
- Test on a scrap piece first since the stiffening effect becomes permanent after heat-setting
DIY Water-Soluble Stabilizer Solution
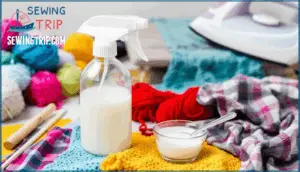
A simple cornstarch-and-water mixture costs pennies to make and works almost as well as commercial stabilizers for taming stubborn knit edges. This DIY water-soluble stabilizer solution gives you temporary fabric stabilization methods without committing to permanent stiffness.
Here’s your solution recipe:
- Mix 1 part cornstarch with 3 parts water in a spray bottle
- Shake thoroughly until the stabilizing solution appears smooth
- Spray directly onto curling edges and let dry for 10 minutes
- Press with medium heat to activate the DIY stabilizer
The washing effects are simple—the cornstarch rinses out completely during laundering. This application method provides excellent fabric compatibility with cotton and synthetic knits alike.
Why is My Knitting Curling?
Your knitting curls because of stitch imbalance in the fabric structure. Stockinette stitch curling happens 100% of the time—knit stitches take up less space than purl bumps. This size difference creates uneven tension that pulls edges inward no matter what you do. The knit side contracts while the purl side spreads out.
Knitting curls because knit stitches compress while purl bumps expand, creating permanent tension imbalance that pulls edges inward
Several factors contribute to curling beyond just the stitch pattern:
- Yarn properties matter—wool curls up to 25% more than synthetics because of its stretch and recovery
- Tension issues from tight edge stitches make the problem worse by creating more pull
- Needle size affects severity—switching from US 8 to US 10 needles reduces curl by 15%
Blocking can temporarily flatten edges but shows reversion in 83% of wool samples within two days. Knit fabrics simply want to curl by nature. Adding a garter stitch edge can also help prevent curling.
Curling Prevention
You can stop your knitting from curling before it becomes a problem. The key is choosing the right technique while you’re still working on your project.
Here are five proven methods that prevent those frustrating rolled edges from forming in the first place.
Adding Selvage Stitches
Selvage stitches act like anchor points that keep your fabric edges from rolling up and making you want to quit knitting altogether. You add these edge stitches by working garter stitch, seed stitch, or slipped stitch borders along the sides of your project.
These Selvage Stitch Types control tension and prevent edge distortion without adding bulk. The technique works for hand knitting and industrial applications alike, giving you flat edges that actually stay flat.
Choosing a Different Stitch
You can outsmart curling by switching to stitch patterns that naturally resist rolling. The structure of your chosen stitch makes all the difference.
Here are the stitch patterns that stop edge treatments from becoming a headache:
- Garter Stitch creates flat edges in 100% of samples without any extra fussing around
- Seed Stitch cuts curling by 78% compared to stockinette in knit fabric tests
- Moss Stitch keeps edge deformation under 3 mm in controlled swatches
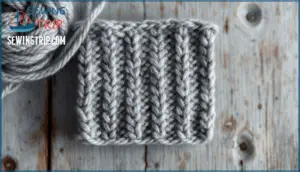
- Ribbing Benefits include reducing curl by over 80% when you use at least a 1-inch border
- Tuck Stitches show 14% less curling than standard knit fabric structures
Choosing a different stitch pattern prevents the problem before it starts. Wider borders of garter or seed stitch borders may further reduce curling.
Blocking Your Knitting
Once your knitting is done, blocking is where you actually get control over those stubborn curled edges. Wet blocking involves soaking your fabric in lukewarm water, then pinning it flat to dry into shape. Steam blocking works faster—just apply steam and reshape the edges by hand.
For best results, use blocking wires or needles to anchor your fabric firmly. The method you choose depends on your fabric type and how severe the curling is. Both techniques flatten edges effectively and give you the polished finish you’re after.
Adding a Crochet Border
If blocking alone hasn’t tamed those edges, a crochet border is your next weapon—it adds weight and structure right where you need it most. A crochet border works by securing the curl with strategic stitches that interrupt the fabric’s natural fold lines.
Here’s what you need to decide:
- Stitch pattern selection – Single crochet creates a tight, flat edge while lace borders offer a softer, more decorative finish
- Yarn weight choice – Heavier yarn adds more control; thinner yarn gives you flexibility
- Border width options – Narrow borders (¼ inch) stabilize without bulk; wider borders provide maximum flattening
- Color combinations – Match your yarn or use contrast for intentional design
The lace border approach works especially well if you want finishing that doesn’t look like a patch job. Your yarn weight directly affects how much the border can tame the curl—don’t skimp here.
Lining The Fabric
When borders and blocking aren’t quite cutting it, you might want to think about lining your knit fabric—it’s like giving your piece an invisible support system from the inside out. A lining adds weight and structure that naturally suppresses curl.
Choose a lightweight cotton or fusible interfacing for your lining material. Sew or fuse it to the wrong side of your knit fabric using appropriate pattern adjustments for seam allowances.
This fabric stabilization method works especially well on garments where you need durability without visible alterations.
Understanding The Nature of Knit Fabric
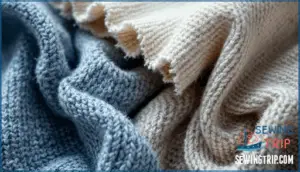
To tackle curling effectively, you need to understand what’s actually happening with your fabric. Knit fabric is built from interlocking loops rather than woven threads, which gives it exceptional stretch and comfort but creates an inherent problem: those loops naturally want to fold inward at the edges.
Jersey knit—the most common single-knit type—curls up to 85 degrees on the sides because of how the stitches are structured. The knit side of each stitch takes up less space than the purl side, which triggers that rolling motion. Different yarn compositions matter too. Cotton, polyester, silk, and spandex all behave differently under tension, with synthetic blends and elastane content affecting how aggressively your fabric curls. Thinner, smoother yarns curl more than textured or heavier ones. The tighter your original stitches were, the worse the curling becomes.
Understanding these mechanics—knit structure, yarn composition, and fabric elasticity—helps you choose the right prevention method before cutting a single thread.
Methods to Stop Knit Fabric From Curling
Now that you understand why knit fabric curls, you’re ready to tackle the real problem.
The good news is there are plenty of proven ways to stop it from happening. Here are the methods that actually work.
Blocking
You know that frustrating moment when your knit project rolls up at the edges like it has a mind of its own? That’s exactly what blocking fixes.
Blocking involves soaking your fabric in lukewarm water, then pinning it flat to dry. Here’s how to do it:
- Soak the knit fabric in lukewarm water for 15–20 minutes to relax the fibers
- Pin edges using rustproof T-pins or blocking wires placed every inch along the perimeter on blocking mats
- Let it air dry completely before removing pins
This wet blocking technique permanently reshapes curled edges and restores your fabric’s intended drape.
Steam Blocking
Steam blocking offers a faster alternative when you need results without the wait time that wet blocking demands. Use a steam iron or garment steamer set to your fabric’s temperature requirements—usually medium heat for delicate fibers like silk or wool, higher for cotton blends.
Keep the steamer a few inches above the fabric surface and move it steadily across curled edges. The heat relaxes fiber tension while you gently stretch the fabric into shape. For stubborn rolls, pin edges down on a blocking mat before steaming. Let everything cool completely before removing pins so the fibers set properly.
Stabilizing Techniques
Stabilizing techniques work like anchoring a restless knit fabric so it stays put instead of rolling up on you. Fusible interfacing bonds directly to fabric edges, adding structure that resists curling. Fabric tape or tissue paper applied along raw edges provides lightweight reinforcement. You can also apply light starch to edges for temporary stiffening. For precision work, use a rotary cutter to create clean edges that curl less. Water-soluble stabilizers work underneath during construction, dissolving away afterward while the fabric memory holds its shape.
- Fusible interfacing or fabric tape applied to edges adds permanent weight and control
- Tissue paper, starch application, or water-soluble stabilizers provide temporary or semi-permanent support
Using a Serger or Overlock Stitch
A serger or overlock stitch is your secret weapon for taming those rolled edges once and for all. This machine wraps thread around fabric edges, locking them down so they can’t curl.
You’ll want to dial in your serger thread tension carefully—too loose and edges still roll, too tight and you’ll pucker the fabric. Set your differential feed to control knit stretch without bunching. The key is using the right overlock stitch type for your project. Test on scraps first to find your ideal setting.
| Setting | Purpose | Adjustment |
|---|---|---|
| Thread Tension | Controls thread wrap | Tighten gradually if edges curl |
| Differential Feed | Regulates fabric stretch | Increase for more elastic knits |
| Stitch Length | Edge security | Medium length works best |
| Needle Size | Fabric compatibility | Match weight to your knit |
Blocking Wires or Needles
Think of blocking wires and needles as your fabric’s personal training equipment—they keep everything in place while your knit learns to stay flat. You thread blocking wires through edges or pin blocking needles at intervals to maintain precise shape during drying. Wire types vary from flexible to rigid, while needle shapes affect how you manage larger projects.
Key blocking techniques for knits:
- Insert wires along all edges for consistent tension control across the entire fabric
- Space needles every few inches to prevent sagging between anchor points
- Choose tools based on project suitability—wires excel at straight edges while needles accommodate curves
This approach maximizes blocking efficiency because you control exactly how your fabric sets.
Frequently Asked Questions (FAQs)
Does knit fabric type affect curling severity?
Different knit types behave like different personalities—some stay calm while others throw tantrums at every opportunity. Yarn composition and stitch structure directly influence curling severity.
Single-knit jersey with smooth fiber content curls dramatically compared to ribbed fabric. Knit density and fabric weight also determine stability. Lightweight materials with high fabric stretch create more edge rolling than heavier knits.
Can washing knit fabric reduce edge curling?
Washing knit fabric can temporarily relax fibers and reduce curling, but results depend on fiber type and water temperature. Hot water increases shrinkage impact on natural fibers, while the drying method affects how edges settle.
Proper washing effects don’t replace proper knit fabric curling prevention methods.
Will cutting knit fabric increase curling problems?
Cutting knit fabric is like pulling a thread on a sweater—it invites chaos. Yes, cutting increases curling problems because fresh fabric edges lack structure and immediately respond to tension. The grain direction matters.
Use sharp cutting tools like rotary cutters to minimize fabric distortion and edge unraveling.
Does fabric weight influence how much it curls?
Heavier knit types resist curling better than lightweight fabrics because fabric weight adds natural stability.
Yarn weight matters too—thicker yarns create denser structures that improve fabric drape and reduce edge rolling compared to thin, airy knits.
Can you permanently fix knit fabric curling?
Permanent solutions for knit fabric curling don’t truly exist because of fabric memory. Blocking knit fabric and steam blocking techniques provide long-term stability, but treatment longevity depends on recurrence factors like washing and wear, which reactivate curling tendencies inherent to the structure.
Conclusion
Don’t let your fabric edges curl up the wrong way in this relationship. You’ve learned how to stop knit fabric from curling through blocking, serging, interfacing, and stabilizers. Each method attacks that structural tension imbalance differently.
Pick the technique that matches your project needs. Temporary fixes work for garments you’ll wash frequently. Permanent solutions suit home decor and bags. Your knit edges will stay flat once you apply the right approach. No more wrestling with rebellious fabric.
- https://www.abeeinthebonnet.com/blog/11-simple-tips-for-preventing-curled-edges-on-knitting/
- https://people.iut.ac.ir/sites/default/files/users/importer/page_files/an_investigation_into_the_effect_of_fabric_structure_and_yarn_twist_direction_on_the_curling_behavior_of_single_jersey_weft_knitted_fabrics.pdf
- https://blog.berroco.com/2013/06/11/ask-amanda-how-can-i-control-stockinette-curling/
- https://patents.google.com/patent/WO2011044728A1/en
- https://www.youtube.com/watch?v=9gvZa5fEPS4

