This site is supported by our readers. We may earn a commission, at no cost to you, if you purchase through links.
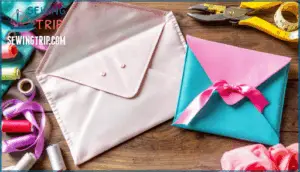
Fabric envelopes aren’t just practical backups for your stationery stash. They’re reusable, customizable, and surprisingly quick to make once you grasp the basic technique. Whether you’re protecting greeting cards, organizing craft supplies, or creating gift packaging that doesn’t end up in the trash, a sewn envelope becomes a surprisingly adaptable tool in your creative arsenal.
With just a few fabric scraps and about 20 minutes, you can master a project that transforms how you think about storage and presentation.
Table Of Contents
Key Takeaways
- Fabric envelopes transform scraps into reusable, customizable storage solutions that take about 20 minutes to make once you’ve learned the basic folding and stitching technique.
- The right material choices matter—cotton fabric paired with fusible interfacing creates structure, while snap closures provide durability that stands up to repeated use.
- Precision in the prep work (cutting with templates, adding seam allowances, and applying interfacing) determines whether your envelope looks professionally made or haphazardly assembled.
- Once you’ve mastered the basic rectangle pattern, you can adapt the technique endlessly by changing sizes, shapes, and decorative elements to fit different purposes from gift packaging to document storage.
Materials Needed to Sew an Envelope
Before you start cutting and stitching, you’ll want to gather a few basic supplies.
The right fabric and materials make the difference between an envelope that holds up and one that falls apart.
Here’s what you need to have on hand.
Recommended Fabric Types and Sizes
Your fabric choice sets the stage for a beautiful envelope. Cotton is your best friend here—over 80% of sewers rely on pre-washed cotton for its durability and ease.
Consider these fabric weights and sizes for your project:
- Lightweight cotton lawn or voile (2–4 oz/yd²) for soft, delicate envelopes with a gentle drape
- Medium-weight cotton poplin or twill (4–8 oz/yd²) for everyday envelopes that maintain their shape beautifully
- Fat quarter cuts at 5 x 11 inches or fabric pieces sized 15 x 30 cm for standard A2 envelopes
- Specialty fabrics like felt or recycled polyester when you want fraying resistance and eco-friendly options
- Fabric scraps from 7 x 7 to 12 x 12 inches for square envelopes, making good use of leftover fabric measurements
Size ratios matter, too—most templates follow a balanced 1:3 flap-to-body ratio. Understanding fabric drape properties will help you achieve the desired envelope style. Match your fabric weight to your envelope’s purpose, and you’ll create something that’s both practical and pretty.
Choosing Interfacing and Closures
Once you’ve picked your fabric, it’s time to think about structure and closure. Fusible interfacing is your go-to choice—about 60% of sewers use it for added body. Match the interfacing weight to your fabric: lightweight pairs with lawn, medium-weight with poplin.
For closures, snaps win hands down, appearing in over half of all envelope projects. Magnetic snaps work beautifully when you want a flat profile, while KAM snaps or plastic snaps offer colorful, decorative options. Reinforce closure placement with interfacing—80% of experienced sewers do this for durability. When choosing the right snap type, consider exploring sewing snap options to find the best fit for your project.
How to Cut Fabric for an Envelope
Cutting your fabric correctly is where good envelopes start—it’s like laying a solid foundation before you build. You’ll want to work with a template, use sharp tools, and plan for seam allowances so everything lines up when you sew.
Let’s walk through the best ways to cut, measure, and prep your fabric so your envelope comes together smoothly.
Creating and Using Envelope Templates
The secret to a professional-looking fabric envelope starts with a template that works like a blueprint—you’ll trace it once and use it over and over, so getting it right the first time saves you from wonky shapes and wasted fabric later.
Here’s how to create your envelope template:
- Trace a store-bought paper envelope directly onto cardstock or template plastic, capturing the classic shape and folding techniques that make envelope construction foolproof.
- Mark your fold lines clearly on the template so you’ll know exactly where each flap bends when working with your fabric layout.
- Add seam allowances of ¼ to ½ inch around all edges to accommodate different closure styles and prevent fraying in your DIY fabric envelopes.
Cutting Techniques for Accuracy
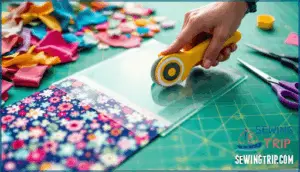
Once you’ve got your template down, cutting your fabric pieces precisely is what separates an envelope that looks handmade-with-love from one that just looks… well, homemade. Pin your template securely to the fabric, then use sharp fabric shears or a rotary cutter for clean edges—this is where precision tools make all the difference in envelope construction.
| Tool | Best For | Accuracy Level |
|---|---|---|
| Fabric shears | Straight cuts, detailed shapes | High with steady hands |
| Rotary cutter | Multiple layers, speed | Excellent with ruler |
| Template plastic | Reusable tracing, durability | Consistent every time |
| Fabric weights | Securing pieces flat | Prevents shifting |
| Cutting mat | Protecting surfaces, grid lines | Aids measurement |
For fabric tracing, mark directly on the wrong side using chalk or a disappearing pen, keeping your sewing techniques sharp and your seam management stress-free.
Seam Allowances and Fabric Preparation
Your seam allowance isn’t just wiggle room—it’s the backbone that keeps your envelope from unraveling at the first tug. Plan for at least ¼ inch around all edges before you begin fabric cutting, giving your sewing project breathing room for solid seam management and fray prevention.
Before stitching, prep your fabric pieces:
- Press out wrinkles with an iron for accurate fabric preparation
- Apply interfacing types like featherweight for structure without bulk
- Trim loose threads using sharp scissors for clean edge finishing
- Test your seam allowance on scrap fabric first
- Mark sewing lines lightly if you’re new to sewing techniques
Preparing Fabric Before Sewing
Before you start sewing, you’ll want to prep your fabric so everything comes together smoothly. This means adding structure, lining up your pieces, and protecting the edges from coming apart.
Here’s what you need to do to get your envelope ready for the sewing machine.
Applying Interfacing or Mod Podge
If you want your fabric envelope to maintain its shape and feel professional, applying interfacing or Mod Podge is the step that makes all the difference.
For interfacing, choose lightweight or featherweight options that add body without bulk—just fuse it to the wrong side of your fabric following the manufacturer’s instructions.
If you prefer Mod Podge for fabric stabilization, brush it evenly across the entire surface, then let it dry for about 30 minutes before sewing.
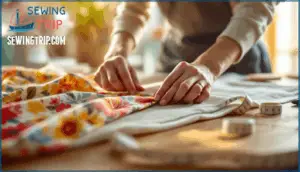
Pinning and Aligning Fabric Pieces
Before you start stitching, pinning and aligning your fabric pieces correctly sets you up for clean seams and a professional-looking envelope.
Place your lining and outer fabric right sides together, then pin along the edges—matching corners and sides guarantees cutting precision translates into seam accuracy. This pinning technique keeps fabric pieces stable during sewing, preventing shifting that throws off your seam allowance and overall shape.
Tips for Preventing Fraying
Fraying edges can unravel your hard work faster than you can say "thread disaster," but a few smart moves keep those fabric edges locked in place.
Use a seam allowance of at least ¼-inch, then finish raw edges with zigzag stitching or pinking shears. Interfacing adds stability from within, while edgestitching reinforces seams beautifully.
Fabric stabilizers work wonders on loosely woven materials.
Step-by-Step Envelope Sewing Instructions
Now that your fabric is ready, it’s time to bring your envelope to life. The following steps will walk you through the actual sewing process, from joining your fabric pieces to adding those finishing touches that make your envelope both functional and beautiful. Let’s get started with the first stitch.
Sewing The Envelope Body
Now you’re ready to bring all your prep work together, stitch by stitch, as the envelope starts to take its shape. Here’s how the body assembly comes to life:
- Place your outer fabric and lining right sides together, smoothing out any wrinkles so they lie flat.
- Pin along three edges—both sides and the top—leaving the bottom open for turning.
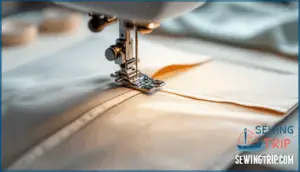
- Stitch with a ¼-inch seam allowance, guiding your fabric steadily through your sewing machine.
This closure method locks everything in place, and your envelope construction is nearly complete.
Turning and Pressing The Envelope
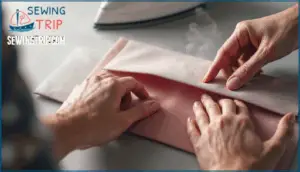
Once the stitching’s done, it’s time to flip that envelope inside-out and give it the crisp, polished look it deserves. Gently reach through the bottom opening and turn the fabric project right-side out, working the corners carefully for good corner shaping.
Smooth the seams flat with your fingers, then press the entire piece with an iron, paying special attention to edge folding and seam finishing. This pressing technique sets the foundation for clean edgestitching techniques later in your envelope construction methods.
Edge-Stitching for Durability
Adding a tight row of stitching around the envelope’s edges locks everything in place and keeps the seams from popping open with use. This edge-stitching provides stitch reinforcement and fabric stability, giving your envelope the seam security it needs for durability testing.
Position your sewing machine needle about ⅛-inch from the edge finishing line, and guide the interfacing-backed fabric steadily around all sides—this simple step turns a basic sewing project into something that’ll last through years of weaving in and out of bags and drawers.
Attaching Flaps and Closures (Snaps, Ribbons)
With your envelope’s edges locked down, it’s time to give it a proper closing mechanism—whether that’s a tiny snap, a ribbon tie, or a combination that suits your style.
For snap installation, mark your flap placement, bore a small hole through the fabric, and press the fastening pieces together using a snap tool.
Ribbon ties offer another closure type—just sew strips to the flap and body, creating a charming weaving detail that keeps your envelope secure.
Creative Envelope Variations and Finishing Touches
Once your basic envelope is sewn, it’s time to add your own creative spin. Small touches like ribbons, labels, or decorative stitching can turn a simple project into something special.
Let’s explore ways to customize your envelopes and make them truly one-of-a-kind.
Decorative Additions (Ribbons, Labels, Embellishments)
Ribbons, labels, and embellishments turn a simple fabric envelope into something that feels handmade with heart. Try sewing ribbon ties to the flap for a closure option that’s both functional and pretty.
Fabric flowers, trim, or fabric labels add personality. You can even use edgestitching techniques to attach decorative ribbon along the envelope’s edges, creating a polished, one-of-a-kind look.
Making Different Shapes and Sizes
Your envelope pattern piece doesn’t have to be a basic rectangle. Scaling templates lets you create square envelopes, hearts, or even hexagonal shapes—each one suited for different uses. Geometric adaptation means adjusting flap variations and seam complexity as you change dimensions.
Creating envelope templates from paper originals makes envelope making simple, and you can adjust size functionality to fit what you need.
- Square envelope designs use equal sides and work beautifully for cards or small gifts
- Mini envelopes (under 4 inches) are perfect for jewelry or gift cards
- Large formats (8+ inches) need interfacing for structure and accommodate documents easily
Tips for Personalizing Handmade Envelopes
Before you glue or stitch that final seam, think about the small details that’ll make your fabric envelope truly one-of-a-kind. Fabric selection sets the mood—choose prints that match your occasion. Button stitching adds charm, while fabric scraps work beautifully for patchwork designs.
Try monogramming options with embroidery, or experiment with unique shapes and embellishment techniques like lace trim or beaded edges. These finishing touches transform simple handmade gifts into treasured keepsakes.
Frequently Asked Questions (FAQs)
Can you wash and reuse fabric envelopes?
Fabric durability is virtually unequaled—these envelopes can withstand countless washes! Hand-wash with mild soap or machine-wash gently. Air dry to extend envelope lifespan.
For stain removal, pre-treat before washing. Reuse frequency? Endless with proper care.
How do you prevent fabric from shifting?
To keep your layers from sliding around, use pinning techniques like placing pins every few inches along the edges.
You can also try clips or weights on your template for better cutting precision and fabric stabilization during sewing.
What thread weight works best for envelopes?
For lightweight envelope fabrics, all-purpose thread (weight 50) works with most sewing machines and tension settings easily.
If you’re topstitching or using thicker fabric, consider heavier thread (weight 40) paired with a larger needle size for better thread strength and a polished finish.
Can you sew envelopes without a machine?
Hand-sewing techniques work beautifully for this DIY project. You’ll need basic stitches like running or whipstitch, plus a needle and thread.
Closure options include ribbons or fabric scraps. Expect longer project time, but the sewing tutorial remains simple.
How do you create a padded envelope?
To create a padded fabric envelope, sandwich batting or thin foam between your outer fabric and lining before sewing.
You can add quilting stitches to secure padding layers and reduce bulk while following standard sewing instructions for assembly.
Conclusion
You’ve moved from confusion to capability—from wondering how to sew an envelope to possessing a finished piece that’s both practical and personal. That shift matters more than you might think.
Now you can transform fabric scraps into reusable storage, protect handmade cards without reaching for plastic, or create gift packaging that feels intentional instead of wasteful.
The basic folding and stitching technique you’ve learned adapts endlessly: larger for documents, smaller for seeds, embellished for special occasions. Your next envelope won’t take 20 minutes—it’ll take ten.

