This site is supported by our readers. We may earn a commission, at no cost to you, if you purchase through links.
Add ease—extra room for comfort—based on the fabric’s stretch. Trace your sleeve pattern onto a new sheet, then cut vertically from the sleeve cap to the hem.
Spread the pattern evenly to add the needed width, keeping the sleeve balanced. Redraw the curves of the sleeve cap and hem to smooth it out.
If the armhole feels tight, lower it slightly. With these tweaks, your sleeves will fit without pinching—or cutting off circulation!
Table Of Contents
Key Takeaways
- Measure your bicep at its widest point with a slightly bent arm, and compare it to your sleeve pattern while accounting for ease and seam allowance.
- Adjust by cutting and spreading your sleeve pattern, adding the required width evenly, and redrawing smooth sleeve cap and hem curves.
- Lower or widen the armhole if the fit feels tight, ensuring the sleeve-bodice balance and ease of movement.
- Always check for proper grainline alignment, symmetry, and seam allowance accuracy to maintain the pattern’s integrity and fit.
Adjusting Sleeve Patterns
When adjusting sleeve patterns, start by measuring your bicep at its widest point to guarantee an accurate fit.
Compare your measurements to the pattern and add just enough ease so the sleeves feel comfortable without being too tight.
Measuring Bicep Circumference
To measure arm circumference accurately, wrap a tape measure snugly around the widest part of your bicep.
Wrap the tape snugly around your bicep’s widest part for precise arm measurements and flawless sleeve pattern adjustments.
Arm position matters—relax it slightly bent for better accuracy.
Finding the widest point guarantees a precise bicep measurement vital for sleeve adjustments.
Consider using a specialized measuring tool for best results.
For self-measurement, ask for help or use mirrors to avoid errors when planning your sleeve pattern alteration.
Comparing Measurements to Pattern
Once you’ve taken accurate bicep measurements, hold them against your pattern’s widest sleeve point—don’t forget seam allowance.
It’s key to guarantee consistency in where you measure. Need help? Partner up, as arm circumference measurements can be tricky solo.
Remember to account for shoulder adjustments made for a better fit.
Keep these factors in mind:
- Pattern ease allowance
- Measurement point consistency
- Seam allowance inclusion
- Sleeve width alignment
Calculating Desired Ease
Once you’ve compared measurements to the pattern, it’s time to figure out how much extra fabric your arms need.
Add your bicep size, fit preference, and ease importance into the mix.
Don’t forget how fabric type or layering needs might shift things, making your full bicep adjustment a perfect fit for personalized pattern adjustments, which guarantees comfort.
Full Bicep Adjustment Method
To master a full bicep adjustment, you’ll modify the sleeve pattern for better comfort and fit.
Start by tracing the sleeve pattern onto new paper, making certain all grainline alignment marks are visible. Next, use the pivoting technique by cutting a vertical line from the shoulder to the hem, leaving a hinge at the seam allowance.
Spread the pieces apart to create a gap matching your desired adjustment width, making certain any grainline markings stay aligned.
Then:
- Reblend the sleeve cap, smoothing out the curve for consistency.
- Fill the gap with paper scraps and tape everything securely.
- Redraw edges, like the bottom hem, to maintain the original pattern’s integrity.
When altering patterns, remember the importance of preserving armhole shape for sleeve compatibility. This sleeve alteration makes certain your pattern modification enhances both comfort and style!
Identifying Fit Issues
When your sleeves feel tight or bunch under the arms, it’s a clear sign they need adjustment.
Look for drag lines or restricted movement to identify where the fit needs improvement.
Snug Sleeves and Bunching
Sleeves feeling snug? It’s a common issue with ready-to-wear (RTW) clothing.
Tight sleeves limit movement, cause fabric stress, and highlight arm shape.
This discomfort usually signals a need for a sleeve alteration, like a full bicep adjustment.
Adjusting your pattern guarantees better upper arm fit and comfort without compromising style.
| Fit Issue | Cause | Sign | Solution |
|---|---|---|---|
| Tightness | Narrow sleeves | Limited Movement | Add width to the pattern |
| Bunching | Small armhole | Wrinkles under the arms | Deepen armhole |
| Pulling fabric | Insufficient fabric | Fabric stress | Full bicep adjustment |
| Sleeve twisting | Misaligned pattern | Twisted or uneven fabric | Check grainline |
Drag Marks and Insufficient Fabric
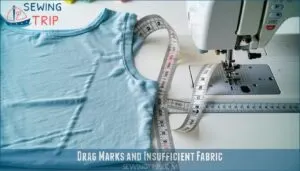
Drag marks on sleeves signal fabric tension or incorrect bicep adjustments.
These lines disrupt your fit and restrict movement.
Correcting them? Focus on these:
- Measure bicep at its widest point.
- Compare sleeve width, adding ease.
- Adjust the pattern’s sleeve cap shape.
- Guarantee proper armhole size to avoid imbalance.
A full bicep adjustment guarantees better upper-arm fit and helps prevent issues like drag marks, which can be caused by incorrect bicep adjustments.
Impact on Bodice Settlement
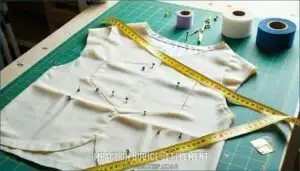
Tighter armholes can disrupt sleeve-bodice balance, causing restricted movement and shoulder fit issues.
A bicep adjustment needs to include an armhole increase so the bodice settles properly, and ignoring this can create comfort issues like bunching or pulling.
By pairing a full bicep adjustment with a bodice adjustment, you’ll achieve a seamless fit between the armscye and the sleeve for smoother movement.
Making Adjustments
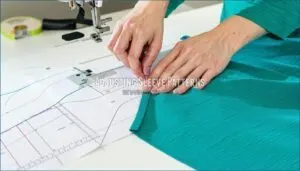
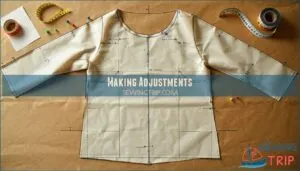
You’ll need to trace your sleeve pattern carefully before making changes to guarantee accuracy.
By cutting and spreading key sections, you can adjust the fit without altering the overall shape.
Tracing Pattern Pieces
Accurate pattern tracing is your first step toward comfy sleeves.
Use tracing tools to copy the sleeve pattern onto fresh paper, including all markings—seamlines, notches, and grainline.
Don’t skip labels, and keep seamline accuracy in mind for pattern alterations later.
This step guarantees a solid foundation for your full bicep adjustment, making pattern modification arms less of a guessing game.
Many sewers find specialized pattern tools invaluable for this task.
Cutting and Spreading Sleeve Pattern
To start your full bicep adjustment, mark the slash line placement carefully. Cut along these lines, leaving a hinge point intact for accuracy.
Mark your slash lines precisely; the hinge is your pivot to a perfectly adjusted, comfortably fitting sleeve pattern.
Spread the pattern to create a gap matching your needed increase in sleeve girth. For specialized tasks, consider using a dedicated pattern tool.
Anchor and align the pattern edges to preserve shape. Hem edge straightening guarantees clean results after this pattern modification. Keep adjustments precise!
Redrawing Sleeve Cap and Bottom Edge
Once you’ve spread the sleeve pattern, focus on smooth adjustments.
Redraw the sleeve cap curve, blending adjustments to maintain symmetry and guarantee a clean shape.
Straighten the bottom edge for a polished finish.
Check grainline alignment, as it’s key to balanced fitting.
These steps guarantee the sleeve cap adjustment works seamlessly, accommodating the larger arm pattern without distorting proportions.
Remember to assess overall jacket fit before making any alterations.
Refining Adjustments
You want your sleeve adjustment to look polished, not patchy, so refining the fit is key.
Focus on balancing the added fabric, adjusting the armhole, and keeping the pattern’s original shape intact.
Accommodating Extra Fabric
Adding extra fabric guarantees comfort and mobility when adjusting sewing patterns for larger arms.
Focus on balanced ease distribution for a natural fit:
- Anchor adjustments along the grainline to avoid skewing the fabric drape.
- Smooth sleeve cap edges using pattern manipulation techniques.
- Fill gaps with paper securely.
- For delicate materials, pressing cloths are essential.
- True up seam adjustments for a clean line.
- Verify sleeve width alignment.
Deepening Armhole or Adding Width
A bigger armhole can make all the difference when refining a bicep adjustment.
Deepening the armhole or widening the side seam helps redistribute fabric for better fit and movement.
These changes complement the sleeve adjustment, balancing comfort with a clean finish.
Combining methods guarantees proper fabric distribution without distorting the bodice.
Test changes using pattern grading arms techniques.
Maintaining Pattern Integrity
When modifying patterns, keeping alignment intact is key.
Verify the sleeve cap shape matches the armscye curve after the bicep adjustment.
Always redraw the grainline and true up edges to maintain structure.
Stick within adjustment limits to avoid distortion.
Seam allowance accuracy is essential for clean fits—small changes while widening the sleeve or grading arms make a big difference, emphasizing the importance of accurate adjustments and maintaining the original structure.
Frequently Asked Questions (FAQs)
How do I adjust my arm width?
Think of your sleeve like a map—it needs redrawing for a smoother journey.
Trace your pattern, slash it vertically and horizontally, spread for extra width, then fill gaps, true the edges, and you’re done!
How can one build muscle in the arms?
To build arm muscles, focus on strength training exercises like bicep curls, tricep dips, and push-ups.
Keep a consistent routine, gradually increase weights, and balance with proper nutrition for noticeable results over time, which is crucial for noticeable results.
How do you adjust the armscye of a sewing pattern?
Imagine your sleeve as a puzzle piece; adjust the armscye by lowering or widening the curve slightly.
Redraw the seamline smoothly to guarantee comfort and fit without altering the pattern’s overall design.
How do you measure your arm size on Day 22?
To measure your arm size, wrap a soft tape measure around the widest part of your bicep with the arm slightly bent.
Make certain the tape is snug but not tight, and note the measurement.
How do I make my biceps look wider?
Broaden your horizon—and your biceps—with compound exercises like curls, pull-ups, and rows.
Focus on lifting heavier weights, adding slow eccentric motions, and eating enough protein.
Strong, sculpted arms start with steady effort and persistence.
How can I increase my arm growth after a workout?
Focus on eating high-protein meals, staying hydrated, and getting enough rest.
Add compound exercises like pull-ups and dips to your routine, and aim for progressive overload to challenge your muscles and spark growth.
How does fabric type affect sleeve adjustments?
Fabric type plays a big role in sleeve adjustments.
Stretchy fabrics are forgiving, needing smaller adjustments, while woven fabrics require precise modifications for comfort and fit.
Always account for fabric stretch and drape when adjusting sleeves.
What tools ensure precise sleeve modifications?
To modify sleeves with precision, use a ruler, rotary cutter, tracing paper, and a dependable pencil.
Pins or tape help secure adjustments, while measuring tape guarantees accuracy.
Tidy cuts prevent sleeve distortion during resizing, ensuring precise modifications and dependable results.
How to maintain symmetry in sleeve alterations?
Think of the sleeve pattern as a butterfly’s wings.
To keep symmetry, always align your adjustments along the grainline, mirror changes on both sides, and double-check for even curves before taping everything down, ensuring that you maintain symmetry in your adjustments.
Can adjustments impact garment durability or wearability?
Yes, pattern adjustments can impact durability if seams are too tight or fabric stretches unnaturally.
Use quality materials, reinforce stress points, and guarantee smooth seams to keep your garment wearable and long-lasting, ensuring it remains durable.
Conclusion
You might worry that adjusting patterns for bigger arms is too complex, but it’s simpler than it seems.
By measuring your bicep, adding ease, and following the steps to cut and spread your sleeve pattern, you can create a custom fit that’s comfortable and stylish.
Don’t forget to refine details like armhole depth and sleeve curves for the perfect balance, and with practice, you’ll confidently adjust any pattern for bigger arms.
Ensuring your garments fit like a dream is the ultimate goal, and by following these steps, you can achieve it.
- https://www.sbccpatterns.com/blogs/news/a-better-way-to-adjust-the-bicep
- https://inthefolds.com/q-a-series/2020/09/27how-to-increase-bicep-width-on-a-sleeve-part-1
- https://www.youtube.com/watch?v=mUeopa5vH80
- https://www.reddit.com/r/sewing/comments/1d97bp3/huge_full_bicep_adjustments/
- https://sewing.patternreview.com/SewingDiscussions/topic/86825

