This site is supported by our readers. We may earn a commission, at no cost to you, if you purchase through links.

Start by taking accurate measurements and comparing them to the pattern’s size chart. You can use the slash-and-spread method to add width or the fold method to reduce it.
For length adjustments, cut and insert paper strips or fold excess sections, making sure to maintain grainlines. Don’t forget to adjust darts and seam allowances to accommodate your unique curves.
Like tailoring a suit that once hung like a potato sack, these adjustments transform ill-fitting patterns into custom creations. The difference between homemade and handmade often lies in these subtle modifications.
Table Of Contents
Key Takeaways
- You’ll need to take accurate measurements and compare them to pattern size charts, selecting a size based on your largest measurement rather than ready-to-wear sizing you normally buy.
- You can use the slash-and-spread method to add width or the fold method to reduce it, while maintaining grainlines and adjusting at designated lengthen or shorten lines for length modifications.
- Don’t forget to adjust darts and seam allowances to accommodate your unique curves, as these elements shape fabric and provide proper fit across bust, waist, and hips.
- Your body shape requires specific grading approaches—hourglass, ruler, apple, and pear shapes all need different pattern modifications, so always test with inexpensive muslin before cutting your final fabric.
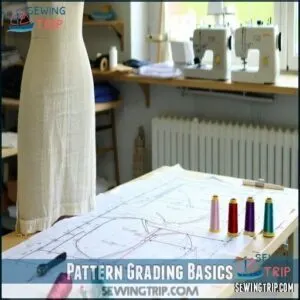
Pattern Grading Basics
You’ll need to carefully resize your sewing pattern using specific measurements rather than just making it bigger or smaller all over.
Pattern grading allows you to adjust your pattern pieces professionally, adding or removing width and length in the right places to maintain the correct proportions for different body sizes, which is crucial for professional results.
What is Pattern Grading
Transforming patterns to fit various body sizes is what pattern grading is all about.
Unlike simply enlarging a pattern on a copier, proper grading maintains pattern integrity while adjusting specific areas differently.
You’ll resize between 1-2 inches per grade, as humans don’t grow uniformly in all directions.
This scaling technique preserves the original design impact while creating well-fitted garments for different apparel sizing needs.
Importance of Accurate Measurements
Now that you know what pattern grading is, let’s talk about measurements.
Your pattern adjustments are only as good as your measurements. Take time to measure twice using a soft tape measure.
Focus on body proportions and record them digitally for future projects.
Remember, seamline accuracy makes or breaks your fit. Even a 1/4 inch mistake can turn your dream dress into an unwearable disaster.
Understanding Size Charts
Now that you’ve got your measurements down, let’s decode those mysterious size charts. They’re like maps that show the relationship between body measurements and garment sizing.
Remember, these charts vary between pattern companies—what’s a size 12 in one might be a 10 in another. Always check both body measurements and ease allowance to confirm your finished project fits just right.
To guarantee accurate adjustments, consider learning about sewing pattern grading, which is crucial for making sewing pattern grading techniques work for you, and understanding body measurements to ensure a perfect fit, and the importance of finished project quality.
Selecting Pattern Size
You’ll need to compare your actual body measurements to the pattern’s size chart instead of relying on ready-to-wear sizes you normally buy.
Your largest measurement will guide your pattern selection, and you can adjust other areas for a custom fit that works with your unique proportions.
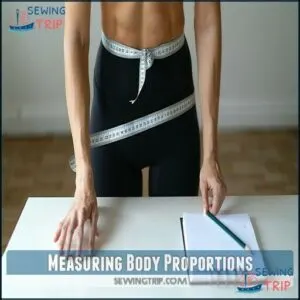
Measuring Body Proportions
Taking your body measurements correctly is the foundation of any successful pattern alteration.
You’ll need more than just bust, waist, and hip numbers for a truly custom fit.
- Mark accurate landmarks with string or elastic to guarantee consistent measurement points
- Measure torso length and limb ratios to understand your unique proportions
- Consider your posture’s impact on how garments will hang on your body
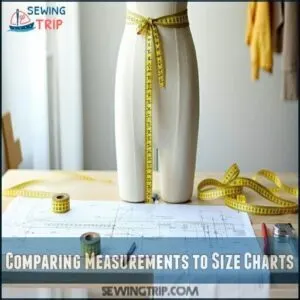
Comparing Measurements to Size Charts
With your measurements in hand, it’s time to decode those pattern size charts.
Don’t panic when your numbers don’t match exactly—few people fit perfectly into standardized sizes.
| Body Area | How to Compare | Common Issues | Pattern Fit Analysis | Adjustment Needed |
|---|---|---|---|---|
| Bust/Chest | Compare upper bust measurement | Often larger than chart | May need full bust adjustment | Grade between sizes |
| Waist | Match natural waistline | Frequently smaller on patterns | Consider ease requirements | Add width if needed |
| Hips | Check widest point | May need blending between sizes | Affects bottom fit | Grade from waist to hip |
| Length | Compare to height or specific measurements | Patterns designed for 5’5"-5’6" | Impacts overall proportion | Lengthen/shorten as needed |
| Shoulders | Measure shoulder width | Often overlooked measurement | Critical for proper fit | Adjust at shoulder seam |
Remember, pattern sizing differs from ready-to-wear clothes.
Pattern sizing and ready-to-wear clothes speak different sizing languages. Trust your tape measure, not the tag.
Focus on body measurement accuracy rather than the size number.
This approach will help you achieve a better fit by considering your unique measurements and the specific requirements of each pattern.
Choosing The Right Size
You’ll often find your body measurements don’t perfectly match a single size on pattern size charts.
When this happens, always select the size that fits your largest measurement. Multi-size patterns let you blend between sizes for different body parts.
Remember that pattern ease impact and fabric considerations also affect your final fit. Understanding pattern grading techniques is essential for achieving a great fit.
Trust your actual body measurements, not ready-to-wear sizing, and consider trust your actual body measurements as a key principle.
Altering Patterns
You’ll need to modify your sewing pattern when the standard size doesn’t match your measurements.
With simple techniques like slash and spread, lengthening, and dart adjustments, you can transform any pattern to fit your unique body shape perfectly.
This approach allows for a perfect fit, ensuring that your garment is tailored to your specific needs.
Slash and Spread Method
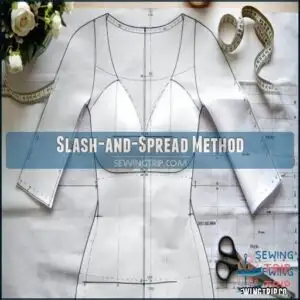
Now that you’ve picked the right pattern size, let’s look at the slash and spread method—your secret weapon for pattern alterations.
This technique involves cutting your pattern along strategic lines and adding space where needed. For a 2-inch increase, make vertical slashes in your pattern, spread them evenly, and tape paper underneath.
Remember to use essential alteration tools for best results. Always maintain your grainline when making these adjustments to control distortion, using the slash and spread method effectively to achieve the desired outcome with essential alteration tools.
Lengthening and Shortening Patterns
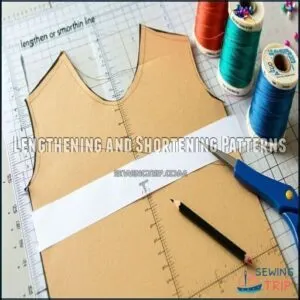
When you need to adjust a pattern’s length, always make changes at designated lengthen or shorten lines to maintain proportions.
Cut along these lines and either insert paper strips for lengthening or overlap sections for shortening, ensuring you keep the grainline straight.
For specialized tasks, consider using dedicated pattern tools for accuracy.
Length adjustments affect hemline variations and fabric drape, so consider both style and function. Remember that small changes (½-1 inch) often make significant differences in the final fit.
Adjusting Darts and Seam Allowances
Now that you’ve adjusted the length, let’s turn to darts and seam allowances. Darts shape fabric around curves, while seam allowances provide room for construction.
When resizing patterns, dart manipulation guarantees proper fit across bust, waist and hips. Move darts up or down based on your measurements, and pivot them to flatter your shape.
You may need specialized pattern tools for complex adjustments. For curved seams, blend allowance variations smoothly to maintain the garment’s flow.
Advanced Alterations
You’ll master specialized techniques for different body types once you’ve tackled basic pattern adjustments.
You can adapt commercial patterns for petite frames, plus sizes, and children’s proportions by applying targeted modifications to key measurement points, which allows for complete concepts to be applied in various ways.
Grading for Different Body Types
While altering pattern measurements is key to proper fit, your body shape plays an equally important role in pattern modification.
Different figures require specific grading approaches.
Bodies aren’t one-size-fits-all, so your pattern adjustments shouldn’t be either.
- Hourglass shapes: Grade waist smaller, keeping bust and hip measurements even
- Ruler shapes: Grade waist larger and hip smaller for balanced proportions
- Apple shapes: Focus on accommodating larger bust measurements
- Pear shapes: Blend from smaller bust to larger hip measurements
Weight distribution affects where you’ll need proportion adjustments. Consider using a pattern grading tool for accuracy. Try muslin fitting before final fabric cutting—it’s the pattern modifier’s secret weapon to achieve a proper fit with accurate adjustments.
Resizing Patterns for Children and Adults
Nearly all children’s bodies have different proportional differences than adults, making pattern grading between these age groups a unique challenge.
When resizing adult patterns for kids, you’ll need to adjust more than just the dimensions—consider narrower shoulders, higher waistlines, and simpler curves.
Remember that children experience growth spurts, so include extra seam allowances for fit adjustments as they grow.
Always test your pattern modifications with inexpensive muslin first, to ensure a proper fit and make any necessary adjustments before working with more expensive materials, considering the extra seam allowances.
Adapting Patterns for Petite and Plus Sizes
While children and adults require completely different pattern approaches, petite and plus sizes present their own unique grading challenges.
Petite proportions often need more than just shorter hems—think narrower shoulders, raised bust darts, and adjusted armscyes.
For plus adjustments, focus on body shape rather than just measurements.
Many specialized patterns like Petite Plus Patterns offer multi-size lines designed specifically for smaller-framed, full-figured women with narrow shoulders and D-cup busts.
Always test with a muslin fitting first.
Mastering Pattern Alterations
You’ll transform your sewing results when you master pattern alterations using the right tools and techniques for your unique measurements.
With practice and careful troubleshooting, you can confidently resize any pattern to fit your body perfectly without the frustration of ill-fitting garments, and this leads to confidently creating garments that fit well.
Using Specialized Tools and Supplies
Now that you’ve mastered complex alterations, let’s look at the tools that’ll make your pattern adjustments easier.
The right supplies can transform your sewing experience. For ruler precision, invest in clear rulers that show pattern lines underneath.
French curves help with smooth necklines, while quality pattern paper prevents tearing during adjustments.
Don’t forget colored marking tools to distinguish between sizes and eraser types that won’t damage your work.
Practicing and Refining Alteration Techniques
Now that you have your tools at the ready, practice makes perfect with pattern alterations. Start with simple projects using muslin fitting to build confidence.
Try complex alterations on scrap fabric first, focusing on blending sizes and seam smoothing.
Remember to document your body measurement recording for consistent results.
Keep track of each pattern adjustment in a notebook. Remember to always check your grainline control—it’s the secret weapon for professional-looking pattern fitting results.
Troubleshooting Common Alteration Issues
Pattern frustrations can sabotage even the most careful size adjustments.
When troubleshooting fit problems, always check your grainline issues first—improper alignment causes unexpected distortion.
For puckering solutions, reduce bulk at intersecting seams.
Seam alignment problems typically result from uneven cutting or inaccurate markings.
Document all pattern alterations in detail; this record becomes invaluable when similar fit issues arise in future projects.
Frequently Asked Questions (FAQs)
How to adjust sleeves for muscular arms?
Like tailoring a suit for a superhero, you’ll need to add width to sleeve patterns.
Measure your bicep, add 1-2 inches for movement, then use slash-and-spread technique to widen the pattern accordingly.
How to grade between multiple size charts?
You’ll need to identify overlap points between charts, blend measurements gradually, and create a smooth handover.
Use a ruler to precisely mark grade points where sizes meet, maintaining proportional increases throughout.
Can vintage patterns use modern grading techniques?
Over 70% of vintage patterns come from an era with different sizing standards.
You can definitely use modern grading techniques, but you’ll need to adjust for different body proportions and ease allowances between eras.
How to maintain design details when resizing?
When resizing, you’ll need to maintain proportional scale for design elements like pleats, ruffles, and pockets.
Trace details carefully and adjust gradually to preserve the original aesthetic while ensuring proper fit.
How to adjust patterns for asymmetric bodies?
The mountain of pattern adjustments becomes manageable with custom changes.
Measure both sides separately, use muslin mockups, and adjust pattern pieces individually for each side of your body.
You’ll achieve perfect symmetry through asymmetry.
Conclusion
Mastering the art of altering patterns for different sizes transforms your sewing from frustrating to fulfilling.
You’ll save money, express your creativity, and create garments that truly fit your unique body.
Remember, it’s a skill that develops with practice. Don’t get discouraged by initial challenges—each adjustment brings you closer to professional-quality results.
With these techniques in your toolbox, you’re ready to tackle any pattern with confidence and precision.

