This site is supported by our readers. We may earn a commission, at no cost to you, if you purchase through links.
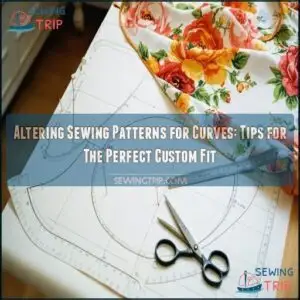
Start by identifying where you’ll need adjustments—typically bust, waist, and hip areas.
Use the slash-and-spread technique for adding fullness or the overlap method for reducing volume.
Mark your adjustments clearly, then blend the altered lines smoothly using a French curve ruler.
When altering sewing patterns for curves, remember to maintain the pattern’s grain lines and notches.
You don’t have to settle for off-the-rack proportions when you can tailor patterns to embrace your natural shape.
The perfect fit is hiding in those precise quarter-inch adjustments.
Table Of Contents
Key Takeaways
- You’ll need accurate body measurements as your foundation—take them while wearing your usual undergarments and compare them to the pattern’s size chart rather than relying on ready-to-wear sizing.
- Your body type determines which adjustment techniques will work best—whether you’re hourglass, pear, apple, or rectangular shaped, specific alterations like dart manipulation and princess seams can enhance your natural curves.
- You can use the slash-and-spread method to add fullness where needed or the overlap technique to reduce volume, always maintaining grainlines and blending new lines smoothly with tools like French curves.
- You should create a muslin test garment before cutting your final fabric to identify and correct fitting issues that weren’t obvious on paper, taking photos from all angles to spot problems you might miss in the mirror.
Measuring Body Proportions
You’ll need to measure your body accurately while wearing your usual undergarments to create perfectly fitted garments that follow your natural curves.
Your precise measurements, taken at key points like bust, waist, and hips, will serve as the foundation for all pattern alterations and guarantee your final creation fits like it was made just for you, with a fit that follows your natural curves.
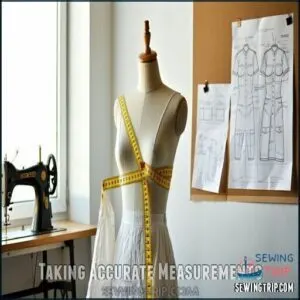
Taking Accurate Measurements
Taking accurate measurements is the cornerstone of successful pattern alteration for curved figures.
Precise measurements are the secret language between your body and your perfectly fitted garments.
You’ll need to:
- Measure body circumference at the fullest points while standing naturally in your regular undergarments
- Record vertical height measurements from consistent reference points
- Update your digital records every six months to track subtle body changes
Don’t rush this process—precise sewing measurements are your roadmap to perfectly fitting garments.
To get started, remember to use a non-stretchable measuring tape for best results, and always prioritize accurate and consistent measurements.
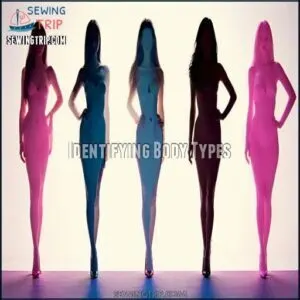
Identifying Body Types
Now that you’ve gathered your measurements, let’s identify your body type – the roadmap to perfect pattern alterations.
Your unique shape determines how fabrics drape and where adjustments are needed most.
| Body Type | Shape Characteristics | Best Pattern Styles |
|---|---|---|
| Hourglass | Equal bust/hips, defined waist | Princess seams, wrap styles |
| Pear/Triangle | Smaller bust, wider hips | A-line silhouettes, empire waists |
| Apple | Fuller bust/middle, narrower hips | V-necks, empire cuts |
| Rectangle | Similar measurements throughout | Darts, belted styles |
| Diamond | Wider middle, narrower shoulders/hips | Raglan sleeves, flared skirts |
The table outlines five distinct body types, each with its own set of characteristics and recommended pattern styles, including Princess seams for Hourglass figures and A-line silhouettes for Pear/Triangle shapes, to help guide your sewing projects and ensure the best fit.
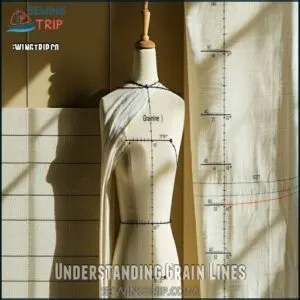
Understanding Grain Lines
When altering patterns for curves, nothing matters more than respecting the grainline direction.
Your fabric grainline controls how your garment hangs and moves.
Properly aligned grainlines prevent twisting and guarantee balanced drape, while bias grain adds stretch and fluidity.
Always mark and maintain grainline markings during alterations—ignoring them leads to grainline issues that can ruin even perfectly measured adjustments, highlighting the importance of respecting the original grainline.
Measuring for Ease Allowance
Now that you understand grain lines, let’s talk about ease allowance—the extra space that makes your garment wearable rather than painted on.
You’ll need to add wearing ease for mobility and design ease for style elements.
- Stretch fabrics like jersey require less ease (sometimes even negative ease) than woven fabrics
- Loose-fitting styles need 3-4 inches of total ease, while fitted garments need 1-2 inches
- Your fabric choice directly impacts ease requirements—stiffer fabrics need more room to move
Choosing Pattern Size
You’ll need to compare your largest body measurement to the pattern’s size chart rather than trusting your ready-to-wear size for the best starting point.
Once you’ve selected a pattern size, you can blend between sizes to accommodate your unique curves and guarantee a custom fit that flatters your body.
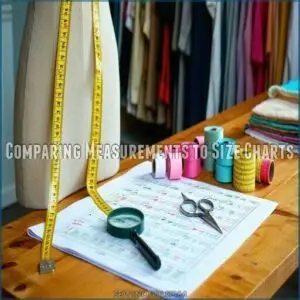
Comparing Measurements to Size Charts
Now that you’ve taken your body measurements, you’ll need to match them to the pattern’s size chart.
Don’t be surprised when your measurements span multiple sizes on the chart—this is completely normal.
Your bust, waist, and hip measurements rarely fall into just one size category.
Remember to prioritize your largest measurement when comparing to size charts, especially for curved figures, as this will help ensure the best fit.
Selecting The Right Size
Once you’ve compared your body measurements, it’s time to select the right pattern size. Trust your actual body measurements over RTW sizing for better results.
- Choose based on your largest measurement (usually bust, waist, or hips)
- Remember that pattern sizing differs from store clothing sizes
- Consider ease preferences for comfort and movement
- Look for multi-size patterns that accommodate body shape variations
Blending Sizes for Custom Fit
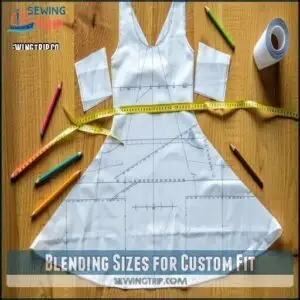
Your body’s unique proportions don’t always match standard pattern sizes.
Your body’s unique proportions don’t always match standard pattern sizes. Blending sizes allows you to customize patterns for a perfect fit. Simply mark different sizes in corresponding areas and connect them smoothly.
Blending sizes allows you to customize patterns for a perfect fit.
Simply mark different sizes in corresponding areas and connect them smoothly.
| Body Area | Common Issue | Blending Solution |
|---|---|---|
| Bust | Too tight | Use larger size |
| Waist | Gaps/binding | Grade sizes |
| Hips | Too snug | Blend outward |
| Shoulders | Width issues | Match upper body |
| Length | Proportions | Adjust separately |
Understanding pattern grading techniques is essential for achieving a well-fitting garment.
For seamline redrawing, remember to maintain pattern alignment throughout your muslin testing process.
Considering Fabric and Pattern Ease
Fabric choices dramatically impact your final garment fit, even with perfect measurements.
Lightweight fabrics like silk drape differently than structured cottons, affecting how much ease you’ll need.
Consider both wearing ease (for movement) and design ease (for style) when altering patterns for curves.
Stretch fabrics require less ease than wovens.
Your fit preferences matter too—some sewists prefer closer fits while others enjoy more room to breathe, which is influenced by personal style.
Pattern Alteration Techniques
You’ll need specific techniques to transform flat patterns into garments that honor your unique curves, whether you’re using slash and spread methods or manipulating darts.
With the right alterations, you can stop wrestling with ill-fitting commercial patterns and create clothing that fits your body perfectly.
Slash and Spread Method
Now that you’ve selected your pattern, you’ll need the right techniques to make it fit your unique curves.
The slash and spread method is your secret weapon for pattern adjustments curves. By cutting and spreading pattern pieces strategically, you can add volume where needed or reduce fullness for a perfect fit.
This technique works beautifully when altering patterns for bust or hips, creating room exactly where your curves need it.
You can also find various related products to assist with this method, making it easier to achieve a tailored fit.
Dart Manipulation
While slashing and spreading makes space in your pattern, dart manipulation offers another powerful tool.
You can reposition darts without affecting your garment’s overall fit, basically moving fullness around to create different style variations.
Think of darts as the magic contour shaping elements that transform flat fabric into curves.
By closing a dart in one location and opening it elsewhere, you’ll create design elements that highlight your best features while maintaining proper bust adjustments and hip adjustments.
Understanding dart manipulation basics is key to achieving these alterations.
Pivoting and Redrawing Seamlines
While dart manipulation shapes fabric around curves, pivoting offers a cleaner way to reshape patterns without cutting them apart.
This technique preserves grainline integrity while creating smooth passages for curved figure sewing. Remember to keep in mind adequate wearing ease for comfort and movement.
When pivoting and redrawing seamlines, follow these steps:
- Pin your pattern at the pivot point
- Rotate the pattern to the desired position
- Mark new seamlines with a pencil
- Blend curves using a French curve for perfect continuity
Your pattern will flow beautifully around your curves without those pesky slash marks, ensuring a cleaner and more professional finish.
Adjusting for Length and Width
Now that you’ve mastered seamline adjustments, let’s resize your patterns properly.
When adjusting for length and width, always cut along designated lengthen/shorten lines to maintain proper proportions.
For pattern lengthening, insert paper strips of your desired measurement. Pattern shortening requires overlapping sections.
Adding width uses the slash and spread method, while reducing width means overlapping cut sections.
Remember to keep your grainline straight during these alterations—it impacts how your fabric hangs.
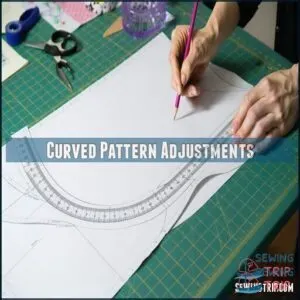
Curved Pattern Adjustments
You’ll need to master the art of curved adjustments with specialized tools like French curves and clear rulers to transform those frustrating straight-line patterns into garments that actually hug your body’s natural contours.
Getting these curves right means the difference between a handmade garment that screams "homemade" and one that fits like it was made just for you, with curved adjustments being crucial for a professional finish and natural contours that make all the difference in the final product.
Using French Curves and Rulers
Now that you’ve mastered pattern alterations, proper tools will make curved adjustments a breeze. French curves and rulers are your best friends when reshaping patterns for your unique body.
These precision instruments help you maintain smooth, professional-looking lines where your body curves most.
- Use a French curve for reshaping necklines and armholes with accuracy
- Position clear grid rulers along cut edges to guarantee perfect seam allowances
- Keep your workspace well-lit and organized for better ruler precision techniques
These tools are available at French curve retailers.
Blending New Lines Smoothly
Smoothly blending new lines after pattern alterations often determines whether your garment looks homemade or professional.
When using curve ruler techniques, always draw with light, confident strokes rather than hesitant, segmented lines. Connect your adjustment points gradually, maintaining the original curve character.
For bust and hip alterations, use long, sweeping motions with your French curve to facilitate seamless transitions. Consider using a curve sewing tool for smoother lines.
Think of blending techniques as creating a gentle slope rather than a sudden cliff. This approach ensures that your alterations are professional, making your garment look polished and well-made.
Adjusting for Armholes and Necklines
Now that you’ve mastered line blending, let’s tackle those tricky armholes and necklines.
These curved areas need special attention for curves to fit perfectly. Adjust armhole depth based on your measurements, ensuring comfortable movement without gaping.
For neckline shape, modify the pattern to flatter your face and complement your shoulder slope. Remember that curve blending is essential here—small adjustments to facings make big differences in comfort and appearance during your sewing pattern alteration journey, which requires careful consideration of comfortable movement.
Creating a Muslin Test Garment
After fine-tuning your armholes and necklines, it’s time to test your handiwork with a muslin mockup.
Choose lightweight muslin fabric that’s similar to your final material. Mark grainlines accurately and transfer all adjustment marks.
During your iterative fitting sessions, you’ll identify specific fitting issues that weren’t obvious on paper. Remember that accurate shoulder angle measurement is essential for a well-fitted garment.
Take photos from all angles to spot problems you might miss in the mirror, ensuring you achieve a well-fitted garment with the right shoulder angle.
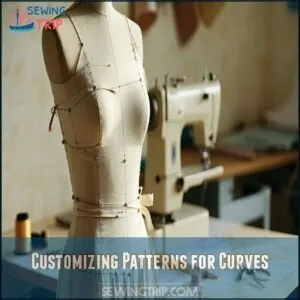
Customizing Patterns for Curves
You’ll need to adapt patterns specifically for your body’s unique curves, which involves identifying your shape type and applying precise adjustments to create a flattering fit.
Your measurements will guide targeted modifications at key areas like bust, waist, and hips, ensuring your finished garment embraces rather than fights against your natural silhouette.
Hourglass Figure Adjustments
With an hourglass figure, you’ll need to focus on maintaining your natural curve appeal.
Adjust patterns to emphasize your waist definition while balancing proportions between bust and hips.
When fitting sewing patterns, grade the waist smaller (typically 1-2 inches less) while keeping bust enhancement and hip shaping consistent.
Use dart manipulation to accentuate curves.
For better results, blend sizes between your measurements, creating that perfect curve emphasis you’re looking for.
Pear-Shaped Body Adjustments
After adjusting for an hourglass figure, let’s talk about pear-shaped bodies.
If your hips are wider than your bust, you’ll need different fitting strategies.
Start by selecting patterns based on your hip measurement, then adjust the upper portions.
Blend sizes by grading from a smaller size at the bust to your full hip measurement below.
This creates balanced garment silhouettes that flatter your proportions without pulling across the hips, resulting in a more flattering fit.
Apple-Shaped Body Adjustments
Many apple-shaped sewists struggle with commercial patterns that don’t account for their unique proportions.
When altering patterns for apple shapes, focus on:
- Bust Accommodation: Choose patterns based on your largest measurement, then grade down other areas
- Waist Definition: Add length to front pieces for full tummy accommodation
- Shoulder Balance: Create visual balance by emphasizing necklines while ensuring proper fit through the midsection
For best results, always maintain a 5/8" seam allowance through curves.
Rectangular Shape Enhancements
Create definition in rectangular shapes by strategically altering patterns to add curves where you need them most.
For silhouette selection, choose designs with princess seams or darts that define your waist.
Pattern alteration techniques like slash and spread add volume at bust and hips.
Fabric choice matters too—structured materials with some drape work best for creating volume while maintaining shape.
A full bust adjustment can further enhance your proportions.
Frequently Asked Questions (FAQs)
How to make pattern adjustments?
Just when you need it most, pattern adjustments become clear.
Use slash-and-spread techniques to add width where needed. For perfect curves, try dart manipulation and pivoting methods.
Don’t forget to test with muslin first.
What is the golden rule sewing pattern system?
The Golden Rule (also called Lutterloh System) lets you create custom-fitted garments using miniature patterns and a special measuring tape.
You’ll enlarge these small templates based on your direct body measurements rather than relying on standard sizing charts.
How to tweak a sewing pattern?
Measure twice, cut once, adjust with purpose.
You’ll transform patterns by slashing and spreading for extra room, overlapping areas to reduce size, or pivoting to reshape sections while maintaining the original design’s integrity, which involves transform patterns.
How to fix pattern gaping at bust?
To fix bust gaping, pinch the pattern where it gaps and add a dart.
You’ll need to cut and spread the pattern, increasing width at the bust point while maintaining the armhole shape.
How to adjust for sloped shoulders?
Nearly 65% of sewists face sloped shoulder issues.
Pinch excess fabric at pattern shoulder seams and remove the same amount from front and back pieces.
Redraw armhole curve slightly for smooth passages, this step is crucial for smooth passages.
When to add princess seams for curves?
Add princess seams when you need better bust, waist, and hip definition.
They’ll follow your curves naturally, creating a flattering silhouette.
You can convert darts to princess seams for more dramatic shaping.
How to modify darts for larger cup sizes?
Who knew tiny triangles could make such a big difference?
You’ll need to widen darts by 1/2 inch per cup size, extend points toward apex, and add more darts if necessary for smoother shaping.
Can I grade patterns between multiple sizes?
You can absolutely grade between sizes on patterns.
Simply blend the lines smoothly where measurements differ, connecting smaller sizes at the bust to larger sizes at the waist or hips for a custom fit.
Conclusion
Will you master altering sewing patterns for curves? The answer lies in practice.
By measuring accurately, selecting appropriate techniques, and testing with muslins, you’ll transform ill-fitting patterns into garments that celebrate your unique shape.
Don’t be intimidated by curved adjustments—they’re simply puzzles waiting to be solved. Your confidence will grow with each successful alteration.
Remember, altering sewing patterns for curves isn’t just about fit—it’s about creating clothes that make you feel fabulous.

