This site is supported by our readers. We may earn a commission, at no cost to you, if you purchase through links.
The best sewing tips for curves start with shorter stitch lengths—they’ll follow your fabric’s path like a loyal friend.
Mark your seam allowances first, then clip notches every half-inch on concave curves and trim points on convex ones.
You’ll want to ease one piece to match the other, pinning at quarter marks.
Press with an up-and-down motion, never dragging your iron sideways.
A walking foot becomes your secret weapon for stubborn fabrics that bunch or shift.
Master these fundamentals, and you’ll gain access to professional-looking princess seams, armholes, and necklines that actually lay flat.
Table Of Contents
- Key Takeaways
- Sewing Curves Basics
- Curve Sewing Techniques
- Top 9 Curve Sewing Tools
- 1. White Fusible Knit Stay Tape
- 2. Open Toe Appliqué Presser Foot
- 3. Clear Open Toe Embroidery Foot
- 4. Open Toe Walking Foot with Guide
- 5. Yalis Sewing Clips Assorted Colors
- 6. Fiskars SoftGrip Pinking Shears Fabric Scissors
- 7. SINGER Pinking Shears Zig Zag Fabric
- 8. Prym Blue Tailors Ham for Pressing
- 9. Dritz Disappearing Ink Marking Pen
- Sewing Convex Curves
- Sewing Curved Seams
- Curve Pressing Tips
- Advanced Curve Sewing
- Mastering Curve Sewing
- Frequently Asked Questions (FAQs)
- Conclusion
Key Takeaways
- Adjust your stitch length for better control – Use 1.8-2.0mm for tight curves and 2.4-2.6mm for gentle ones, which gives you precision and prevents puckering that ruins your seams.
- Clip and notch your seam allowances strategically – Make small diagonal cuts every quarter-inch on tight curves and trim triangular notches on convex curves to eliminate bulk and help fabric lie flat.
- Pin frequently and ease fabric properly – Place pins perpendicular to the edge every quarter-inch, starting at center points and working outward to distribute fabric evenly without creating tension.
- Press with proper technique using the right tools – Use a tailor’s ham for curved seams, press with up-and-down motions instead of dragging sideways, and always press seams flat before turning them right side out.
Sewing Curves Basics
Sewing curves doesn’t have to make you want to toss your fabric scissors across the room—you just need to understand a few basic principles first.
Start by adjusting your stitch length to 1.8-2.0mm for tight curves and 2.4-2.6mm for gentle ones, then pay attention to your fabric’s grainline and choose materials that won’t fight you every step of the way.
Setting Stitch Length
Getting your curve stitch length right makes all the difference between smooth sailing and a hot mess.
Testing stitch lengths on scrap fabric prevents disasters and saves your sanity.
Here’s your cheat sheet for optimal stitch length:
- Use 1.8-2.0mm for sharp, tight curves
- Set 2.4-2.6mm for gentle, wider curves
- Avoid ultra-short stitches for puckering prevention
- Test settings before sewing curved seams
- Shorter stitches give better control
Choosing Fabric Type
Not all fabrics play nice when sewing curves.
Woven fabrics like cotton offer stability and curve friendliness, making them perfect for beginners.
Knit vs. woven matters—stretchy fabrics can distort your carefully planned curves.
Slippery fabrics like satin require extra pins and patience.
Check your pattern compatibility before diving in.
The fabric drape and fiber content will determine whether your curves look professional or wonky, and it’s crucial to consider these factors for a successful outcome with carefully planned curves.
Understanding Grainlines
Grainline direction becomes your secret weapon when sewing curves. Pay attention to how fabric’s natural weave affects curve distortion and fabric drape.
Cutting curves on the bias creates stretch but challenges control, while staystitching prevents unwanted fabric stretching during construction.
- Master grainline matching for professional-looking curved seams that won’t pucker
- Understand how bias impact affects your fabric’s behavior around tight curves
- Control fabric drape by respecting the natural grain when cutting curved pieces
- Prevent curve distortion through proper directional sewing techniques
- Achieve perfect pattern matching by aligning grainlines before cutting curves
Curve Sewing Techniques
You’ll need more than basic stitch settings to tackle tricky curves that want to pucker, stretch, or shift during sewing.
These three stabilizing techniques will transform your curved seams from wobbly disasters into smooth, professional results that make your garments look store-bought, giving them a store-bought appearance is not the focus, but rather the outcome of using these techniques.
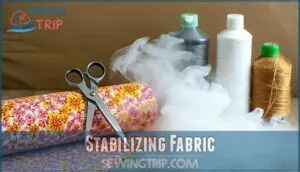
Stabilizing Fabric
Before diving into curves, you’ll want to master fabric stabilization techniques that prevent stretching and distortion.
Staystitching curved edges just inside your seam allowance stops fabric from warping during handling.
Never skip staystitching—it’s the secret to curves that behave instead of stretching into wonky disasters.
Consider starching fabrics beforehand—it’s like giving your material backbone for cleaner cuts.
Stay-stitch benefits include maintaining original shape while tissue paper stabilizer adds temporary support for tricky curved seams, providing a means to achieve cleaner cuts and prevent distortion, thus maintaining the fabric’s original shape with backbone.
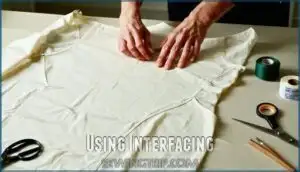
Using Interfacing
Interfacing becomes your secret weapon for taming unruly curves that want to stretch and distort.
This fabric stabilization technique prevents bulk while maintaining professional results on necklines and armholes.
You can even find specialized options for interfacing curved edges.
- Fusible vs Sew-in: Choose fusible interfacing for quick application, sew-in for delicate fabrics
- Interfacing Weight: Match lightweight interfacing to your fabric weight for curve stability
- Interfacing Types: Use knit interfacing on stretchy fabrics, woven on stable materials
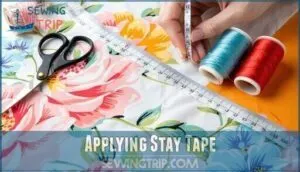
Applying Stay Tape
Stay tape transforms wobbly curved seams into rock-solid foundations. Apply this lifesaver to necklines, armholes, and shoulder seams before they stretch out of shape.
Cut bias tape alternatives on the diagonal for flexibility around tight curves.
| Stay Tape Width | Curved Edge Support | Securing Stay Tape |
|---|---|---|
| 1/4 inch for delicate fabrics | Light support for cotton | Iron on wrong side |
| 3/8 inch for medium weight | Medium support for blends | Stitch along edges |
| 1/2 inch for heavy fabrics | Strong support for knits | Press with steam |
| Custom width for specialty | Maximum support for stretch | Hand-baste if needed |
Top 9 Curve Sewing Tools
Having the right tools makes all the difference when you’re tackling curved seams, especially if you’ve ever wrestled with fabric that bunched up or refused to cooperate around tight corners.
These nine essential tools will help you achieve smooth, professional-looking curves every time, from specialized presser feet that give you better visibility to clips that hold fabric precisely in place.
1. White Fusible Knit Stay Tape
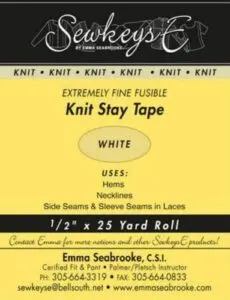
In the case of taming stubborn curved seams, white fusible knit stay tape is your secret weapon.
This nearly invisible 1/2-inch wide reinforcement prevents necklines and armholes from stretching out of shape while you sew.
Simply iron it along the seam line before stitching – it bonds instantly and stays put through countless washes.
You’ll find it especially helpful on boat necklines and lightweight jerseys that want to misbehave.
Think of it as insurance for your curves, keeping everything perfectly aligned.
Best For: Sewists working with lightweight knits, curved seams, and delicate jersey fabrics needing stabilization and reinforcement.
- Prevents stretching and distortion in hems, necklines, and shoulder seams.
- Easy to apply with heat activation and works with an iron.
- Virtually invisible on fine fabrics, maintaining fabric drape and feel.
- Fusible side can be hard to identify, requiring careful attention during use.
- Thickness may be insufficient for heavy fabrics without layering.
- Adhesion may weaken after multiple washes, though garment stability remains intact.
2. Open Toe Appliqué Presser Foot
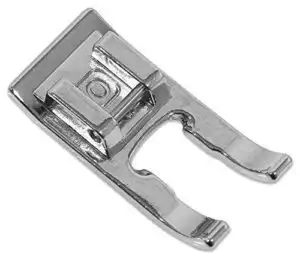
Mastering tight curves becomes effortless when you swap your standard presser foot for an open toe appliqué foot. This game-changer provides crystal-clear visibility of your stitching line, letting you see exactly where your needle hits the fabric.
The wide groove underneath glides smoothly over dense decorative stitches without catching or bunching. You’ll maneuver around sharp corners and intricate patterns with newfound confidence.
Whether you’re tackling appliqué work, quilting curves, or detailed monogramming, this versatile foot transforms tricky stitching into precision work that’ll make your curves look professionally crafted.
Best For: Sewing enthusiasts, including beginners and advanced users, seeking precision and visibility for appliqué, quilting, and detailed stitching projects.
- Clear visibility of stitching line for precise work.
- Glides smoothly over dense decorative stitches without bunching.
- Versatile for use in appliqué, quilting, monogramming, and cutwork.
- Compatibility needs to be checked with specific sewing machine models.
- Not ideal for very heavy-duty sewing projects.
- Limited to users who engage in decorative or precision stitching tasks.
3. Clear Open Toe Embroidery Foot
Why settle for guesswork when precision matters most?
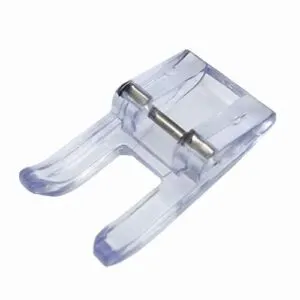
The Clear Open Toe Embroidery Foot transforms tricky curve work into smooth sailing. Its transparent design gives you crystal-clear visibility, so you’ll nail every stitch placement without second-guessing.
The extra-large opening makes appliqué work effortless, while the tunnel underneath feeds stitches smoothly over previous work. You’ll achieve perfect stitch row alignment every time, turning challenging curves into your sewing superpower.
This foot takes the anxiety out of detailed work, making it your new sewing superpower.
Best For: Sewers who need clear visibility and precision for appliqué, decorative stitching, and quilting projects.
- Transparent design ensures clear stitch visibility.
- Smooth feeding for accurate stitch alignment.
- Extra-large opening simplifies appliqué work.
- May not fit securely on some Janome machines.
- Compatibility issues reported with specific Brother models.
- Some units arrive damaged or missing components.
4. Open Toe Walking Foot with Guide
Think of this specialized foot as your curve-sewing superhero.
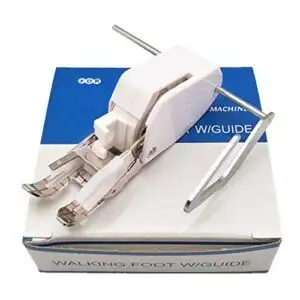
The Open Toe Walking Foot with Guide features its own feed dogs that work alongside your machine’s feeding system, guaranteeing even fabric movement and increased control.
You’ll love the clear view through the open toe design, letting you see exactly where your needle enters.
The adjustable guide bar helps you follow seam lines or previously stitched marks perfectly, which is especially brilliant for stitch-in-the-ditch quilting and handling those tricky curved seams with professional precision.
Best For: Quilting enthusiasts and sewists needing precision and control for curved seams and intricate designs.
- Ensures even fabric feeding with its own feed dogs.
- Clear open toe design for excellent visibility.
- Adjustable guide for precise seam alignment.
- Limited to low shank, top-loading drop-in bobbin machines.
- Not compatible with all sewing machine models.
- May require practice for optimal use on tight curves.
5. Yalis Sewing Clips Assorted Colors
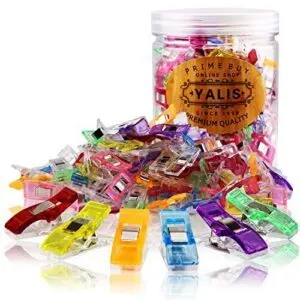
Traditional pins can feel like threading a needle in a hurricane when you’re wrestling with curves.
Yalis Sewing Clips offer a game-changer solution with their 100-pack assortment of colorful, 27x10mm clips.
You’ll love the flat bottom design with marking lines at 5mm, 7mm, and 10mm intervals – perfect for maintaining consistent seam allowances on curved pieces.
The wide opening grips multiple fabric layers securely, while the transparent colors let you see your work clearly underneath.
These clips won’t poke you or damage delicate fabrics like pins often do, making them a great alternative for delicate fabrics.
Best For: Beginners and experienced sewers looking for a safe, versatile, and convenient alternative to traditional pins for sewing and crafting projects.
- Random color assortment may not match preferences.
- Transparent colors may look different from photos.
- Occasional defect, such as a deformed clip, reported in packs.
- Flat bottom with marking lines for precise seam allowances.
- Wide opening holds multiple fabric layers securely.
- Safe, child-friendly design with no sharp edges.
6. Fiskars SoftGrip Pinking Shears Fabric Scissors
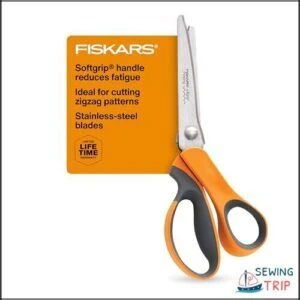
Fiskars SoftGrip Pinking Shears become your secret weapon when finishing curved edges.
These 8-inch scissors cut through multiple fabric layers while creating that signature zigzag edge that prevents fraying.
The bent handle design keeps your fabric flat during cutting, which is essential for maintaining smooth curves.
You’ll appreciate the ergonomic grip during long sewing sessions – no more cramped hands.
The precision-ground stainless steel blades stay sharp, making clean cuts that won’t distort your carefully sewn curves or leave ragged edges behind.
This feature, combined with the overall design, makes Fiskars SoftGrip Pinking Shears a valuable tool for achieving professional-looking results with minimal effort.
Best For: Individuals who need high-quality pinking shears for precise zigzag cuts on fabric edges, including professional seamstresses and craft enthusiasts.
- Cuts through multiple fabric layers with ease.
- Ergonomic handle reduces hand fatigue during extended use.
- Stainless-steel, precision-ground blades ensure lasting sharpness.
- Slightly heavy and stiff, requiring more effort to use.
- Large size may not be ideal for smaller hands.
- Requires periodic maintenance like oiling and sharpening.
7. SINGER Pinking Shears Zig Zag Fabric
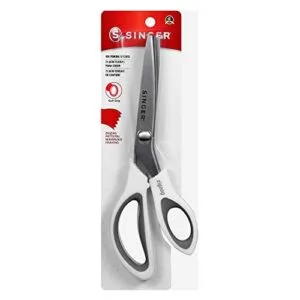
When you’re wrestling with curved seams that fray like crazy, SINGER’s 9-inch pinking shears become your secret weapon.
These heavy-duty stainless steel blades cut precise zigzag patterns that stop fabric edges from unraveling. You’ll slice through multiple fabric layers effortlessly, even thick velvet.
The comfortable grip means your hands won’t cramp during long sewing sessions. At just 5.6 ounces, they’re surprisingly lightweight yet durable.
Perfect for finishing curved seam allowances before pressing, these shears deliver professional results every time you tackle tricky curves.
Best For: Sewing enthusiasts and crafters who need precise, clean cuts on fabric to reduce fraying and ensure professional results.
- Sharp, heavy-duty stainless steel blades for precise zigzag cuts.
- Lightweight and ergonomic design minimizes hand fatigue.
- Cuts through multiple fabric layers, including thick materials like velvet.
- May feel tight to use initially.
- Not suitable for cutting non-fabric materials like plastic or wire.
- Requires regular maintenance to keep blades sharp over time.
8. Prym Blue Tailors Ham for Pressing
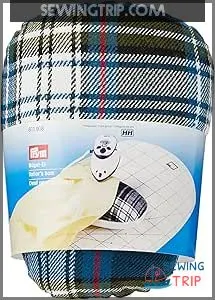
Curved seams need proper pressing to look professional, and the Prym Blue Tailors Ham delivers exactly what you need.
This polyester blend pressing tool weighs 1.3 pounds and handles necklines, waistbands, cuffs, and darts with ease.
You’ll love how it molds sleeve caps and curved seams perfectly, and the discretely edged padding and quality construction mean it’ll last for years.
Whether you’re pressing face mask seams or complex garment curves, this versatile tool works at various temperatures to give you crisp, professional results every time.
Best For: Sewing and craft enthusiasts who need a reliable tool for pressing and shaping curved seams and other detailed fabric areas.
- Limited to specific tasks like pressing fabric curves
- Multicolor design may not suit minimalist preferences
- Polyester blend may not appeal to those preferring natural materials
- Durable polyester blend with a long-lasting design
- Handles curved seams, sleeve caps, and fabric folds with precision
- Versatile for different ironing temperatures and techniques
9. Dritz Disappearing Ink Marking Pen

Precision marks make or break your curved seams, and this dual-ended pen delivers exactly what you need.
You’ll love the blue water-soluble ink for permanent markings and purple air-soluble ink that disappears within 24-72 hours.
It’s perfect for tracing embroidery patterns, marking seam allowances, and transferring those tricky curve guidelines onto fabric.
Just remember to complete your project within the timeframe—nobody wants surprise disappearing marks mid-sew!
A damp cloth instantly removes blue marks when you’re ready.
Best For: Sewing, quilting, and crafting enthusiasts needing precise, temporary fabric markings for intricate designs.
- Dual-ended for versatile use with blue water-soluble and purple air-soluble inks.
- Temporary markings disappear naturally or with water for easy cleanup.
- Ideal for delicate fabrics and detailed work.
- Purple ink may fade too quickly in high humidity environments.
- Not suitable for dry clean only fabrics or red/pink dyes.
- Requires completing projects within 24-72 hours to avoid losing marks.
Sewing Convex Curves
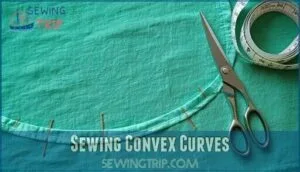
Convex curves, which bulge outward like the rounded edge of a collar or the outer seam of a sleeve, require specific techniques to prevent puckering and achieve professional results.
You’ll need to clip triangular notches in the seam allowance and use careful pressing methods to help the fabric lie flat without creating unwanted bulk.
Marking Seam Lines
Clear markings make sewing curves feel less like guesswork and more like following a roadmap.
Use fabric markers or chalk pencils to draw your seam allowance lines directly on the fabric.
Mark notch placement points at curve centers for perfect alignment.
These visual guides eliminate second-guessing and keep your stitching steady, especially when fabric manipulation gets tricky around tight curves.
These guides are essential for maintaining steady stitching, and by using them, you can ensure that your sewing project turns out as expected, with perfect alignment.
Clipping Curves
After marking your seam lines, you’ll need to clip curves strategically to prevent puckering.
Make small diagonal cuts into the seam allowance at clipping angles, stopping just shy of your stitching line.
Focus on notch placement every quarter-inch on tight curves for proper curve release.
This reduces bulk while maintaining seam integrity, letting your fabric bend naturally without fighting you.
Turning and Pressing
After clipping curves, you’ll press seams flat before turning right side out—this seam setting step prevents wonky results.
Use a tailors ham for curved seams, pressing with up-and-down motions to avoid fabric distortion.
These advanced techniques guarantee your notching curves and curve clipping efforts pay off.
A proper pressing routine transforms amateur work into professional-looking pieces.
Sewing Curved Seams
When you’re sewing curved seams, you’ll need to match a convex curve to a concave curve, which means the raw edges won’t align perfectly even though the seam lines should.
You’ll master this technique by marking centers on both pieces, easing the fuller curve into the shorter one, and pinning strategically to distribute the fabric evenly before sewing.
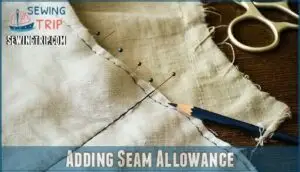
Adding Seam Allowance
You’ll want to add seam allowances of 1/4 to 3/8 inch for curved seams, marking them with precise accuracy using a fabric pencil.
Consistent width throughout the curve prevents puckering and guarantees smooth results.
Consider allowance trimming and grading seams after stitching to reduce bulk, especially on tight curves where multiple fabric layers create thickness issues.
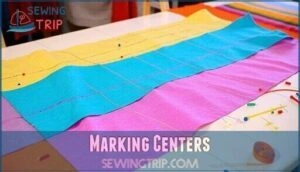
Marking Centers
Once you’ve added your seam allowance, accurate Curve Center Marking becomes your roadmap to success.
Mark the center of each curved piece using chalk vs. marker – whatever works best for your fabric. The Folding Fabric Method creates a natural crease that’s foolproof. AccuQuilt dies include built-in notches, but you can create your own reference points.
- Find your center point – it’s like having a GPS for your fabric pieces
- Choose chalk over disappearing markers – you’ll thank yourself when pins don’t smudge your lines
- Fold and press for instant accuracy – no measuring tools needed, just smart technique
- Mark both pieces identically – matching centers means professional-looking curved seams every time
- Use light, removable marks – your finished project will look clean and polished
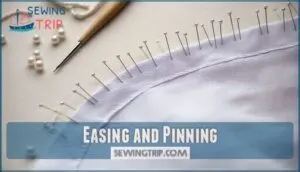
Easing and Pinning
After marking your curve centers, strategic pinning becomes your best friend for smooth results.
Place pins perpendicular to the fabric edge, starting at center alignment points and working outward.
This technique prevents fabric creases while maintaining proper tension.
| Pin Placement | Distance | Purpose |
|---|---|---|
| Center crease | Exact match | Alignment anchor |
| Curve quarters | 1/4 inch apart | Even distribution |
| Tight sections | Every 1/8 inch | Extra control |
| Gentle curves | 1/2 inch apart | Basic stability |
| Pin removal | Before presser foot | Needle protection |
The table outlines specific guidelines for pin placement, including the distance between pins and their purpose, to ensure smooth results and maintain fabric integrity.
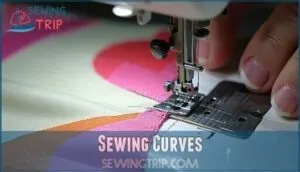
Sewing Curves
Now comes the moment of truth for your curved seams.
Sew slowly with a 2.0mm stitch length, guiding fabric gently with your fingertips.
Focus directly ahead of your needle, not the edges.
For tight quilting curves, stop frequently and pivot with the needle down.
Your fabric manipulation skills will shine as you ease curves naturally into place.
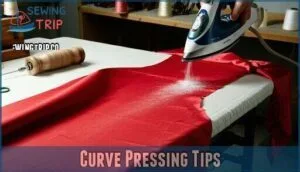
Curve Pressing Tips
Pressing curved seams correctly makes the difference between professional-looking results and amateur work that screams "homemade."
You’ll need specific techniques and tools to avoid stretching, distorting, or flattening your carefully sewn curves during the pressing process.
Pressing Seams Flat
Before turning your curved seams right side out, you’ll need to press them flat to set stitches and prevent stretching.
This vital step guarantees your curves achieve smoothness without avoiding distortion when you flip the fabric.
Here’s your pressing fabric roadmap:
- Press seams flat first – Don’t skip this step before turning
- Use gentle heat – Avoid high temperatures that damage delicate curved seam pressing
- Work in sections – Press small areas of seam allowances at a time
Using Pressing Tools
Professional seam pressing transforms amateur curves into polished perfection.
You’ll need a tailor’s ham for pressing curved seams like necklines and armholes—its domed surface matches fabric contours perfectly.
A seam roll works wonders for cuffs and tight spaces.
Pre-press seams with your fingers first, then apply steam to make pressing fabric more malleable for curve shaping success.
These tools are essential for achieving professional pressing results through the use of tools like a professional pressing results, which can be found online for those looking to improve their curve shaping skills.
Avoiding Fabric Distortion
Why does fabric distortion happen when pressing curves? Heat and moisture can stretch your fabric out of shape, especially on bias cuts.
Press with an up-and-down motion rather than sliding your iron. Use a pressing cloth to protect delicate fabrics.
Keep tension control gentle—don’t pull or stretch while pressing. This prevents wavy, puckered seams that’ll haunt your finished project.
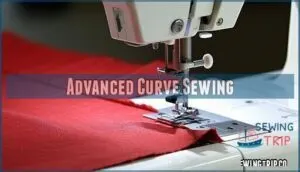
Advanced Curve Sewing
When you’ve mastered basic curve sewing, you’re ready to tackle complex techniques that transform tricky curves from sewing nightmares into smooth victories.
These advanced methods focus on specialty presser feet, precise fabric control, and managing tight radius curves that would otherwise cause puckering or uneven stitching, utilizing specialty presser feet to achieve professional results.
Using Specialty Feet
Specialty presser foot types transform your curve-sewing game from frustrating to fabulous.
These game-changing attachments offer superior visibility benefits and precise fabric feeding that standard feet simply can’t match.
- Open toe feet provide unobstructed views for decorative stitches and intricate curves
- Curve Master feet automatically ease fabric without measuring or clipping
- Walking feet with guides prevent shifting while maintaining consistent seam allowances
For a variety of options, explore open toe feet online.
Sewing Tight Curves
Sharp bends demand extra finesse when sewing curves.
Reduce your stitch length to 1.8mm for better control at pivot points. Use finger guidance to ease fabric around tight spots, stopping frequently to lift your presser foot.
Focus on stitch density for smooth results. Master seam clipping and notching on both concave curves and convex curves to eliminate bulk and puckering, ensuring a clean finish with better control.
Managing Fabric Movement
Control your fabric’s movement like a conductor guiding an orchestra. Adjust presser foot pressure for lighter fabrics and increase feed dog adjustment for smoother fabric flow.
Fabric weight impact affects how you’ll ease curves, so match your tension settings influence accordingly. Use differential feed on sergers for stretchy materials.
Master directional sewing by pivoting strategically, maintaining steady sewing control throughout each curve.
Mastering Curve Sewing
You’ll transform from a curve-sewing novice to a confident expert by mastering these final techniques that separate good sewers from great ones.
These advanced methods will help you tackle the trickiest curved seams with precision, troubleshoot problems before they happen, and achieve professional-quality results every time.
Practicing Curve Sewing
Like riding a bike, sewing curves gets easier with consistent practice. Start with scrap fabric to build confidence without wasting good material. Speed control becomes second nature as you develop muscle memory through repetition.
- Begin with gradual curves – Practice on gentle arcs before attempting tight circles
- Use visual guides – Draw seam lines on practice fabric for accuracy
- Master curve techniques slowly – Focus on one skill at a time
- Build daily sewing practice habits with 15-minute curve sessions
Troubleshooting Common Issues
Even with practice, you’ll face bumps in the road.
When puckering strikes, clip those seam allowances and ease your sewing machine tension. Uneven curves happen when you rush—slow down and let the fabric guide itself. Fabric slippage? Pin more frequently and use a walking foot for better control.
| Problem | Quick Fix | Prevention |
|---|---|---|
| Puckering Solutions | Clip seam allowances, reduce tension | Use shorter stitch length |
| Uneven Curves | Slow down, re-pin sections | Mark seam lines clearly |
| Seam Waviness | Press seams flat, trim bulk | Don’t stretch while sewing |
| Pointed Curves | Pivot frequently, guide gently | Practice on scraps first |
Improving Sewing Accuracy
Perfect sewing curves demands unwavering attention to three fundamentals: consistent stitching rhythm, precise pivoting at quarter-inch intervals, and accurate seam allowance maintenance.
Master these marking techniques by practicing grainline accuracy on scrap fabric first.
Your curved seams will transform from wobbly disasters into professional masterpieces when you prioritize proper clipping and notching over rushing through projects.
Frequently Asked Questions (FAQs)
My Curved Seams Puckered After Sewing. How Can I Fix This?
Check your stitch length first—it’s likely too short.
Try 0-4mm instead.
Also clip your seam allowances properly, press gently without stretching, and consider using interfacing for extra stability next time.
What makes it easier to sew curved areas?
Shortening your stitch length to 0mm gives you better control.
Pin every quarter-inch, sew slowly, and use starched fabric for stability.
An open-toe presser foot improves visibility while guiding fabric gently around curves.
What stitch is best for curves?
A straight stitch with 8-0mm length works best for tight curves, giving you precise control.
For gentle curves, use 4-6mm length.
Shorter stitches let you pivot smoothly and create professional-looking seams.
What is the best presser foot for sewing curves?
Don’t think you need fancy equipment—an open-toe or clear-view presser foot works best for curves.
You’ll see exactly where you’re stitching, giving you better control and precision around those tricky turns.
How to curve when sewing?
Slow down your speed and shorten stitch length to 0mm for better control.
Pin every quarter-inch perpendicular to the curve’s edge, then gently guide fabric with your fingertips while focusing ahead of the needle.
How do I sew curves on stretchy fabrics?
Just as athletes need proper gear for peak performance, you’ll need stay tape and a walking foot for stretchy fabric curves.
Use shorter stitches, pin frequently, and don’t stretch while sewing—let the machine do the work.
What tension settings work best for curves?
Set your tension to normal (4 on most machines) for curves.
You’ll avoid puckering and thread breaks that plague tight corners.
Test on scraps first—fabric weight matters more than the curve itself for tension adjustments.
Can I use serger for curved seams?
Yes, you can use a serger for curved seams.
It trims and finishes edges simultaneously, preventing fraying.
However, sew slowly around tight curves and use a shorter stitch length for better control and smoother results.
How to fix puckered curved seams afterward?
Carefully remove stitches using a seam ripper, then re-press fabric flat with starch.
Shorten your stitch length to 0mm, pin every quarter-inch, and sew slowly while gently guiding the fabric around curves.
Which needle types prevent skipped stitches on curves?
Use universal or ballpoint needles for knits, sharp microtex needles for wovens, and verify you’re using the correct size for your fabric weight.
A fresh, quality needle prevents skipped stitches on curves.
Conclusion
Picture Sarah’s first curved neckline disaster—puckered, uneven, and frankly unwearable.
Fast-forward six months: she’s crafting flawless princess seams that rival designer garments.
These best sewing tips for curves transformed her technique completely.
You’ll achieve similar results by mastering shorter stitches, proper clipping methods, and strategic pressing techniques.
Remember to stabilize your fabric, use appropriate tools, and practice consistently.
With patience and these proven methods, you’ll confidently tackle any curved seam project.

