This site is supported by our readers. We may earn a commission, at no cost to you, if you purchase through links.
 What stitch should you use for denim? Start with a straight stitch for most seams—side seams, basic construction, all the structural stuff.
Zigzag stitch handles stretch denim and keeps raw edges from fraying.
Flat-felled seams are the ideal for durability, creating those strong, professional-looking seams you see on quality jeans. Triple stitch adds reinforcement where stress hits hardest, like belt loops and pocket corners.
Topstitching isn’t just decorative—it flattens seams and adds structural stability. The right combination of these techniques transforms denim from a challenging fabric into a rewarding project that’ll outlast nearly everything else in your closet.
Table Of Contents
- Key Takeaways
- Best Stitches for Sewing Denim
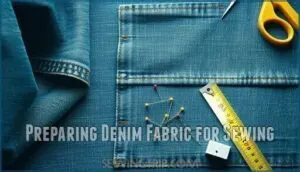
- Preparing Denim Fabric for Sewing
- Choosing The Right Needle for Denim
- Selecting Thread for Denim Projects
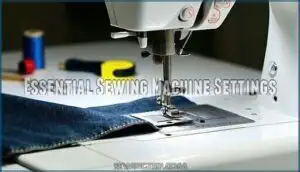
- Essential Sewing Machine Settings
- Techniques for Sewing Seams on Denim
- Finishing Edges to Prevent Fraying
- Tips for Sewing Stretch Denim
- Hemming and Altering Denim Jeans
- Caring for Finished Denim Projects
- Frequently Asked Questions (FAQs)
- Conclusion
Key Takeaways
- Straight stitches work for most denim construction seams, while flat-felled seams create the strongest, most professional finish found on quality jeans—and triple stitches add reinforcement at high-stress points like belt loops and pockets. – Proper preparation matters as much as stitching: prewash denim to prevent shrinkage, use a size 90-100 jeans needle matched to fabric weight, and set stitch length between 3.0-4.0mm to avoid puckering on heavy fabric. – Heavy-duty polyester thread (Tex 150-300) paired with correct tension settings (around 4.0-4.6) prevents seam failure, while topstitching thread in size 30-40 weight creates those bold, visible seams that define denim’s industrial aesthetic. – Tools like walking feet prevent fabric slippage on thick layers, hump jumpers help machines cross bulky seams, and finishing techniques—whether serging, zigzag stitching, or pinking shears—stop raw edges from fraying through repeated wear and washing.
Best Stitches for Sewing Denim
Getting denim to cooperate means picking the right stitch. You’ve got five workhorses here—straight stitch, zigzag, flat-felled seam, triple stitch, and topstitching.
Each one tackles denim’s thickness and toughness in its own way.
Straight Stitch
The straight stitch does the heavy lifting on denim—most seams you’ll sew on jeans, jackets, and tough projects rely on it.
Set your stitch length between 3.0 and 4.0 mm for maximum seam strength on denim fabric. You’ll want to pair this with a size 90 or 100 needle and adjust thread tension to around 4.6 to handle the fabric weight without puckering.
Zigzag Stitch
Zigzag stitches work best when you’re dealing with stretchy denim or need some give along the edges. Unlike straight stitches, they move with the fabric and stop fraying in its tracks.
Here’s where they shine in denim projects:
- Seam flexibility – Sew stretch denim with a narrow zigzag for give
- Edge finishing – Prevent raw edges from unraveling
- Buttonholes – Create sturdy openings with sewing machine settings
- Decorative stitching – Add visual interest to seams
- Appliqué designs – Attach fabric pieces securely
Adjust your sewing techniques by setting width between 2-4mm for best results.
Flat-Felled Seam
If zigzag stitches handle stretch, flat-felled seams are your go-to for strength. This is the seam you’ll find on the inseams and side seams of quality jeans because it locks two layers of fabric together while finishing raw edges in one pass.
It’s incredibly durable and keeps bulk to a minimum—exactly what you need when working with heavy denim.
The learning curve can be steep, but once you get it down, you’ll have strong seams that look as good as they perform.
Triple Stitch
Think of the triple stitch as denim’s insurance policy—it’s the same straight stitch run three times in quick succession, creating a reinforced seam that won’t quit under pressure. Here’s why it’s a staple in denim sewing techniques:
- Durability Boost – Three parallel lines create seam reinforcement that withstands stress better than single stitches
- Decorative Element – The visible stitching adds industrial-style character to your denim fabric
- Industrial Applications – Jeans manufacturers rely on this for pockets and waistbands
- Stretch Fabrics – Works well on denim blends without restricting movement
- Needle Considerations – Use a size 100/16 jeans needle with heavy-duty thread for best results
Most machines include this stitch; just adjust your settings and let it handle the repetition automatically.
Topstitching
Topstitching turns functional seams into design details that give your denim project that authentic, store-bought finish. Use topstitching thread and a size 100 needle for pronounced lines that won’t break under stress. A longer stitch length between 3.5 mm and 4.0 mm creates that classic denim look while securing seams beautifully.
| Setting | Standard Denim | Decorative Options |
|---|---|---|
| Thread Weight | 30-40 wt | 12-20 wt topstitching thread |
| Needle Size | 90/14 or 100/16 | 100/16 or 110/18 |
| Stitch Length | 3.5-4.0 mm | 4.0-5.0 mm |
| Tension Adjustment | Slightly reduced | Test on scrap first |
Preparing Denim Fabric for Sewing
Skipping the prep work on denim? That’s how you end up with a project that looked perfect until the first wash turned it into doll clothes.
Taking time to prewash, iron, cut cleanly, and mark accurately sets you up for professional results without frustrating surprises.
Prewashing and Shrinkage Prevention
Before you stitch your first seam, throw that denim in the wash—skipping this step is like building a house on sand. Prewashing fabric prevents shrinkage and color bleed after your project’s complete.
Here’s how to prep denim fabric preparation right:
- Soak raw denim in cold water soaking before the first wash
- Check for Sanforization effects—treated fabric shrinks less
- Use pinking shears for fraying prevention on cut edges
- Wash separately to avoid dye transfer from color bleed
Raw denim care requires extra attention since it hasn’t been pre-treated.
Ironing and Removing Creases
Once your denim is clean and dry, you’ll want to iron it while it’s still slightly damp to smooth out wrinkles and get it ready for cutting. Set your iron to a high-temperature cotton setting and use steam generously to tackle stubborn creases.
A pressing cloth protects specialty denim finishes from heat damage. Press firmly with the grain rather than dragging the iron, which prevents distortion in the weave and ensures your fabric lies flat for accurate pattern placement.
Cutting Tips for Clean Edges
Sharp tools make all the difference when you’re ready to cut your freshly pressed denim into pattern pieces. Invest in sharp shears or a rotary cutter paired with a cutting mat for the cleanest edges.
Pattern weights hold fabric steady without pins that can shift heavy denim. Cut in smooth, confident strokes—hesitation creates jagged lines.
Your fabric edges should look professional, not frayed or uneven, setting you up for success.
Marking The Wrong Side
Getting your cutting lines right means nothing if you mark the wrong side of the fabric and end up with a backwards piece. Always mark denim on the wrong side using these tools:
- Chalk vs. Pen – Water-soluble chalk pencil works best for marking dark denim
- Fabric Erasers – Remove mistakes without leaving residue
- Marking Dark Denim – White or silver chalk shows up clearly
- Accurate Transfers – Press firmly for precise lines
- Temporary Solutions – Test your marking tool on scrap fabric first
Sharp chalk gives you clean, accurate transfers that won’t bleed through your weaving.
Choosing The Right Needle for Denim
Pick the wrong needle for denim and you’ll spend more time fixing problems than sewing.
The right size and type keeps your machine happy—no skipped stitches, no snapped needles, just clean seams that hold up.
Needle Sizes for Denim
The right needle size can make the difference between a professional-looking project and a frustrating afternoon of broken needles and skipped stitches.
For most denim, a size 90/14 denim needle works well on medium-weight fabric. Heavy denim demands a size 100/16 or even 110/18.
Fabric weight impact matters—lightweight chambray needs smaller needles, while raw selvedge requires the heaviest options. Your sewing machine manages these variations best when you match needle size to your specific project thickness.
Denim Vs. Universal Needles
Universal needles work for lighter denim, but denim needles—also called jeans needles—are built for the task. Their reinforced shaft and sharper point cut through dense layers without bending, reducing skipped stitches by over 60% and lasting 40% longer on your sewing machine.
Universal needles handle everyday fabrics well (that’s their versatility), but denim durability demands a specialized tool. For stitch quality and application guidelines that matter, needle selection shifts the outcome. Needle sizes range from 60/8 to 120/19, accommodating various applications.
Denim needles cost more upfront, yet the cost comparison favors fewer replacements and stronger seams.
Preventing Needle Breakage
Broken needles don’t just slow you down—they can ruin your project and even damage your sewing machine if you’re not careful. Here’s how to prevent needle breakage when working with denim fabric:
- Needle Size Matters – Use a jeans needle (size 90/14 or 100/16) matched to your fabric thickness.
- Sewing Speed Control – Slow down over thick seams and double layers to reduce stress on the needle.
- Thread Tension Issues – Check your machine maintenance and adjust tension to prevent strain.
Don’t force your machine through heavy areas—patience pays off.
Selecting Thread for Denim Projects
Thread choice matters more than most people realize when sewing denim. You need something strong enough to handle the fabric’s heft without snapping mid-seam or leaving weak spots that’ll fail later.
You’ll want to match your thread’s strength to the job, whether you’re constructing sturdy jeans or adding decorative topstitching that catches the eye.
Heavy-Duty Thread Options
Choosing the right thread makes all the difference when sewing denim. Heavy-duty thread options like corespun—polyester core wrapped in cotton—boost seam stability and resist breakage far better than standard thread.
Thread size matters too; Tex 150 to Tex 300 accommodates thick fabric without snapping. Polyester thread offers colorfastness and near-zero thread shrinkage, preventing puckered seams after washing.
Understanding how to evaluate denim thread quality is key for garment manufacturers. For bobbin thread and construction seams, select thread material that matches your top thread weight to maintain balanced tension throughout your project.
Topstitching Thread Choices
When you want those bold, professional-looking seams that make store-bought jeans stand out, topstitching thread becomes your go-to choice. Polyester thread works best for topstitching denim seams because it won’t break under tension.
Look for heavier weights—size 30 or 40—that create visible, durable lines. Some brands offer special finishes that glide through thick fabric layers smoothly.
Thread selection matters because the right topstitching thread transforms your project from homemade to handcrafted.
Matching Thread Color and Weight
Your thread choice matters just as much as your stitch—pick the wrong color or weight, and even the best seam work can look sloppy or fall apart under stress. Thread color theory helps you decide between contrast and blend—golden topstitching thread stands out on classic blue denim, while matching shades disappear into the fabric.
Weight matching fabric is critical:
- Use heavyweight thread or polyester thread for construction seams
- Choose specialty denim threads for authentic jean-style topstitching
- Match topstitching thread weight to fabric thickness
- Consider contrast vs. blend based on your design goals
Thread selection affects both strength and appearance.
Essential Sewing Machine Settings
Your machine settings can turn a clean seam into a mess—or save you from ripping stitches for the third time.
You’ll need to dial in your stitch length and tension, and maybe grab a walking foot to wrangle denim’s bulk.
Adjusting Stitch Length
Set your stitch length between 3.0 and 4.0 millimeters to tackle denim’s thick weave without fighting your machine every step of the way. This longer stitch length works with fabric thickness impact rather than against it, preventing puckering while giving you clean, professional seams.
For reinforcement stitching or decorative stitching details, you can adjust shorter—but standard denim sewing tips recommend starting here for most construction work on denim garments.
Tension Settings for Denim
Getting your tension right can mean the difference between seams that pucker and ones that lay perfectly flat. Start with ideal tension around 4 to 4.6 for denim fabric, adjusting based on thread type and fabric thickness.
Always test stitching on scrap material first. If your seams tunnel or loop, tweak the tension dial slightly until you find the sweet spot where both threads lock together evenly inside the fabric.
Using a Walking Foot or Hump Jumper
Once you’ve got your tension dialed in, a walking foot or hump jumper can save you from wrestling with thick seams and uneven fabric feed. A walking foot grips both layers of denim fabric equally, preventing slippage and assuring consistent stitching. The hump jumper helps your sewing machine glide over bulky intersections without stalling.
- Fabric Feed Control: A walking foot moves top and bottom layers together for even feeding
- Preventing Slippage: Both tools maintain steady pressure across heavyweight jeans
- Consistent Stitching: Even pressure foot contact eliminates skipped stitches on thick denim fabric
- Bulk Management: Hump jumpers keep your machine level when crossing heavy seams
- Needle Protection: Pair these tools with a heavy-duty jeans needle for best results
Techniques for Sewing Seams on Denim
Get your denim seams right and they’ll survive everything—wash after wash, wear after wear.
The right seam technique prevents fraying, adds strength where you need it most, and gives your work that professional finish you’re after.
Flat-Felled Seams for Strength
If you’re chasing seam durability that stands up to real wear, flat-felled seams are your go-to construction technique for denim garments. This approach encases raw edges within two rows of topstitching thread, drastically improving stress resistance—studies show up to 37% greater strength compared to overlocked alternatives.
Industrial applications have relied on flat-felled seams since the late 1800s, and longevity comparison data confirms they last through 200+ washes on heavy-duty jeans. Use a heavyweight jeans needle and patience; the payoff in denim fabric longevity is worth it.
Double-Stitched Seams
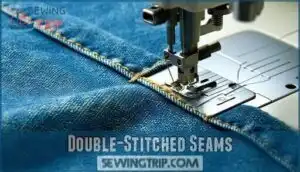
If flat-felled seams feel like overkill for your project, double-stitching offers a simpler path to seams that won’t give up under pressure. You’ll sew two parallel rows about 1/8 inch apart, which boosts seam durability without complex fabric manipulation.
This technique works well on denim fabric of varying thickness and adds aesthetic appeal while reinforcing stress points. Adjust stitch placement based on garment construction needs—closer spacing for high-stress areas, wider for decorative topstitching.
Reinforcing High-Stress Areas
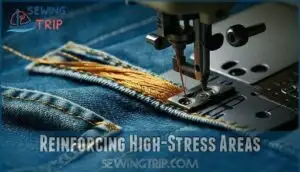
Denim doesn’t fail on its own—it fails where you push, pull, and sit, so smart sewers lock down those spots before the first wear. Focus seam reinforcement on pocket corners, belt loops, and fly openings using bar tacks—short, tight zigzag stitches that cluster thread into near-indestructible anchors.
For rivets placement and extra pocket securing, switch to heavy-duty thread with a longer stitch length to handle stress points without snapping during jeans repair.
Finishing Edges to Prevent Fraying
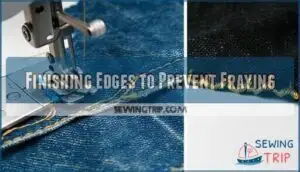
Raw denim edges fray easily if you don’t finish them properly.
You can use a serger, zigzag stitch, or pinking shears to seal the edges and keep your project looking clean and lasting longer.
Serged Edges
A serger creates clean, professional edges that lock the fabric and stop fraying before it starts. This seam finish is ideal for finishing denim edges because it trims and encases fabric edges in one pass. Adjust your serger tension and differential feed to handle denim’s weight without puckering.
Why serger sewing machines shine for finishing denim edges:
- Speed matters: A serger finishes fabric edges four times faster than traditional methods
- Built-in strength: The multi-thread chain stitch withstands wash after wash without unraveling
- Rolled hems add polish: Perfect for lightweight denim projects like skirts and shirts
- Decorative serging possibilities: Transform functional edges into design features with contrasting thread
- Mock flatlock versatility: Create professional athletic-wear style seams that flex with stretch denim
Zigzag Stitch Edge Finish
Don’t have a serger on hand, or need a backup method that works just as well? Your sewing machine’s zigzag stitch is a reliable alternative for finishing denim edges. Set your machine to a medium-width zigzag and position the stitch so it catches the fabric edge on one side and swings off on the other. This technique locks down fabric edges and provides excellent fray prevention while maintaining flexibility.
| Setting | Recommended Value |
|---|---|
| Stitch Width | 3.0-4.0 mm |
| Stitch Density | 2.0-2.5 mm length |
| Thread Choice | All-purpose polyester |
| Edge Appearance | Clean, slightly textured |
| Technique Variations | Center on edge or straddle |
For best results with this seam finish, use a slightly longer stitch length than you’d use for construction seams. You can also apply fray check liquid to stubborn edges before zigzagging for extra security.
Using Pinking Shears
Pinking shears offer a low-tech solution that works surprisingly well when you don’t have access to a serger or prefer working without electricity.
These zigzag-edged scissors cut denim fabric in a way that naturally disrupts the weave, providing solid fray prevention without any machine time.
You’ll get clean fabric edges on straight seams and curved seams alike, though you’ll want to keep your shears sharp for best results with heavier denim.
Tips for Sewing Stretch Denim
Stretch denim flexes as you move, but the give in the fabric means seams need careful attention to stay flat and durable.
The right needle, stitch, and technique prevent wavy, puckered edges that can ruin your project.
Choosing The Right Needle
The right needle changes everything with stretch denim. Grab a heavy-duty jeans needle in 90/14 or 100/16—pick based on how thick your fabric is.
Ballpoint tips are your friend here. They glide between the fibers instead of punching through, which keeps your stretch intact.
Check that your shank size matters for proper machine fit. Brand comparisons show Schmetz and Organ excel at needle selection.
Twin needle use creates professional parallel topstitching when choosing sewing needles for finishing touches.
Using Stretch or Zigzag Stitch
When you’re working with stretch denim, the zigzag stitch becomes your secret weapon for keeping seams flexible and preventing them from popping when the fabric moves. Set your sewing machine to a narrow zigzag—around 1.5mm width works well—and adjust your stitch length to 2.5mm to 3mm.
This stretch stitch benefits your project by moving with the fabric instead of fighting it, which prevents seam puckering when you wear the garment.
Preventing Wavy Seams
Wavy seams happen when stretch denim gets pulled or compressed during stitching. You can avoid this common headache by making a few key adjustments to your sewing techniques before you start your project.
- Lower your presser foot pressure to let the fabric feed smoothly without stretching—this cuts distortion by around 35%
- Install a walking foot to keep both layers moving together evenly, which reduces waviness by over 50%
- Increase your stitch length to 3-3.5mm and check thread tension so the denim doesn’t pucker or wave as you sew
Supporting the fabric gently without pushing or pulling helps prevent seam stretching during construction.
Hemming and Altering Denim Jeans
Hemming denim jeans doesn’t have to mean losing that factory-finished look. Whether you’re shortening a pair or adjusting the fit, the right technique keeps your alterations looking professional and lasting through countless washes.
Original Hem Technique
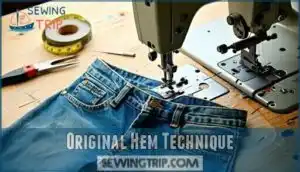
The original hem technique lets you keep that factory-finished look on your jeans while shortening them to just the right length. You cut the excess denim, then reattach the original hem using a straight stitch or chain stitching. This alteration illusion preserves the matching wash and maintains the weight of your jeans.
| Step | Key Focus |
|---|---|
| Cut excess fabric | Fray prevention with clean cuts |
| Reattach original hem | Use chain stitching for authenticity |
| Press and topstitch | Secure for hemming jeans durability |
Double Fold Hem
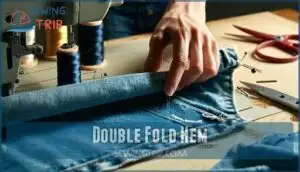
For hemming that doesn’t preserve the original edge, a double fold hem offers a clean and professional finish that’s surprisingly simple to execute. Here’s how to create one:
- Fold up your hem allowance once, then fold again to enclose the raw edge
- Press each fold firmly to set the fabric in place
- Pin or clip the layers together before stitching
- Topstitch close to the inner fold using your denim needle
This hemming technique works beautifully on denim fabric and other sewing denim garments, creating durable edges that won’t fray.
Tools for Hemming Thick Denim
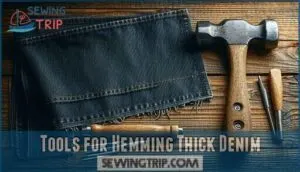
Thick denim puts your sewing machine through its paces, but having the right tools on hand makes hemming those heavy layers much easier. A hump jumper helps your machine glide over bulky seams without stalling. Fabric glue can temporarily hold hems in place before topstitching. An awl is handy for punching through extra-thick spots.
| Tool | Purpose | Best For |
|---|---|---|
| Hump Jumper | Levels presser foot over thick seams | Crossing multiple denim layers |
| Jeans Needle (100/16) | Penetrates dense denim fabric | All hemming techniques |
| Heavy Hammer | Flattens bulky seams before stitching | Reducing bulk at hem folds |
Caring for Finished Denim Projects
Once you’ve finished your denim project, you’ll want it to last. How you wash, dry, and store it makes the difference between seams that hold up and ones that start to fray.
The right care techniques protect your work and keep everything looking sharp for years.
Washing and Drying Tips
Once you’ve hemmed your denim project to completion, knowing how to wash and dry it properly will keep all that hard work intact. Turn your denim inside out before washing to minimize fading and fabric shrinkage.
Wash frequency matters—skip overwashing to preserve the weave. Cold water temperature protects color and prevents shrinkage.
Choose mild detergent and air-dry or tumble on low heat to avoid damaging your stitching.
Preserving Seams and Stitching
To keep your seams strong for years, turn denim garments inside out before washing—this simple sewing technique preserves stitching integrity by reducing abrasion. Air drying is gentler on durable fabrics than machine drying, which gradually weakens reinforcement options over time.
Skip fabric softeners; they compromise denim fabric characteristics and break down essential sewing techniques that hold denim garment construction together. These repair strategies and storage solutions protect your weaving work.
Storing Denim Garments
After all that careful stitching work, how you hang or fold your denim makes a real difference in keeping those seams intact and the fabric looking sharp. Hanging denim on sturdy hangers works best for jeans and jackets, preventing creases that weaken the fabric.
If you’re folding for space optimization, stack items loosely to allow air circulation.
Keep denim in cool, dry spots with humidity control, and toss in cedar blocks for moth prevention.
Frequently Asked Questions (FAQs)
How do you prevent puckering when sewing denim?
Prevent puckering by adjusting your tension settings and stitch length to match the fabric weight. Check that your feed dogs are clean and your presser foot pressure is balanced.
Steam pressing your seams after stitching also helps flatten any minor ripples.
Can you sew denim without a heavy-duty machine?
You don’t need a heavy-duty sewing machine for denim garments. A standard machine works fine with a jeans needle, adjusted stitch length, and slow stitching.
Hand sewing reinforces seams when needed for smaller project sizes.
Whats the best way to sew denim buttonholes?
Stabilize both sides of denim with interfacing or tear-away stabilizer before sewing buttonholes. This prevents puckering and shifting during the stitching process.
- Use a size 100/16 jeans needle to pierce through thick denim layers without breaking
- Test buttonhole placement on scrap denim with your sewing machine’s buttonhole foot first
- Try corded buttonholes or keyhole buttonholes for extra reinforcement techniques on heavy jeans
- Apply buttonhole stabilizers underneath to keep stitches crisp and prevent fabric distortion
How do you attach rivets or metal hardware?
Attaching rivets strengthens high-stress points on denim jeans and garment construction. Select proper Rivet Types and Tool Selection for your hardware—setter tools work for most metal fasteners.
Mark Hardware Placement carefully, then use Installation Techniques like hammering through reinforced fabric layers, making sure Reinforcement Methods secure metal zippers and weaving durable connections.
Conclusion
Getting comfortable sewing denim isn’t just about talent—it’s about building up the right habits and flexing those skills with a bit of practice.
The best stitch really depends on what you’re making: straight stitches get the main job done, flat-felled seams bring long-lasting strength, and a good topstitch gives it that polished, finished look.
Match your needle and thread to the fabric weight, adjust your tension, and don’t rush through thick layers. With these fundamentals in place, you’ll tackle any denim project with confidence and create garments built to last.
- https://rsisinternational.org/journals/ijriss/articles/impact-of-various-stitch-classes-and-seam-types-on-seam-strength/
- https://www.amefird.com/wp-content/uploads/2010/01/Selecting-the-right-SPI-2-5-10.pdf
- https://scienpg.com/jea/index.php/jea/article/view/jea.2020.04.005/29
- https://journals.sagepub.com/doi/full/10.1177/1558925021988976
- https://www.denimsandjeans.com/denim/manufacturing-process/denim-sewing-threads-garment-stitching-recommendations-and-guide/2178

