This site is supported by our readers. We may earn a commission, at no cost to you, if you purchase through links.

Your trusty pair of scissors can indeed be sharpened, and you don’t need to be a pro to do it. Whether you’re a crafting enthusiast, a DIY champion, or just someone who wants to keep their home tools in top shape, sharpening scissors is a skill you’ll want to add to your arsenal.
In this article, we’ll show you how to sharpen your scissors with various methods, from using a sharpening stone to sandpaper or even a rotary tool. You’ll also discover the telltale signs that indicate when your scissors need a good sharpening, and we’ll share some essential tips to ensure your scissors stay razor-sharp.
So, get ready to dive into the world of scissor maintenance and achieve those precise, effortless cuts you’ve been longing for. Your scissors will thank you, and you’ll be better equipped for all your cutting needs.
Table Of Contents
Key Takeaways
Sharpening Scissors at Home
Methods for Sharpening Scissors
- Using a sharpening stone
- Wet the stone
- Mark the edge
- Sharpen until it shines
- Remove burrs
- Hone the blade
- Using sandpaper
- Cut through 150-200 grit sandpaper
- Fold and cut strips
- Wipe the scissors clean
- Using a rotary tool
- Secure the blade
- Grind while moving
- Wear protective eyewear
- Using aluminum foil (for minor sharpening)
- Fold the strip
- Make full strokes on both blades
- Wipe the blades clean
Essential Tools for Sharpening
- Options like Sharp Pebble wetstone kit, In One Kitchen Knife Accessories Grey, Dremel Rotary Tool Kit with LED Light, or household items like sandpaper and aluminum foil.
Signs Your Scissors Need Sharpening
- Uneven cuts
- Increased effort
- Material slippage
Common Misconceptions
- The effectiveness of DIY methods
Angle Techniques
- Maintaining the manufacturer’s recommended angle (40-45 degrees) while sharpening
Sharpening Stones and Blade Care
- Start with the coarser side
- Remove burrs
- Practice regular maintenance
- Cleaning
- Lubrication
- Rust prevention
- Blade alignment
- Proper storage
Sharpening Frequency
- Routine maintenance every 2-3 months
- Professional sharpening every 6 months to a year
Avoid Dulling Practices
- Proper use
- Avoiding damaging materials
- Safe storage
- Regular cleaning
Consider Professional Sharpening
- Specialized scissors like hair shears
Signs to Replace Your Scissors
- Struggling to cut cleanly
- Chipped blades
Extending Scissor Lifespan
- Proper maintenance and sharpening
Finite Lifespan of Scissors
- Knowing when to invest in a new pair
Conclusion
- Emphasizes the ease of sharpening scissors at home with the right tools and techniques
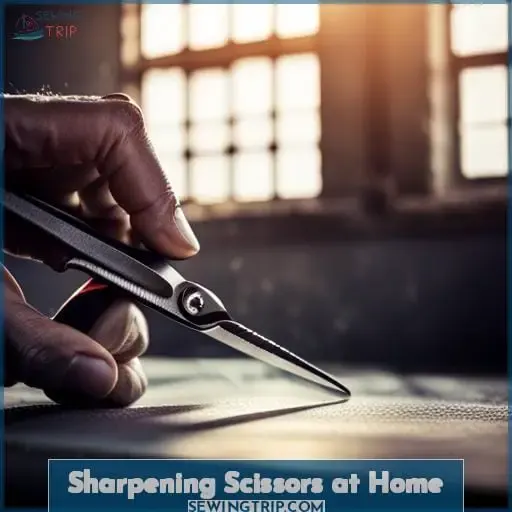
Sharpening Scissors at Home
Ready to give your dull scissors a new lease on life? Sharpening scissors at home is easier than you might think, and in this article, we’ll walk you through four effective methods: using a sharpening stone, sandpaper, a rotary tool, and even aluminum foil.
Whether you’re a DIY enthusiast or simply looking to save a trip to the professional sharpener, these techniques will help you achieve a razor-sharp edge on your scissors with ease.
Use a Sharpening Stone
To sharpen your scissors at home using a sharpening stone, follow these steps for a precision edge. Begin by wetting the stone and drawing the blade across it. Use a marker to identify the edge and sharpen it until it’s shiny.
Then, remove any burrs and hone the blade on the fine side. Repeat the process for the other scissor blade. This method ensures your scissors are in top-notch condition, extending their lifespan.
Use Sandpaper
Now, to sharpen your scissors at home using sandpaper, gather the necessary materials and follow these simple steps for a cost-effective way to maintain your scissor’s cutting prowess. Begin by cutting through 150-200 grit sandpaper multiple times to refine the blade’s edge.
Then, fold the sandpaper with the rough sides facing outward and cut strips. Wipe down your scissors with a damp paper towel. This DIY sandpaper technique offers an alternative sharpening method for scissor care and blade maintenance.
Use a Rotary Tool
Sharpen your scissors at home by using a rotary tool. When it comes to DIY sharpening, rotary tools offer a versatile approach. Secure the blade and grind it while keeping it moving for even sharpening. Repeat the process for the second blade.
Just remember, safety first – always wear protective eyewear when using a rotary tool. With the right techniques and sharpening tools, you can extend the life of your scissors and enjoy the satisfaction of sharp blades without the need for scissor replacement.
Use Aluminum Foil
When sharpening scissors at home, achieve a fine edge using aluminum foil. It’s a DIY sharpening technique that can breathe new life into your dull scissor blades. Simply fold a strip of aluminum foil and make full strokes, ensuring both blades come into contact.
This process smooths out the cutting edges and can improve scissor performance. Afterward, wipe down the blades, and your scissors are ready to tackle cutting tasks with precision, thanks to this clever aluminum foil trick in your arsenal of household sharpening methods.
Sharpening Tools You’ll Need
To ensure your scissors are properly sharpened, you’ll need a set of essential tools and equipment. Choosing the right tools is crucial for achieving a razor-sharp edge while maintaining scissor care.
If you prefer specialized tools, options like the Sharp Pebble wetstone kit, the In One Kitchen Knife Accessories Grey, or the Dremel Rotary Tool Kit with LED Light can be your go-to choices.
For those who want to keep it simple, household items like sandpaper, aluminum foil, or even a mason jar can be surprisingly effective. Just remember to practice proper blade maintenance and scissor care to extend their lifespan.
Whether you’re a DIY enthusiast or just want to keep your scissors in top shape, understanding the tools and techniques available will help you achieve those razor-sharp results. Sharpening scissors doesn’t have to be a daunting task; with the right tools and a bit of know-how, you can safely and effectively maintain your scissors for years to come.
How to Tell When Scissors Need Sharpening
You can easily determine if your scissors need sharpening by assessing their cutting performance and examining the quality of the cuts they produce.
Uneven Cuts: If your scissors struggle to make clean, even cuts and instead result in jagged or frayed edges, it’s a clear indicator that they need sharpening.
Increased Effort: When you find yourself applying more force than usual to cut through materials, it’s a sign that your scissors have lost their edge. This extra effort can lead to hand fatigue and imprecise cutting.
Material Slippage: If the material you’re cutting tends to slip or fold rather than being cleanly severed, it’s time to sharpen your scissors to ensure safer and more accurate cutting.
Regular maintenance techniques like using a sharpening stone or DIY scissor care can help maintain optimal sharpness. However, for the best results, consider professional sharpening when your scissors exhibit these wear indicators.
Scissor Sharpening Tips
You’ve learned when your scissors need sharpening, and now it’s time to dive into the art of scissor sharpening.
Common Misconceptions:
Let’s start by debunking some myths. You don’t always need fancy tools or a professional to sharpen your scissors. Many DIY methods are effective, saving you time and money. Don’t believe that you’re stuck with dull scissors forever.
Angle Techniques:
When sharpening, understanding the right angle is crucial. Whether you’re using specialized tools or common household items like sandpaper, maintaining the manufacturer’s recommended angle is essential. This typically falls in the range of 40-45 degrees. Learning to establish and maintain this angle will significantly enhance your scissor-sharpening prowess.
Sharpening Stones and Blade Care:
Sharpening stones are your best friend in this journey. They come in varying grits, and it’s vital to start with the coarser side for reshaping and then move to the finer side for refining sharpness. Remember, taking care of your blades goes beyond sharpening; it involves removing burrs and regular maintenance.
With these tips in your arsenal, you’ll be well-equipped to breathe new life into your trusty scissors. Don’t let dull blades slow you down; take matters into your own hands and keep those scissors sharp.
Scissor Maintenance
For maintaining the sharpness of your scissors, regular care is essential. To keep your scissors performing at their best, follow these simple yet effective maintenance tips.
Start by cleaning your scissors regularly. Remove any debris, adhesive residue, or gunk that may accumulate on the blades. This not only helps maintain the sharp edge but also prevents contamination of your cuts.
Scissor lubrication is another crucial step. Applying a drop of oil at the pivot point can keep the scissors moving smoothly, preventing unnecessary wear and tear and ensuring a longer lifespan for your scissors.
Rust prevention is vital, especially for metal scissors. Keep them dry and store them in a cool, dry place to avoid rust formation. If you notice any signs of rust, address it promptly with a rust remover and some gentle scrubbing.
Don’t forget about scissor blade alignment. Ensure both blades meet evenly to maintain a precise cutting edge.
Lastly, proper scissor storage matters. Hang them, use blade protectors, or keep them in a scissor case to avoid unnecessary damage and maintain their sharpness.
Following these maintenance tips will keep your scissors in top-notch condition, ready to serve you safely and effectively.
Scissor Sharpening Frequency
Now, let’s delve into how often scissors should be sharpened to maintain their cutting efficiency. Keeping your scissors sharp is essential for effortless cutting and preventing damage to your materials.
Regular Maintenance: Routine scissor maintenance involves honing the blades and removing any minor nicks. You should aim to do this every two to three months, depending on your usage. DIY sharpening methods, such as using a sharpening stone or sandpaper, are suitable for these quick touch-ups.
Professional Sharpening: For more intensive sharpening, consider professional sharpening services. If you use your scissors frequently, professional sharpening every six months to a year is advisable. This ensures a professional touch to extend your scissor’s lifespan.
Watch for Signs: Ultimately, the frequency depends on how often you use your scissors. Keep an eye out for signs of dullness, such as frayed edges or difficulty in cutting. Sharpen as needed to maintain their efficiency and longevity.
By following these guidelines, you can enjoy the benefits of sharp scissors and extend their lifespan without much hassle.
Avoid These Dulling Practices
Avoid These Dulling Practices
When it comes to maintaining your scissors, avoiding practices that dull the blades is crucial. Let’s delve into some key points to help you keep those scissors sharp and efficient.
Proper Use: Snip scissors together on the beveled side for sharpening. Use diamond or ceramic plates, fine belt sharpeners, or honing rods to maintain the cutting edge.
No DIY No-Nos: Avoid using your scissors on materials that can damage them, such as tough metal wires or hard plastics. These practices can quickly dull the blades.
Store Safely: When not in use, store your scissors properly, ensuring they don’t rub against other hard objects that could chip or damage the blades.
Regular Cleaning: Clean your scissors after use to remove any residue or gunk that can accumulate and affect their performance.
Professional Care: For specialized scissors like hair shears, consider professional sharpening services for the best results.
By following these guidelines, you can extend the life of your scissors and ensure they remain sharp and reliable.
When to Replace Your Scissors
When should you consider replacing your scissors? Understanding the signs of a dull blade and the lifespan of your scissors is crucial for maintaining your tools effectively.
Scissors, like any cutting instrument, have a finite lifespan. If you notice that they struggle to cut cleanly or if the blades are chipped, it might be time for a replacement.
Extending the life of your scissors can be achieved through proper maintenance and sharpening, as discussed earlier in this article.
Safety should be your top priority, so if you find your scissors no longer perform as they should, it’s time to invest in a new pair.
Keep an eye on those telltale signs and know when to bid farewell to your old scissors for a safer and more efficient cutting experience.
Conclusion
Wondering if your scissors can be sharpened at home? The answer is yes, and we’ve got you covered. With the right tools and techniques, you can breathe new life into those dull scissors. Whether you opt for a sharpening stone, sandpaper, a rotary tool, or even aluminum foil, our tips will help you achieve a razor-sharp edge.
Furthermore, we’ve outlined the essential maintenance steps and recommended frequency for keeping your scissors in top shape.

