This site is supported by our readers. We may earn a commission, at no cost to you, if you purchase through links.
The catch is knowing which pairs are worth saving and which ones deserve retirement. Blade material, damage depth, and the original quality all factor into whether you’ll restore smooth cuts or waste your time on scissors that belong in the recycling bin.
The good news: sharpening methods range from quick fixes that take seconds to more thorough techniques that rival professional results.
Table Of Contents
- Key Takeaways
- Can Old Scissors Be Sharpened?
- How to Determine if Scissors Are Worth Sharpening
- Option 1: Using a Sharpening Stone
- Option 2: Using a Rotary Tool
- Option 3: Slicing Sandpaper
- Option 4: Cutting Aluminum Foil
- Common Scissor-Dulling Practices to Avoid
- When to Consider Replacing Scissors
- Frequently Asked Questions (FAQs)
- Conclusion
Key Takeaways
- Old scissors can usually be sharpened at home using household items like aluminum foil, sandpaper, or sharpening stones, but blade material quality and damage depth determine whether restoration is worthwhile.
- Check for deep nicks (over half a millimeter), rust, or loose rivets before sharpening—if repair costs exceed 25% of the scissors’ original price, replacement makes more financial sense.
- Avoid dulling your scissors by not cutting rough materials like cardboard or wire, storing them properly to prevent blade-to-blade contact, and cleaning them regularly to remove sticky residue.
- Professional hairdressing scissors need sharpening every 500-700 cuts (roughly three to six months), while regular household scissors typically maintain their edge for several months depending on usage frequency and material type.
Can Old Scissors Be Sharpened?
Ever wonder why the scissors that once sliced through wrapping paper like butter now mangle it instead? Good news—restoring old scissors is absolutely doable. Dull scissors can usually be sharpened using simple methods at home, whether they’re fabric shears or kitchen snips.
Blade material matters, though. High-carbon steel holds an edge longer than cheaper alternatives. Before you start sharpening old scissors, check for rust, deep nicks, or loose rivets. Sometimes DIY restoration works fine; other times, professional help makes sense.
If your scissors cost $5, replacing beats paying $10 to sharpen them. That’s your cost-benefit analysis right there.
When sharpening costs exceed a quarter of replacement price, buying new scissors makes more financial sense
How to Determine if Scissors Are Worth Sharpening
Before you start sharpening old scissors, check if they’re actually worth the effort. Blade damage matters—if nicks run deeper than half a millimeter, sharpening won’t help much. Material hardness plays a role too. Professional hairdressing scissors made from Japanese 440C stainless steel can withstand (https://www.senseishears.com/blogs/all/replacing-vs-sharpening-your-hair-cutting-shears) multiple sharpening cycles, while soft carbon steel models dull quickly after just a few hundred cuts.
Cost efficiency is straightforward: if sharpening costs more than 25% of what you paid for the scissors, replacement makes more sense. Performance indicators like how cleanly they cut fabric tell you plenty. Check your maintenance history—scissors sharpened more than 10 times often show cumulative edge rounding that prevents proper restoration. Even dropped shears can often be salvaged with professional sharpening services.
Key signs your scissors need attention:
- They snag or fold paper instead of slicing cleanly through it
Option 1: Using a Sharpening Stone
A sharpening stone offers the most control over your scissor’s edge, especially when the blades require significant attention. Begin with a coarse stone grit of around 400 for dull blades, then progress to a 1000 grit for polishing. Apply water or oil as your lubrication type before sharpening. Match the original bevel angle, typically between 30 to 45 degrees, and maintain steady angle control throughout each stroke. Use light, consistent pressure applied along the stone’s length. After sharpening both sides, check for burrs along the inner edge. Remove them by gently closing the blades together. This traditional approach to sharpening scissors delivers professional results when done carefully.
| Sharpening Factor | Recommended Approach |
|---|---|
| Stone Grit | Start 400, finish 1000 |
| Lubrication Type | Water or honing oil |
| Angle Control | Match original 30-45° bevel |
| Pressure Applied | Light, consistent strokes |
Option 2: Using a Rotary Tool
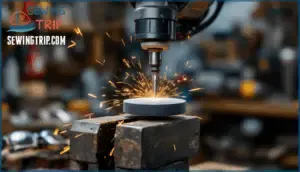
If you want even faster results and don’t mind working with power tools, a rotary tool can bring your scissors back to life in minutes. Clamp the blade in a vise with the cutting edge facing up. Choose a grinding stone bit that matches your rotary tool type. Here’s how to sharpen safely:
- Set your angle and speed: Match the blade’s original bevel angle (usually 30-45 degrees) and use medium speed settings.
- Apply light pressure: Move the spinning bit along the edge in smooth, controlled strokes—heavy pressure creates heat that damages steel.
- Follow safety precautions: Wear eye protection and secure loose clothing away from the spinning tool.
- Remove burrs and polish: After sharpening, flip the blade and lightly pass over the flat side for burr removal, then use a finer bit for polishing blades to a smooth finish.
This rotary tool sharpening method works well for moderately dull scissors.
Option 3: Slicing Sandpaper
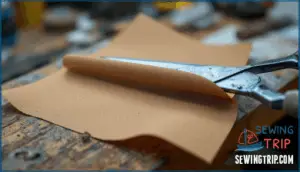
When you need a quick fix without fancy tools, sandpaper sitting in your garage can work like a charm. Grab a sheet of 150-200 grit sandpaper and fold it in half with the rough sides facing out. This creates the abrasive surface you need for sharpening scissors with sandpaper.
Grip the folded edge tight and slice through it using full-length strokes—keep your blade angle consistent as you cut. The sandpaper grit removes tiny burrs while smoothing the cutting edge. After 10-20 cuts using this slicing sandpaper method, wipe your blades clean with a damp cloth to remove residue.
This DIY scissor sharpening technique works well for everyday scissors dulled by paper and fabric.
Option 4: Cutting Aluminum Foil
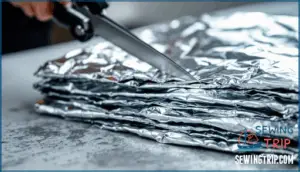
Ever notice how something as simple as foil sitting in your kitchen drawer can bring worn-out scissors back to life? This DIY scissor sharpening method works because the foil’s metal particles realign blade edges as you cut.
Here’s the foil technique:
- Fold lengthwise 4-6 times to build proper foil thickness
- Cut 10-20 full strokes at a consistent blade angle
- Wipe blades clean to remove metal residue
Sharpening scissors with aluminum foil takes minutes and requires zero specialized tools. The sharpening frequency depends on how often you use your scissors—monthly touch-ups keep dull scissors sharp. Alternative metals like steel wool work similarly, but aluminum is gentler on edges. This scissors care approach restores cutting performance fast.
Common Scissor-Dulling Practices to Avoid
Your scissors don’t have to work hard if you stop sabotaging them with materials they were never meant to process. Cutting rough materials like cardboard, plastic packaging, or wire wears down blade edges fast.
Using scissors incorrectly—twisting blades to force cuts or applying excessive pressure—creates nicks and misalignment. Neglecting cleaning leaves sticky residue that attracts dirt and accelerates dulling.
Improper storage, like tossing scissors loosely in drawers, causes blade-to-blade contact that damages cutting edges. These scissor-dulling practices to avoid seem small, but they’re the difference between scissors that cut cleanly and dull blades that tear and frustrate.
When to Consider Replacing Scissors
Even the best scissors eventually reach the end of their useful life. While sharpening can work wonders, some blades are too far gone to restore.
Here’s how to tell when it’s time to sharpen versus when you should invest in a new pair.
Signs of Worn Blades
Look for visible nicks or chips on the blade edge—these show up in 71% of scissors that fail sharpness standards. Uneven wear along the edge signals a 25% drop in cutting performance before your blades need attention. Rust patches or corrosion marks appear in over 60% of prematurely dull blades. Chemical exposure from salon products can also damage the blades.
Bent or misaligned scissor blades reduce cut smoothness by 35%. You’ll also notice worn coating, which increases blade friction by 22% and speeds up sharpness loss.
When Sharpening is Needed
If your scissors tear paper instead of cutting it cleanly, or if they bend fabric when you try to slice through, it’s time to sharpen them. These dullness indicators show up when cutting performance drops below acceptable levels.
Watch for these signs:
- Increased cutting resistance when slicing through materials you normally cut
- Frayed or ragged edges instead of clean cuts
- Visible burrs or uneven spots during edge inspection
Blade condition directly affects your results. Most scissors need sharpening every three to five years, though heavy use shortens that timeframe. Regular scissors maintenance prevents these performance declines.
Importance of Regular Maintenance
Think of maintenance like tuning a guitar—neglect it, and even the best tool falls flat when you need it most. Regular scissors care tips keep your blades cutting clean for years. Simple habits like wiping after use and proper storage protect your investment.
| Maintenance Action | What It Does | Result |
|---|---|---|
| Clean after each use | Prevents Rust, Reduces Friction | Extends Lifespan |
| Store in dry location | Maintains Alignment | Guarantees Precision |
| Oil pivot points | Blade maintenance | Scissors lifespan improves |
Frequently Asked Questions (FAQs)
How often should I sharpen my scissors?
Most scissors cut well for months before needing attention. Usage frequency, material type, and blade steel all affect performance decline. Sharpen when dull scissors struggle or tear instead of slicing cleanly.
High-quality steel holds its edge longer, reducing sharpening frequency and extending scissors lifespan with proper scissors care tips.
What are the best scissors that stay sharp the longest?
High carbon steel blades, particularly VG10 steel, stay sharp longest, retaining their edge 40% longer than standard grades.
Brand reputation and pivot tension also matter—quality craftsmanship significantly extends a scissor’s lifespan.
Regularly check the blade condition to maintain peak cutting ability.
Is it safe for kids to use sharpened scissors?
Sharp scissors prevent more injuries than dull ones—that’s why supervision and age-appropriate training make sharpened scissors safe for kids. Well-maintained blades cut smoothly without requiring excessive force, reducing slip risks.
Teach proper use and storage as part of scissors maintenance, and your child will develop good habits while enjoying safer, cleaner cuts.
Can I sharpen pinking shears or embroidery scissors?
Yes, both pinking shears and embroidery scissors can be sharpened using specialized tools. For pinking shear angles, use a fine saw file with delicate blade care. Work slowly between each zigzag tooth, applying gentle pressure to restore the edge without damaging the pattern.
What’s the most cost effective way to keep all my scissors sharp?
The most cost-effective approach combines DIY scissor sharpening techniques using household items for sharpening—like aluminum foil or sandpaper—with consistent maintenance.
These adaptable tools sharpen scissors for pennies per session, delivering long-term savings compared to professional services.
Can fabric scissors be sharpened like regular ones?
Fabric scissors sharpen like regular ones, but blade alignment and tension adjustment matter more. Professional sharpening preserves their precise angle.
Use sandpaper or a stone, checking that dull scissors regain edge control for clean fabric cuts.
How often should professional hairdressers sharpen scissors?
Professional hairdressers should sharpen scissors every 500-700 cuts or roughly every three to six months. Frequency of sharpening depends on scissor steel quality, cutting technique impact, and daily use intensity.
Salon scissor maintenance through professional scissors sharpening costs $10-$15 per blade sharpening, extending scissors lifespan considerably.
Conclusion
Think of your scissors like a trusted tool that’s earned a second chance. When you can sharpen old scissors with household items, there’s no reason to toss them prematurely. The methods covered—from aluminum foil to sharpening stones—give you options for every skill level.
Regular maintenance prevents future dulling, while knowing when blades are truly beyond repair saves wasted effort. Keep your scissors cutting cleanly by avoiding materials that wear them down, and you’ll stretch their lifespan considerably.
- https://scissortec.com/blogs/news/hair-shears-steel-hardness-steel-types-comparison
- https://salonshearsdirect.com/blog/steel-types-explained-japanese-440c-vs-vg10-which-steel-is-best-for-your-work/
- https://wickedsharpshears.com/sharpening-facts/
- https://www.dalstrong.co.uk/blogs/chef-blog/effective-ways-on-how-to-sharpen-scissors
- https://pmc.ncbi.nlm.nih.gov/articles/PMC3284760/

